Virtual Credit Card Requirements
A Virtual Credit Card (VCC) is an electronic payment option provided through Citizens ERPConnect.
For VCC payments, vendors receive an email containing a unique virtual credit card number that they can use to process the payment. All VCC payments must be made in USD.
Vendor Onboarding
The vendor onboarding process is manual.
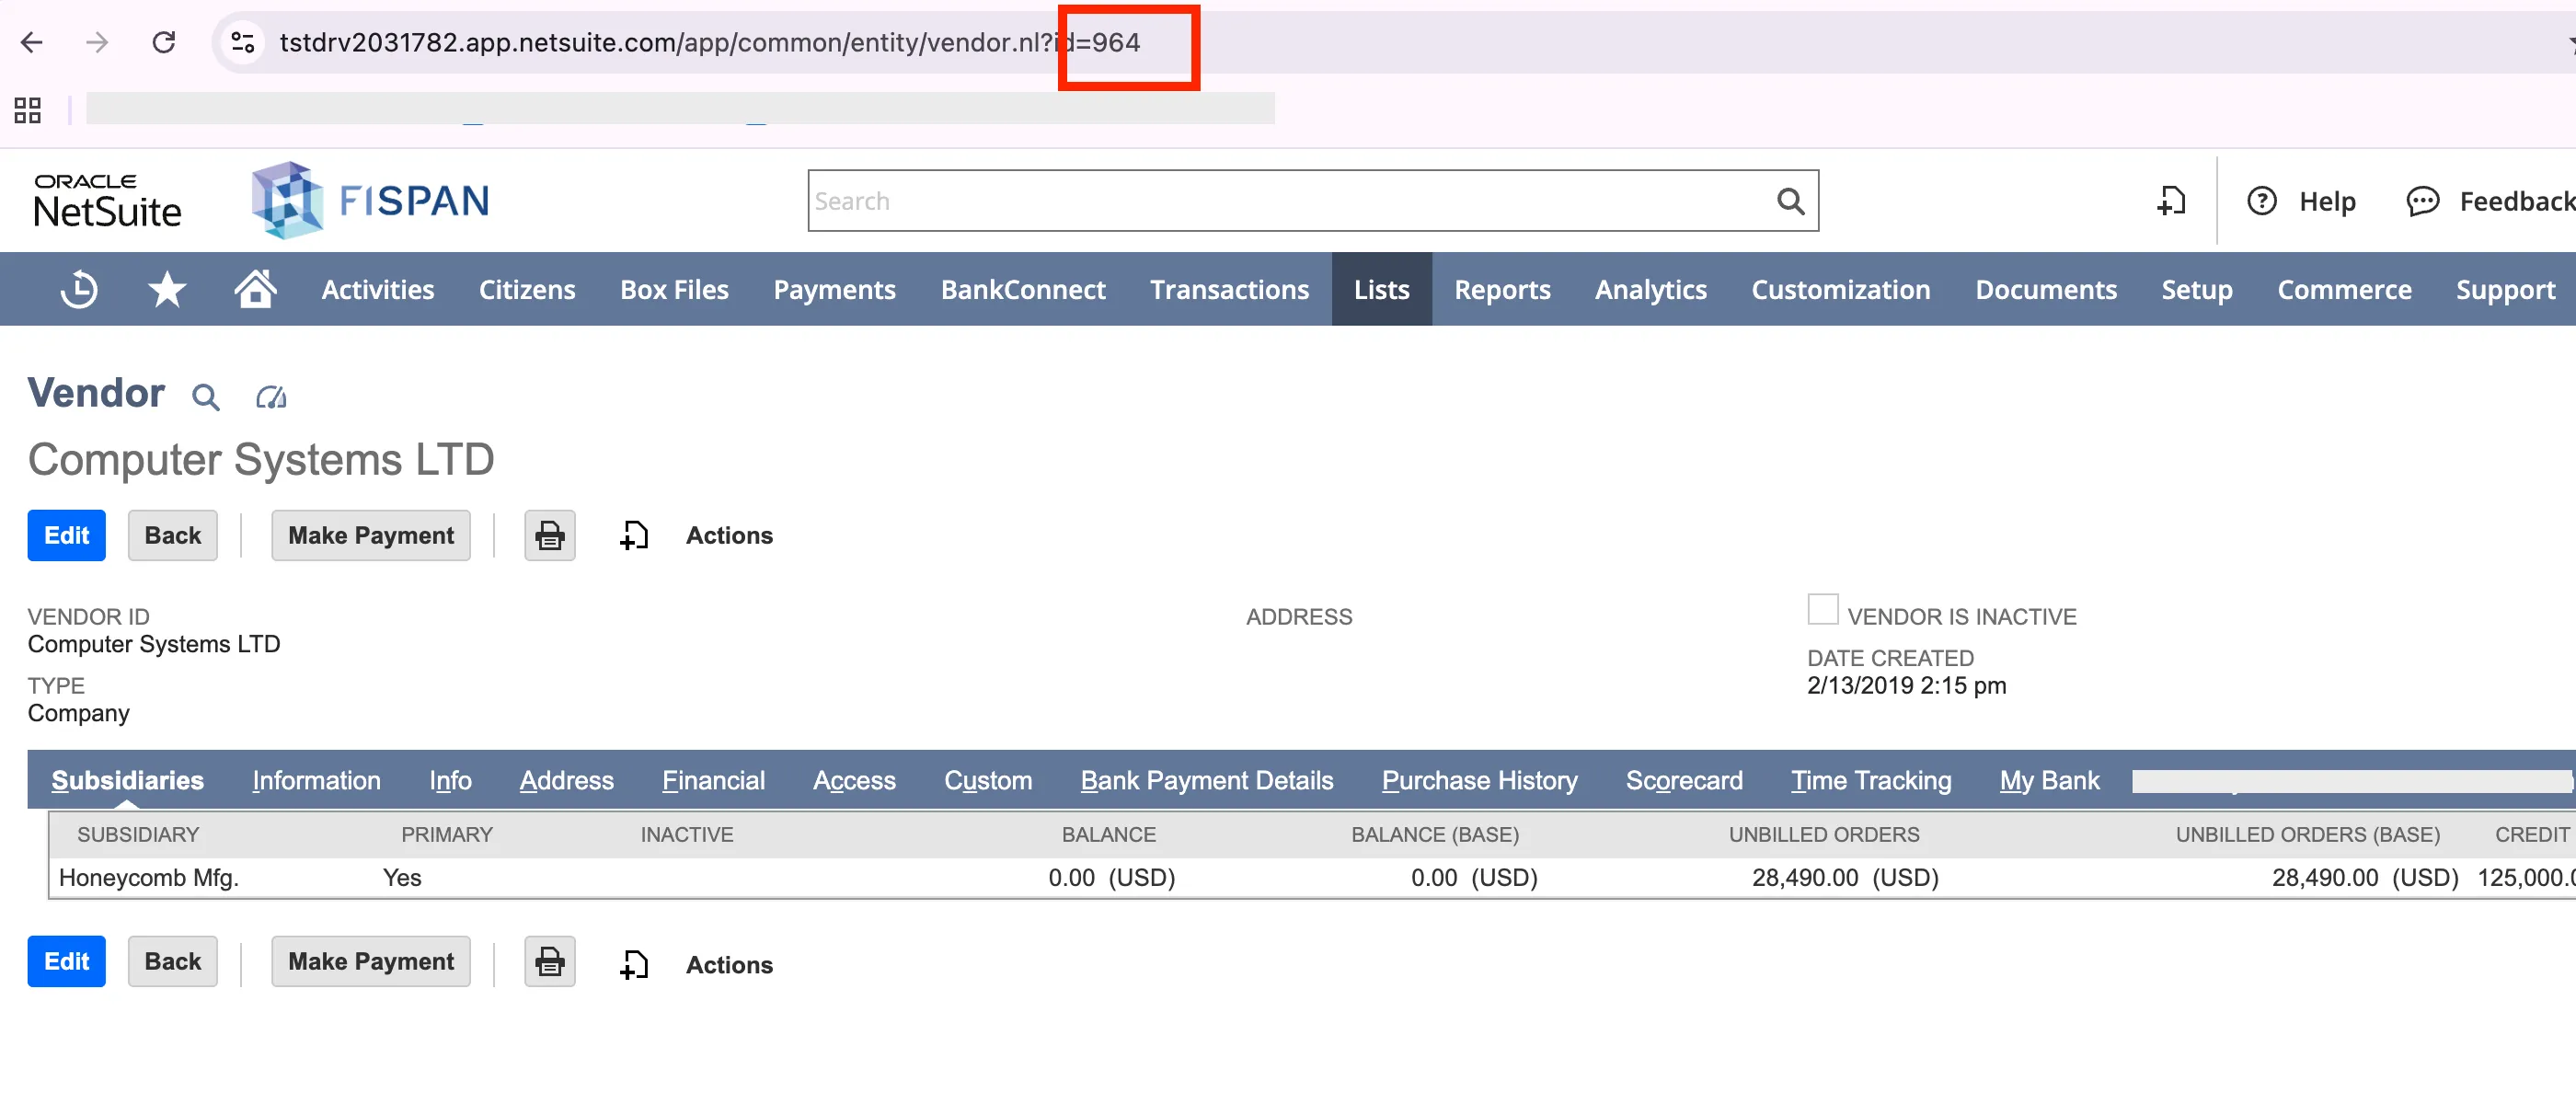
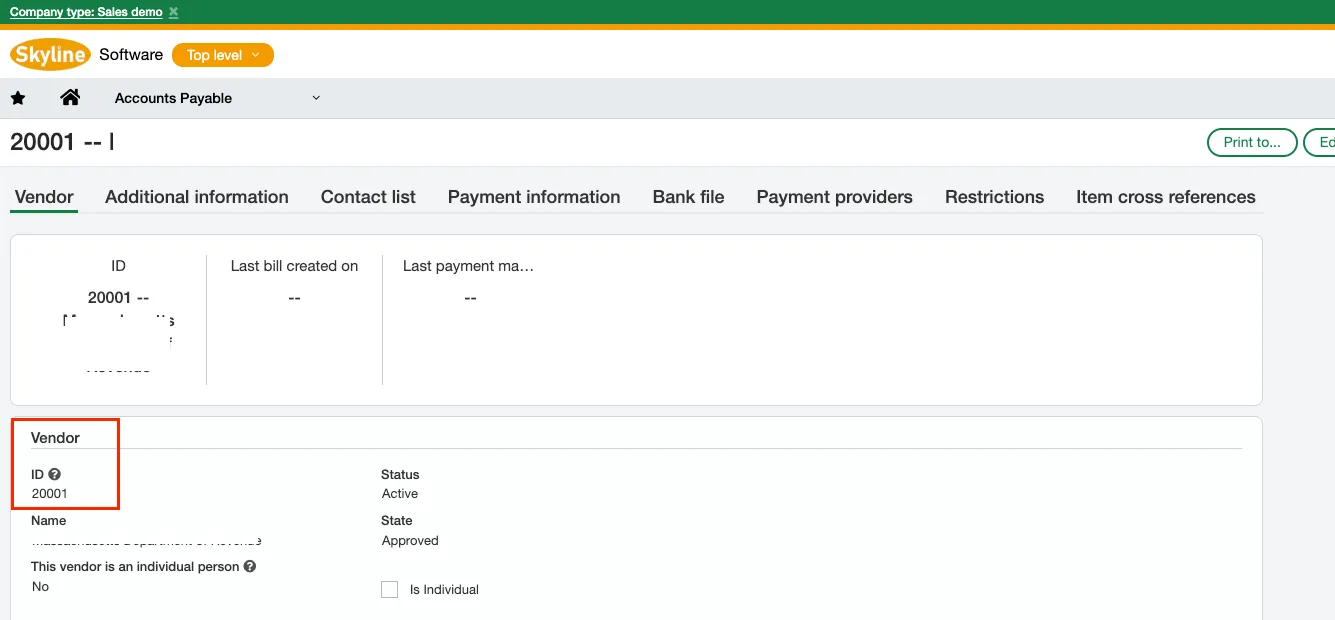
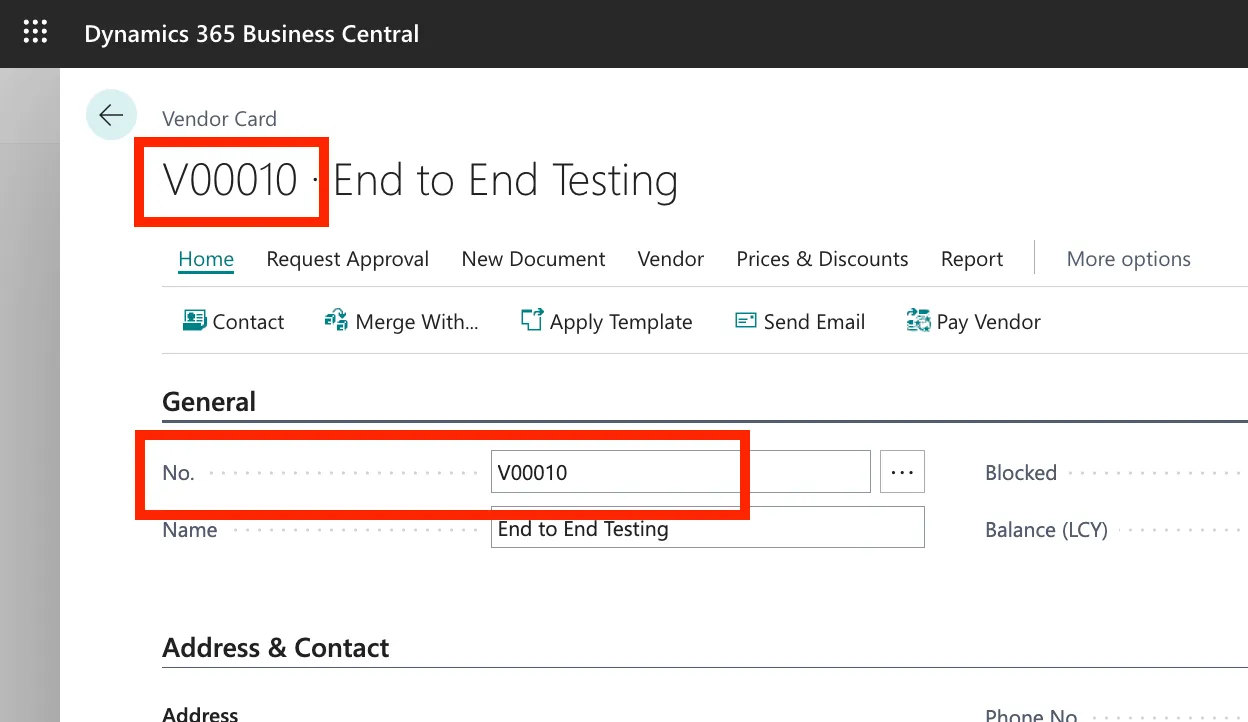
To onboard a vendor for VCC payments, retrieve the Vendor ID from the ERP and share it with the Citizens team.
IMPORTANT: This step is required. If the Vendor ID is not provided, payments will fail.
NetSuite
Intacct
Business Central
Setting Default Payment Method
To set a default payment method for a vendor, please follow ERP specific steps.
NetSuite
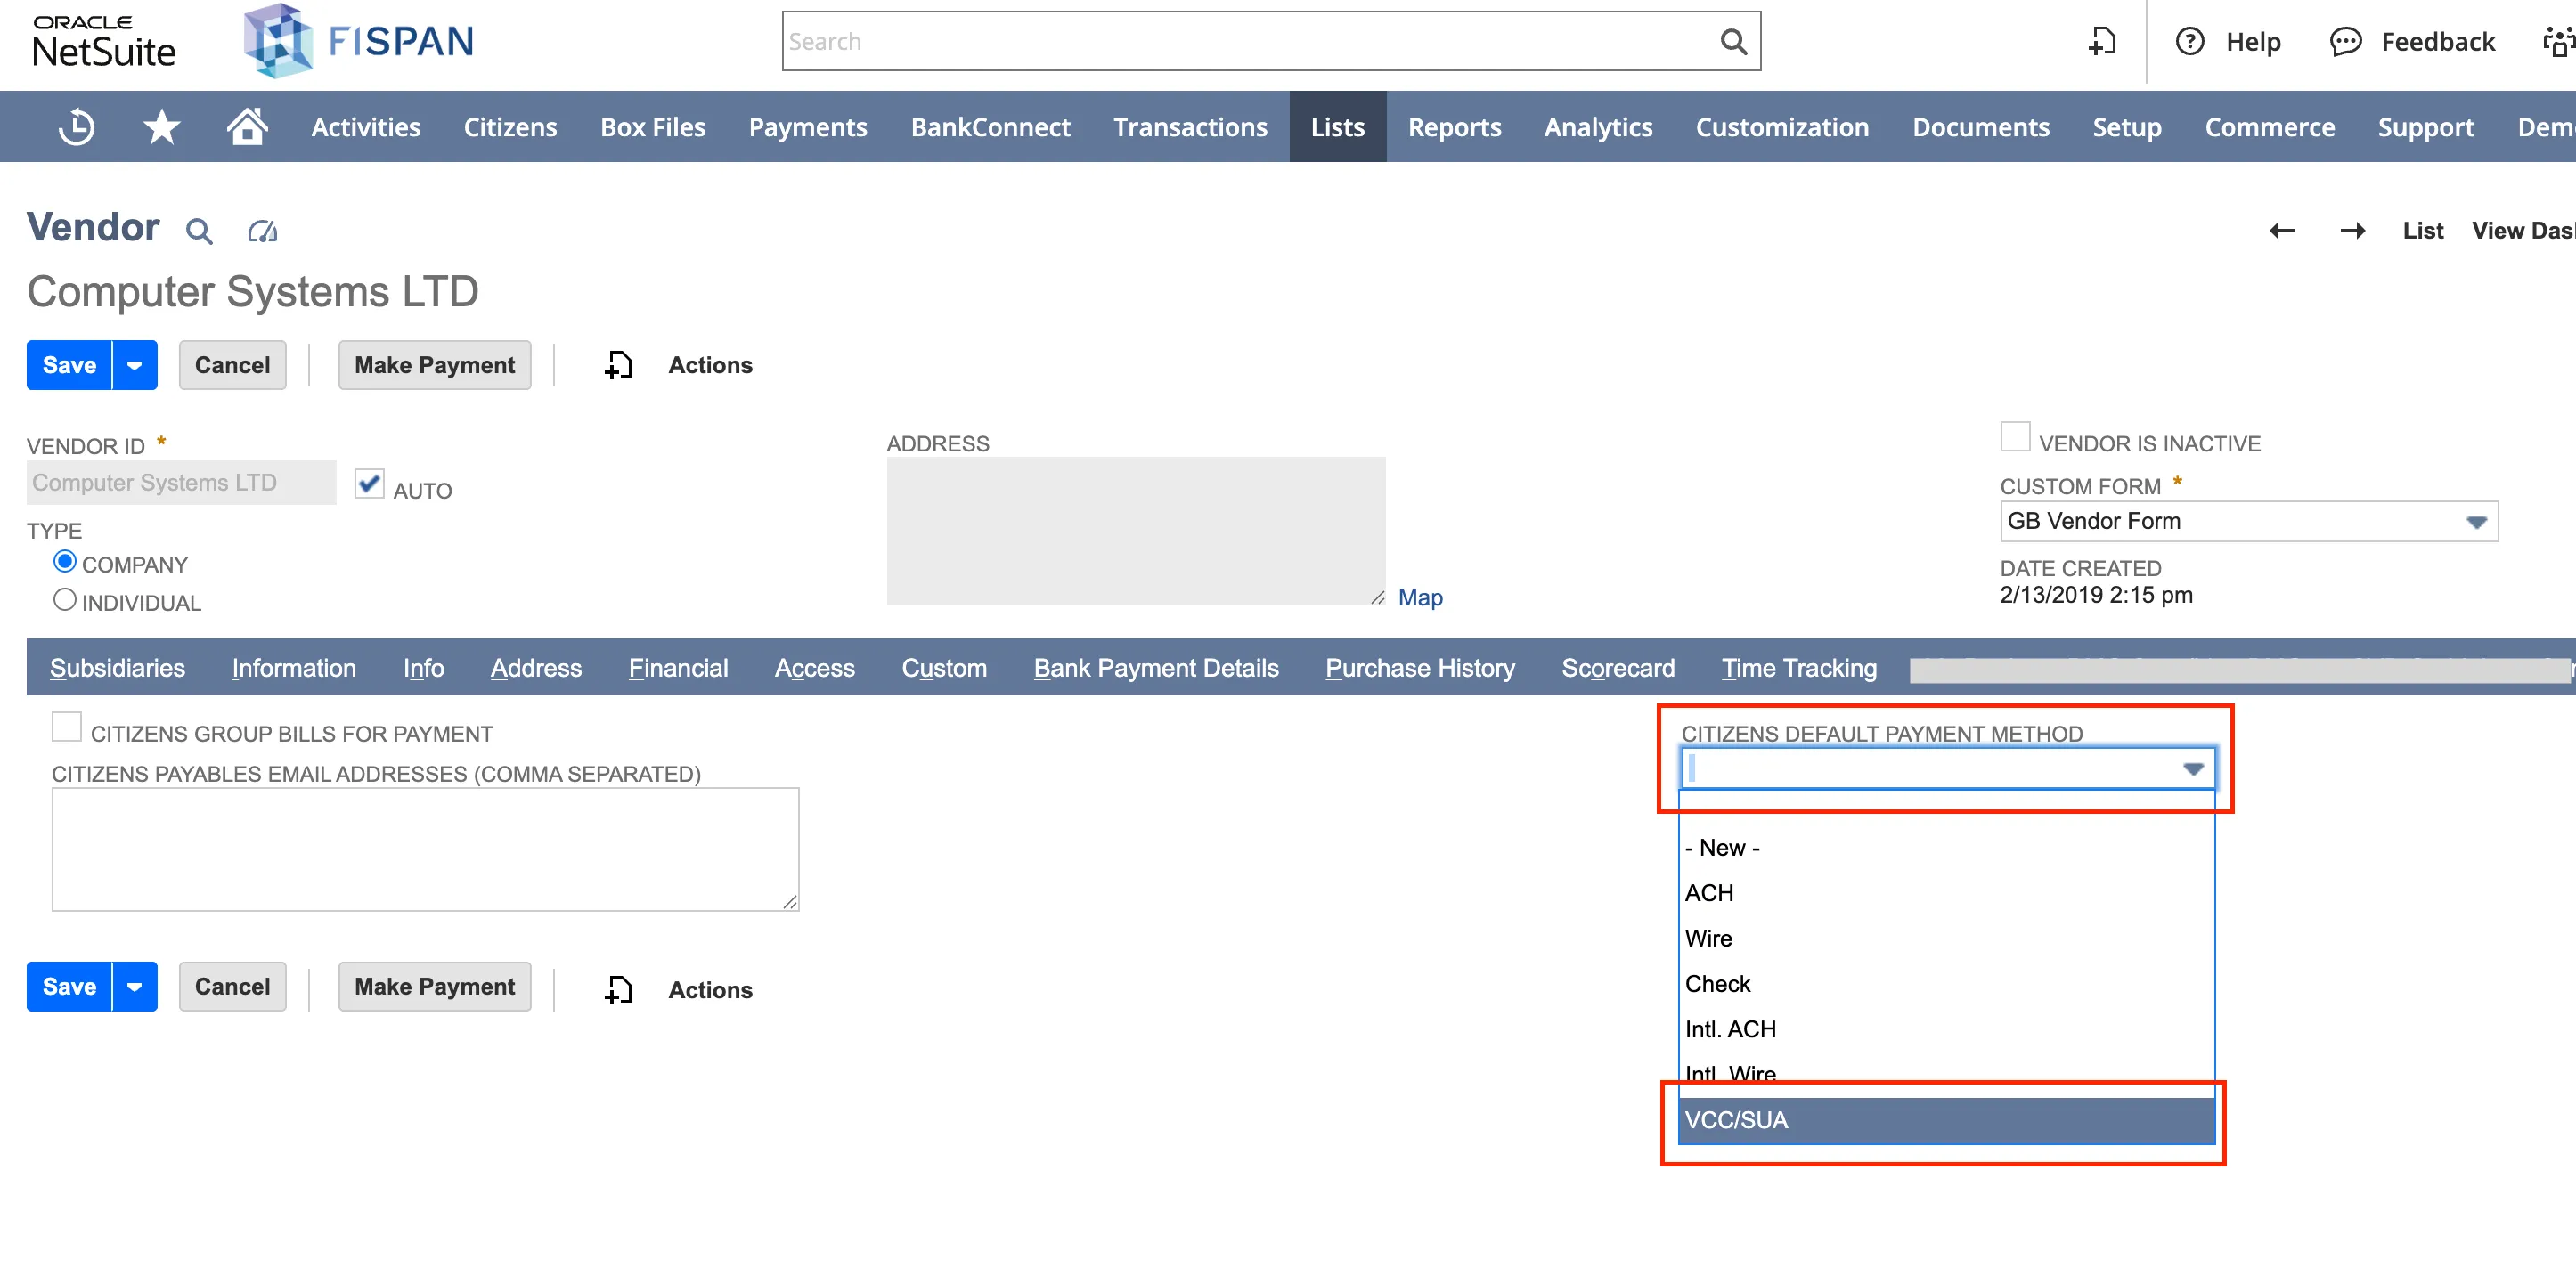
On the Vendor's Record, navigate to the Citizens Subtab.
Select VCC/SUA from the list of payment methods.
Intacct
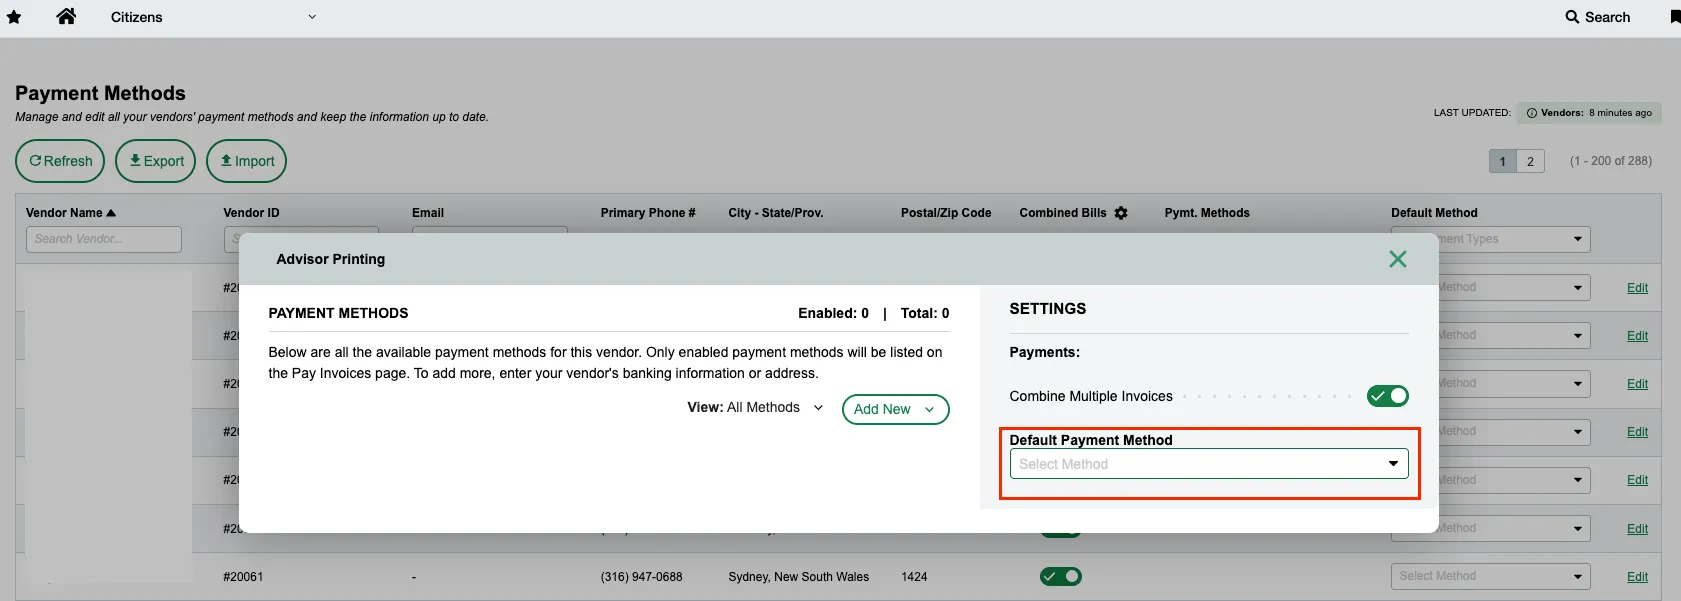
In the Citizens plugin within your ERP, navigate to the specific vendor's record.
Go to the Payment Method tab.
Select VCC to set it as the default.
Business Central
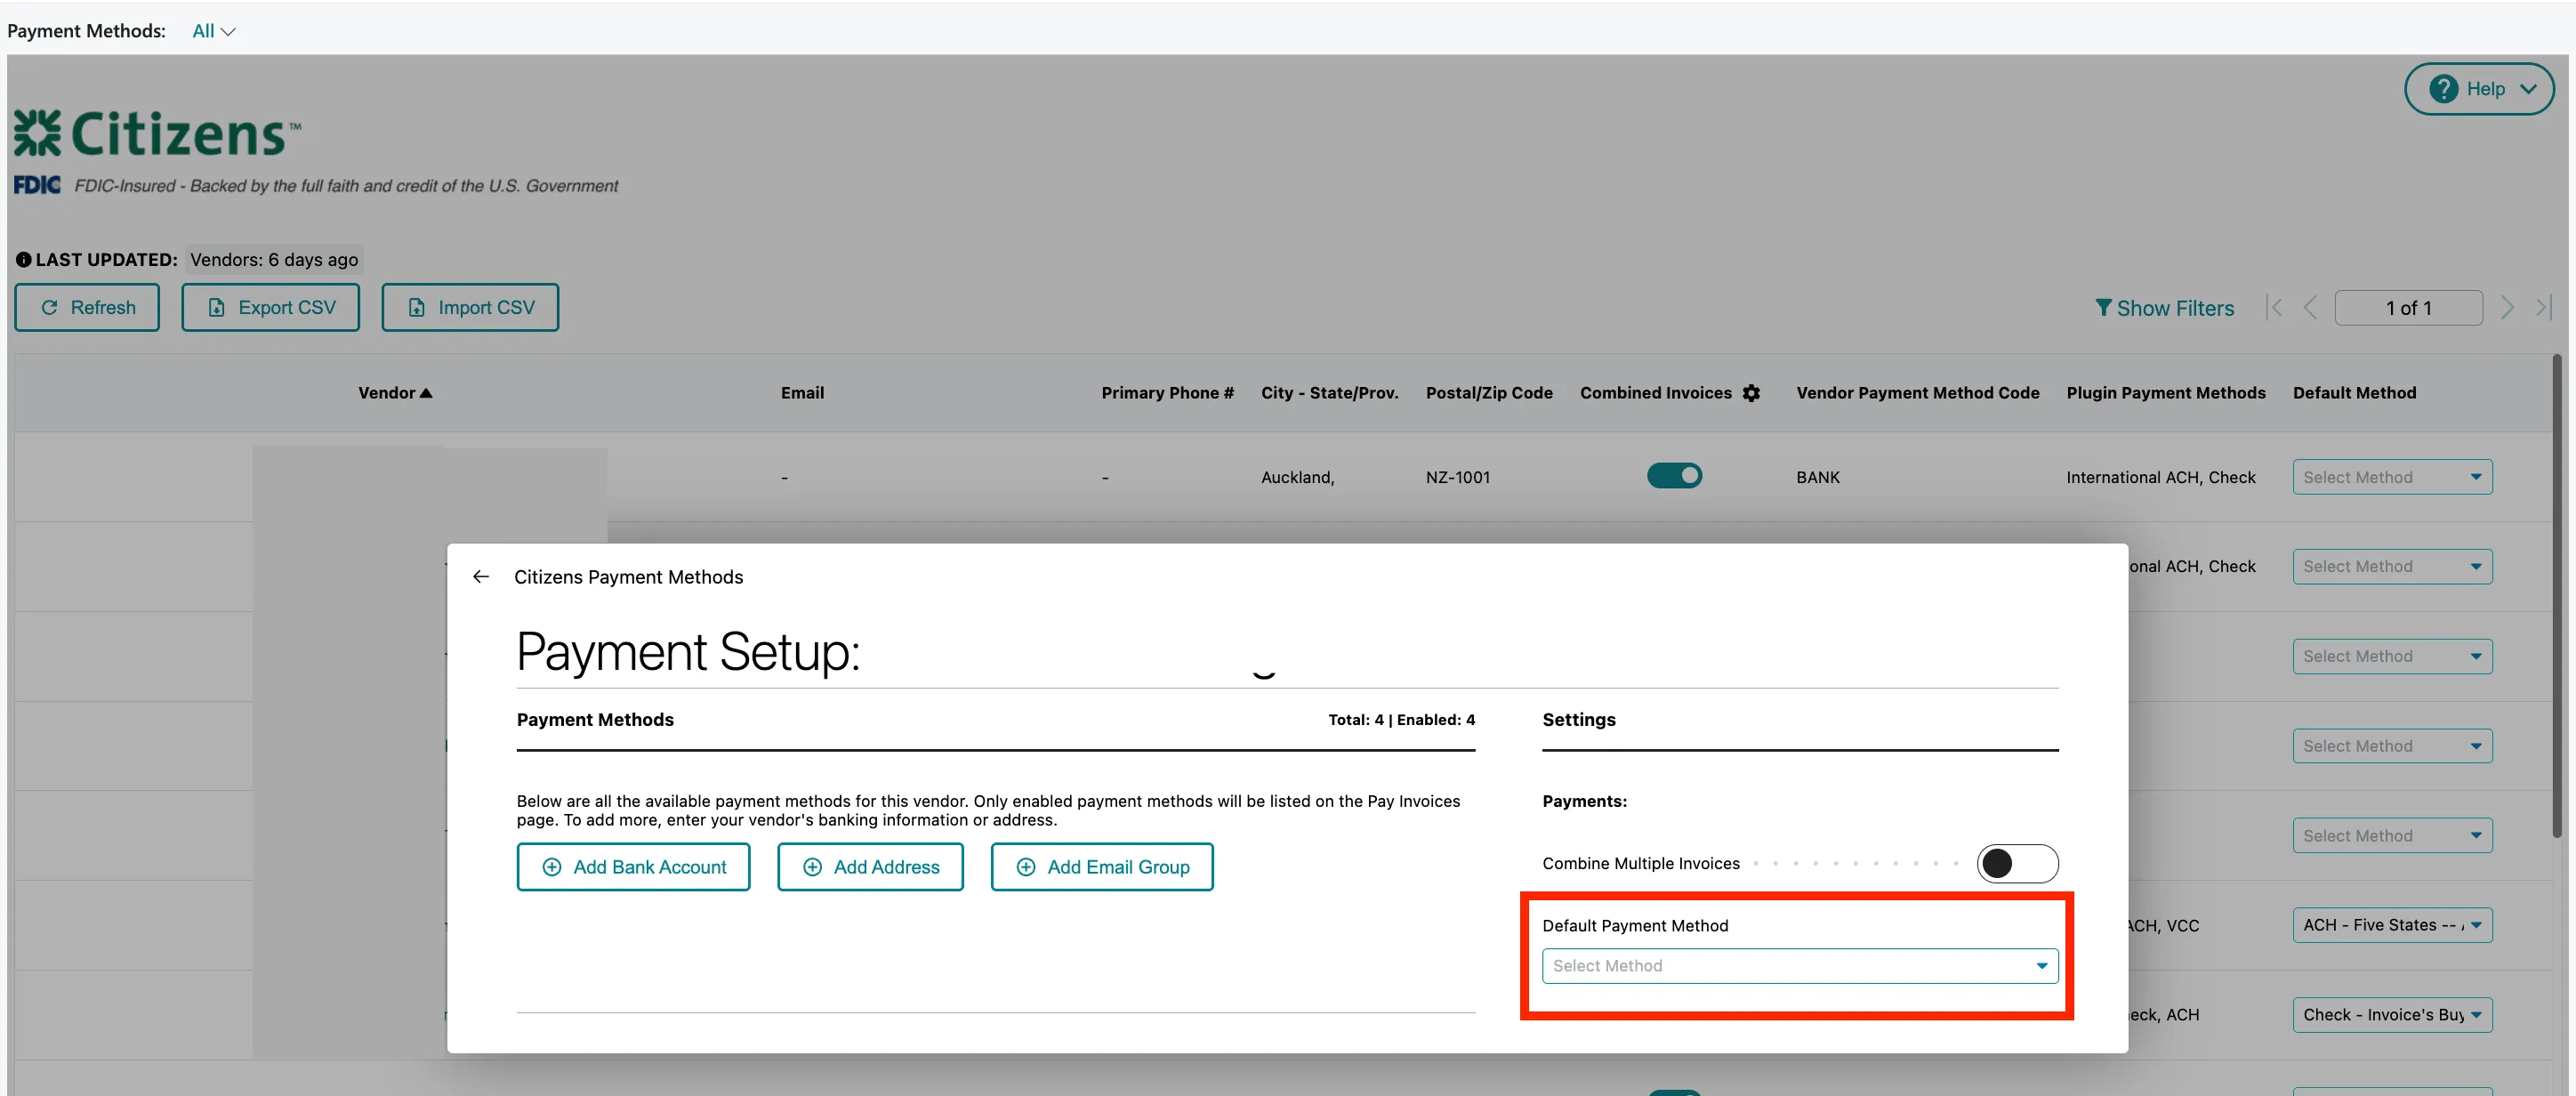
In the Citizens plugin within your ERP, navigate to the specific vendor's record.
Go to the Payment Method tab.
Select VCC to set it as the default.
VCC Proxy Pay Support
Feature Overview
Proxy Pay is a specialized VCC payment execution service supported by ERPConnect. It is designed to facilitate VCC payments to external vendors (such as telecommunications or utility companies, e.g., Verizon) that do not accept standard emailed virtual cards and instead require payments to be routed directly to a specific vendor billing account.
Proxy Pay removes this friction by allowing the bank to route the virtual card payment directly to the vendor's designated billing account on the client's behalf. This requires adding the vendor's billing account identifier to the vendor's profile.
Vendor Billing Account Identifier
The Unique Customer Identifier assigned to the vendor by the merchant (e.g., a Corporate Utility or Telecom Account Number).
NOTE: This refers strictly to the Merchant-Facing Billing Account Identifier, not a Financial Institution Routing or Bank Account Number.
Setting Vendor Billing Account Identifier
To enter Vendor Billing Account Identifier for a vendor, please follow ERP specific steps.
NetSuite
Go to Lists → Relationships → Vendors.
Locate and click Edit on the specific Vendor Profile you need to update.
On the Vendor's Record, navigate to the Citizens Subtab.
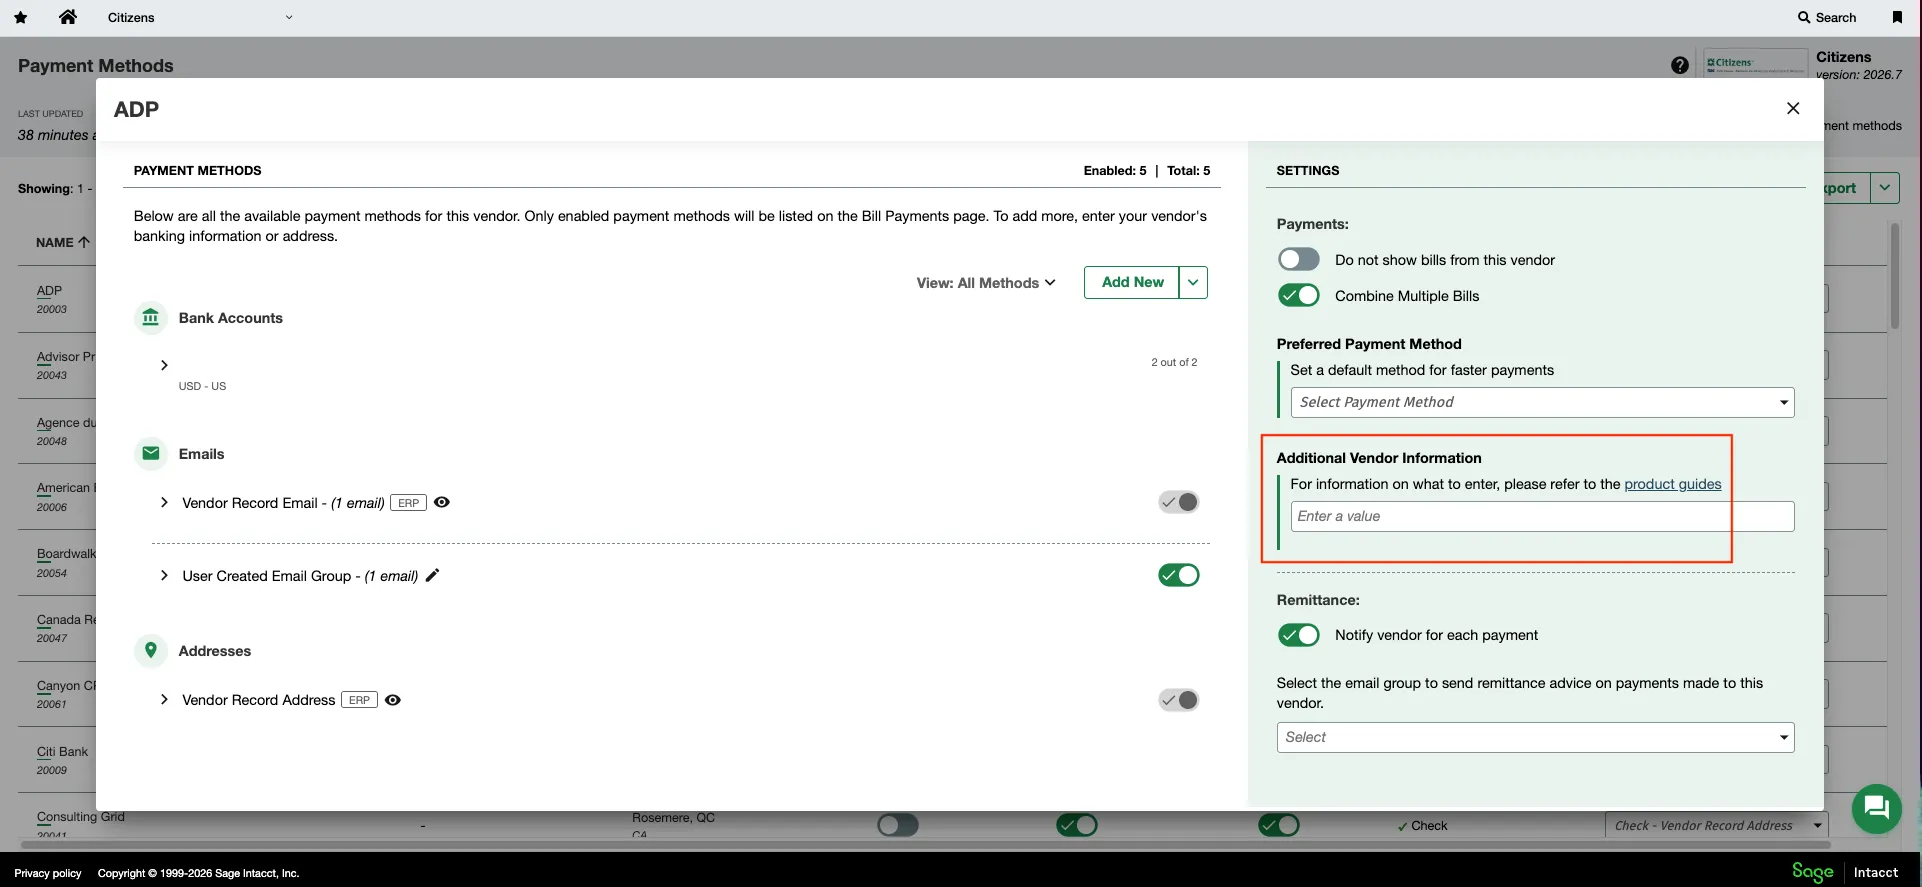
Input the Billing Account Identifier directly into the Additional Vendor Information field. Click Save to apply the changes.

Intacct and Business Central
In your main menu, go to Citizens Plugin → Payment Methods, and select the Vendors list.
Select the specific vendor you wish to update and click the Eye (View) Icon to open the configuration window.
On the right-hand panel of the window that appears, locate the Additional Vendor Information field.
Enter the Billing Account iIdentifier directly into this field and click Save to persist your updates.