Step 9: Enable Bank Feeds (Xero)
Bank Feeds allow your settled bank transactions to automatically flow into Xero's Bank Reconciliation module. This eliminates the need to manually export and import bank statements.
NOTE: If you are connected to a Xero Demo Company, the Bank Feeds solution will not be accessible. This is due to a restriction within Xero that prevents bank feed connections for demo environments.
Enabling Bank Feeds
Select Accounts
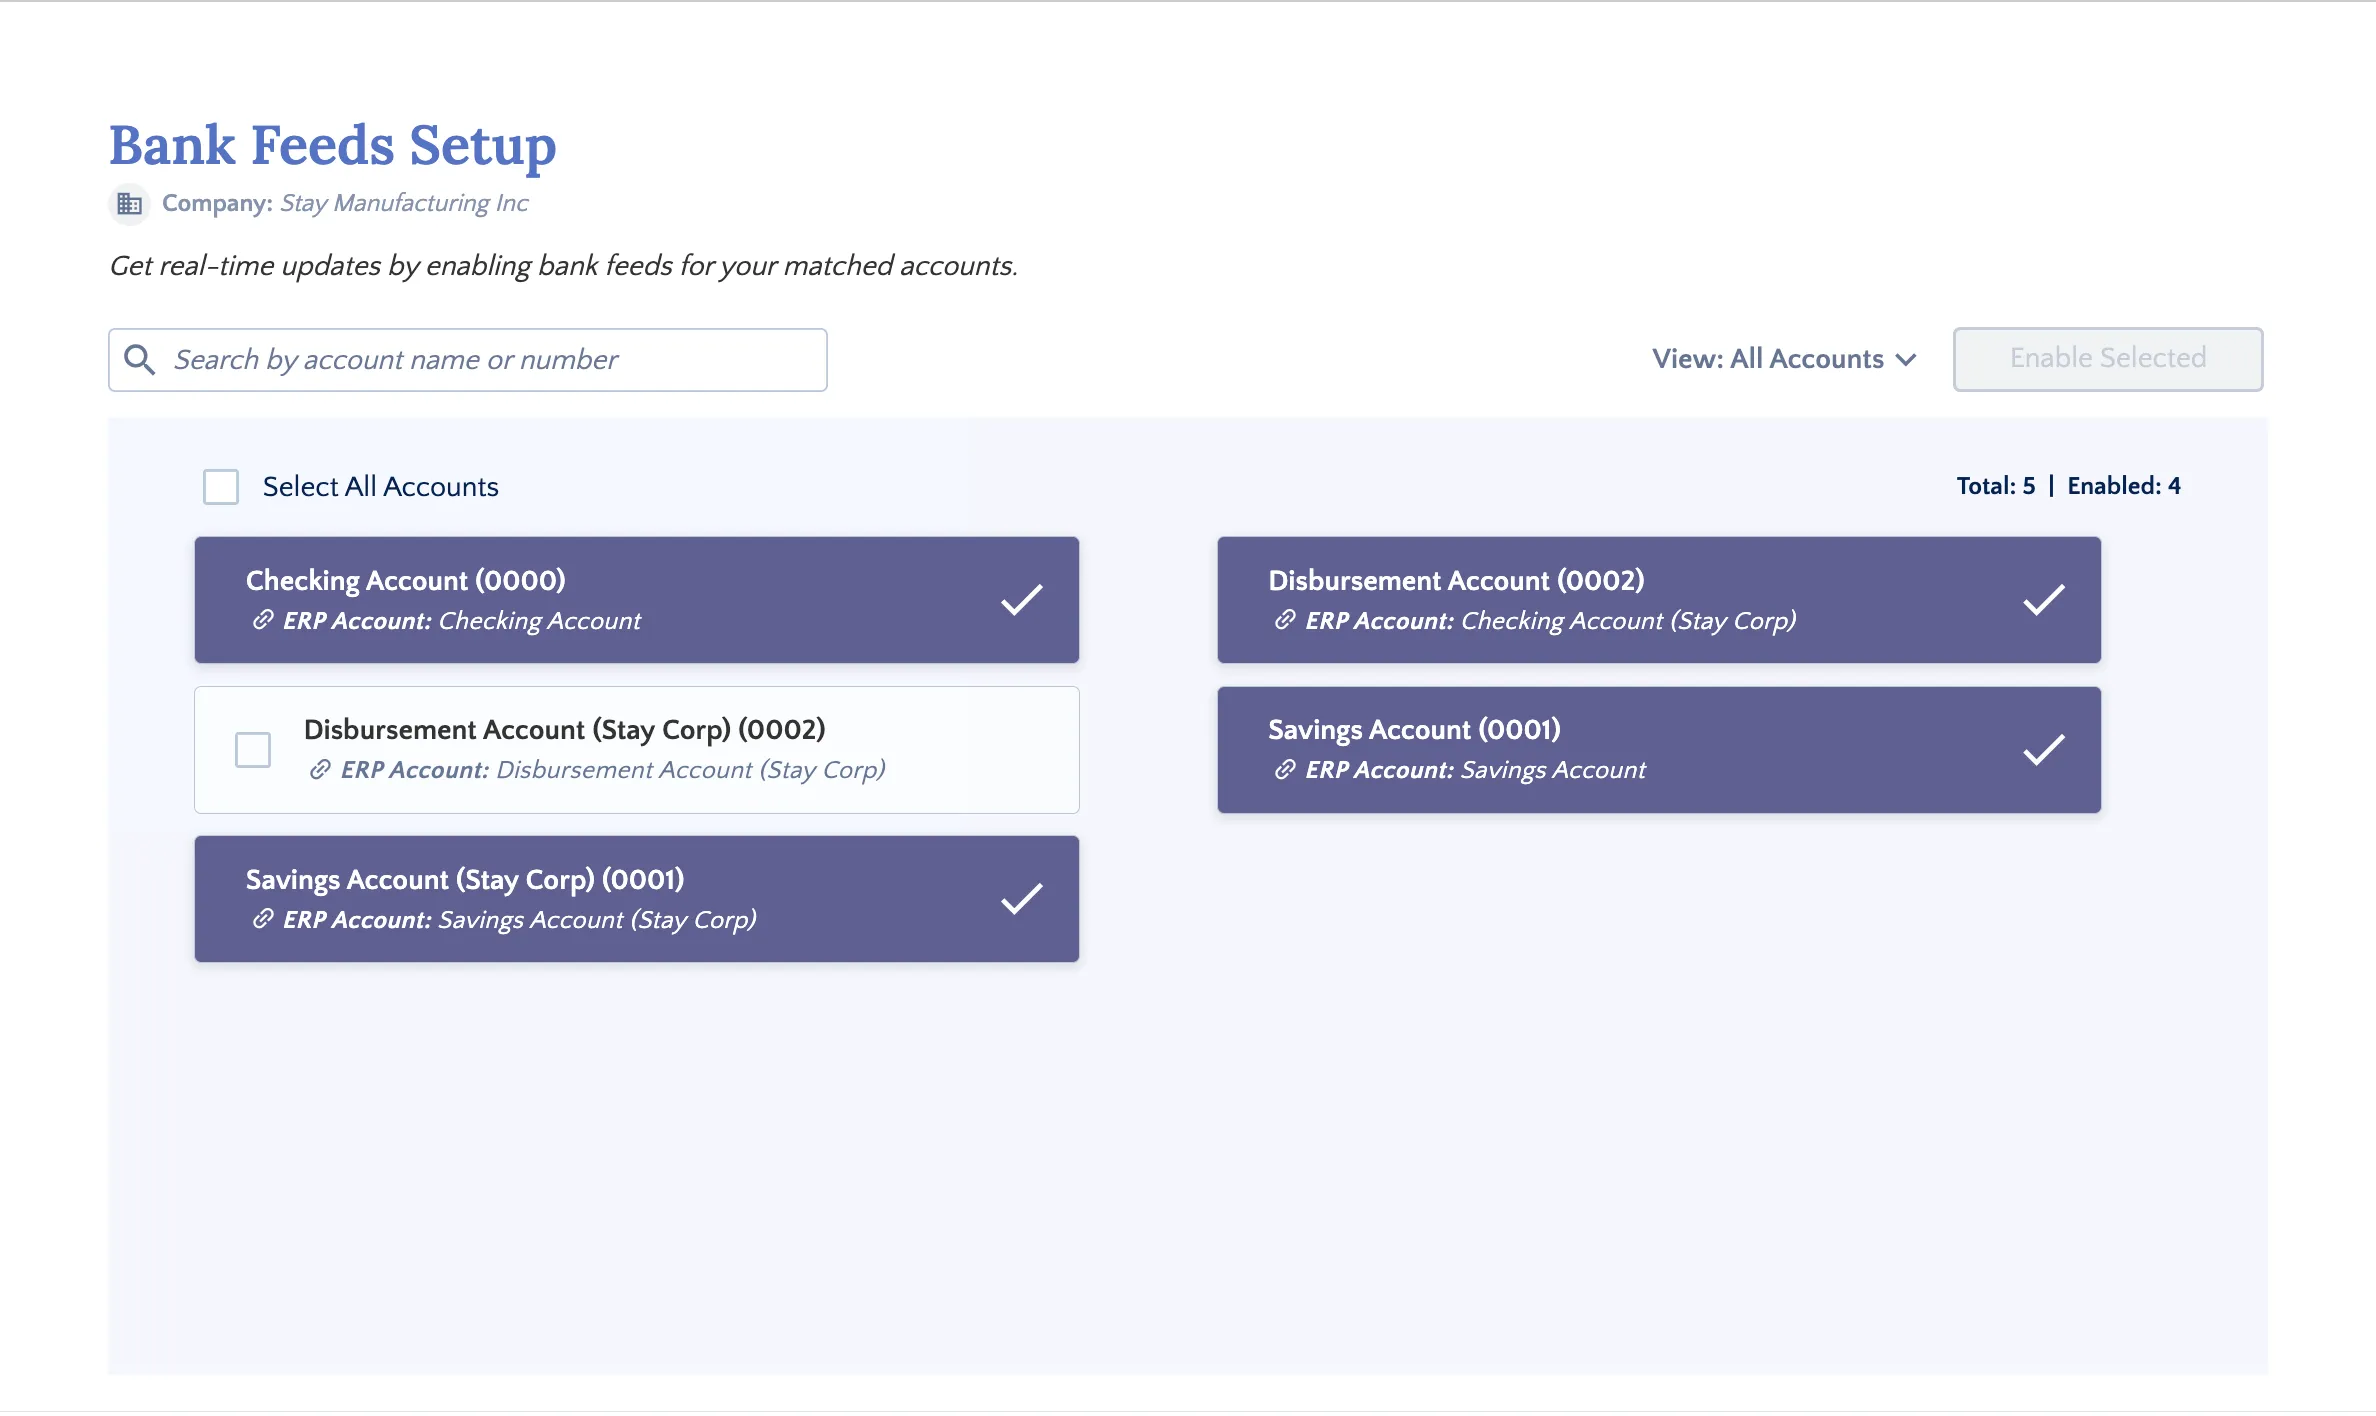
Navigate to the Bank Feeds Setup page to view your mapped accounts. This page shows all accounts, whether they're connected to bank feeds or not.
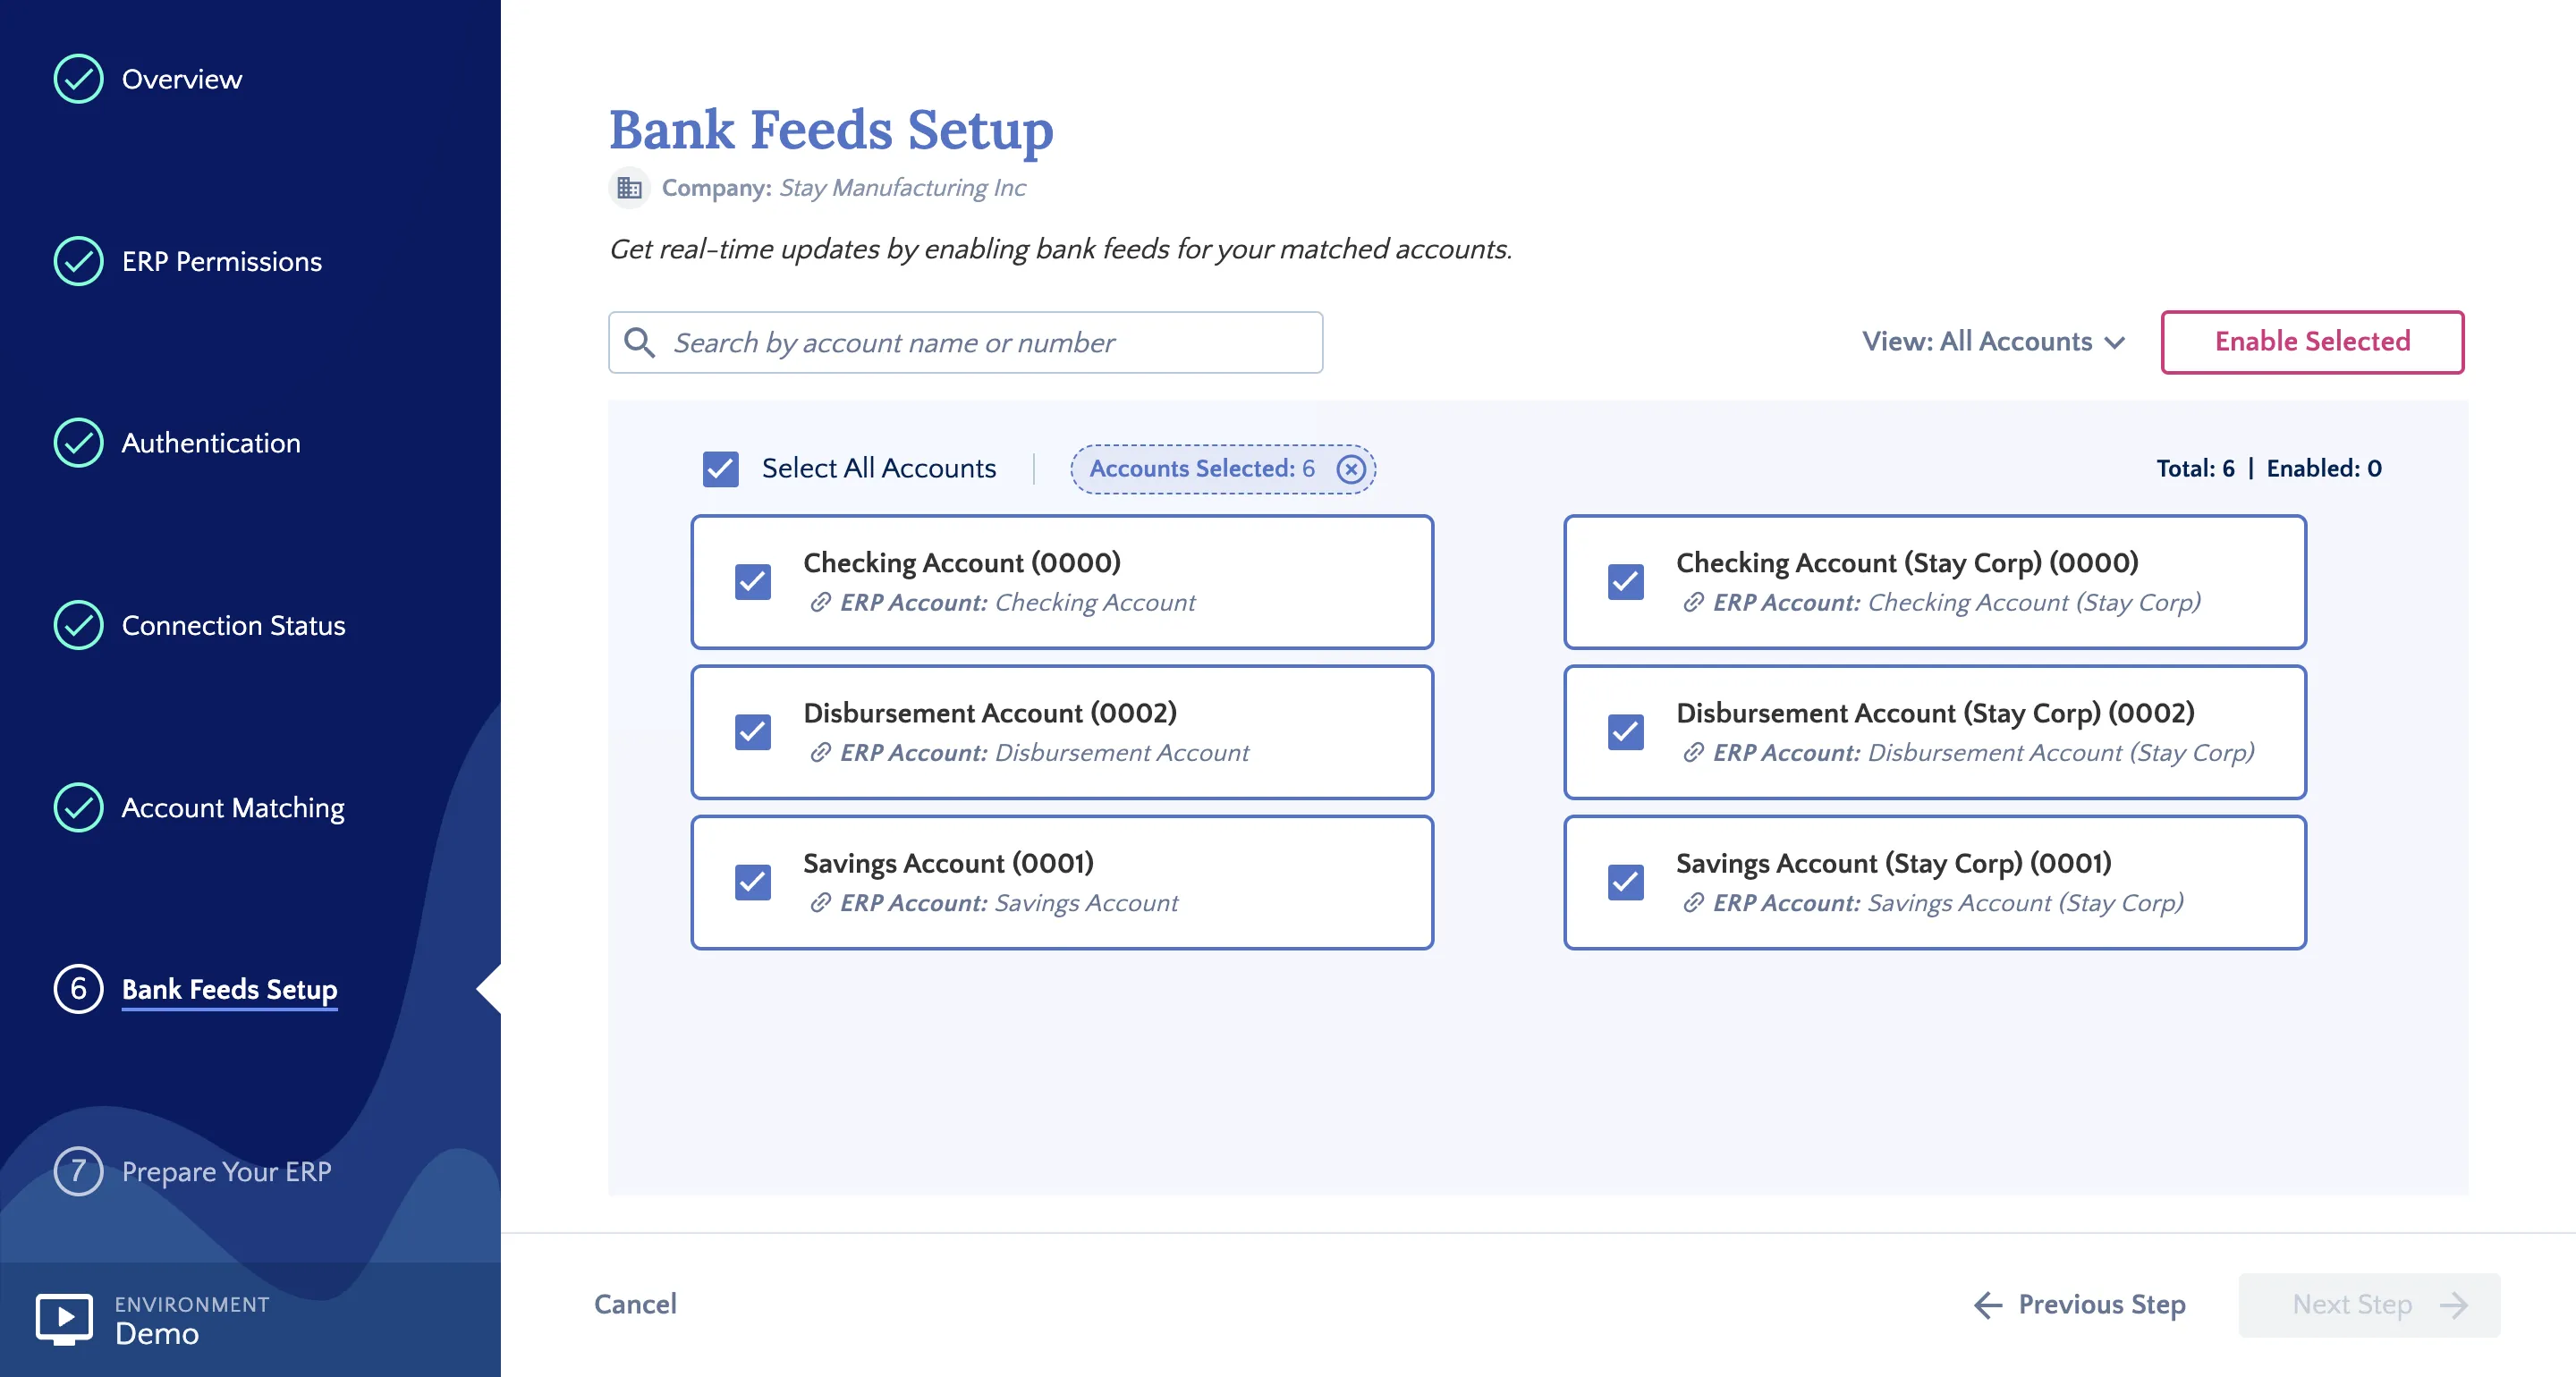
Select the accounts you wish to connect and click Enable Selected.
NOTE: Only accounts mapped during the Account Matching step will appear here.
Configure Sync Date
A pop-up will appear listing the accounts you have chosen to enable. Here, you can specify the date from which transactions should begin syncing to Xero Bank Reconciliation.
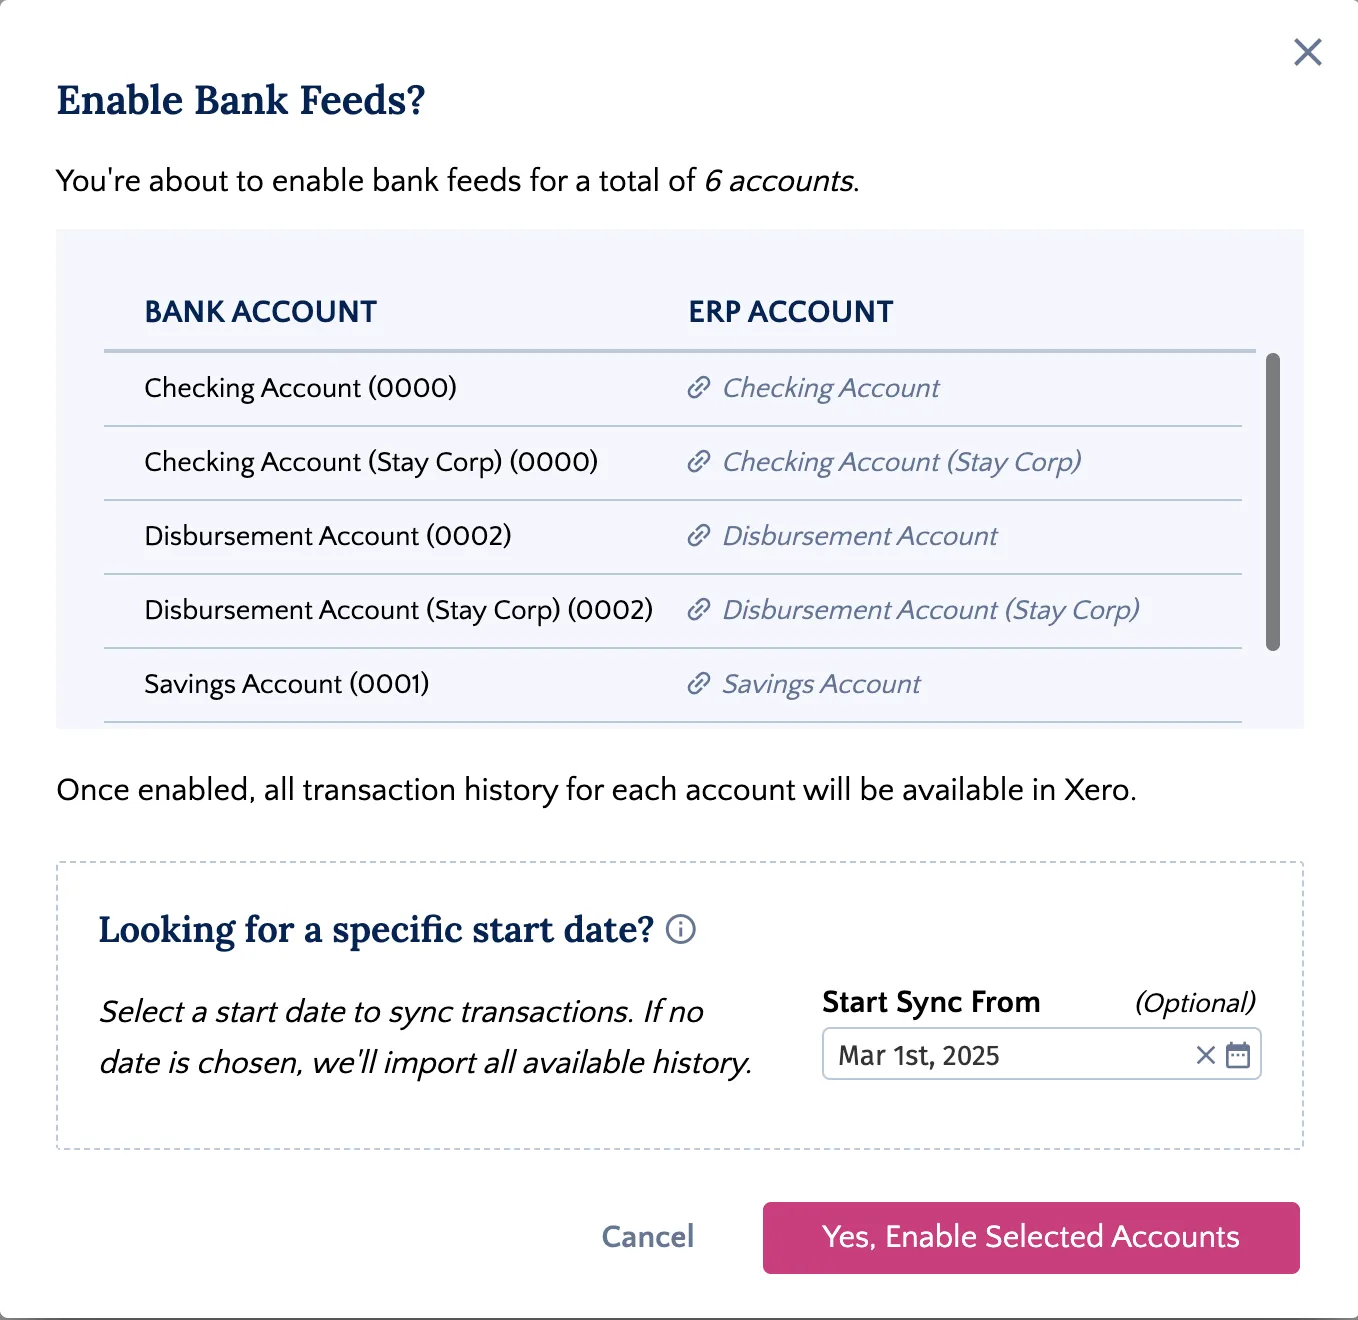
If you do not select a date, we will push all available transaction data from the bank.
Confirm Start Sync From date, and click Yes, Enable Selected Accounts.
NOTE: Historical transaction availability depends on your bank and may not cover the full period from your selected sync date.
Confirm Setup
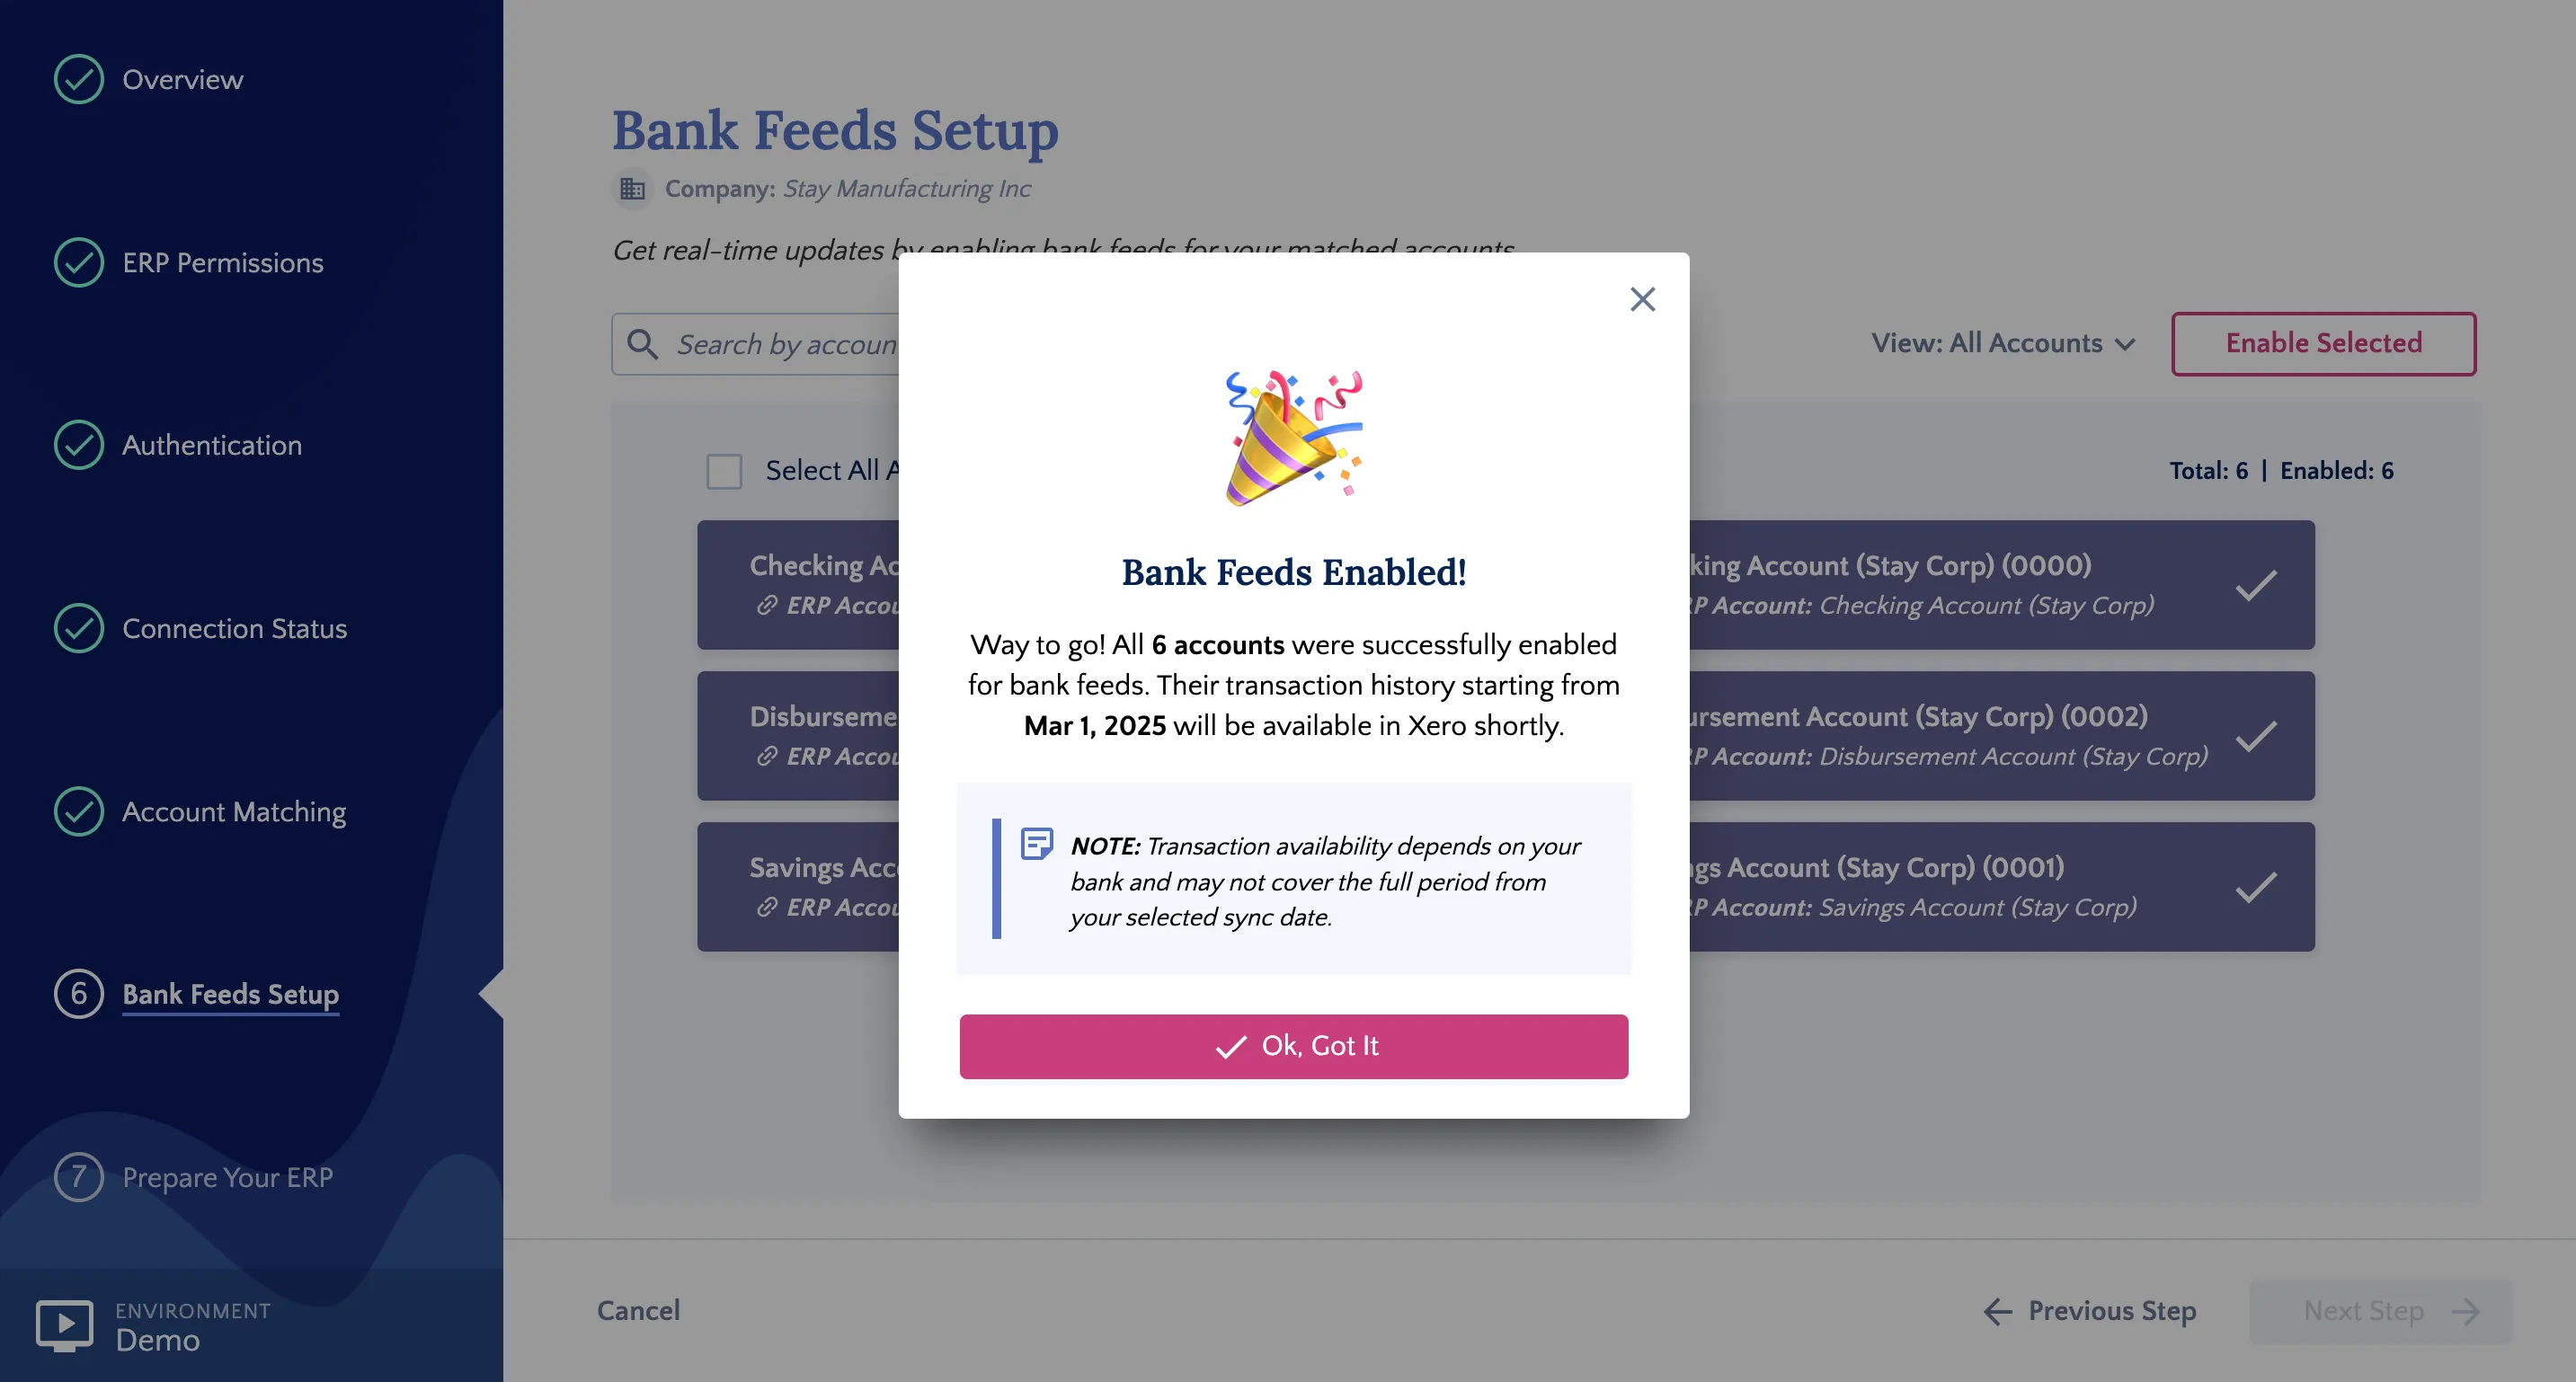
Once enabled, a confirmation message will appear. The Bank Feeds Setup page will automatically update to show the status of your connected accounts.
If any accounts fail to connect, a summary will display the failed accounts and their specific error messages. Any successfully enabled accounts will still be processed.
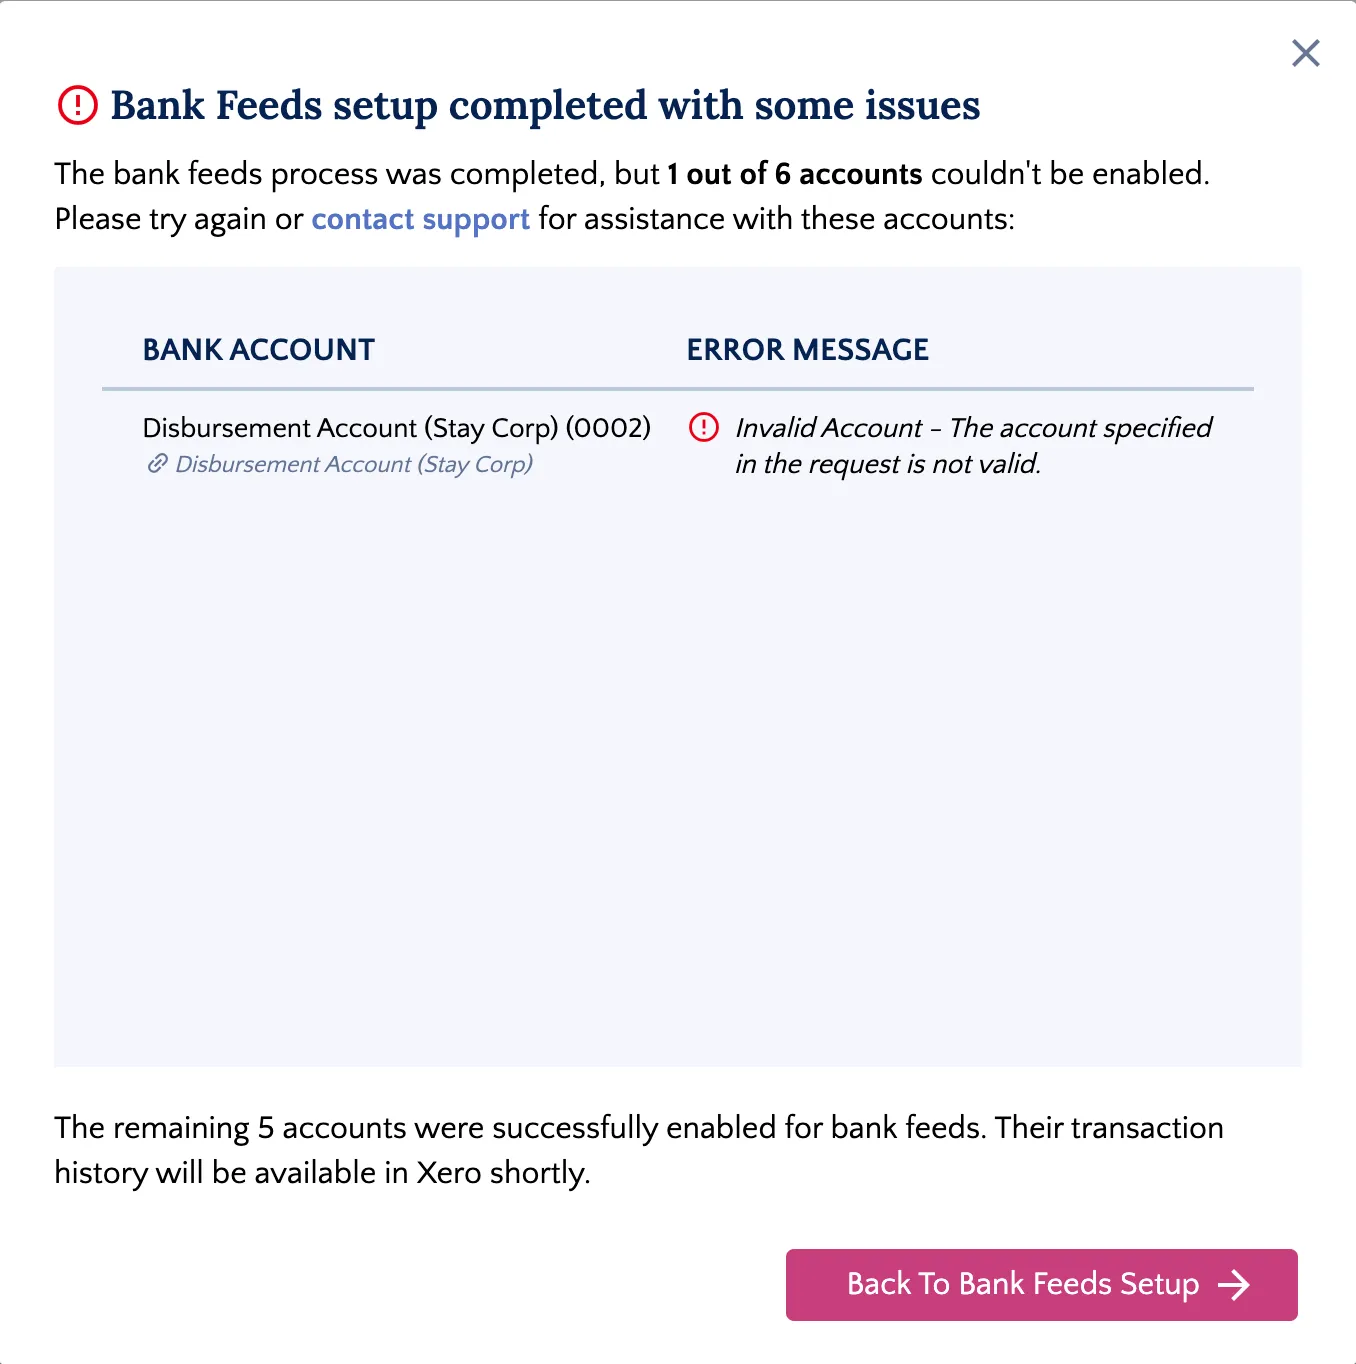
If you encounter errors, please contact our support team and provide the specific error message displayed.
Click Next Step to proceed to the post-onboarding checklist, or click Close to exit the wizard.
Your transactions will begin appearing in your Xero Reconciliation module shortly.
If you are facing any errors while connecting your accounts, read the FAQs (Xero)FAQs guide for solutions.