Paying Invoices (Business Central)
Paying bills in Business Central is now faster and more intuitive with the Payments interface. You can manage multiple currencies and catch errors before they happen—all without leaving your ERP.
Pay an Invoice
Follow these steps to pay your first invoice with the plugin.
Go to Payments
Go to MUFG Connect -> Payments page within the plugin menu.

NOTE: During the transition phase, the new interface is labeled "Payments (Beta)" while your previous page remains available as "Pay Invoices".
Select Invoices to Pay
The Pay Invoices page will then load. This page will load every Posted Purchase Invoice that is Open in your Business Central company.
On this page, you can multi-select your invoices across multiple pages. Select the invoices you would like to pay by selecting the checkbox.
TIP: Use these new features in the Payments page to locate and pay your invoices more easily.
- Fixed Columns: Fixed columns keep crucial information like Vendor Name visible as you scroll horizontally, ensuring you never lose track of what you are paying.
- Quick Actions: Use quick actions to set a vendor’s default payment method directly from this list without navigating to vendor settings.
- Sorting & Filtering: Use the sorting & filtering available for every column to quickly find specific bills.
Review Selection Summary
As you select bills, a Selection Summary appears at the top of the list. Hover over this panel to view the total and currency breakdown for your selected batch. This acts as a "sanity check" to ensure your batch totals are correct before moving forward.
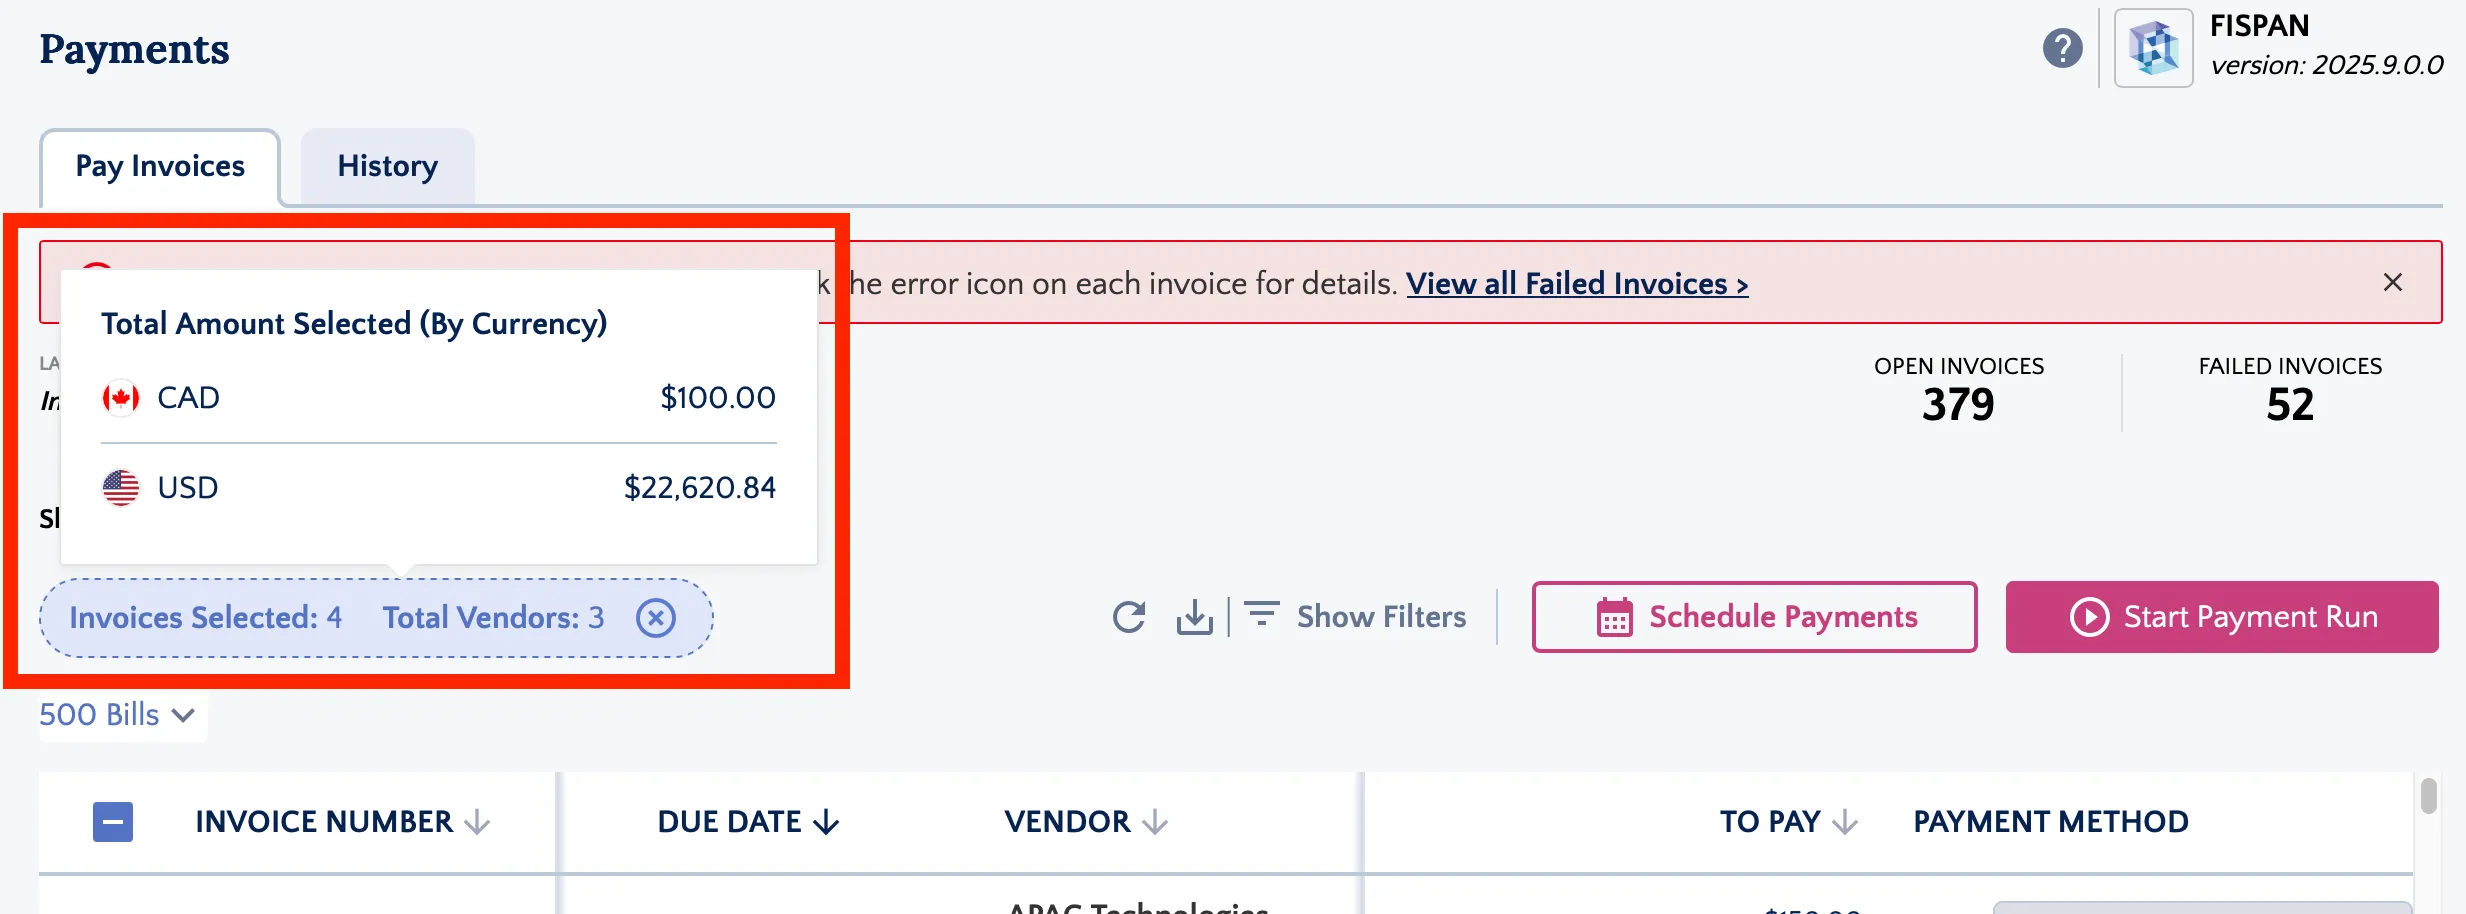
IMPORTANT: If a bill has data issues preventing payment, an error icon will appear directly in the list. Click the icon to view the specific error message for immediate troubleshooting.
Start Payment Run
Select Start Payment Run to initiate payments immediately.
With multi-source capability, you can include bills across various currencies and bank accounts within a single batch. The system intelligently bundles these payments, eliminating the need for multiple separate runs.
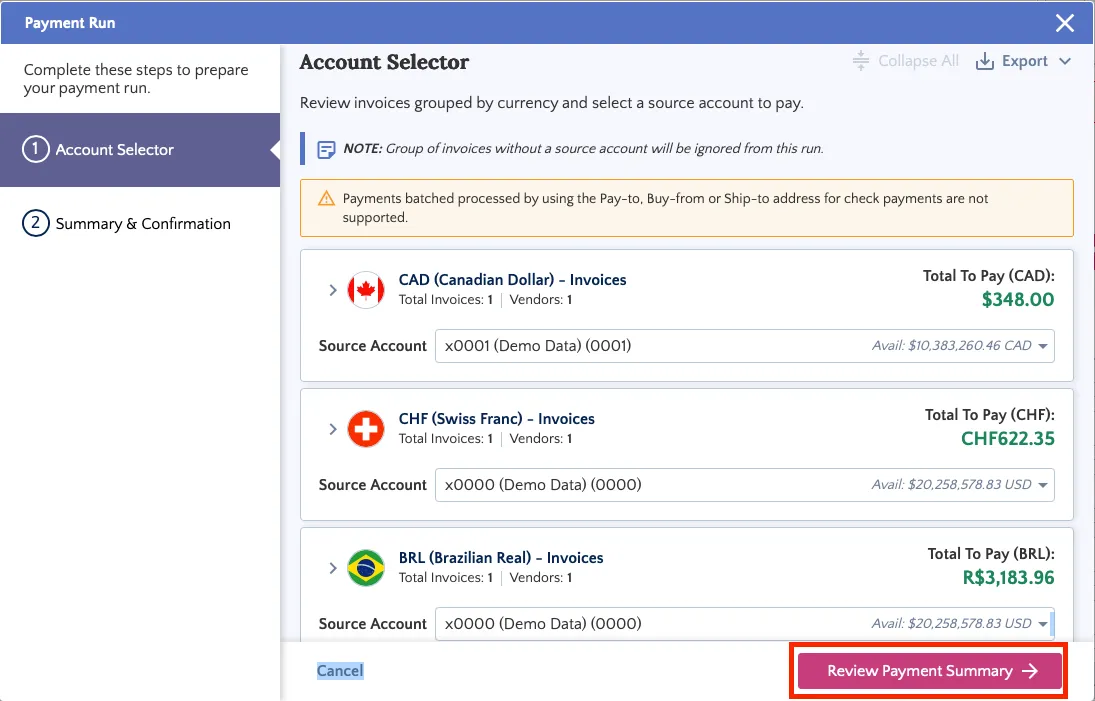
Click Review Payment Summary to continue.
Review Payment Run
Review your payment run in the confirmation window. Verify the source accounts and amounts.
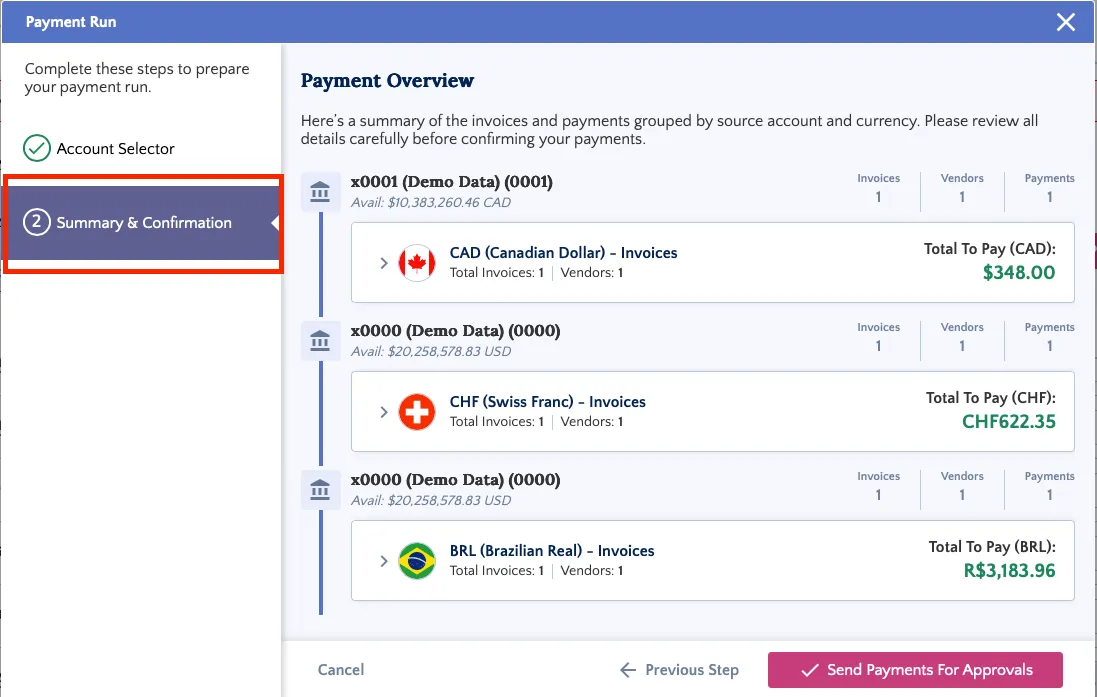
After verifying the details, click Send Payments For Approvals to submit the batch for processing
Confirm Payment Run
Once submitted, you will receive a confirmation.
Navigate to the History tab to track the status. Scheduled payments will appear here with a distinct "Scheduled" status until they are processed.
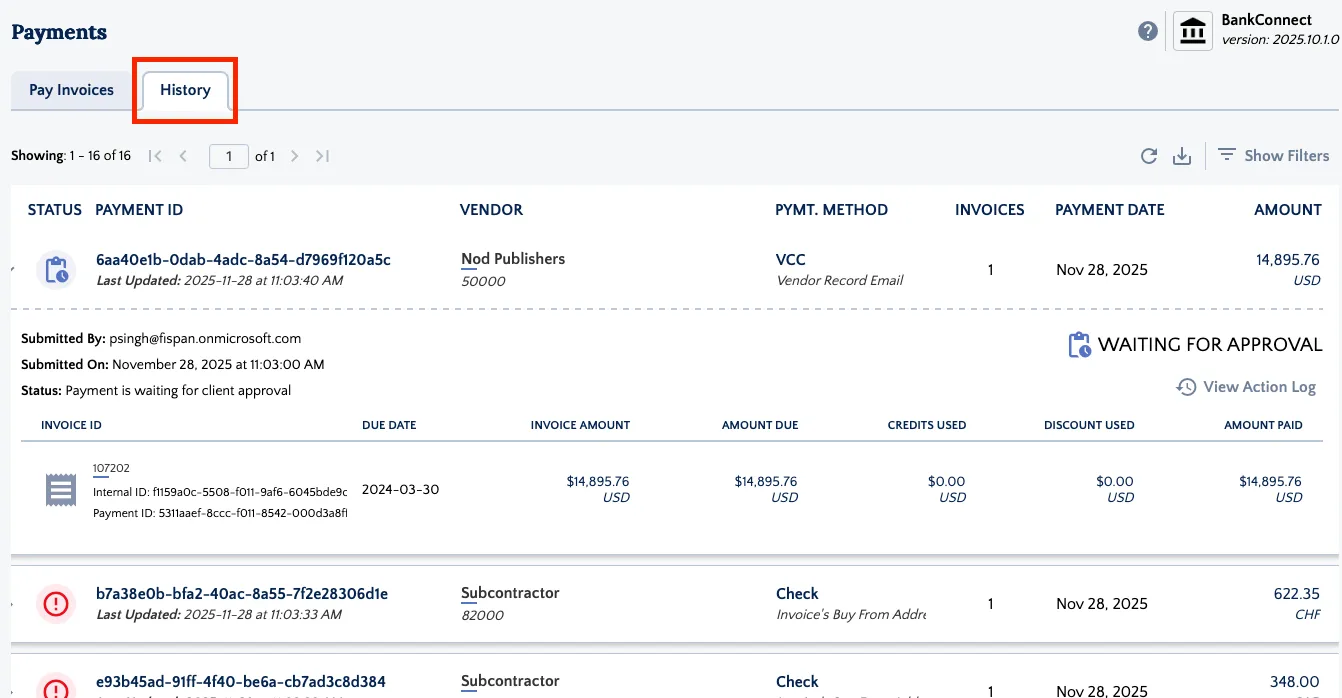
If any payment fails during the run, a banner on the Payments page will alert you immediately.
Payment Statuses
Payments that are processed through the plugin will first appear as Pending. Dependent on the payment method, payments may remain Pending for up to several business days after submission, after which the payment will automatically be moved to a Completed state.
Processing Payment Statuses
A processing status indicates that a payment has been submitted for approval and is awaiting release.
- SENT FOR PROCESSING: Payments enter this state immediately after they have been submitted for payment via the plugin.
- PROCESSING: Payments will enter this state once they have been approved and released.
Terminal Payment Statuses
A terminal status indicates a final state. In most cases, payments will not automatically change from these states unless intervention is applied by the support team.
- COMPLETED: This is a final status. Some payments are marked as autocomplete based on the payment network's handling. This status should not change.
- FAILED: Payments that fail to be processed enter this status. Failure can occur due to various reasons, such as initial validation issues (missing or inappropriate information) or failure within the payment network (e.g., the destination bank account is closed).
- CANCELLED: This status indicates that the payment was rejected in the bank approval portal or cancelled directly within the platform.