New Payments Experience (NetSuite)
CNB Pay's New Payments Experience is a modern, reimagined approach to bill payments and expense reimbursements in NetSuite. Built from the ground up for speed and collaboration, the new experience brings powerful features like partial payments, cross-page bulk selection, and flexible payment runs capabilities that transform how your AP team works.
This upgrade removes the friction of managing two separate bundles to make payments, creating a seamless experience where all vendor and employee payment information lives in one place. Say goodbye to switching between the Bank Plugin and Entity Bank Details, everything you need is now unified under the Payment Methods page.
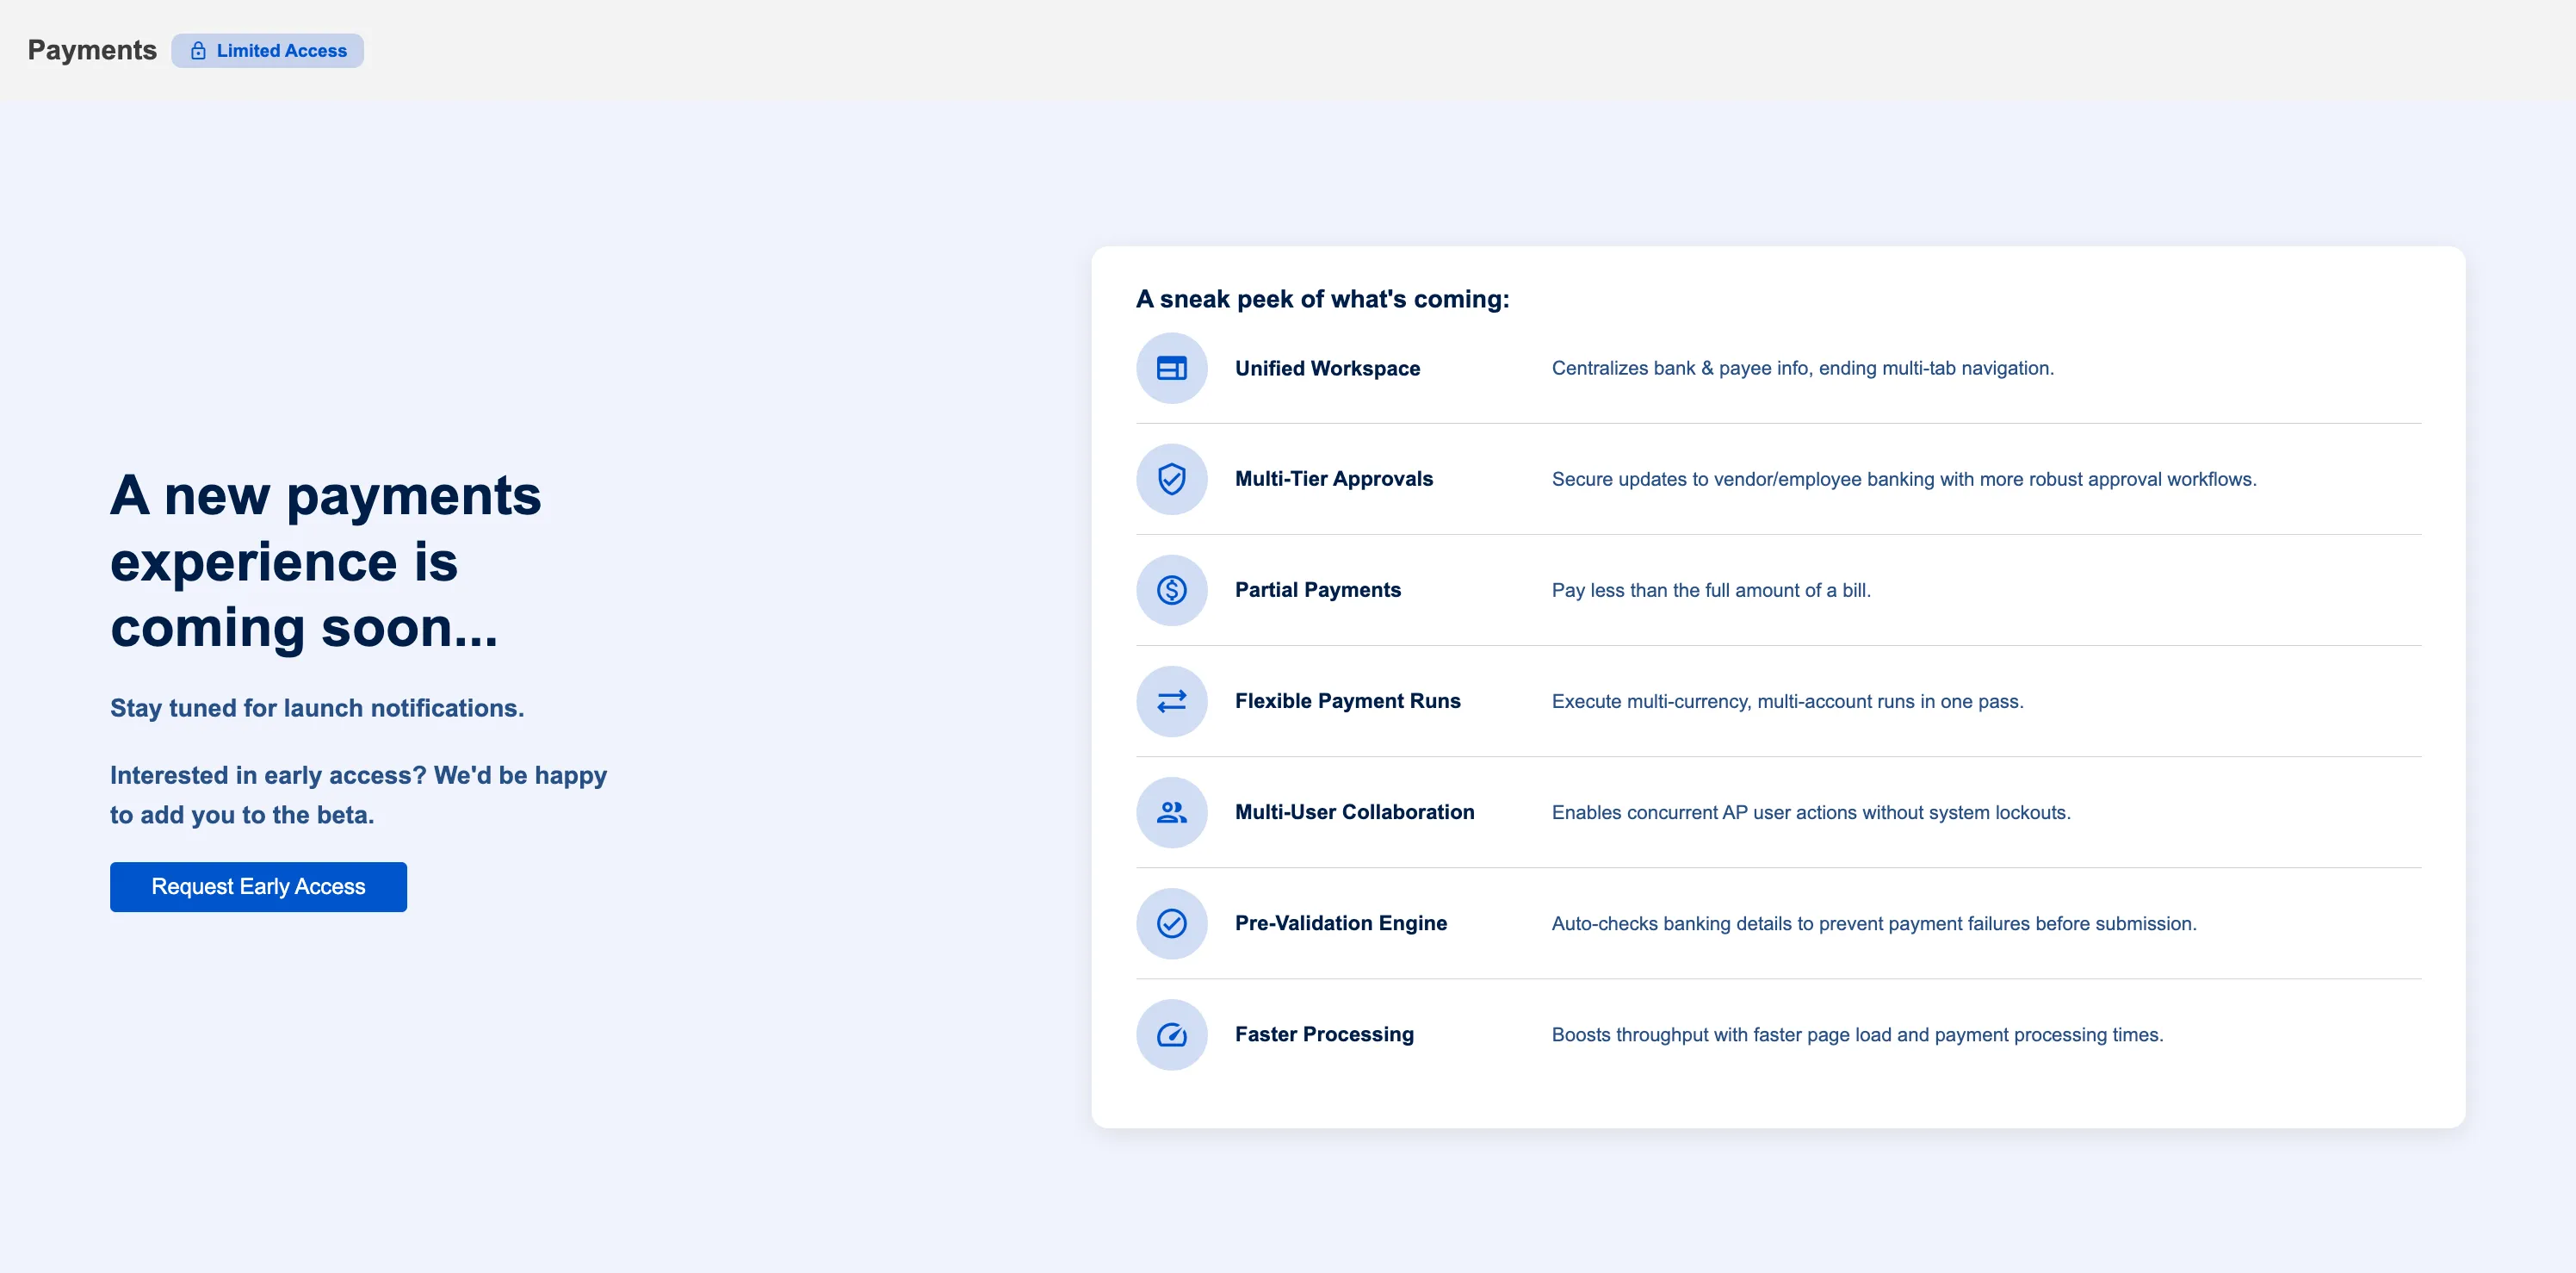
IMPORTANT: The New Payments Experience is currently available to invited clients only. If you don't see the upgrade popup and instead see a "Limited Access" screen, your organization has not been invited yet. Click "Request Early Access" to join the waitlist, and We will contact you when the upgrade becomes available for you.
This guide helps administrators upgrade once your organization is invited to the New Payments Experience and explains what changes for all users.
What's New in the Payments Experience
Unified Workspace
Currently, you need to install two separate bundles to manage payments: the CNB Pay Plugin (for payment processing) and the Entity Bank Details bundle (for storing vendor and employee bank accounts). Managing payment information means switching between these two bundles.
With the new experience, all bank account management is built directly into the Bank Plugin's Payment Methods page. You only need the CNB Pay Plugin, no more managing a separate Entity Bank Details bundle. Everything you need to manage and process payments is in one place under Accounts Payable (New).
Partial Payments
Pay any amount less than the full bill balance. This is useful when you want to pay in installments or match available cash flow. The remaining balance stays on the bill for future payments. For example, if a bill is for $10,000, you can pay $3,000 now and the remaining $7,000 later.
Enterprise-Grade Performance
Pages load faster with smoother navigation. The new experience reads data from a high-performance database instead of querying NetSuite directly every time. You'll notice less waiting for bills and expense reports to load, and navigating between pages feels more responsive.
Multi-Page Bulk Selection
Select bills across multiple pages without losing your selections. Currently, if you select bills on page 1 and navigate to page 2, your selections on page 1 are cleared. With the new experience, you can select bills across the entire list (page 1, page 2, page 3, etc.), then pay them all in one batch. This saves time when processing large payment runs.
Multi-User Collaboration
Multiple team members can work on payments simultaneously without blocking each other. Currently, all users are locked out when someone else is initiating the payments. With the new experience, your entire AP team can work together, selecting and processing payments at the same time. This improves efficiency for teams processing high payment volumes.
Flexible Payment Runs
Process payments across multiple currencies in a single payment run by selecting a different source account for each currency. Currently, you can only select one source account per payment run. This means if you need to pay bills in CAD, USD, and EUR, you have to run three separate payment processes. Each currency requires its own payment run. With the new experience, select bills in any currency all at once, then choose which source account to pay from for each currency during the same payment run.
Smart Payment Defaults
Choose exactly which bank account to use for each vendor or employee when you set up their payment method. In the current experience, you select "ACH" as the payment method and then separately mark a bank account as Primary in Entity Bank Details. This causes less visibility, is cumbersome while making payments, and is prone to error. However, with the new experience, you set up "ACH + Bank Account A" or "ACH + Bank Account B" directly for each vendor in the Payment Methods page. This full detail shows up when you pay bills, so you always know exactly which account the payment will come from.
Granular Approval Control
Set up multi-level approval workflows for payee's payment information changes with up to 3 tiers of up to 5 approvers in each tier. Define who can approve when someone adds, updates, or deletes a payee's payment information (bank account, address, and email). Email notifications are automatically sent to approvers when changes need approval. This gives you more control and helps with compliance for your payee management processes.
Prerequisites
Before starting the upgrade, ensure the following requirements are met:
You Must Be Invited
The New Payments Experience is available to invited clients only. This is a controlled rollout to ensure a smooth transition for all clients.
How to check if you're invited:
- Navigate to any legacy payment page (Pay Vendor Bills or Pay Expense Reports)
- If you see a popup titled "New Experience Available" with an upgrade flow, your organization is invited
- If you see a "Request Early Access" button instead, your organization is not invited yet
To request access:
- Click "Request Early Access" on the limited access screen
- Your email will be registered for opt-in
- We will contact you when the upgrade becomes available for your organization
Administrator Access Required
Only NetSuite administrators can perform the upgrade. If you are not an administrator, contact your NetSuite admin to start the upgrade process. Non-admins will see an informational message in the upgrade popup but cannot proceed with the upgrade.
Enable REST Web Services
The new experience requires REST Web Services to be enabled in NetSuite.
To enable:
- Go to Setup → Company → Enable Features
- Click the SuiteCloud tab
- Check REST Web Services under SuiteScript
- Click Save
Test in Sandbox Environment First
IMPORTANT: Perform the upgrade in your NetSuite Sandbox environment first before upgrading Production.
- Verify all bank accounts migrate correctly
- Test payment workflows in the new pages
- Train your team on the new experience
- Identify any issues before they affect production
Only upgrade Production after confirming everything works in Sandbox.
Approve All Entity Bank Details Records
The upgrade brings your approved bank accounts from Entity Bank Details (EBD) to the new experience. This is a one-time migration and only migrates approved records.
Before upgrading:
- Go to Entity Bank Details Approvals page in NetSuite
- Approve the pending records
Any unapproved bank accounts will NOT migrate and will not be available in the Payment Methods page after upgrade.
The Upgrade Flow
NOTE: This section is for administrators. If you are not an admin, you will see an informational message but cannot start the upgrade.
Watch the upgrade flow in action:
This video walks you through the complete upgrade process and gives you a sneak peek into the new Payments experience.
Navigate to Accounts Payable (New)
This upgrade flow can be accessed through any pages under Accounts Payable (New) tab within CNB Pay plugin drop-down.
Upgrade Flow
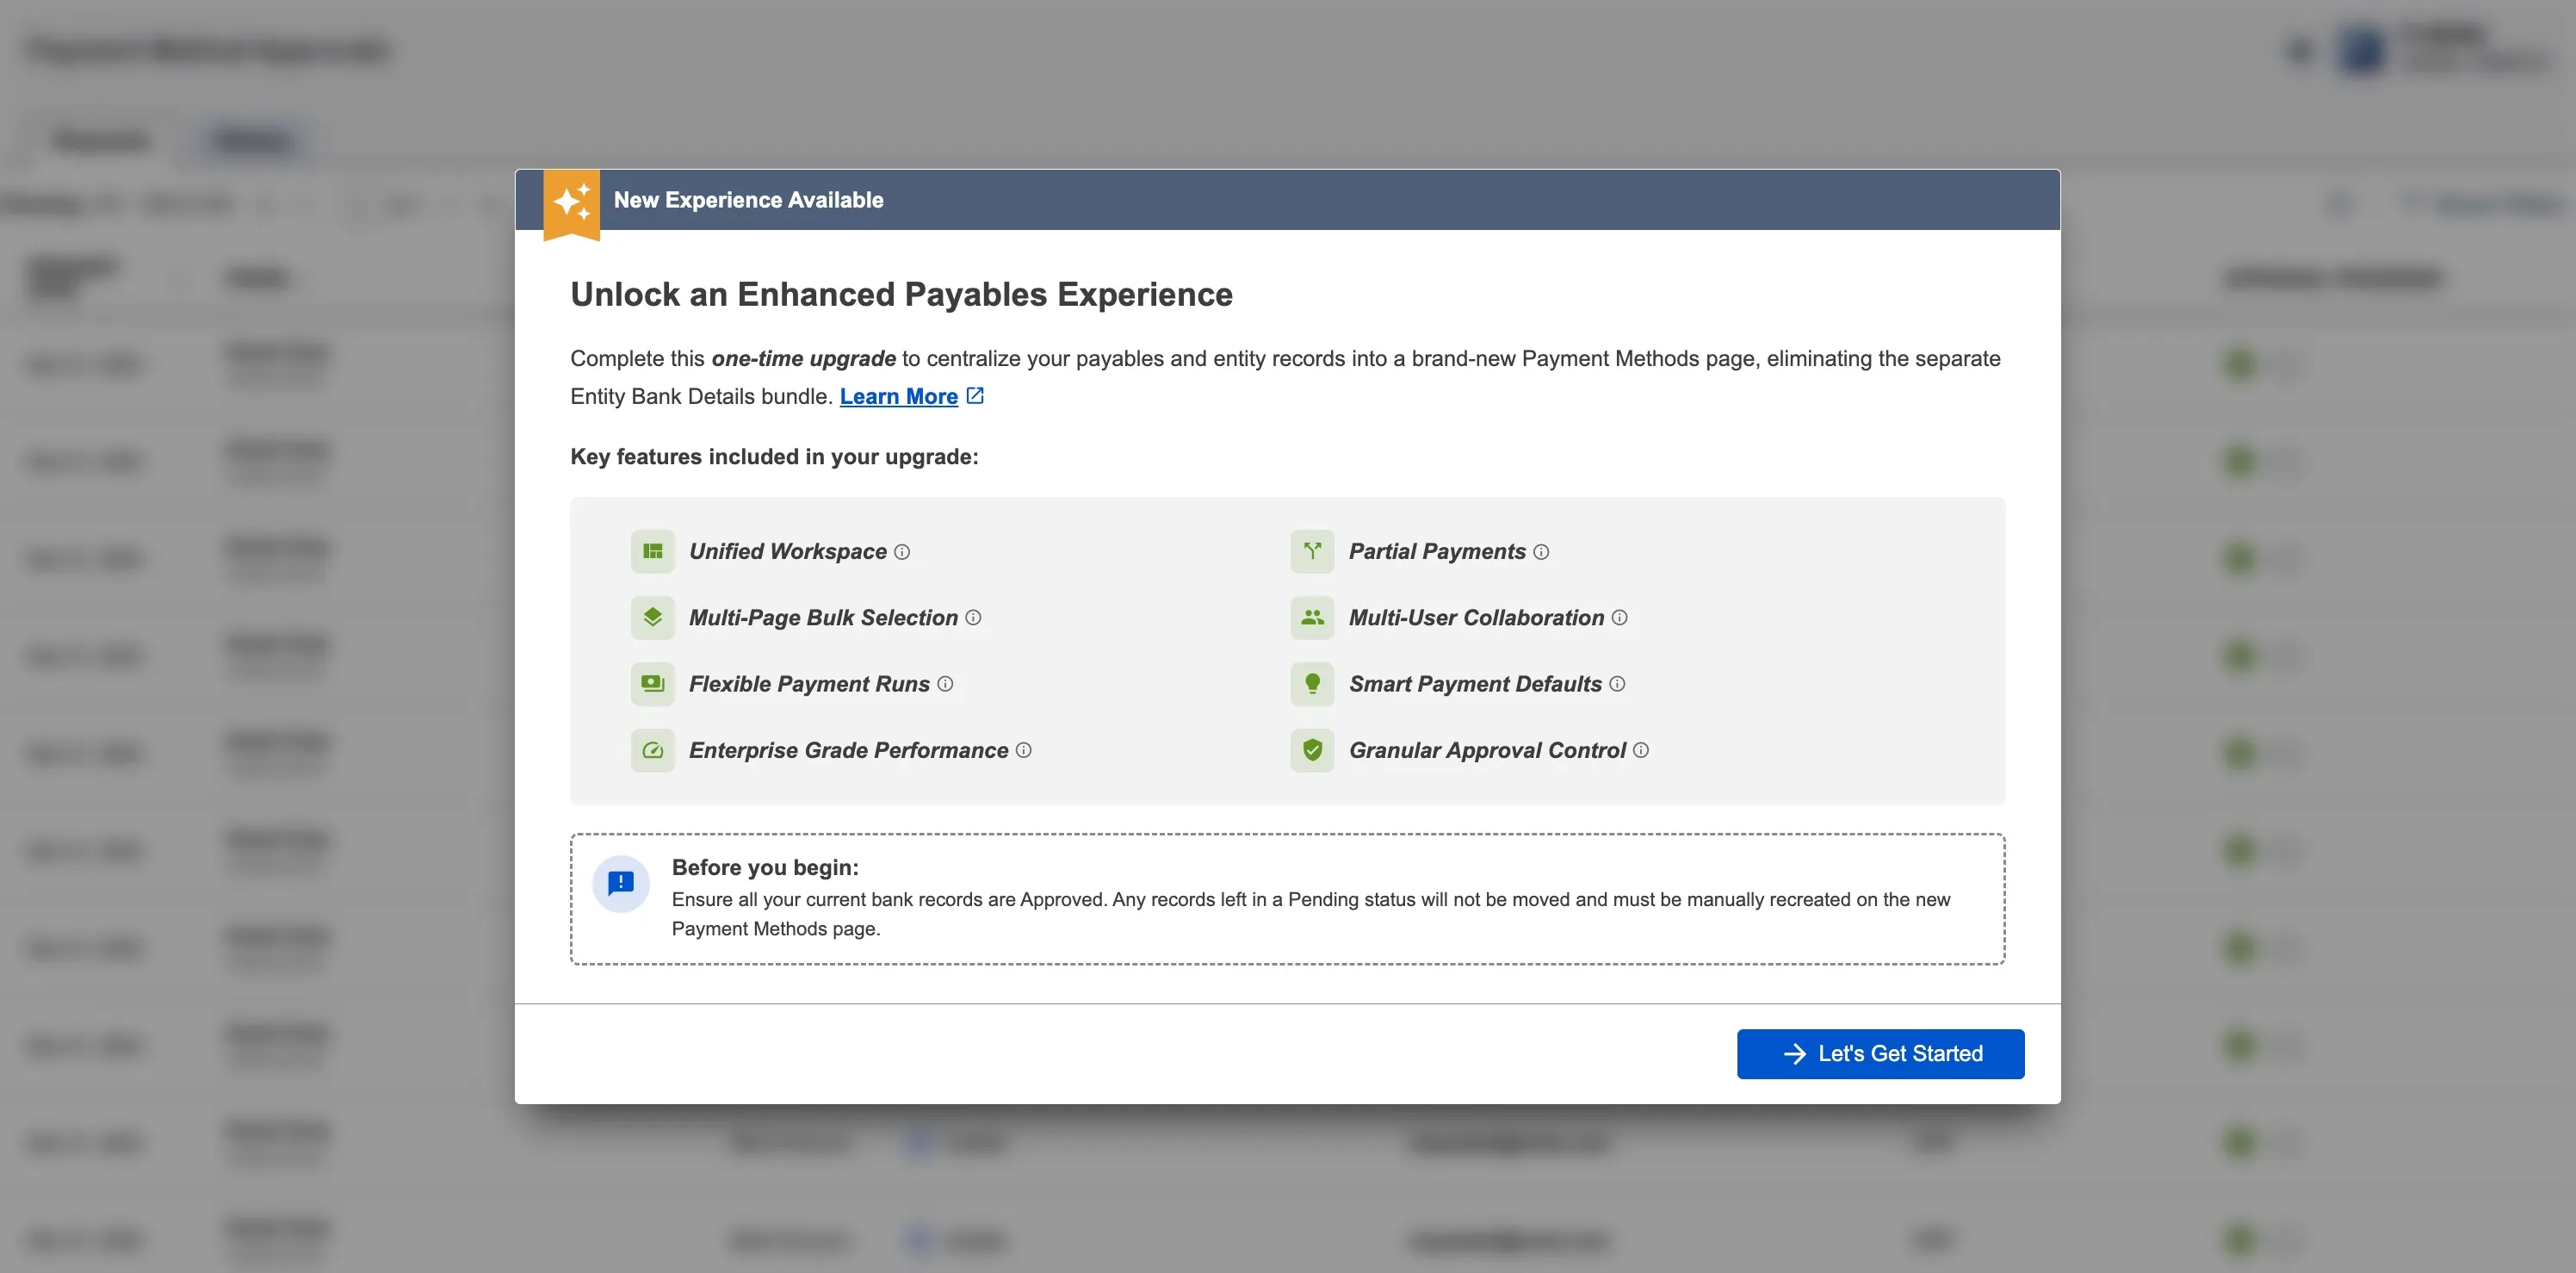
Review the "Before You Begin" section explaining how the upgrade works. When ready to proceed, click "Let's Get Started."
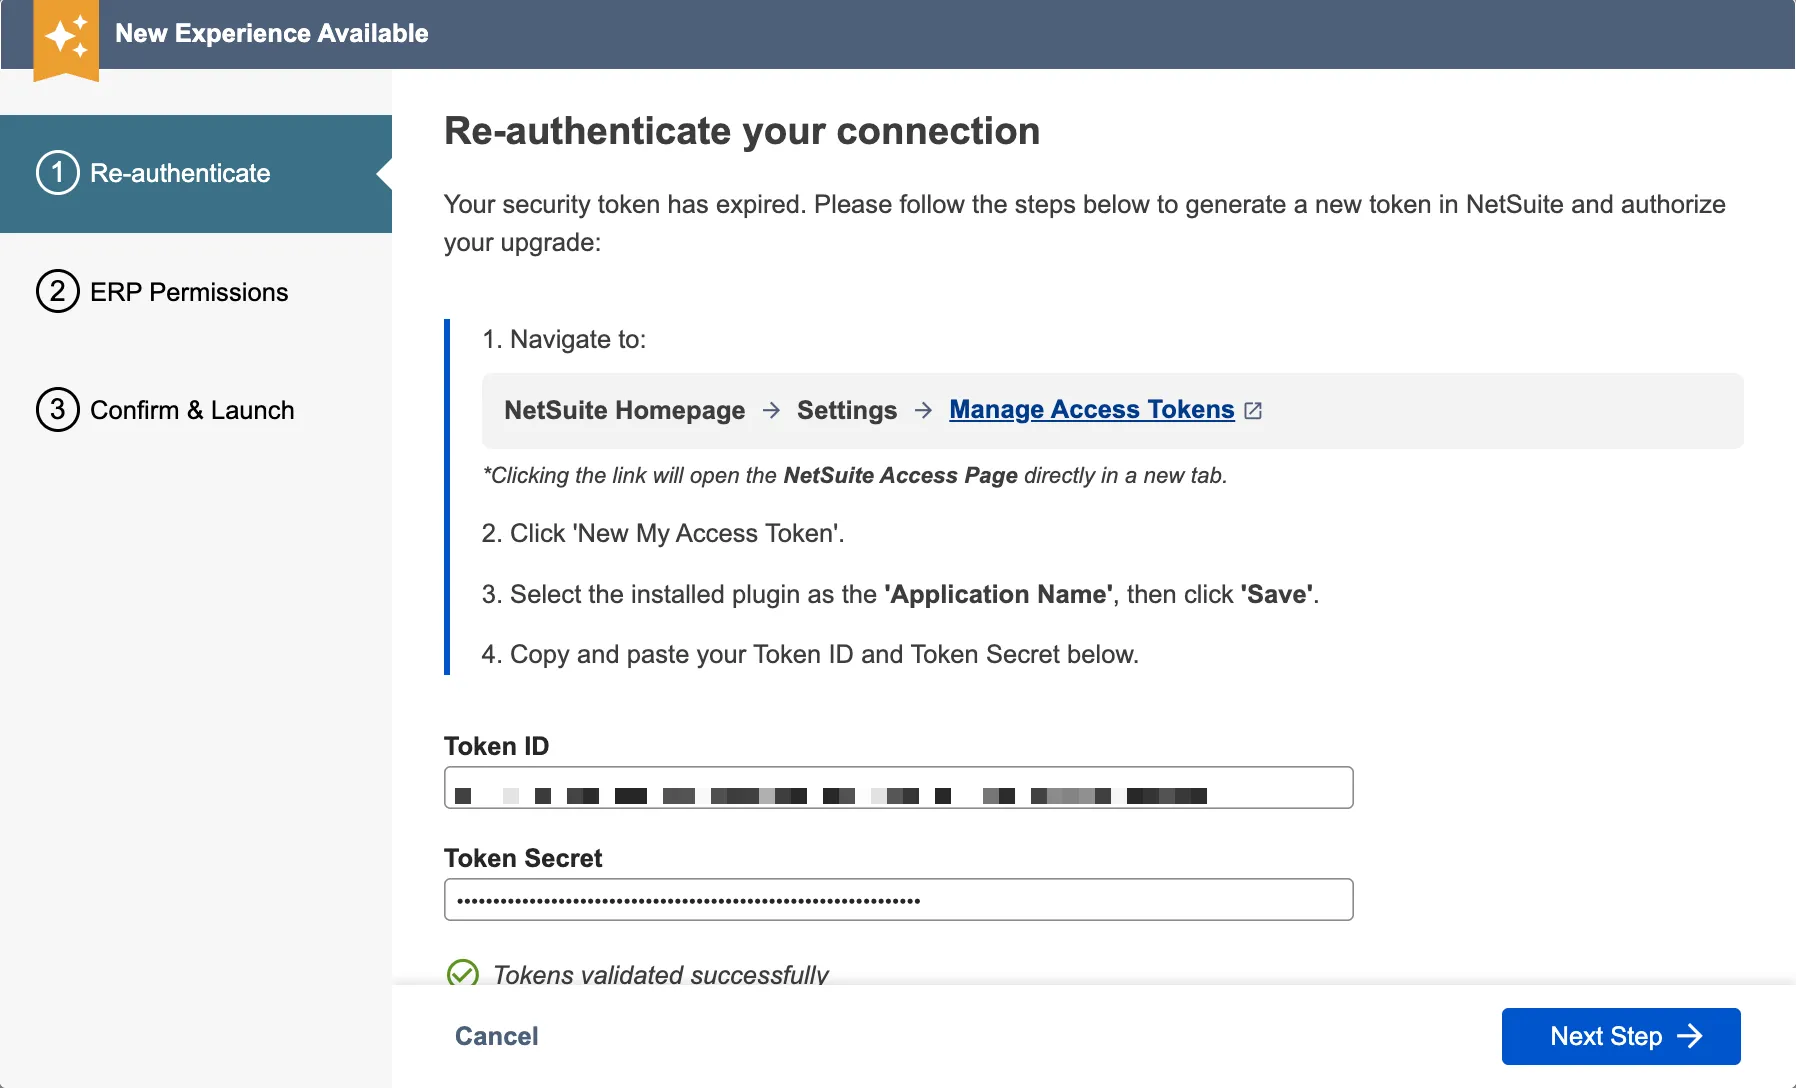
Re-authenticate (if needed)
This step only appears if your existing NetSuite tokens has expired since your initial setup. Go to NetSuite to generate a new Token ID and Token Secret, enter both tokens in the upgrade flow, and validate them. Once validated, click "Next" to continue.
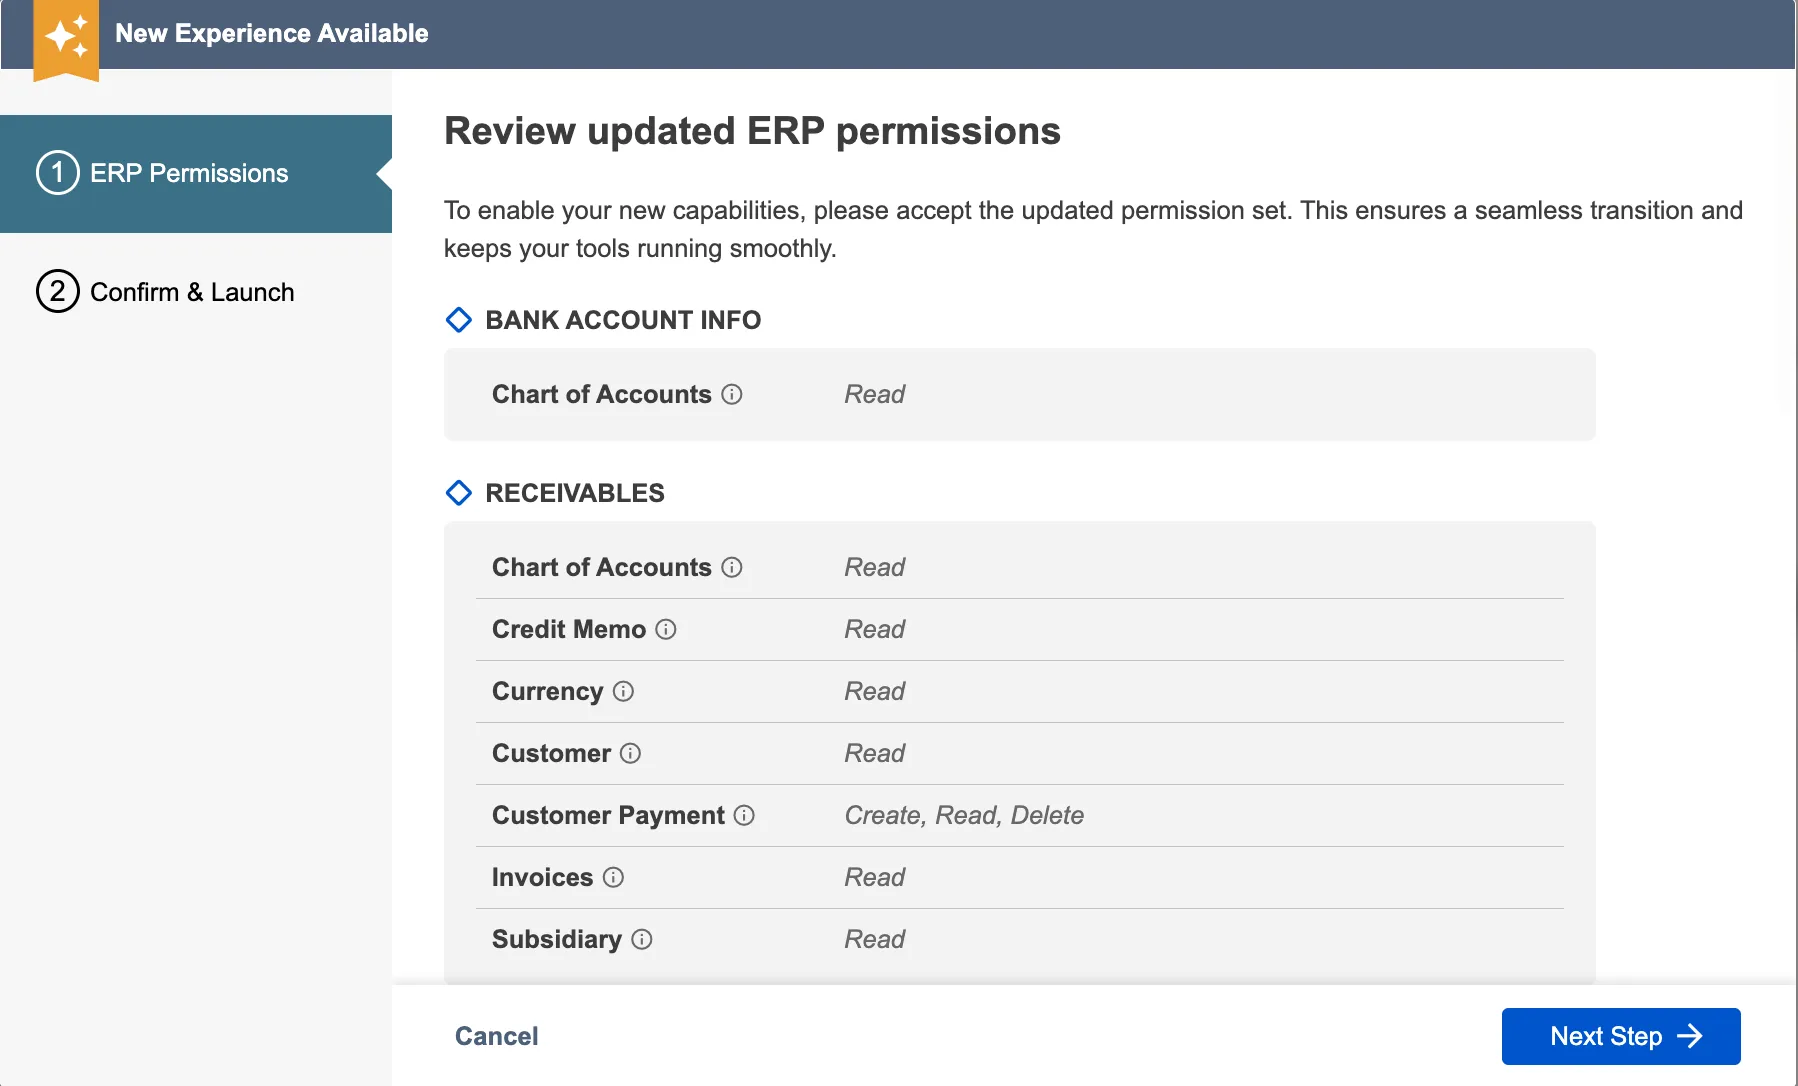
Confirm Permissions
The upgrade verifies that CNB Pay has the necessary permissions to read and write NetSuite data. These are the same permissions you granted during the initial onboarding wizard when you first set up the Bank Plugin. No new permissions are being requested, this step ensures your existing permissions are up to date and active. Review the list of permissions, toggle on the "Agree and Allow" toggle, and click "Next."
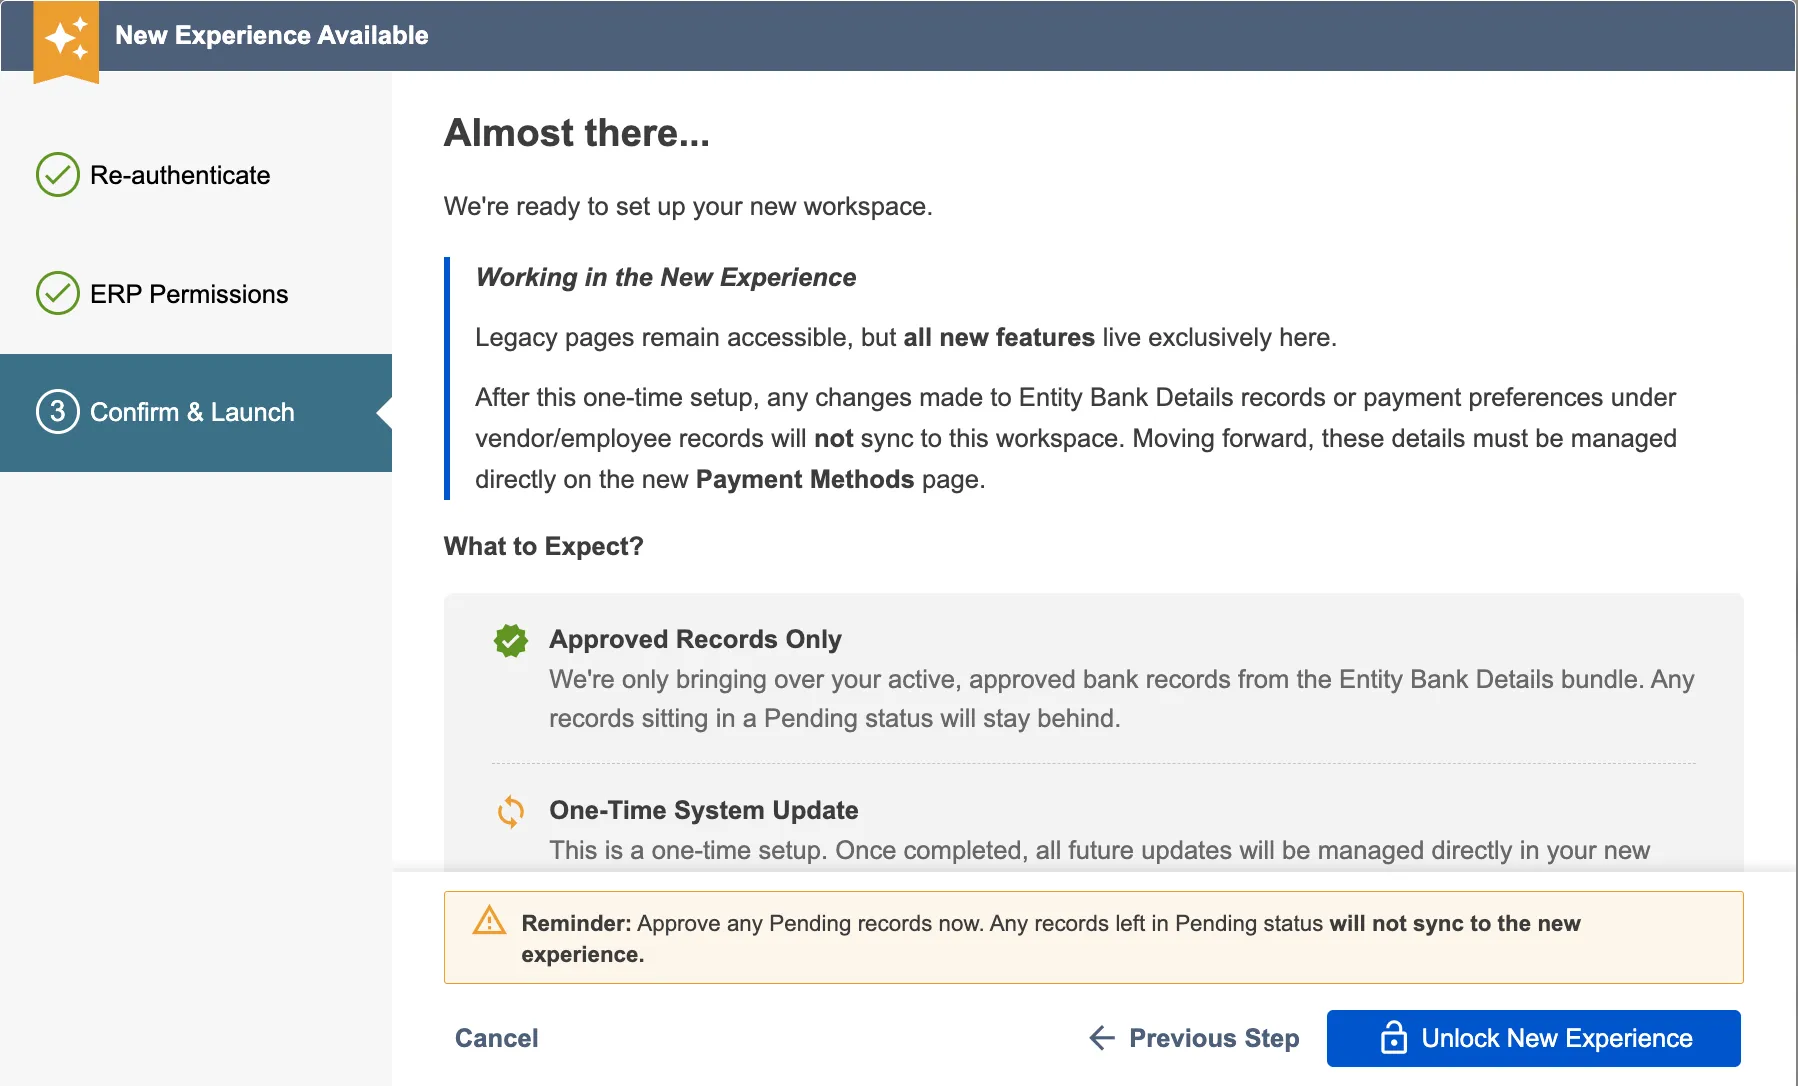
Confirm and Start Upgrade
The final confirmation screen explains what happens during the upgrade. When ready, click "Start Migration" to begin.
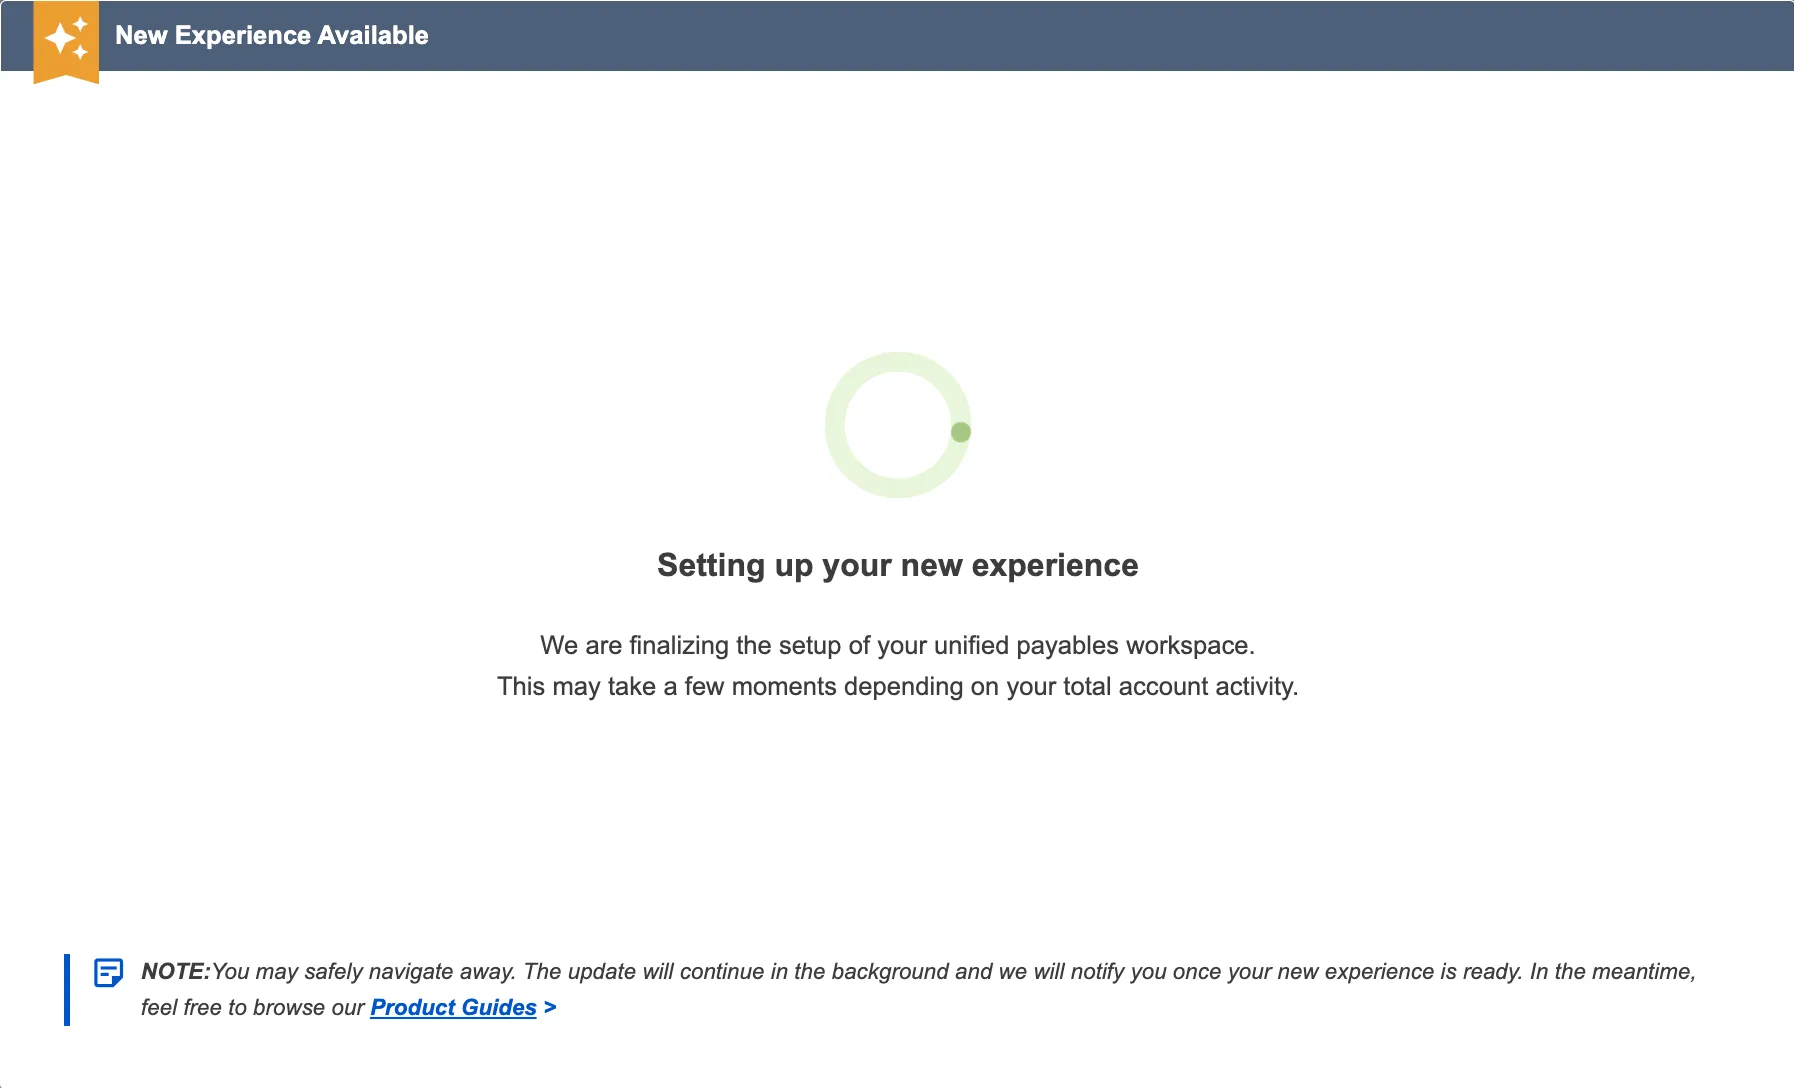
Setting Up New Experience
The upgrade runs in the background and can take sometime depending on the volume of the A/P data in your NetSuite account. You can navigate away from the page, close your browser, or continue working in other NetSuite tabs while upgrade continues running. Once the upgrade is finished, you will be notified by an email about next steps.
Review Results
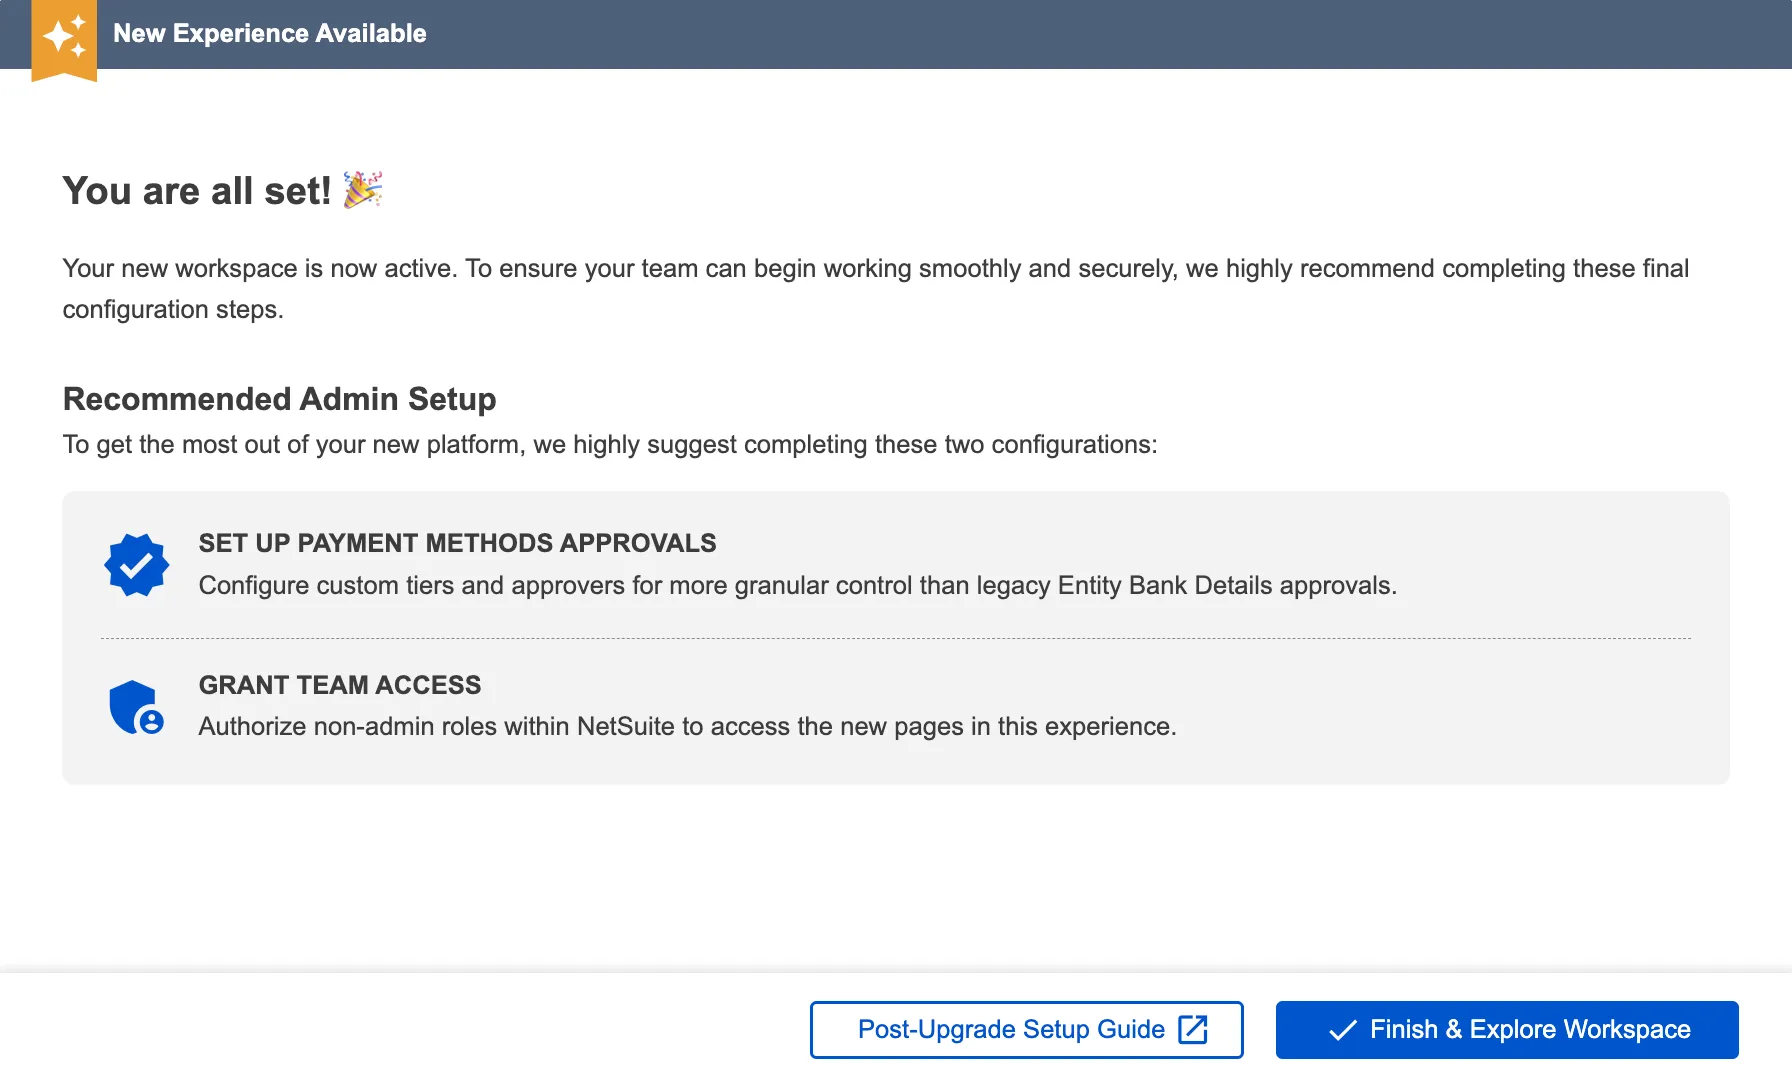
When the upgrade finishes, you'll see one of two result screens based on the migration outcome:
Success:
The upgrade has been successfully completed without errors. You'll see recommended next steps for setting up payment method approvals and granting team access. Click "Finish and Explore Workspace" to start using the new pages.
What's next? See the Post-Migration Setup section below for detailed instructions on granting team access and setting up approval workflows.
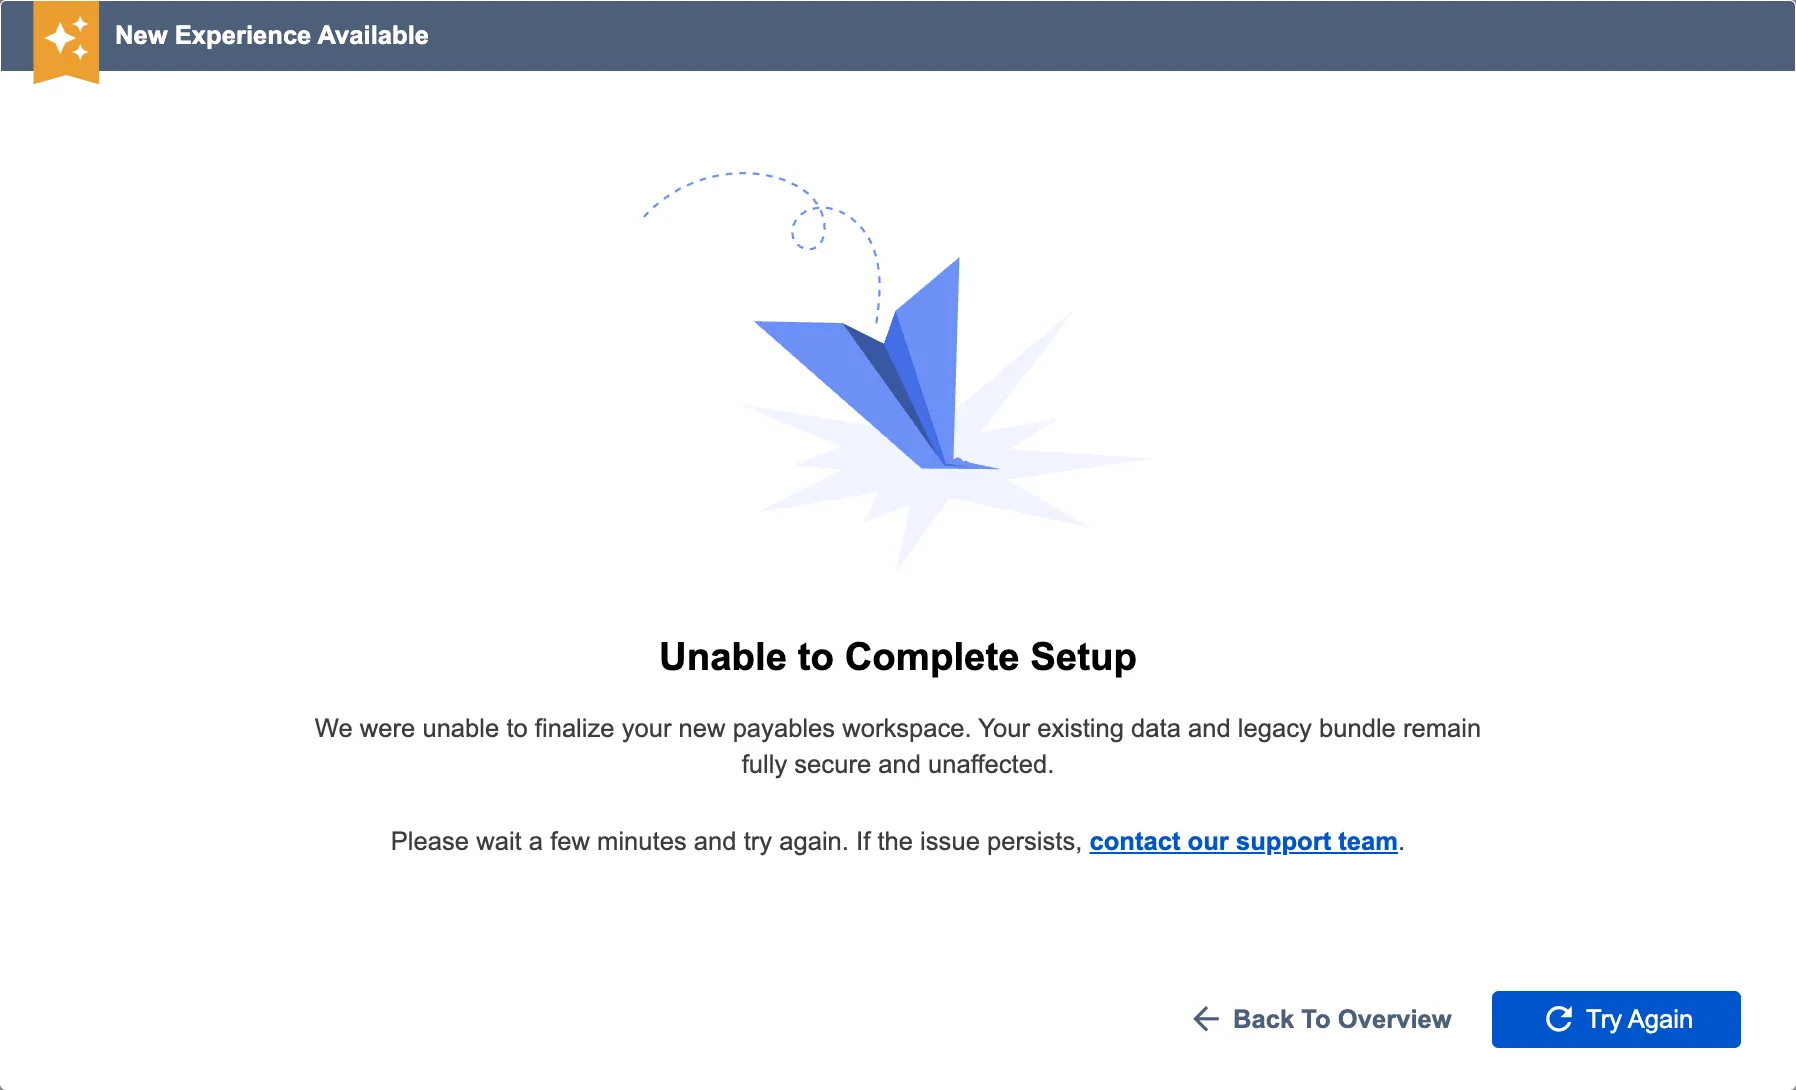
Failure:
The upgrade encountered critical errors and could not complete the migration. Click "Try Again" to resume the upgrade. If the retry fails again, contact FISPAN Support for assistance with troubleshooting the specific error.
Post-Migration
After the upgrade completes successfully, there are two important setup tasks for administrators:
Grant Team Access to New Pages (Required)
All non-administrator users in your NetSuite account won't have access to the new Accounts Payable (New) pages by default. You need to grant permissions to the following Suitelet scripts for your AP team to allow them to use the New Experience.
Required Suitelet Scripts:
- CNB Payments - Access to Payments page (pay bills).
- CNB Payment Methods - Access to Payment Methods page (manage bank accounts and payment preferences).
- CNB Expense Reimbursements - Access to Expense Reimbursements page (pay expense reports).
- CNB Payment Method Approvals - Access to Payment Method Approvals page (approve payment information changes).
How to grant access:
To get access to the Payment Approvals page, please have your ERP Administrator navigate to the role to Customization → Scripting → Script Deployment. Use the following filters:
- On the Type dropdown, select Suitelet.
- On the API Version dropdown, select 2.1.
Edit the above listed scripts and, under the Audience tab, add roles that require access to Payment Approvals.
Set Up Payment Method Approvals (Optional)
If your organization requires approval workflows for changes to vendor or employee payment information, you can set up multi-level approval rules with up to 3 tiers of up to 5 approvers in each tier.
What gets approved:
- Adding a new payment method (bank account, address, email) for a vendor or employee.
- Updating an existing payment method (changing bank account, routing number, address fields).
- Deleting a payment method.
Who can approve:
- Define specific users or roles as approvers for each tier.
- Set how many approvers are required in each tier (e.g., 2 out of 5 approvers must approve).
How to set up
Follow this guide to setup Payment Method Approvals workflow: Payment Method Approvals (NetSuite)
Bank Account Management: Entity Bank Details → Payment Methods
Before (Legacy Experience)
Managing payment information required looking in two different places. Bank accounts lived in the Entity Bank Details (EBD) bundle, while payment preferences (like default payment methods, email addresses, and bill grouping options) were stored in custom fields under the Bank Plugin sub-tab on Vendor and Employee records.
After (New Payments Experience)
All bank account and payment preference management is now unified in a single location: the Payment Methods page under Accounts Payable (New).
Here is what you need to know about managing these records going forward:
- Your Data Migrates Automatically: During the upgrade, all your existing Entity Bank Details and payment preferences are automatically migrated to the new Payment Methods page.
- One Central Hub: You will now manage all preferences—including bank accounts, payment types, addresses, emails, remittance details, and bill grouping—directly in the Payment Methods page.
- Stop Using EBD: This upgrade is a one-time migration, meaning the old and new systems do not sync after the upgrade is complete. Any updates you make in the old EBD bundle or NetSuite custom fields will not show up in the New Payments Experience. To ensure your payments process correctly, all future edits must be made directly on the Payment Methods page.
NOTE: Using Legacy vs. New Payments Pages after the one-time migration is complete, the old and new pages do not sync.
- New Pages: (Accounts Payable New) read exclusively from the new Payment Methods page.
- Legacy Payments Pages: Continue to read from the old Entity Bank Details (EBD) and Vendor/Employee Preferences stored in the plugin custom fields.
Because they operate independently, changes made in the new Payment Methods page will not sync back to the legacy pages, and vice versa. Always update records in the specific system you plan to use to process the payment.