Setting Default Payment Information (NetSuite)
NOTE: This guide only applies to the payments made from Vendor Bills or Expense Reports pages (legacy payments experience).
If you are using the Accounts Payable (New) module, please refer to Update Payment Methods via CSV (NetSuite) to manage vendor payment information.
Save time paying bills by setting Vendor Default Payment methods, and choose to group bills into one lump sum payment for vendors. Follow the steps in this guide to get started.
Payment Methods page
Navigate to Payment Methods
Navigate to Accounts Payable (New) → Payment Methods
The Payment Methods page has two tabs:
- Vendors tab - Manage payment information for vendors (used when paying bills)
- Employees tab - Manage payment information for employees (used for expense reimbursements)
Select the tab for the type of payee you want to manage Payment Information. The workflow is the same for both vendors and employees.
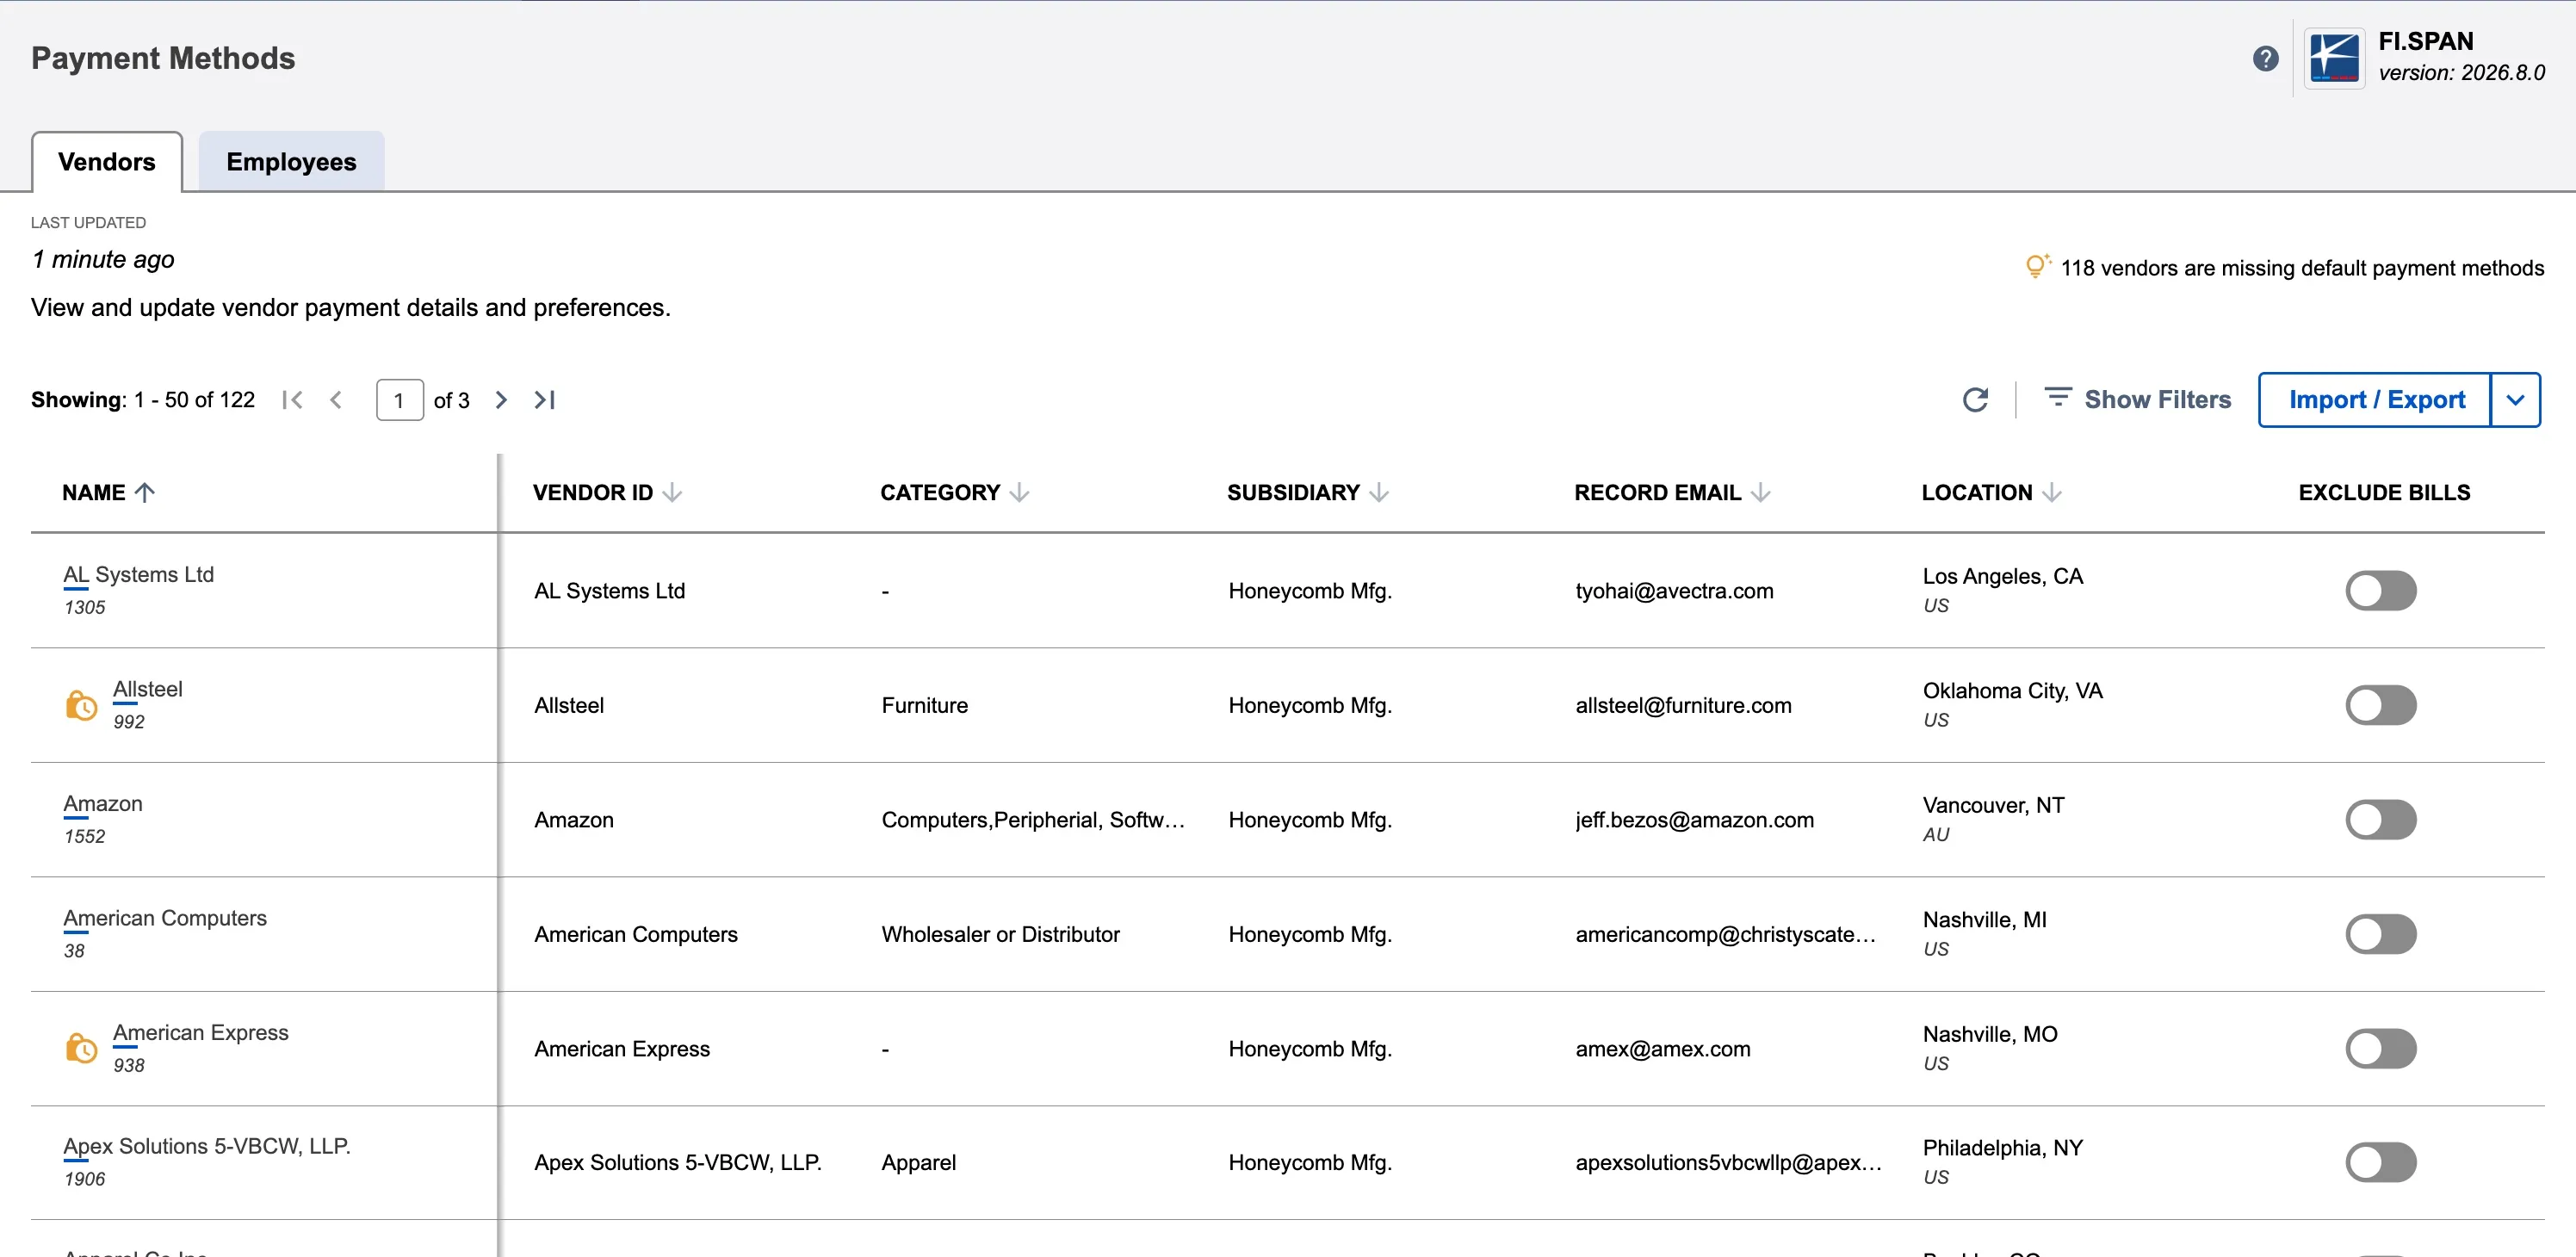
Find a Vendor/Employee
The Payment Methods page shows all vendors/employees with payment information. You only see vendors/employees from subsidiaries you have access to in NetSuite.
Use search or filters to find a specific vendors/employees by name, email, or subsidiary.
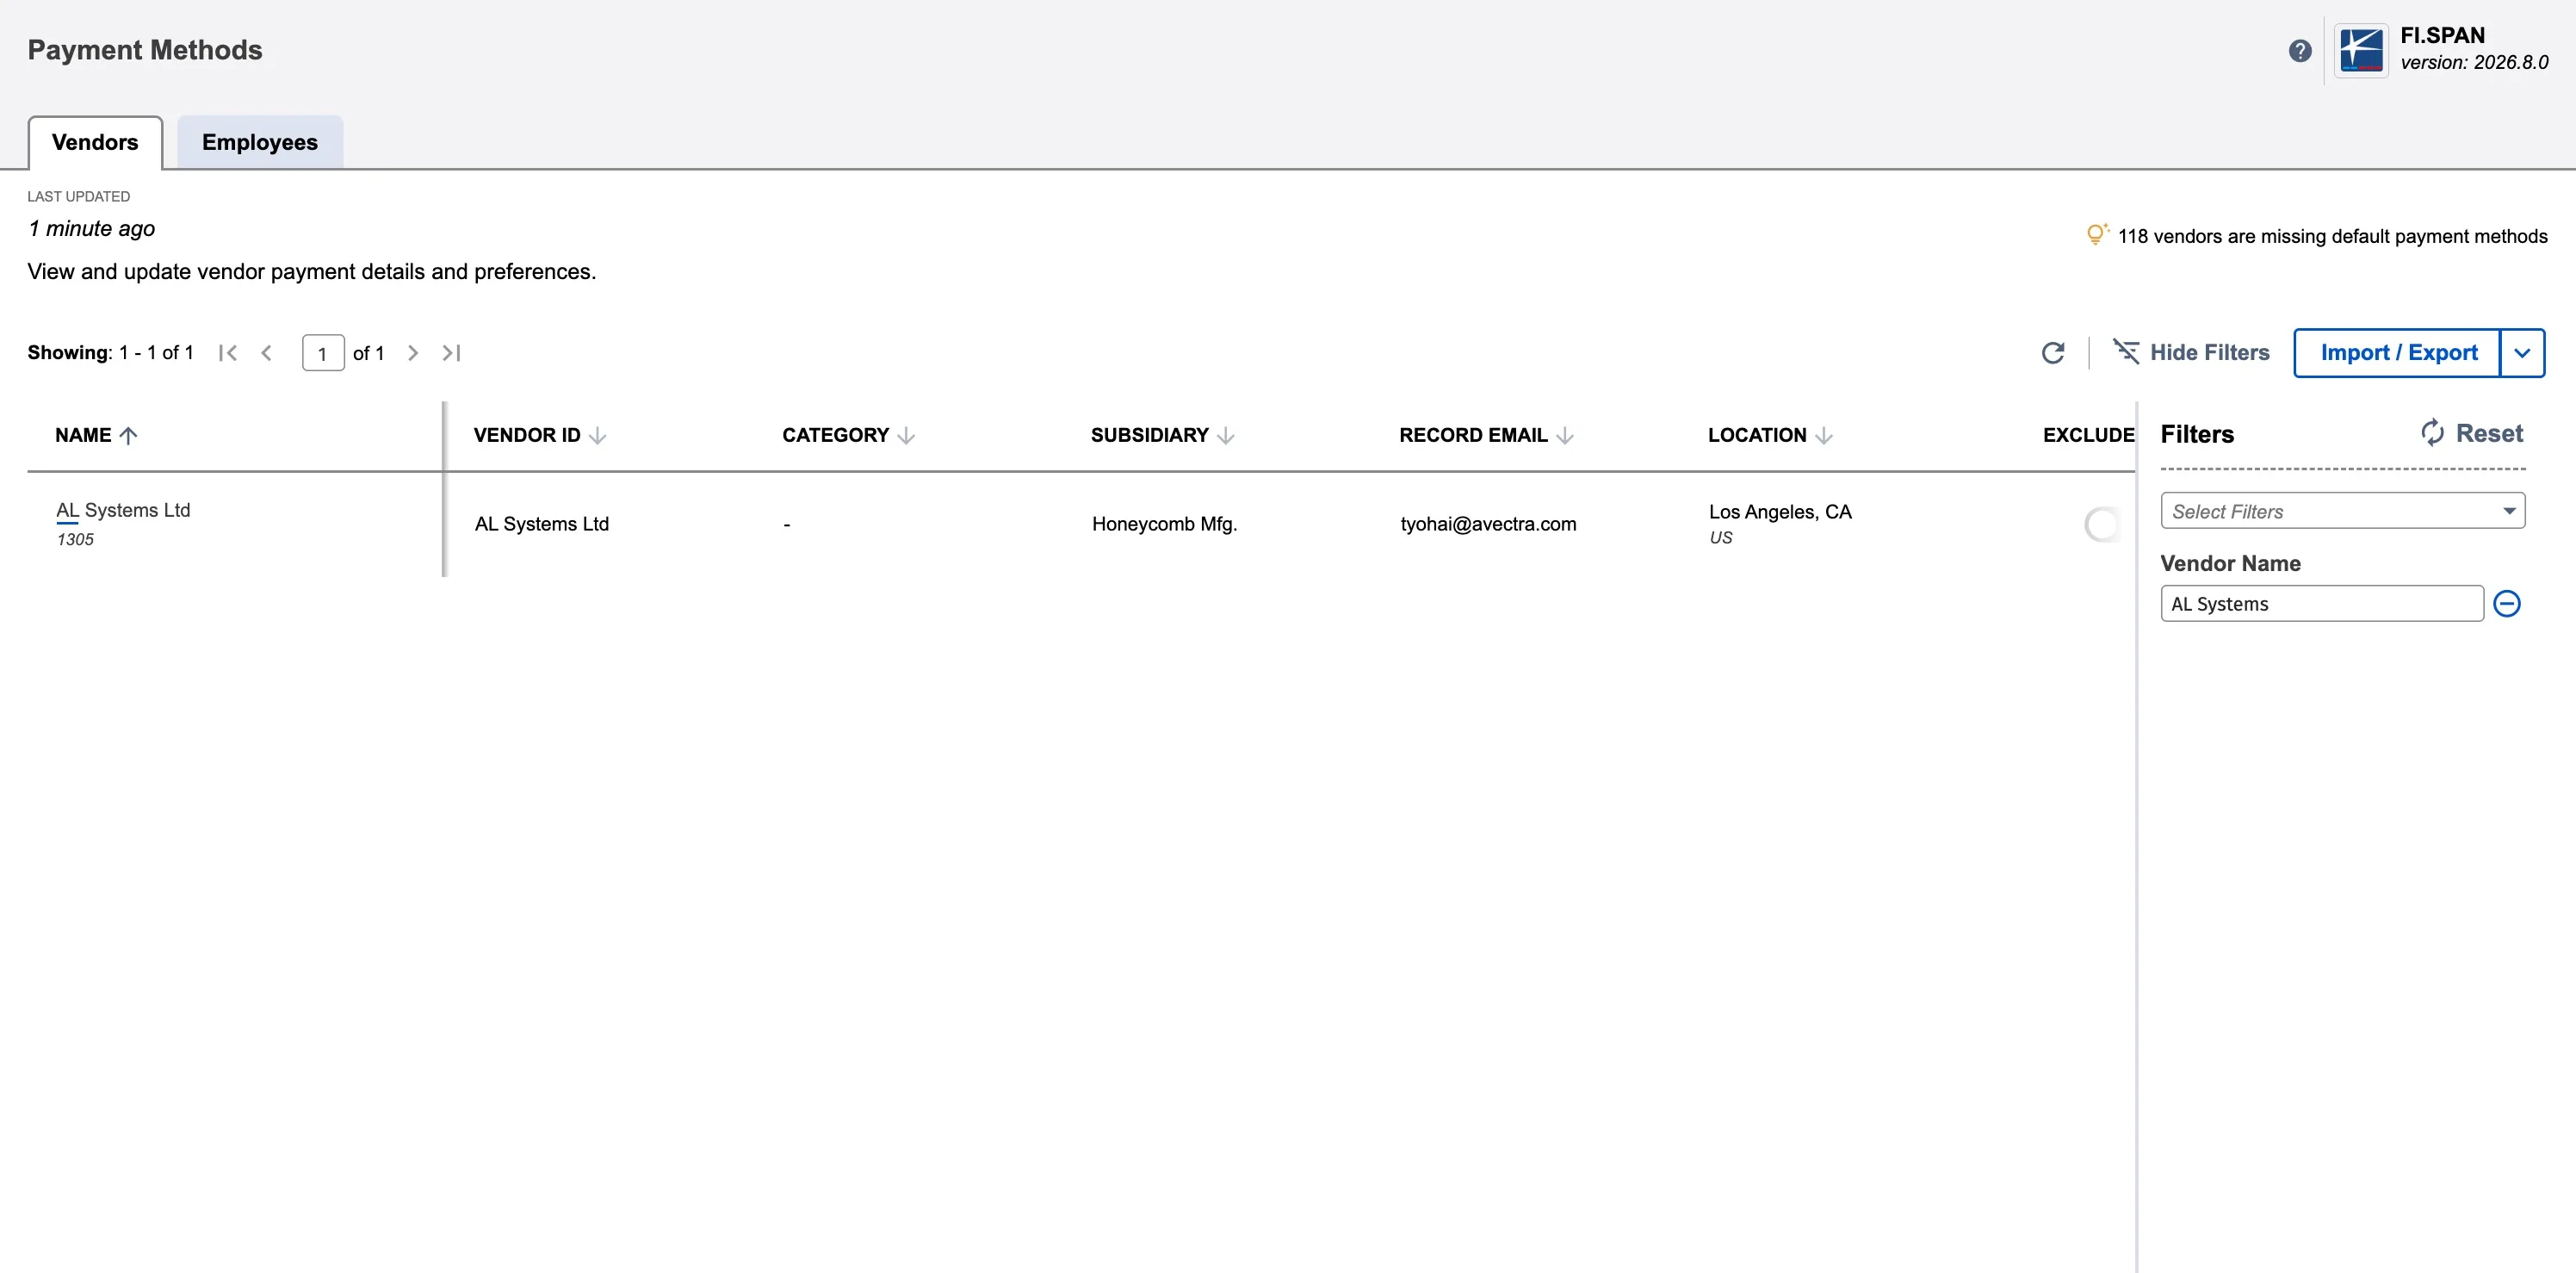
Default Payment Method
Click any vendor/employee row to open the vendor details panel, where you can add payment information or configure specific settings.
- In the Settings panel (right side), find Preferred Payment Method
- Select a default payment method at the payment information level
- The selection saves automatically
You can also set up Default Payment Method on the Payments page (while paying bills)
- Go to the Accounts Payable (New) → Payments
- On the bill row, scroll to the right side
- In the Payment Method dropdown, click the star icon next to a payment method
- That payment method becomes the default for that vendor
NOTE: If you are making payments using the old Vendor Bills/Expense Reports page, you need to follow below instructions instead
Method 1: Vendor Record
Go to a Vendor Record and select Edit. Then, select the bank plugin tab in the sub-menu.
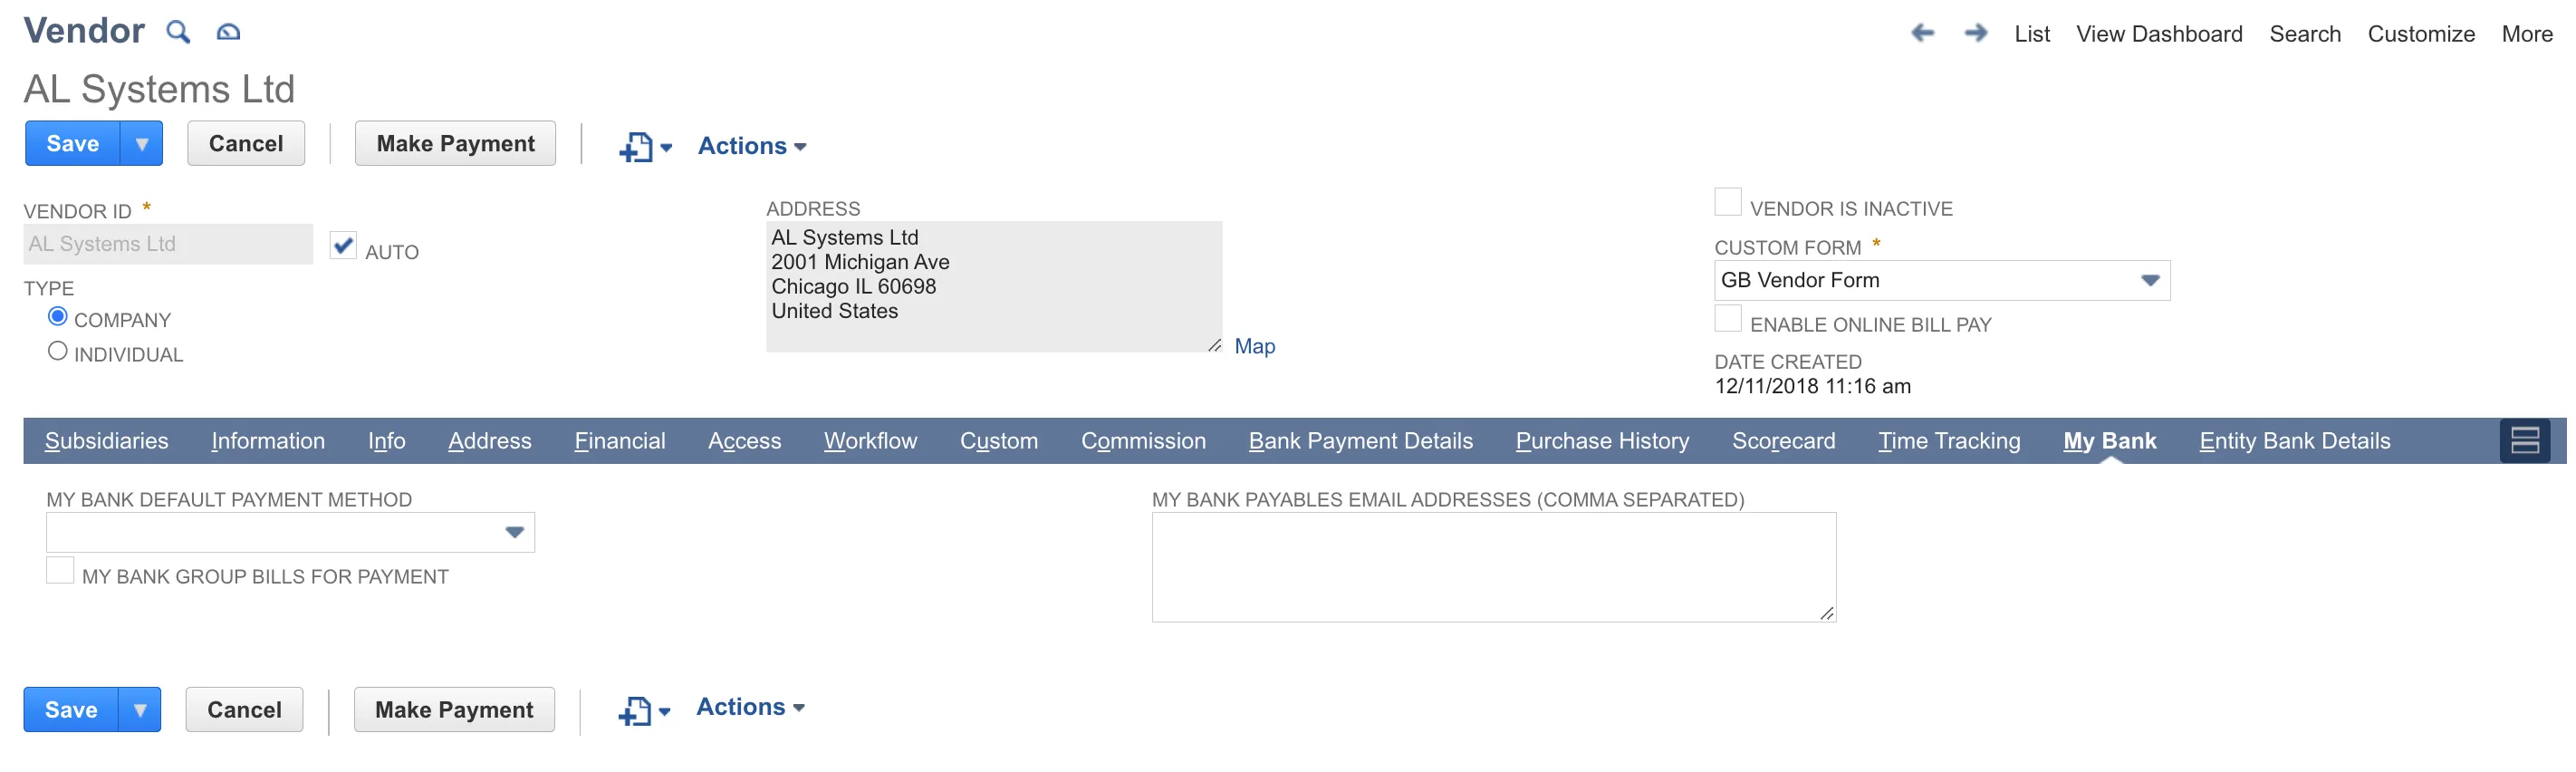
Here you will be able to set the Default Payment Method and enable the option to Group Bills for Payment.
Method 2: Vendor List
Go to Customize View
Select Lists → Relationships → Vendors.
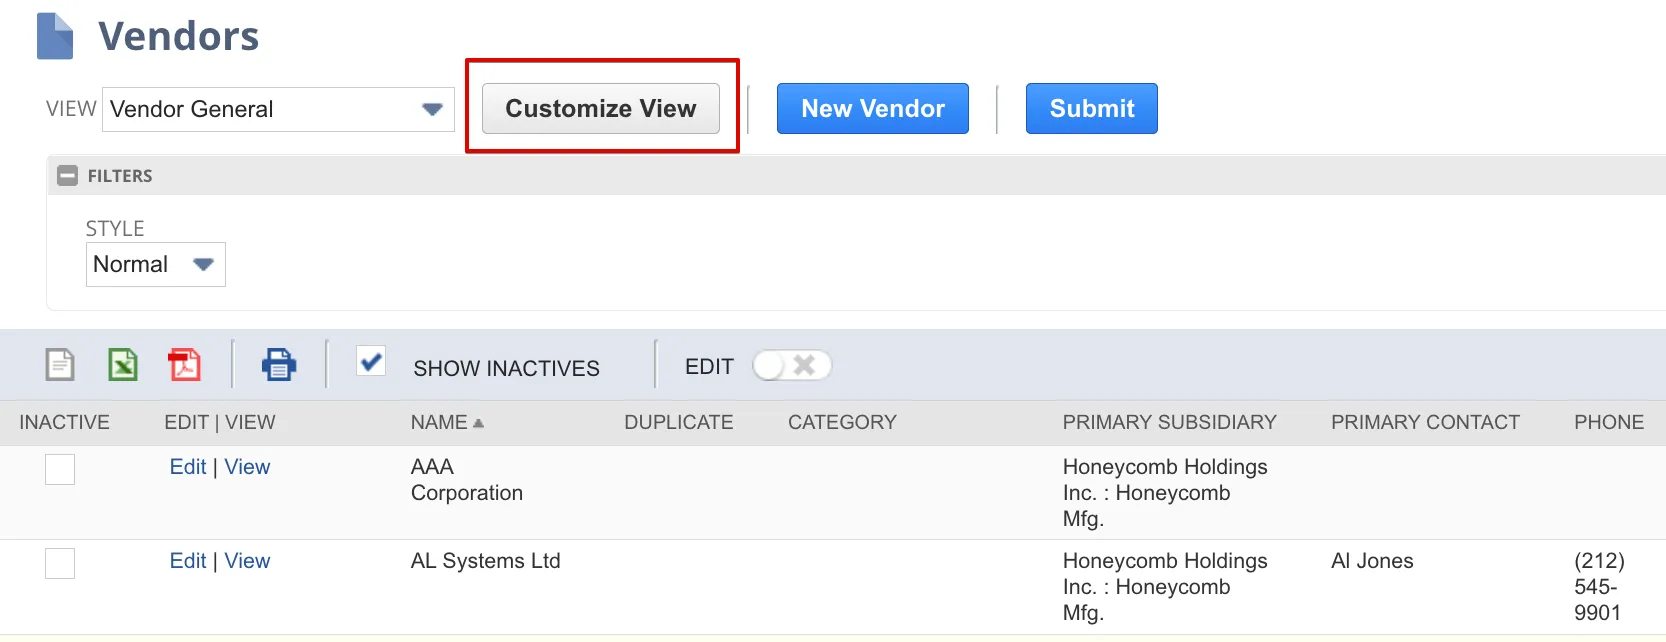
Then, select Customize/Edit View.
Add Custom Fields
Add the Default Payment Method (Custom) and Group Bills for Payment (Custom) fields for your bank to the list.
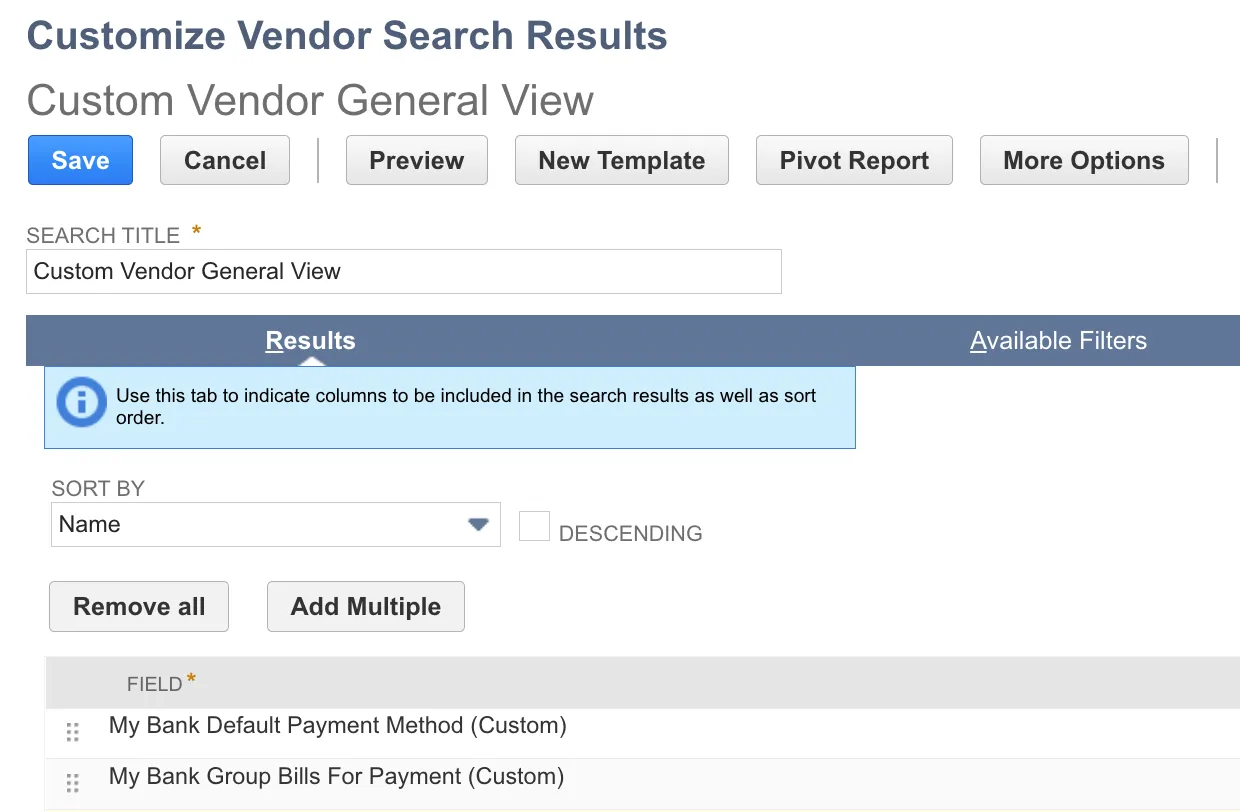
Then, select Save.
Set Default Payment Method and Group Bills
Toggle the Edit option.
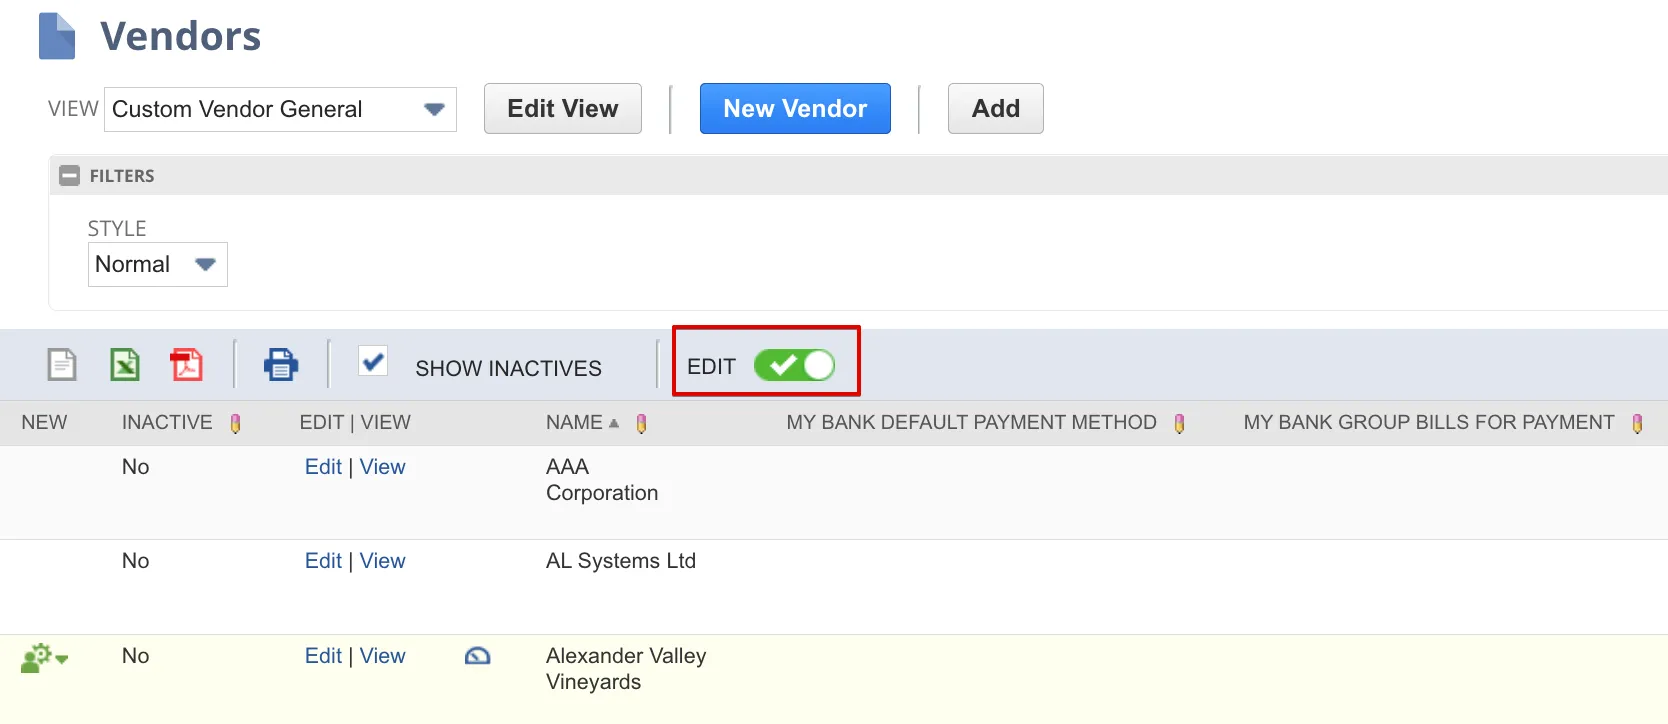
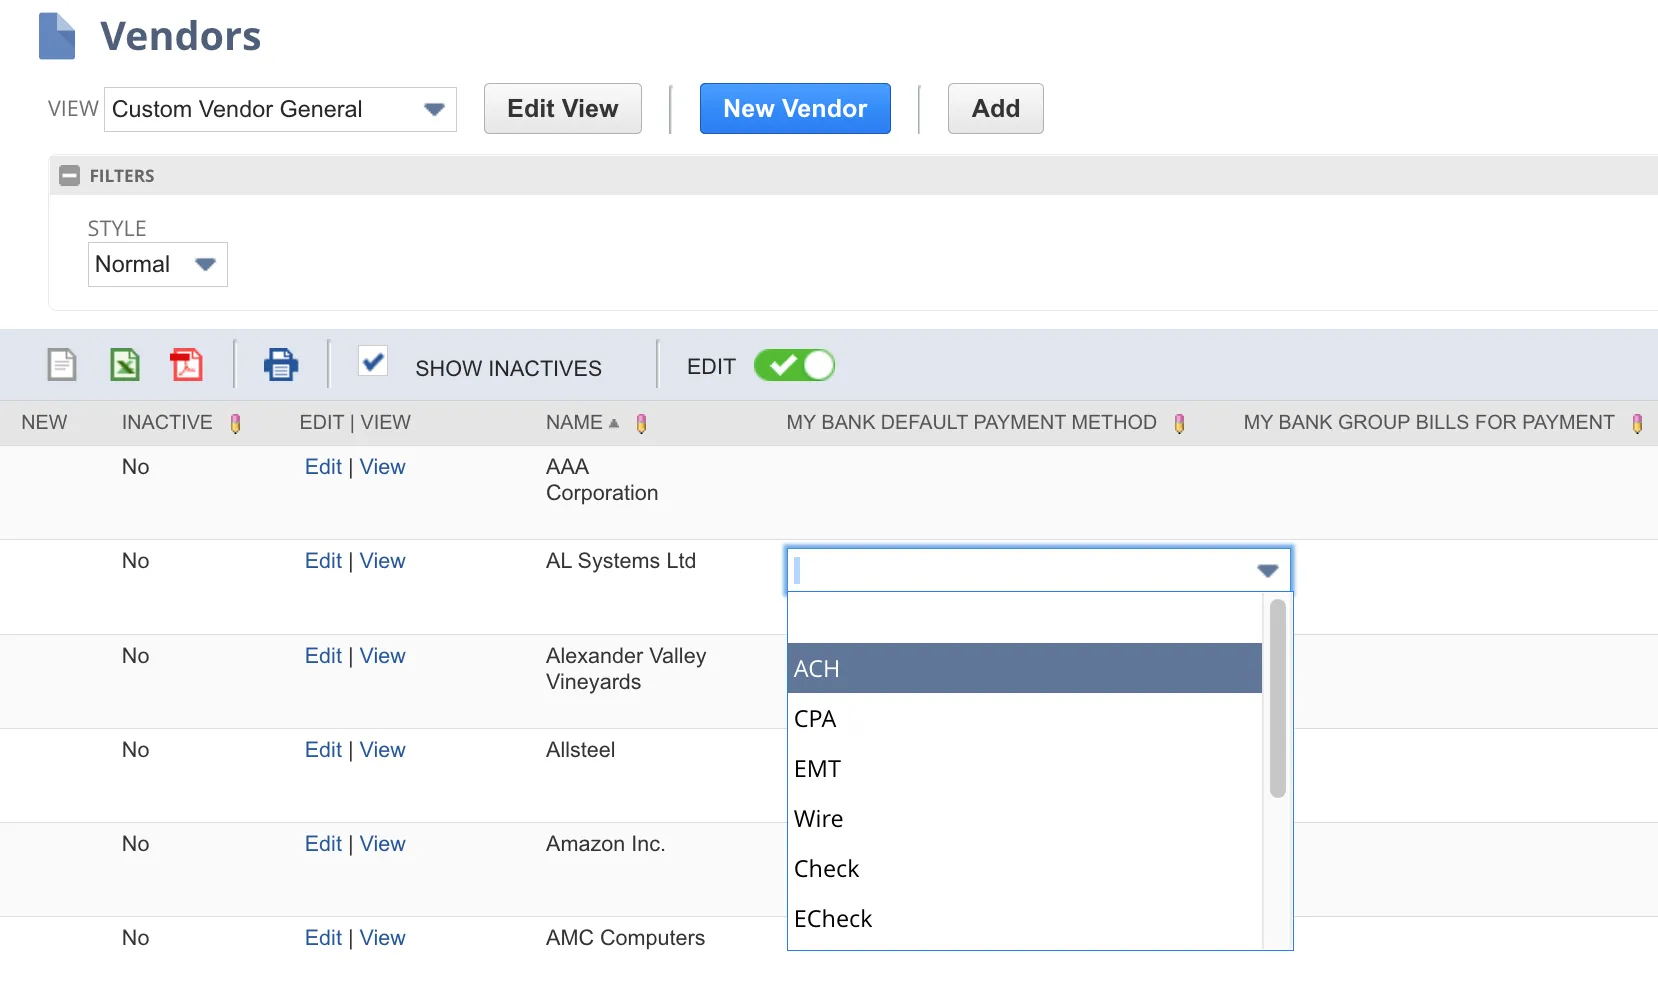
Select the blank area under the appropriate columns and select the Default Payment Method or Bill Grouping option for each vendor. Only the payment methods you have enabled for plugin will be available in the dropdown.
Method 3: CSV Import
This method uses NetSuite's Import CSV functionality to set up default payment information.
Create CSV File
To begin, first manually create a CSV file using any external spreadsheet software with the following column headers:
- Vendor ID
- Default Payment Method
- Group Bills for Payment
- Payables Email Address [OPTIONAL]
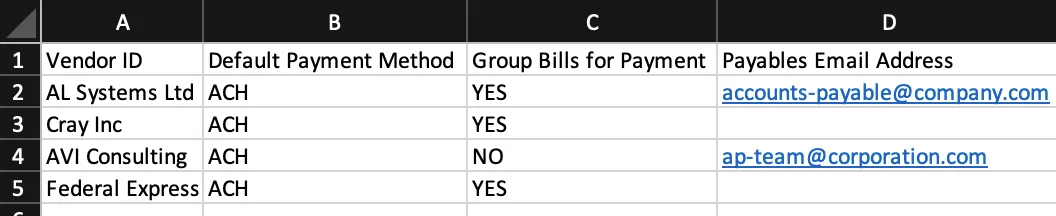
NOTE: The Vendor ID is the field on the vendor record itself, not the internal NetSuite ID.
Populate the CSV file with the relevant Vendor IDs, the desired Default Payment Methods [YES or NO], and an indication of whether or not you wish to Group Bills for Payment [YES or NO].
Once complete, save the file and name it—we suggest using "default_payment_information."
Upload CSV File
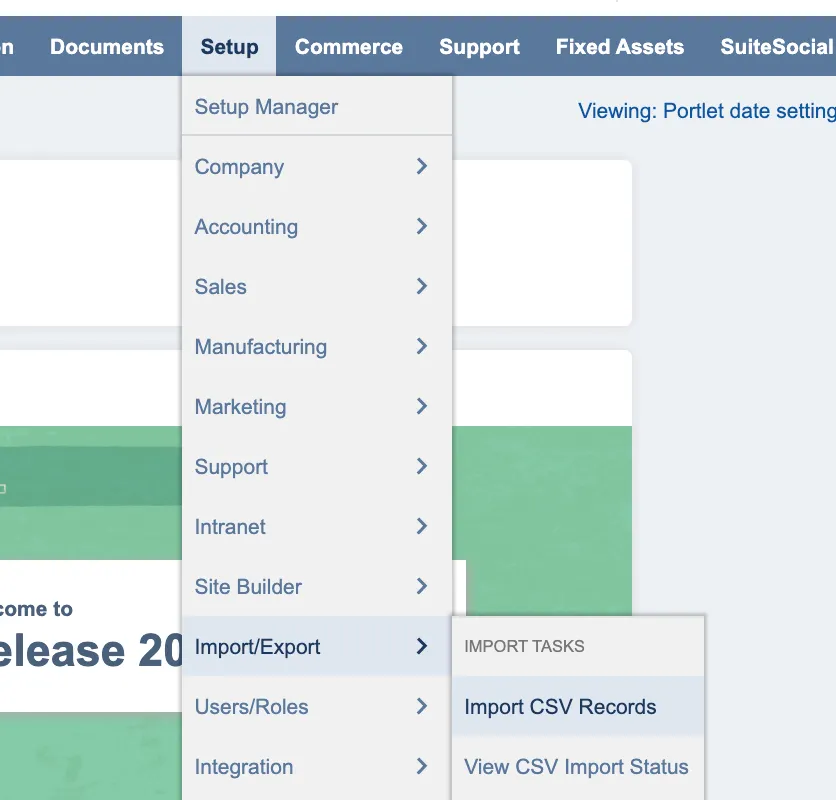
Then, head into NetSuite and navigate to Setup → Import/Export → Import CSV Records.
Set the Import Type to Relationships and the Record Type to Vendors.
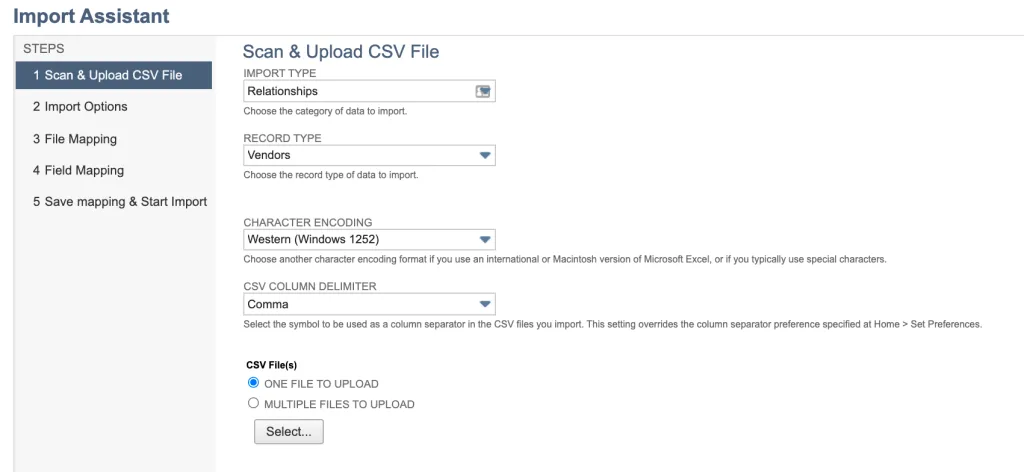
Then select the CSV file you have created and select Next.
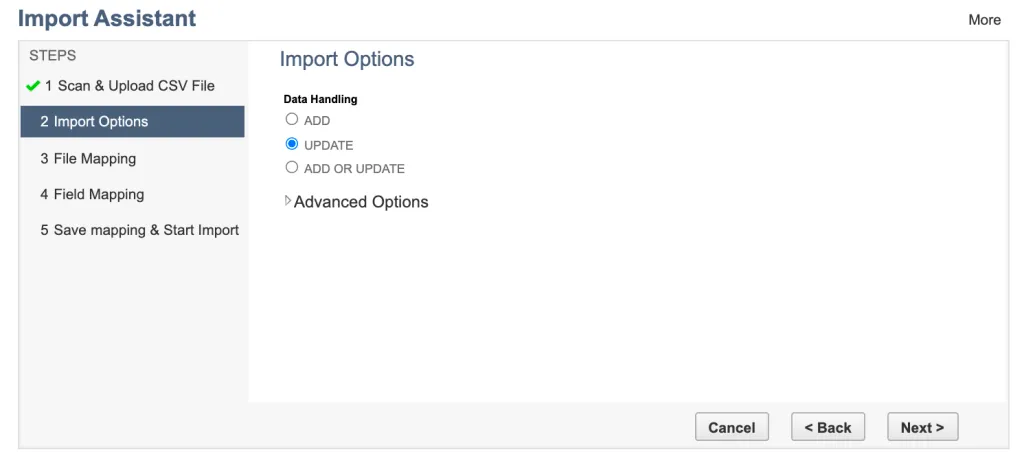
Select Update as the Import Option, then select Next.
Map Fields
Map the fields as per the example below.
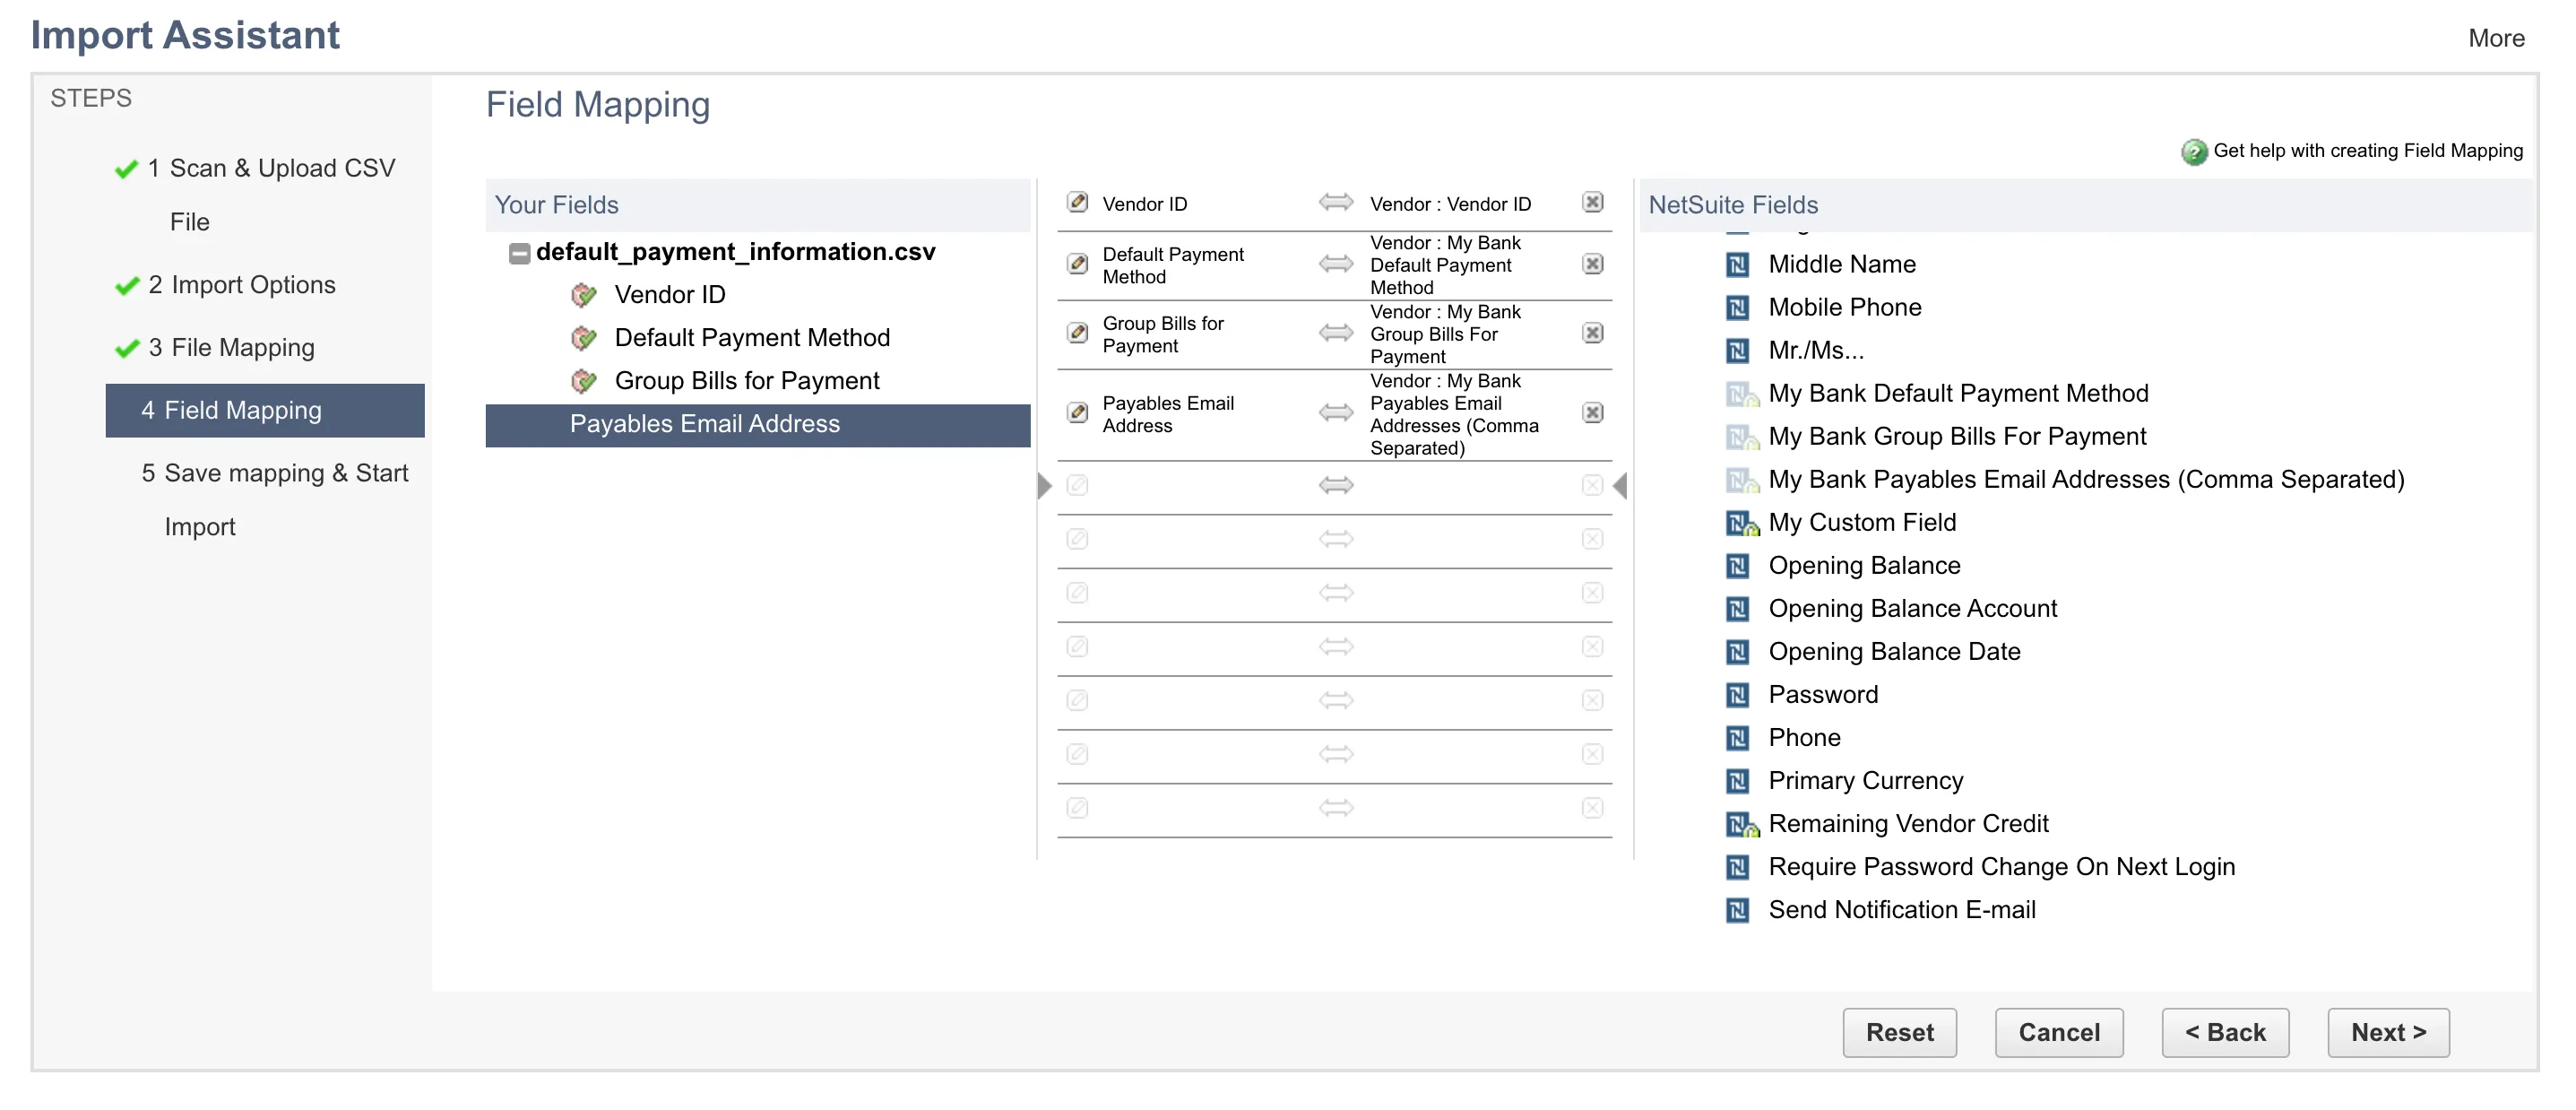
Select Next.
Import
Select Save & Run or Run to initiate the import.