Remittance Advice (NetSuite)
Remittance Advice emails will change how you talk to vendors and make paying bills easier. Payment details are automatically sent to your vendors right after a bill is paid, giving them what they need to quickly check their records.
NOTE: If you are interested in enabling this feature, contact your Sales Officer.
Remittance Advice Overview
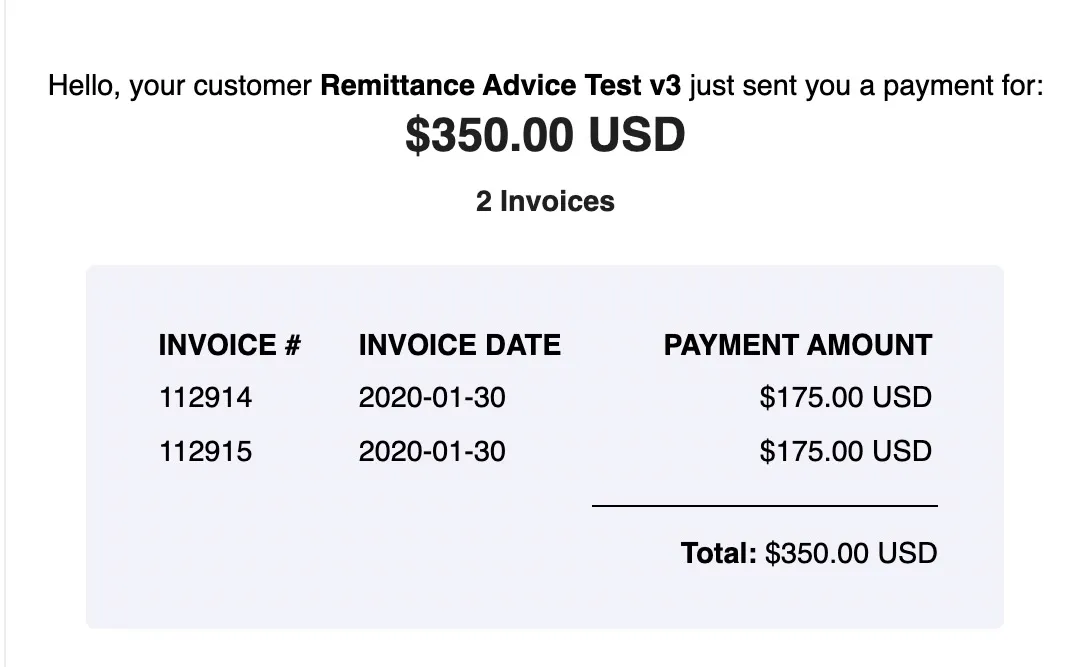
FISPAN's Remittance Advice service automatically sends an email to the vendor’s designated email address(es) for every submitted payment. This email will contain your company name and a detailed list of the paid bills, including the Reference/Invoice #, Invoice Date, Amount, and Discount Used. If any credits were applied, the credit's reference number and amount will also be displayed.
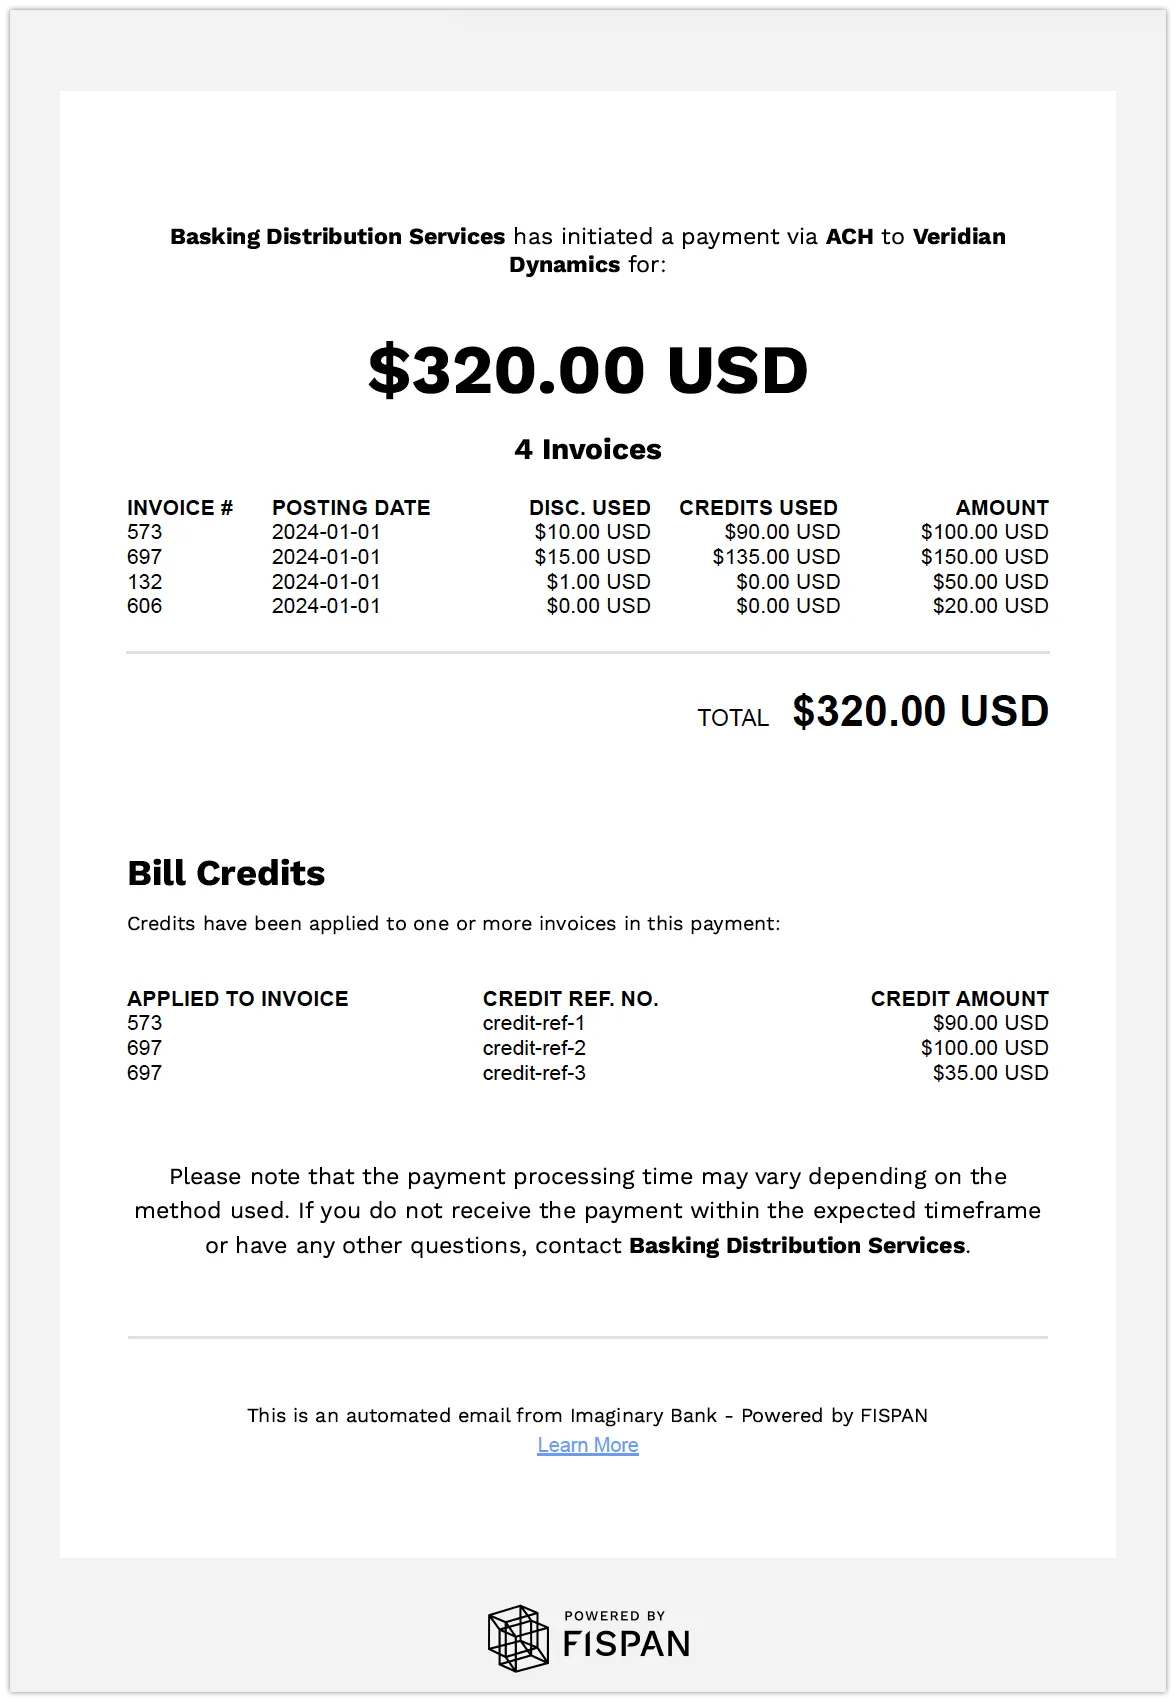
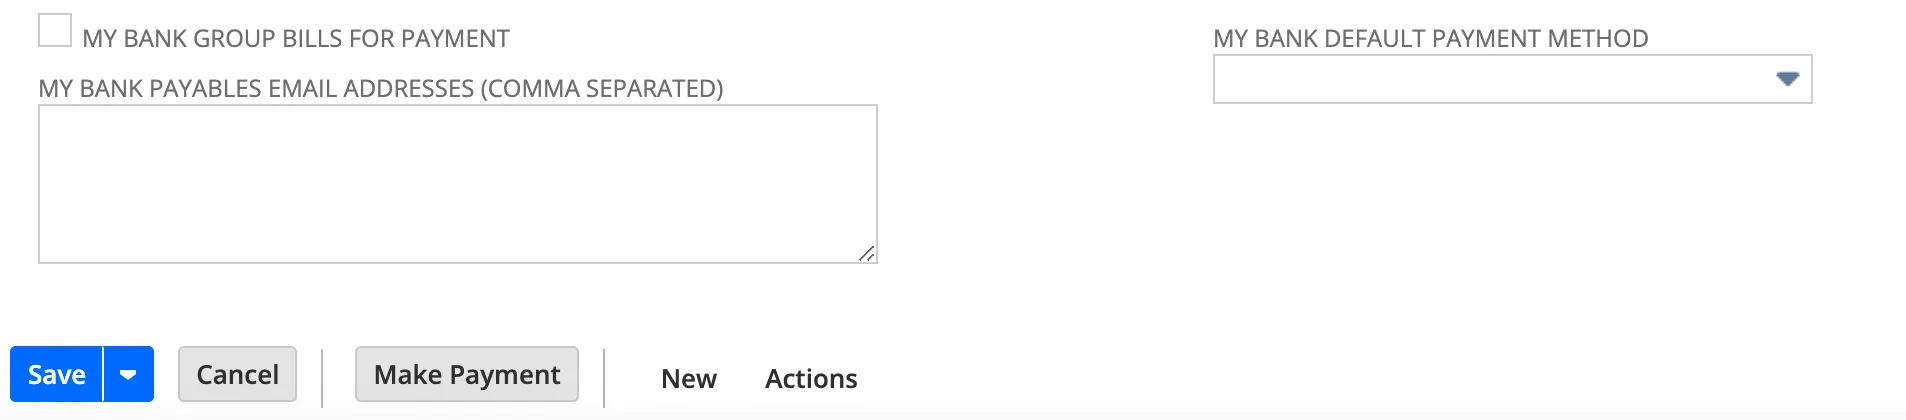
Each remittance email can be sent to up to 5 email addresses. By default, the system uses the Vendor’s email address. If you prefer to use a custom list, you can set Payables Email Addresses on the custom tab of the Vendor's profile in NetSuite (or the Payment Methods page in Sage Intacct and Business Central).
The email will be sent from FISPAN and feature your bank's branding. As a user, you can customize several settings:
- "Reply-To" Email Address: Configure an address that the recipient will see and use if they reply to the remittance advice.
- Receive Copies: Choose an email address to receive copies of all sent remittance advice.
- Alternative Company Name: You may request that we configure a different company name to appear in the email on a per-bank account basis.
Remittance emails are submitted shortly after the payment is successfully sent from your ERP. The subject line of the email will appear as: "Your customer {CUSTOMER_NAME} has initiated a payment."
IMPORTANT: Enabling the GROUP BILLS FOR PAYMENT function means that only one remittance email is sent for multiple bills grouped into a single payment for the same vendor.
If this feature is not enabled, each paid bill is treated as a unique payment with its own remittance email, which results in multiple payments and multiple emails.
Configuring Remittance Advice
Follow these steps in the FISPAN Portal to enable and manage your Remittance Advice settings.
Navigate to the App Center
Log in to https://sys.fispan.live/ (or Sandbox: https://sandbox.fispan.cloud/) using your FISPAN Portal credentials.
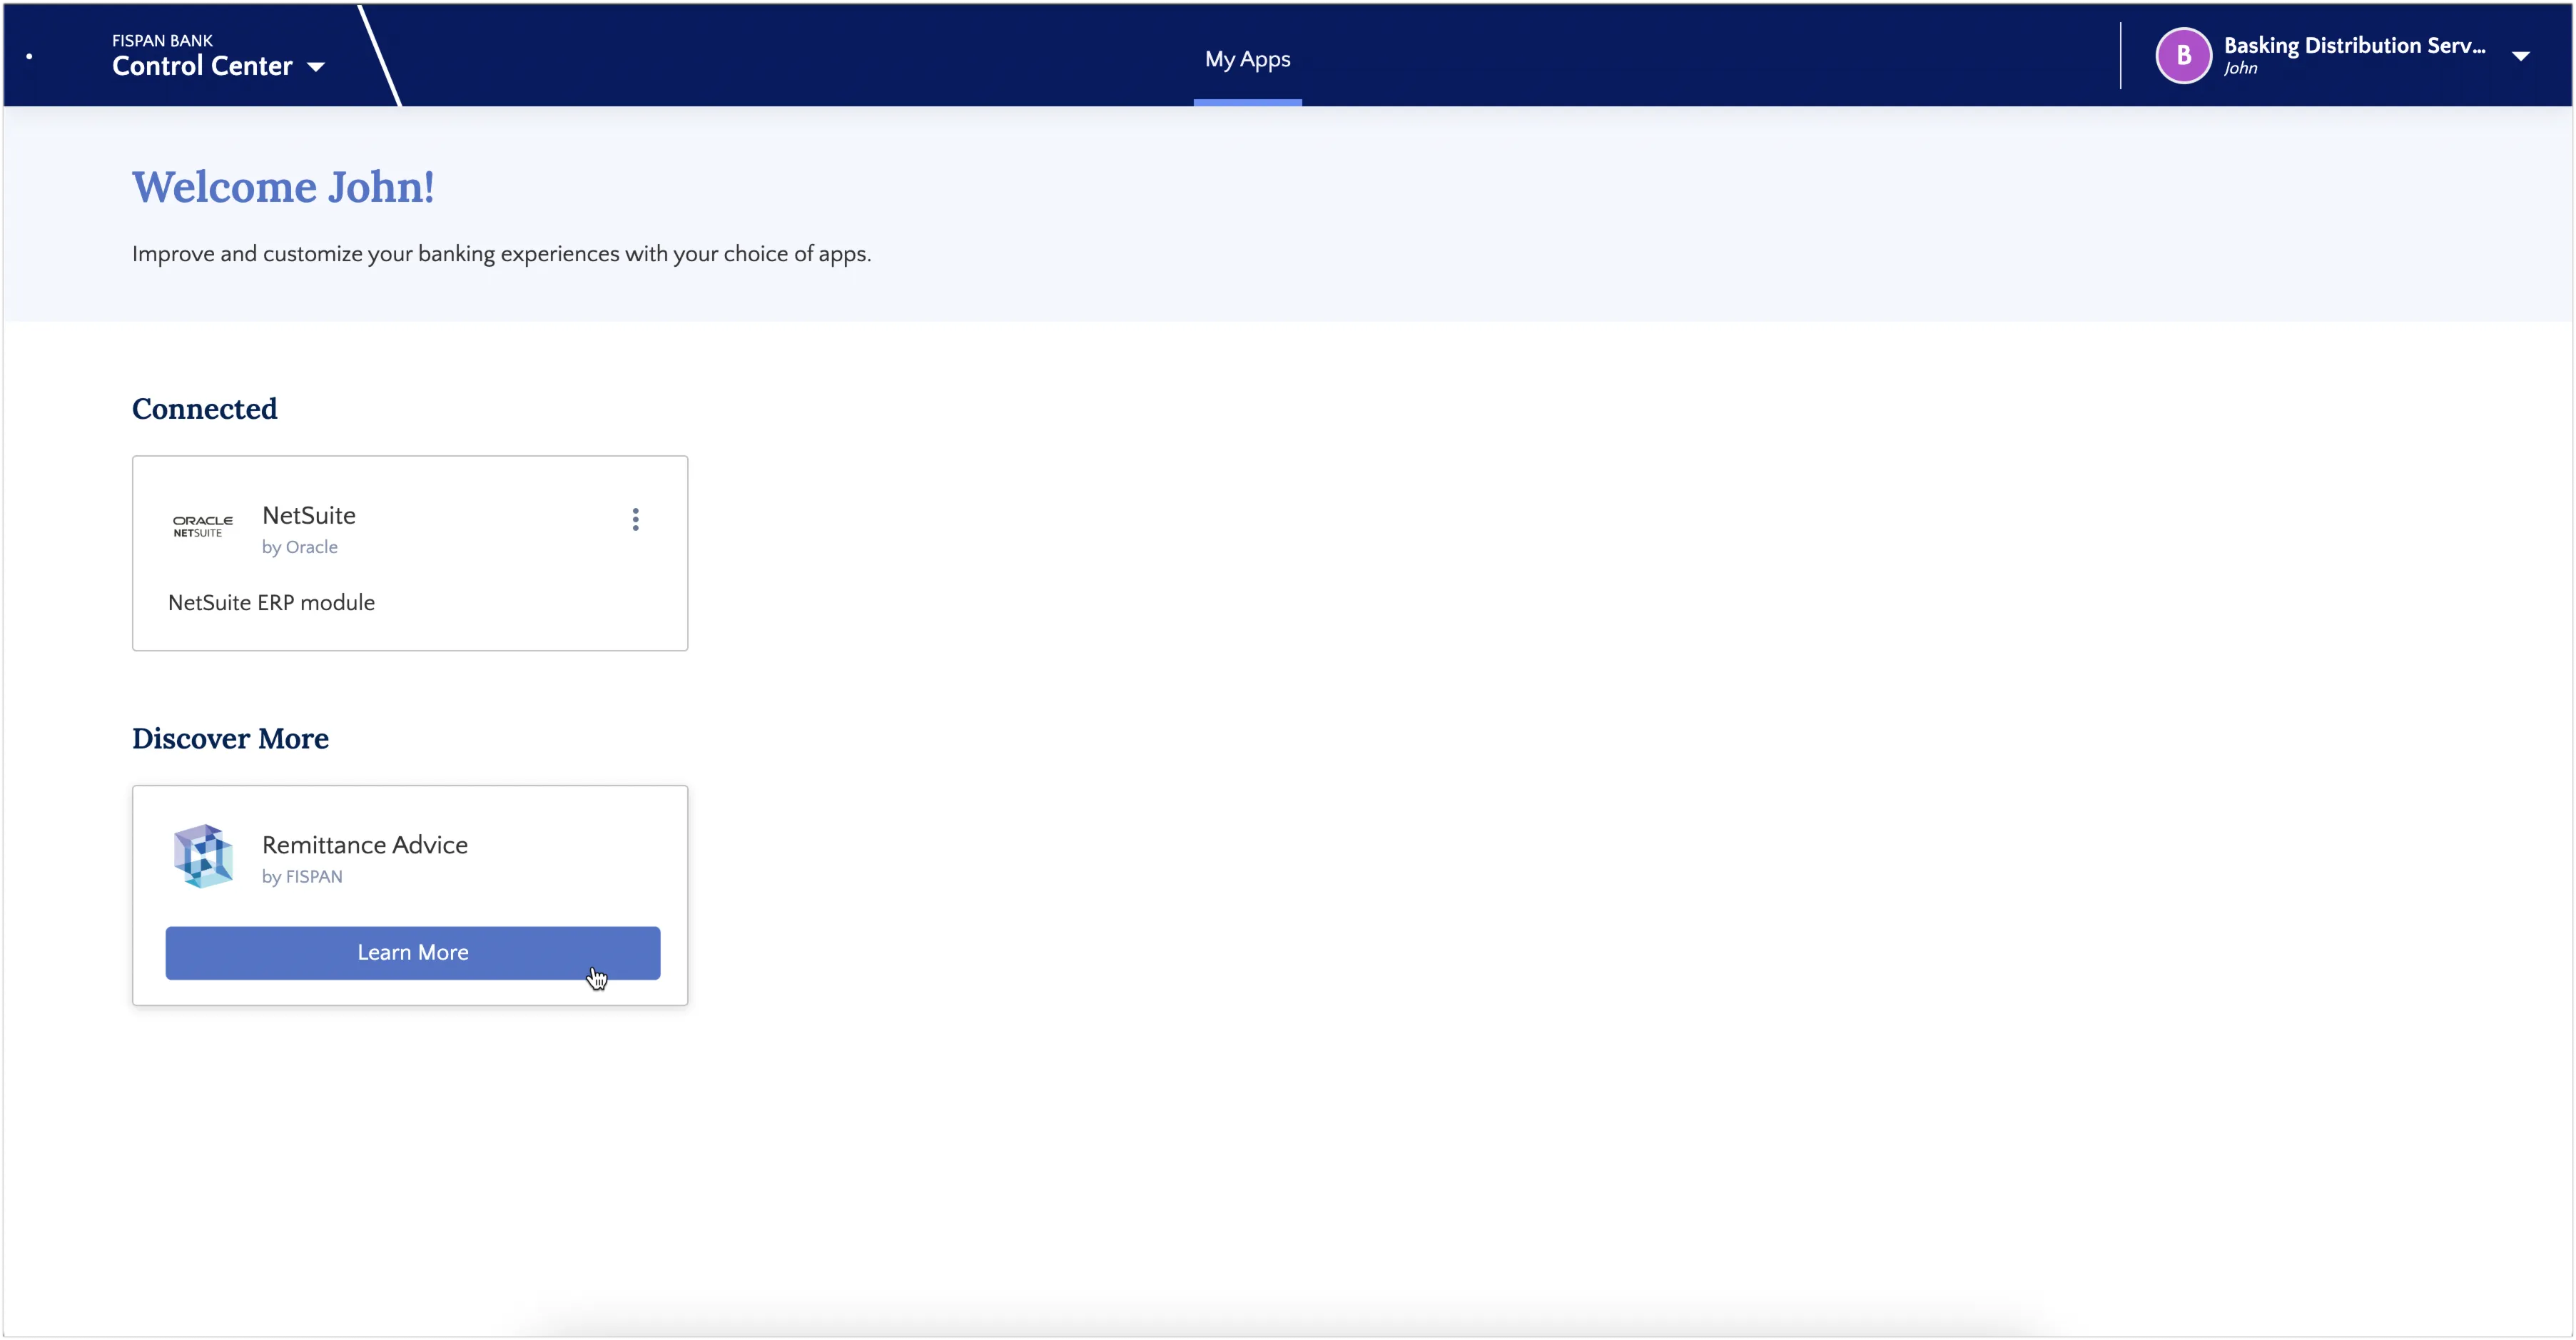
If not already there, navigate to the App Center.
Remittance Advice, as well as any other available extra features, will be displayed in the lower Discover More section.
Enable Remittance Advice
To begin enabling Remittance Advice, hover over the card and select Learn More.
The Learn More button will begin the short setup process.
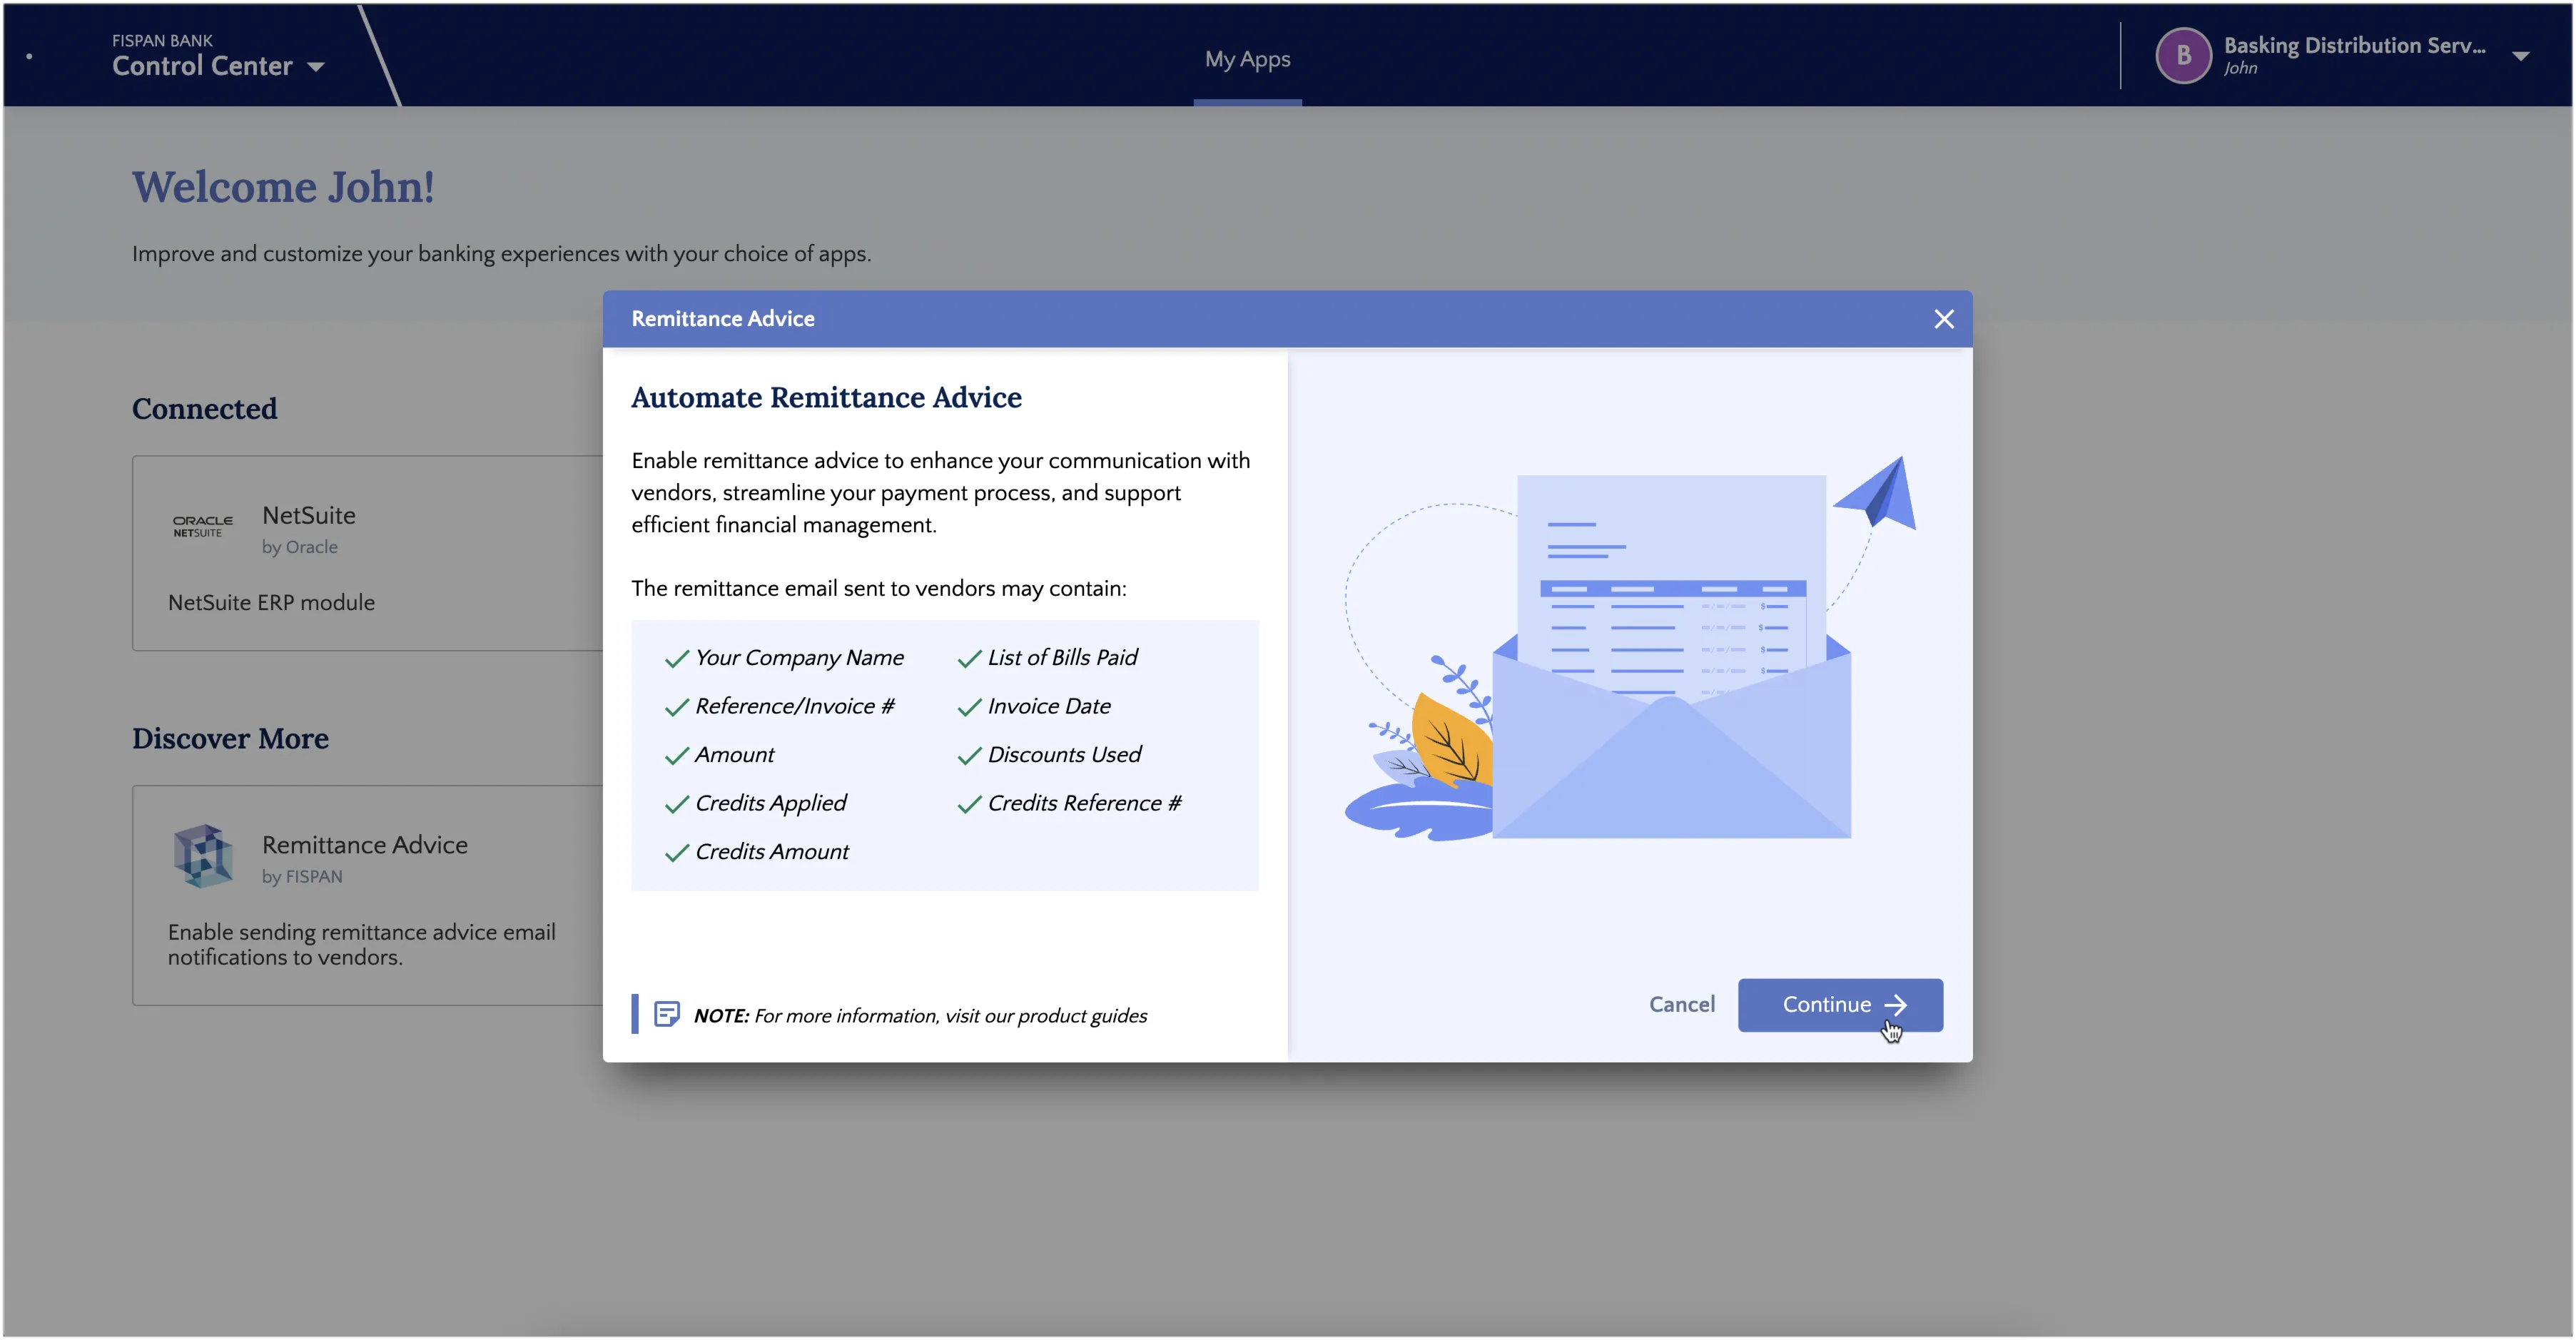
NOTE: Don't see Remittance Advice in the Connected or Discover More sections? Please reach out to FISPAN Support to have this product made available to you.
Configure Remittance Advice
In order to complete the setup, we require a few details from you.
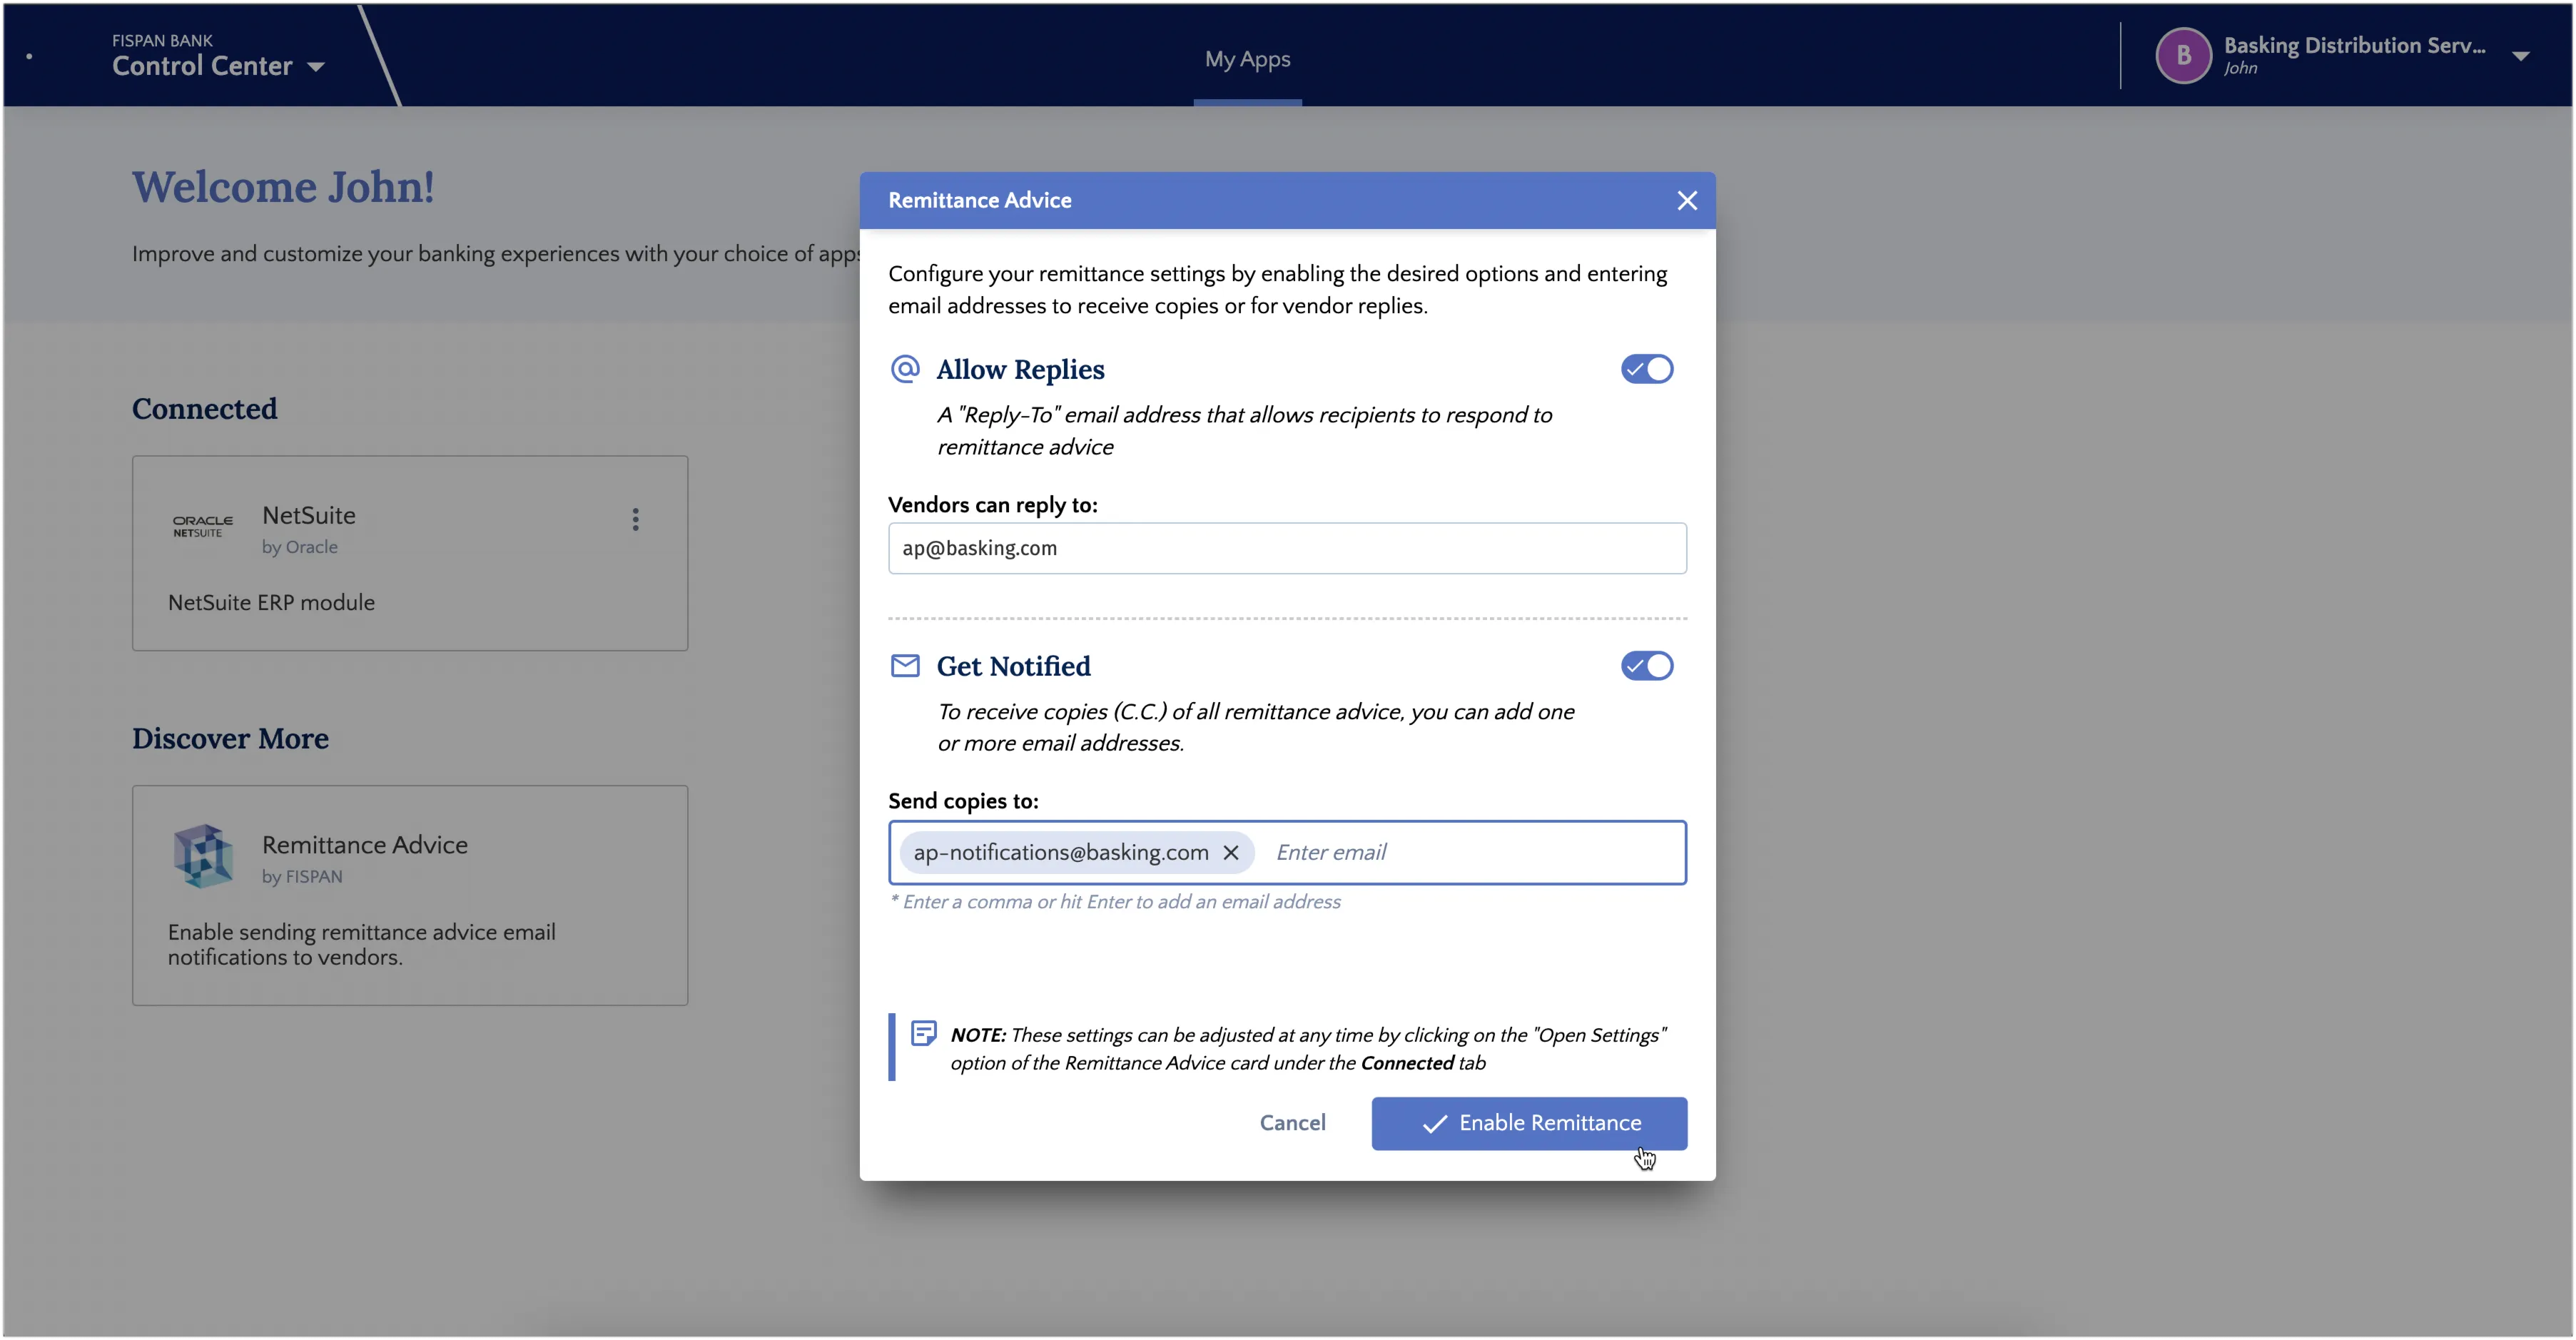
All emails come from the unmonitored inbox [email protected]. If a vendor replies to a remittance email, their response will be redirected to the address you specified in the Vendors can reply to field.
Internal copies of all remittance advices will be sent to the emails noted for copies.
Once Enable Remittance is selected, it can take up to 15 minutes for the changes to come into effect.
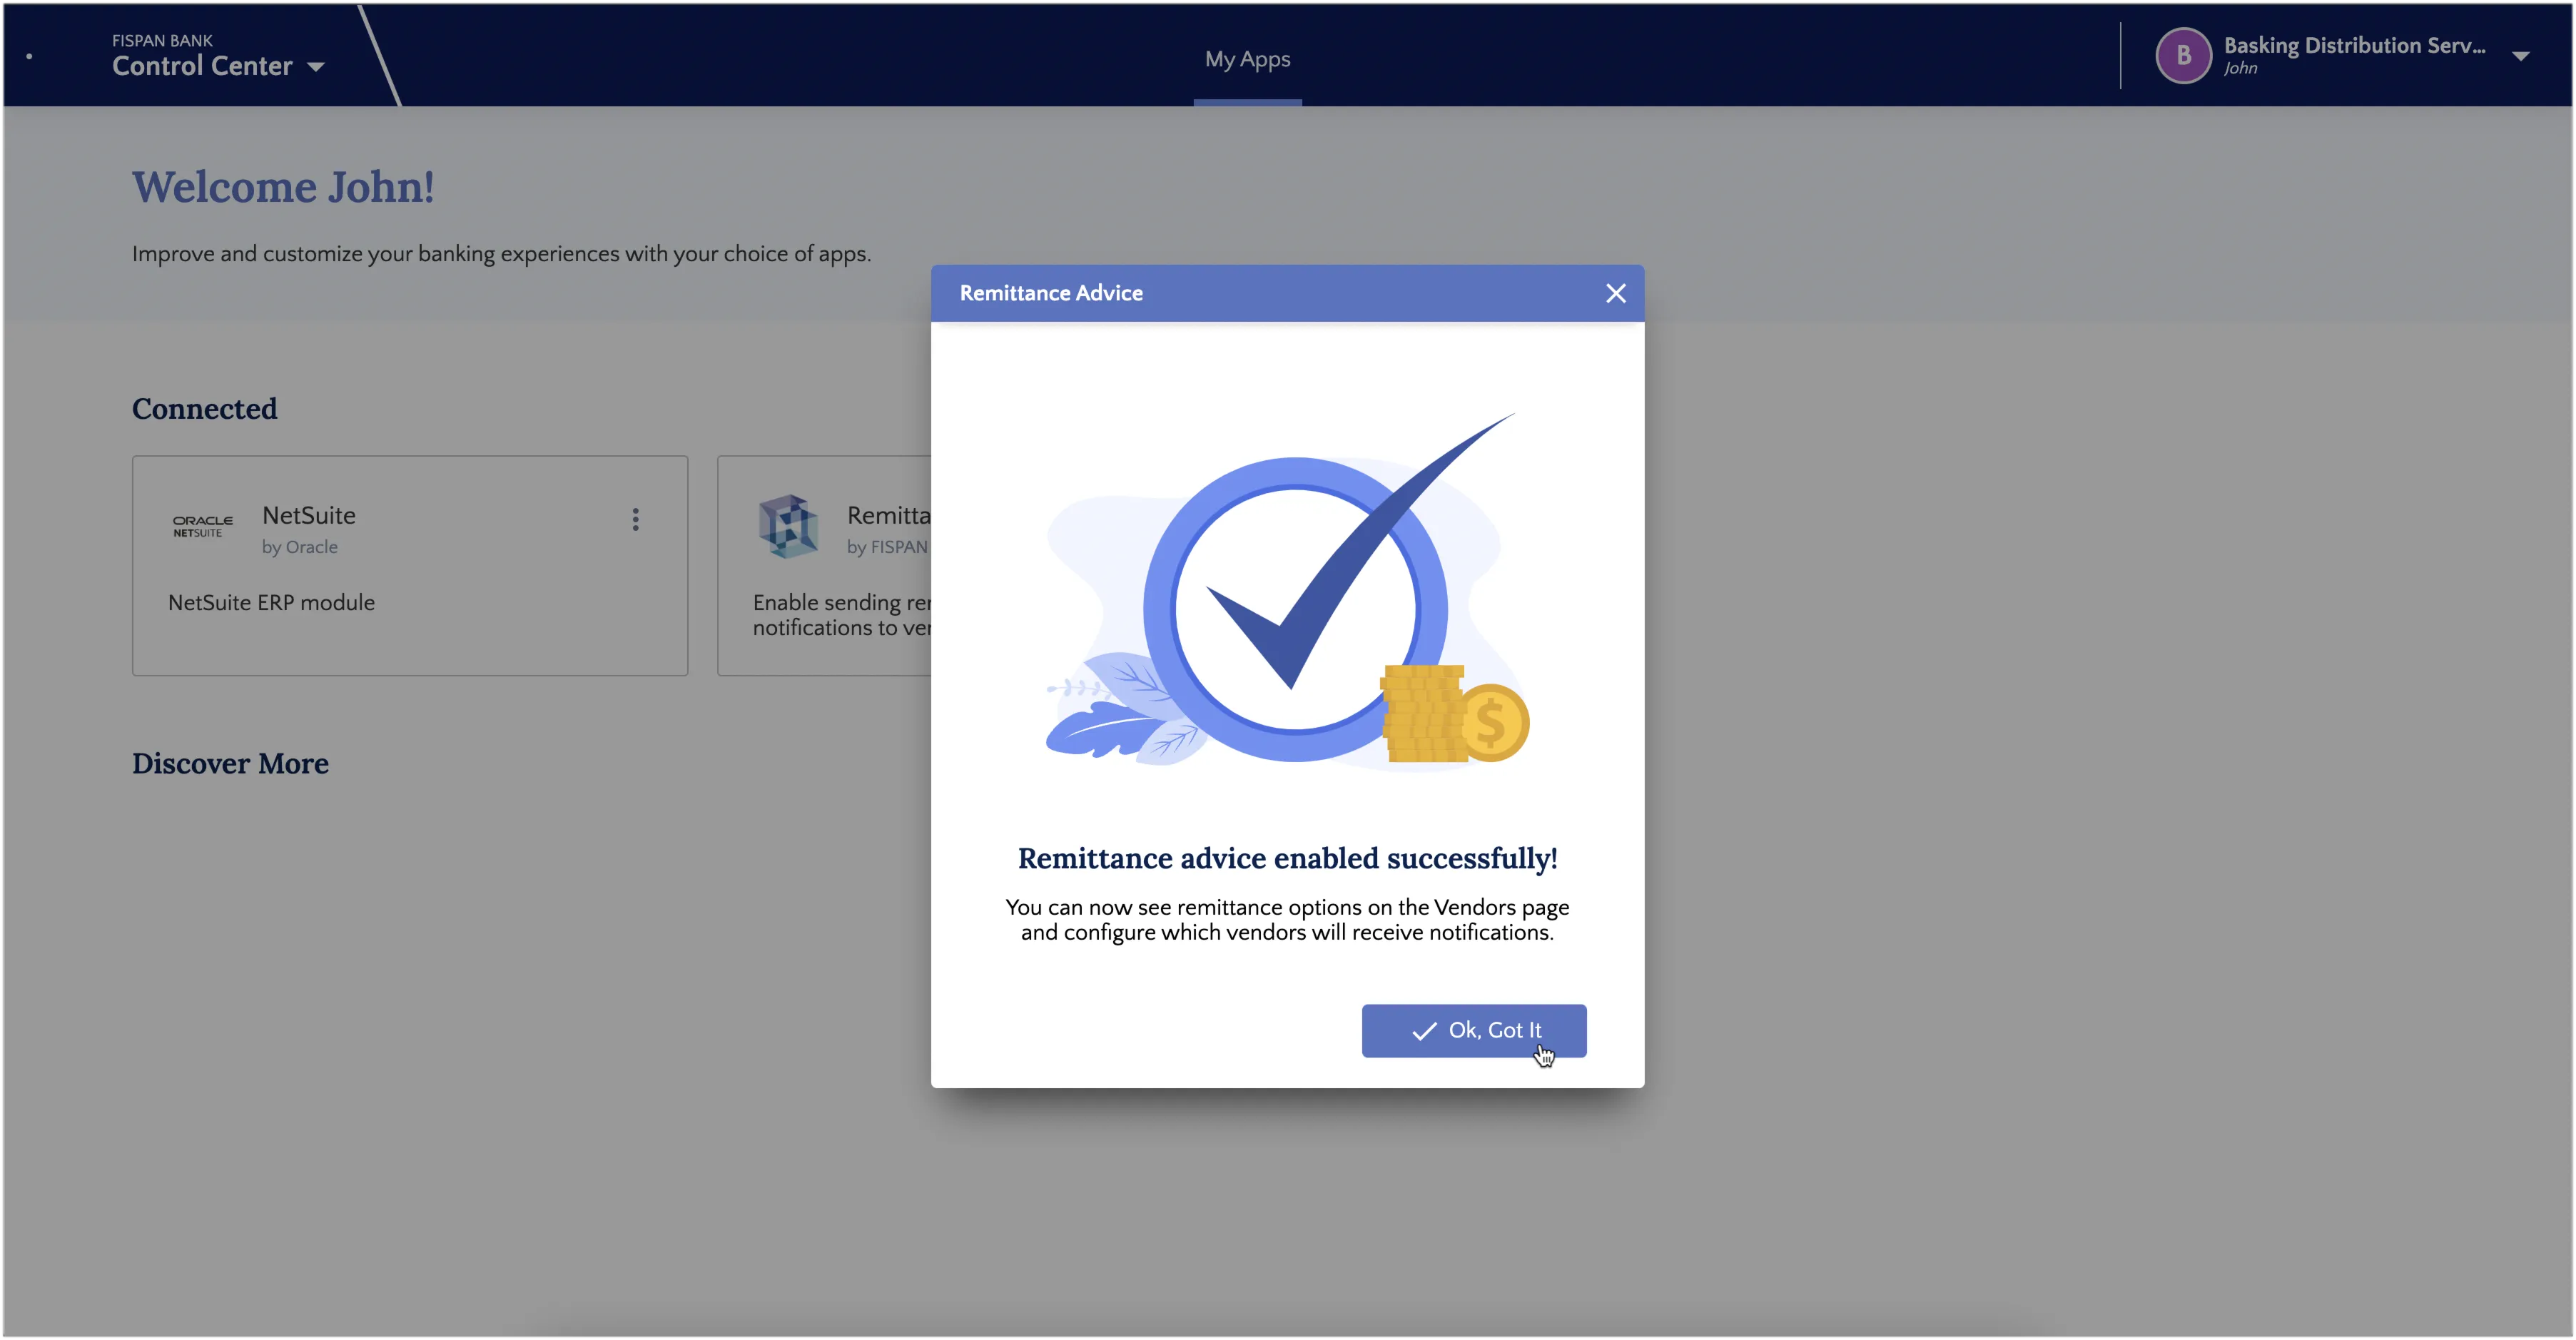
Modify Remittance Advice Settings
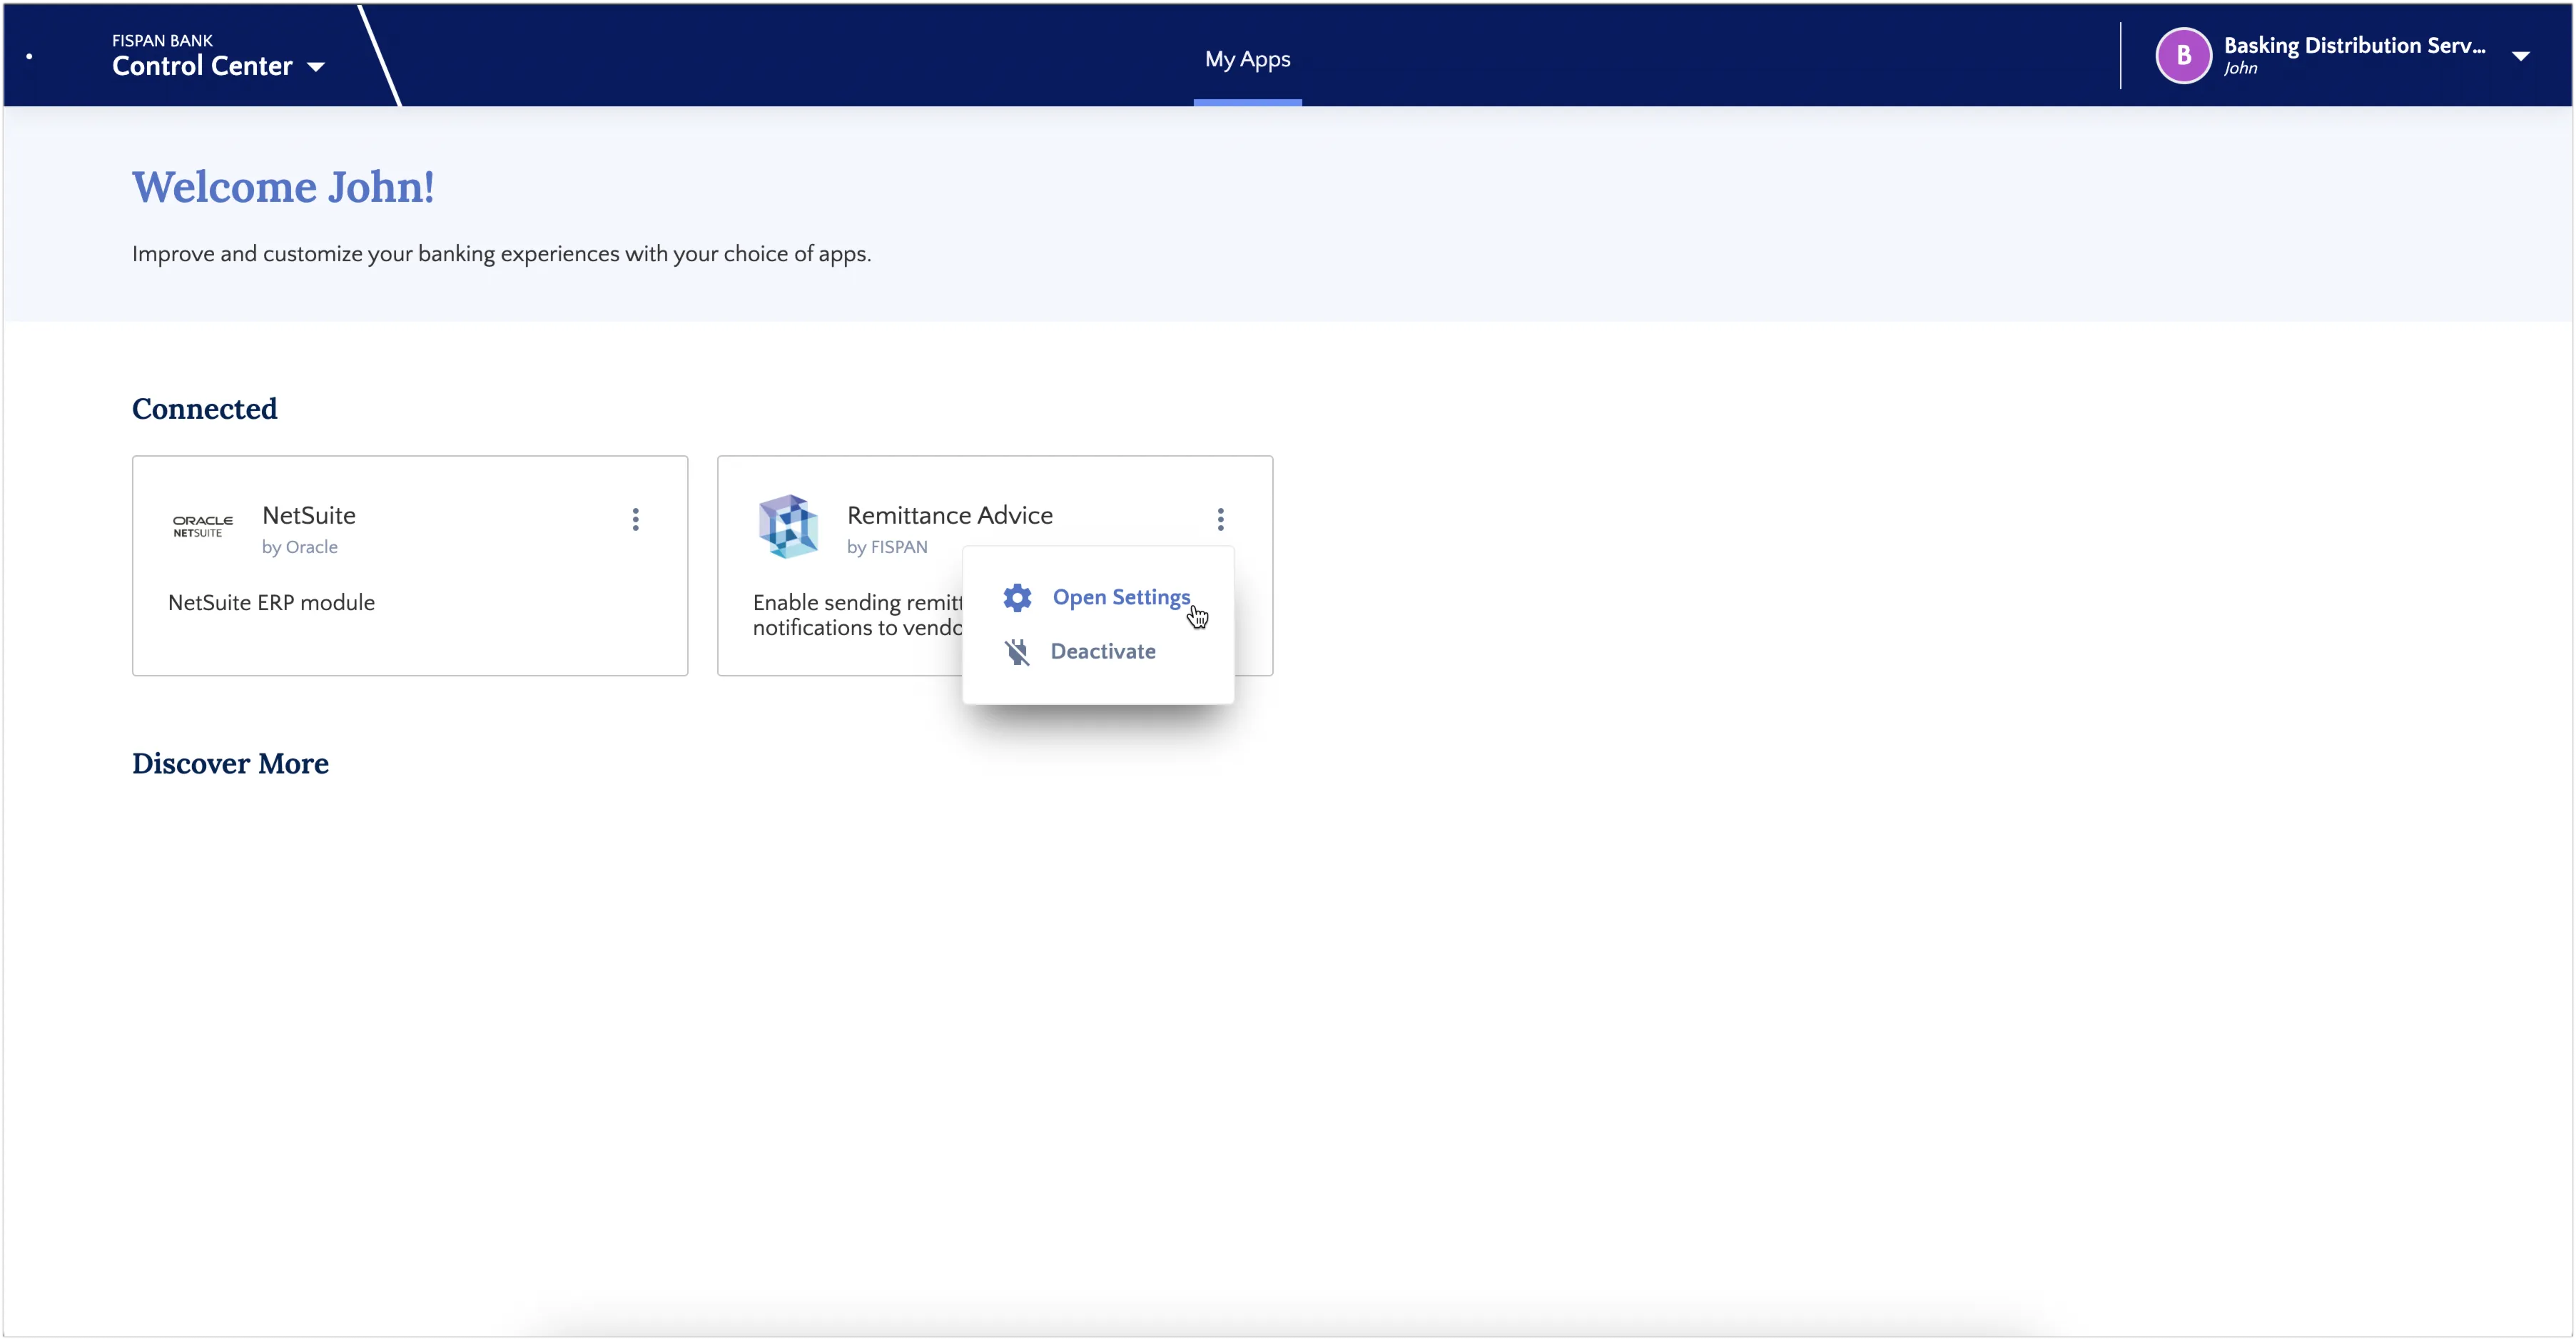
You can view or change your current settings through the App Center. Find the Remittance Advice card, select its drawer, and choose Open Settings. If you need to disable the integration entirely, select Disable. The change may take up to 15 minutes to come into effect.
NOTE: Use the below section if you are initiating payments from the Accounts Payables (New) module.
Enable Remittance on Payment Methods Page
Email remittance advice allows you to automatically send detailed payment notifications to your vendors, improving communication and saving time.
Navigate to Payment Methods Page
Navigate to Accounts Payable (New) → Payment Methods
The Payment Methods page has two tabs:
- Vendors tab - Manage payment information for vendors (used when paying bills)
- Employees tab - Manage payment information for employees (used for expense reimbursements)
Select the tab for the type of payee you want to manage Remittance Advice. The workflow is the same for both vendors and employees.
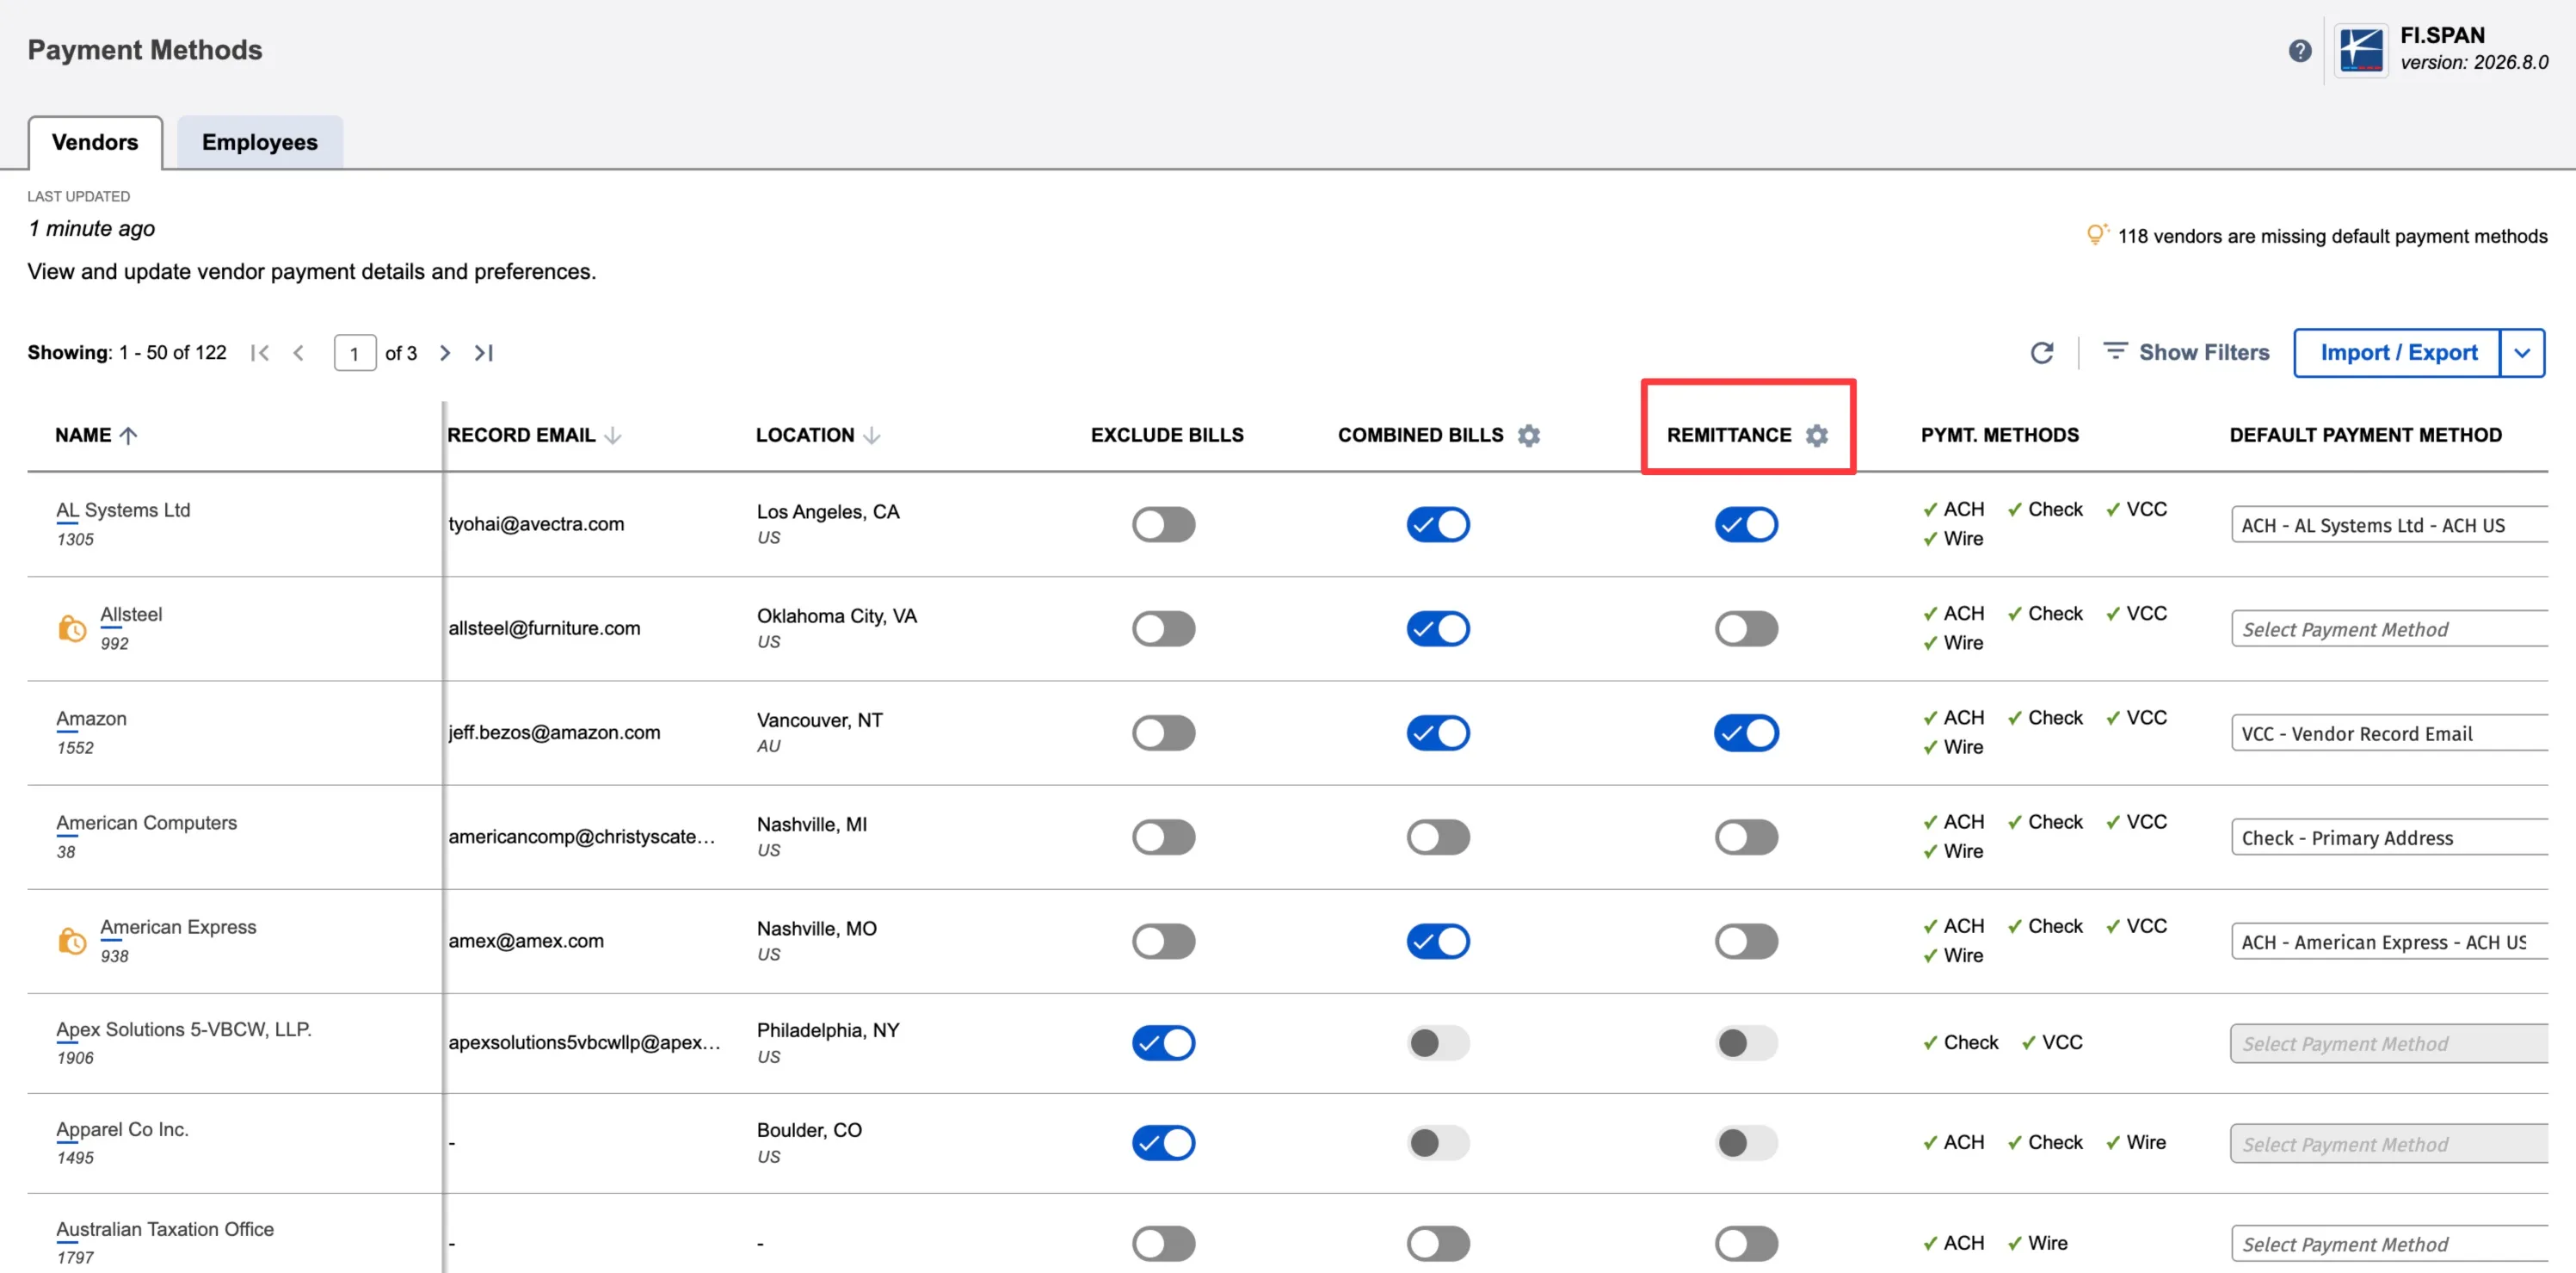
Enable Remittance (Bulk)
Once the page loads, click on the gear icon placed next to the Remittance column.
You will now be prompted to select the option you prefer.
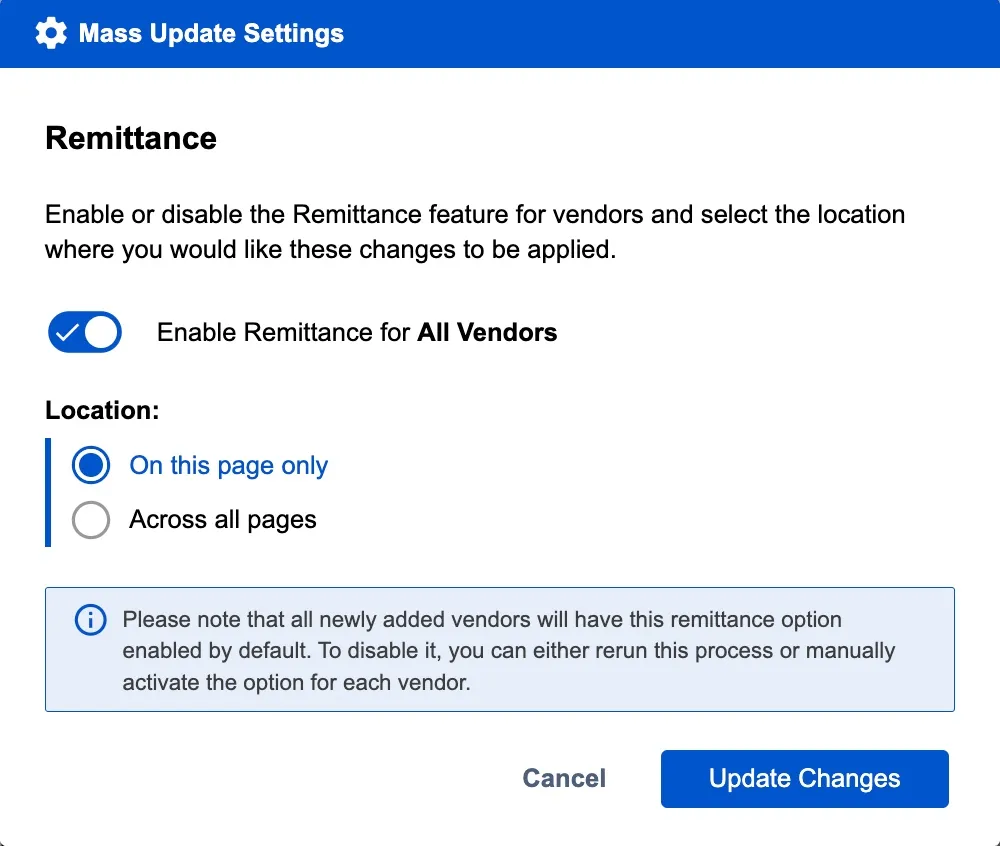
NOTE: If you choose to enable this for all vendors, you will need to make updates for any new vendors that are created in the future.
Once the option has been selected, click Update Changes.
The screen will reload, confirming the Remittance toggle is now on and displaying the settings you selected.
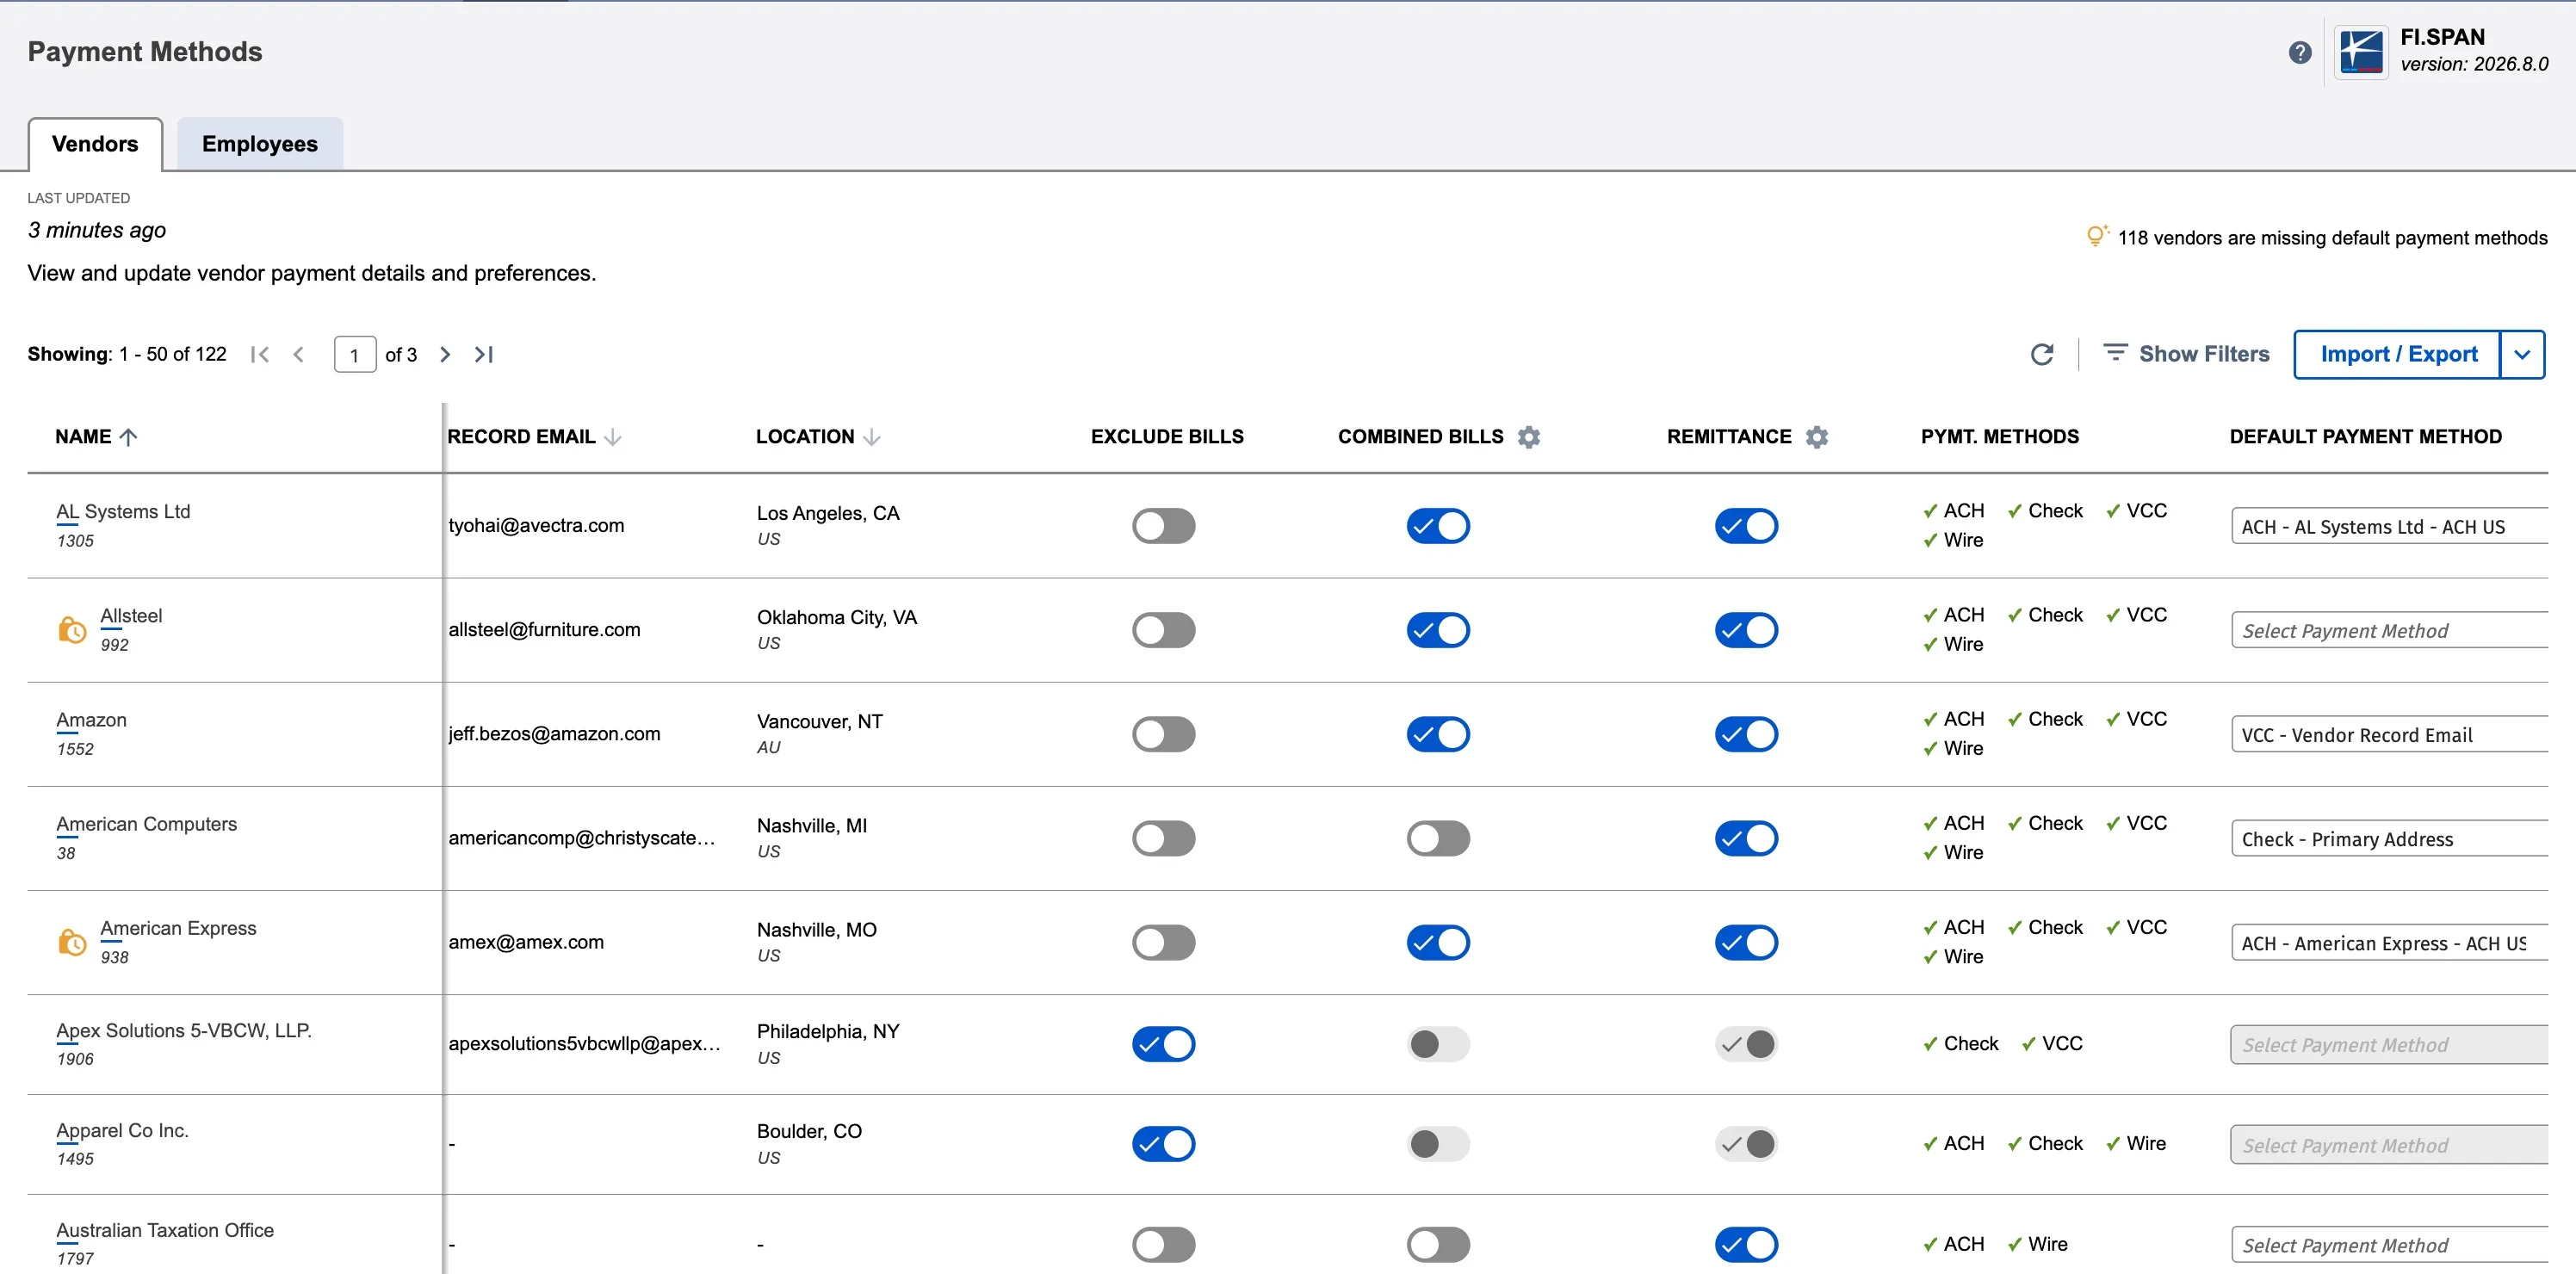
If you need to, you can disable the feature for specific vendors using the individual vendor toggles.
Configure Email Group (Per Vendor)
For each vendor where remittance is enabled:
- Click the vendor row to open the payment method dialop
- In the Settings pane (right side), find the Remittance section
- Click the dropdown under "Notify vendor for each payment"
- Select the email group to receive remittance notifications
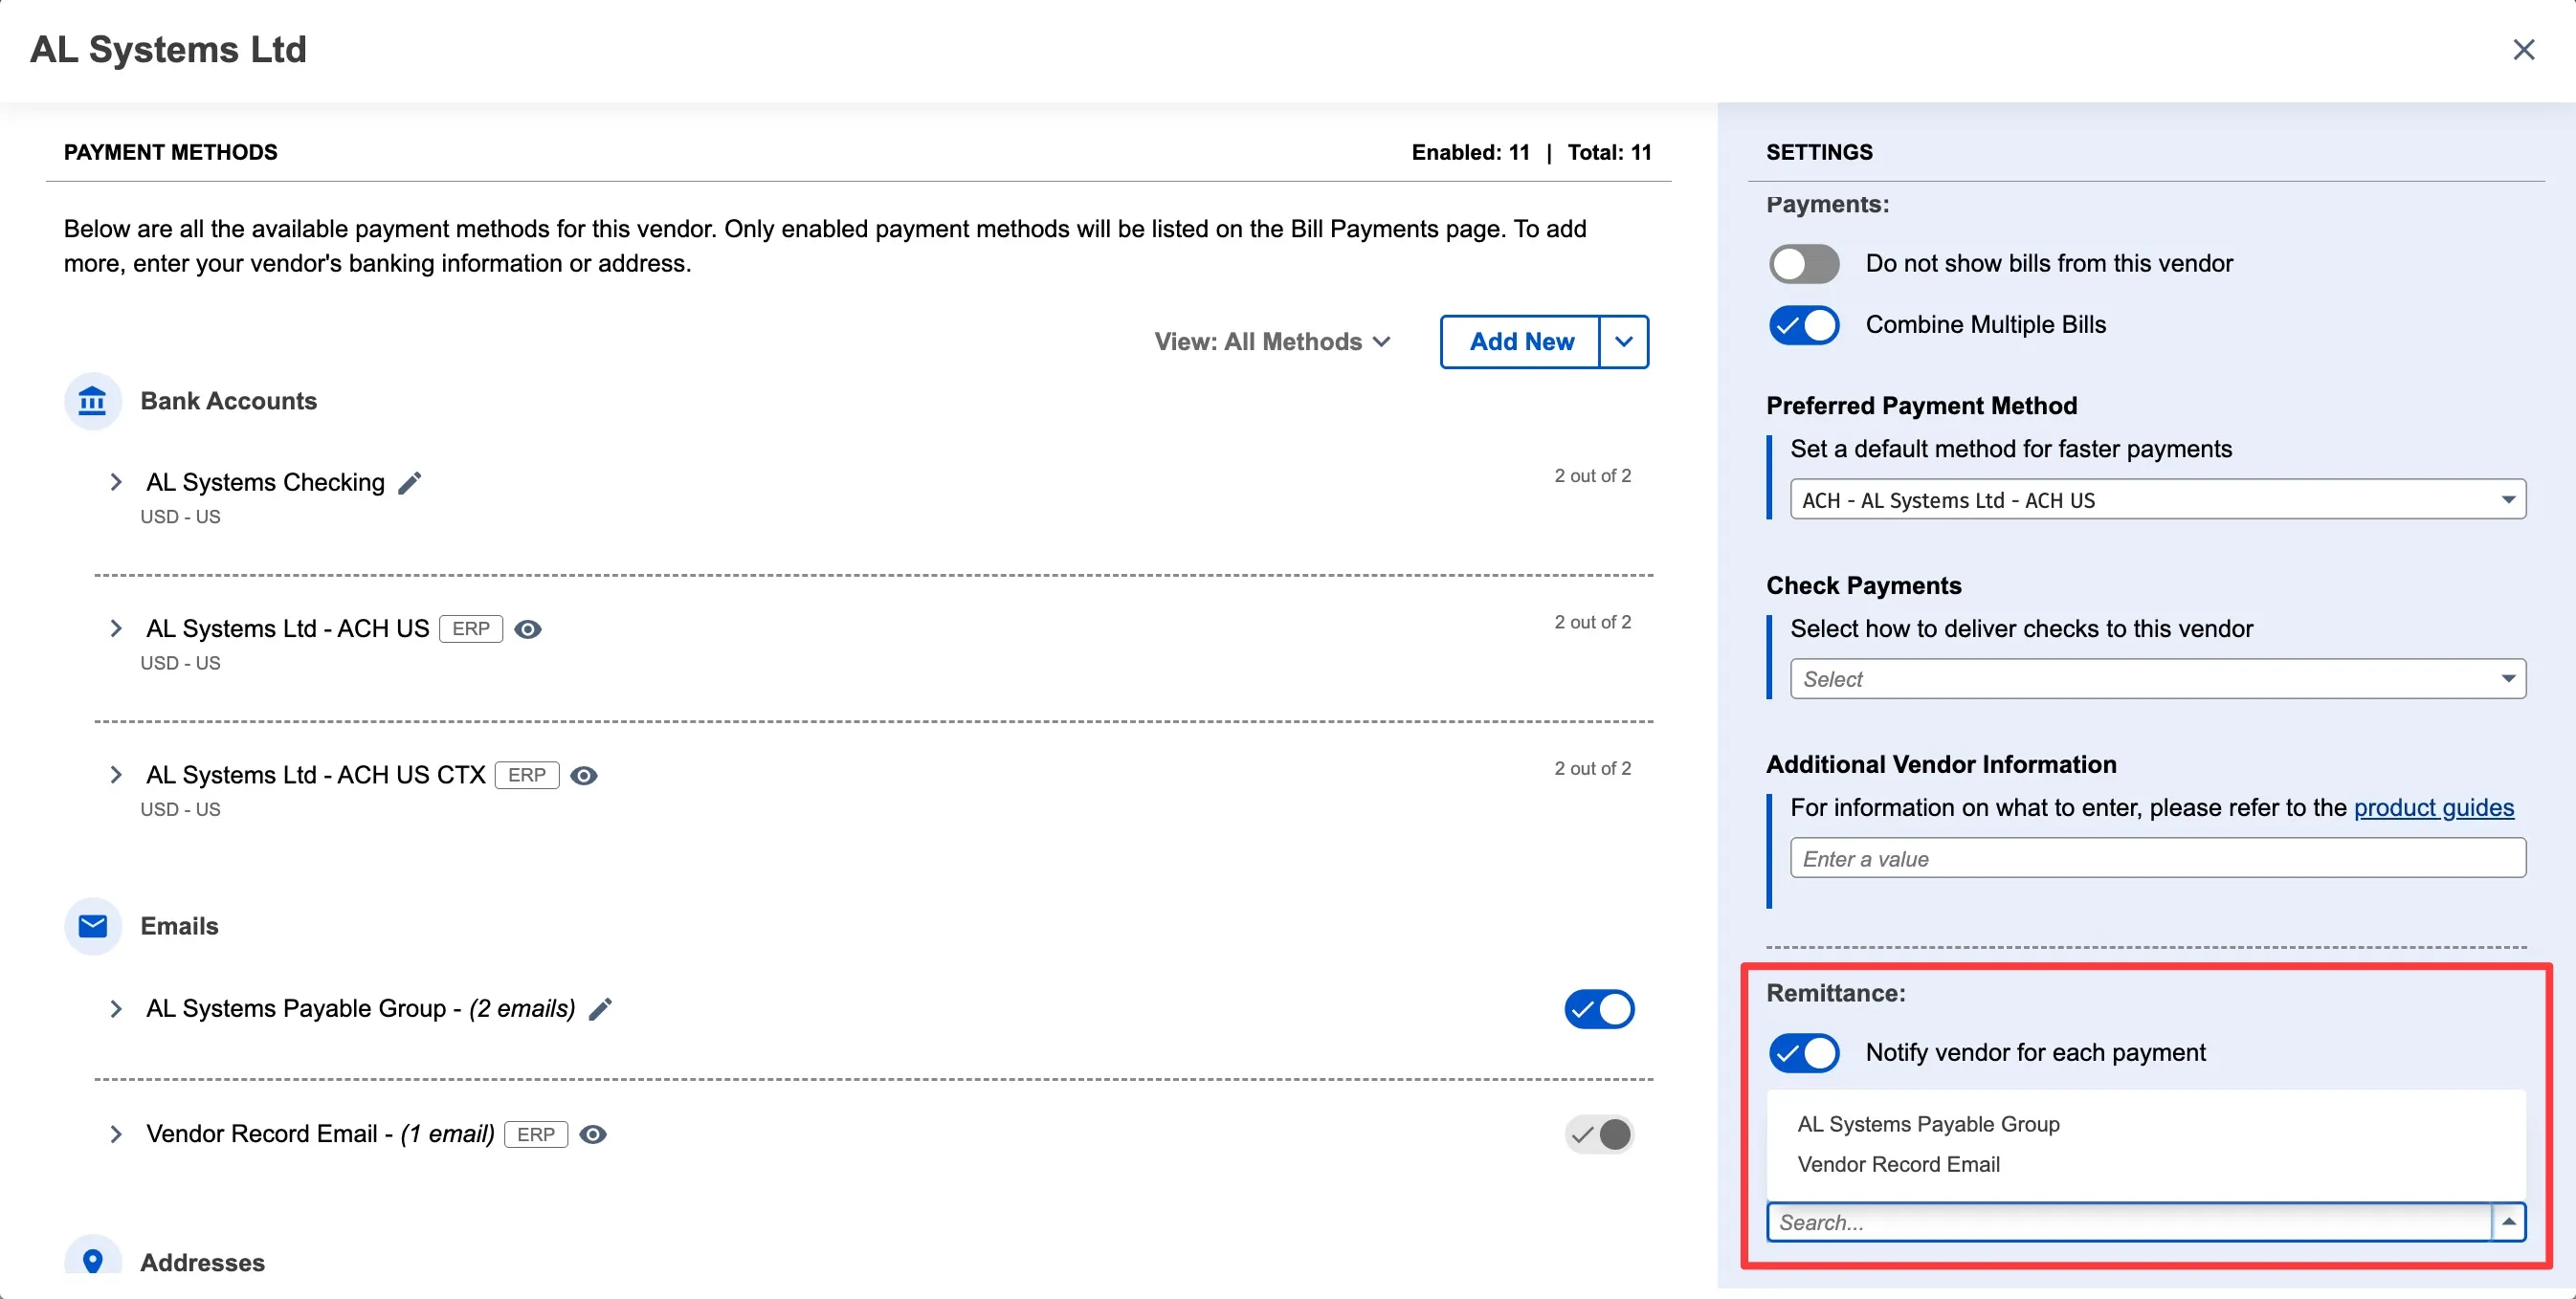
The selected email group will receive a remittance email every time you pay bills for this vendor.
Disable Remittance
The page will refresh, and all the toggles will be updated to match the status you selected. From this page, you can disable remittance for specific vendor or do in bulk using the above step.
NOTE: Use the below guide if you are making payments from old Vendor Bills or Expense Reports page.
Update NetSuite Vendor Settings
You can add or remove email addresses for vendors in NetSuite to control who receives remittance emails. Access these details by following the steps below.
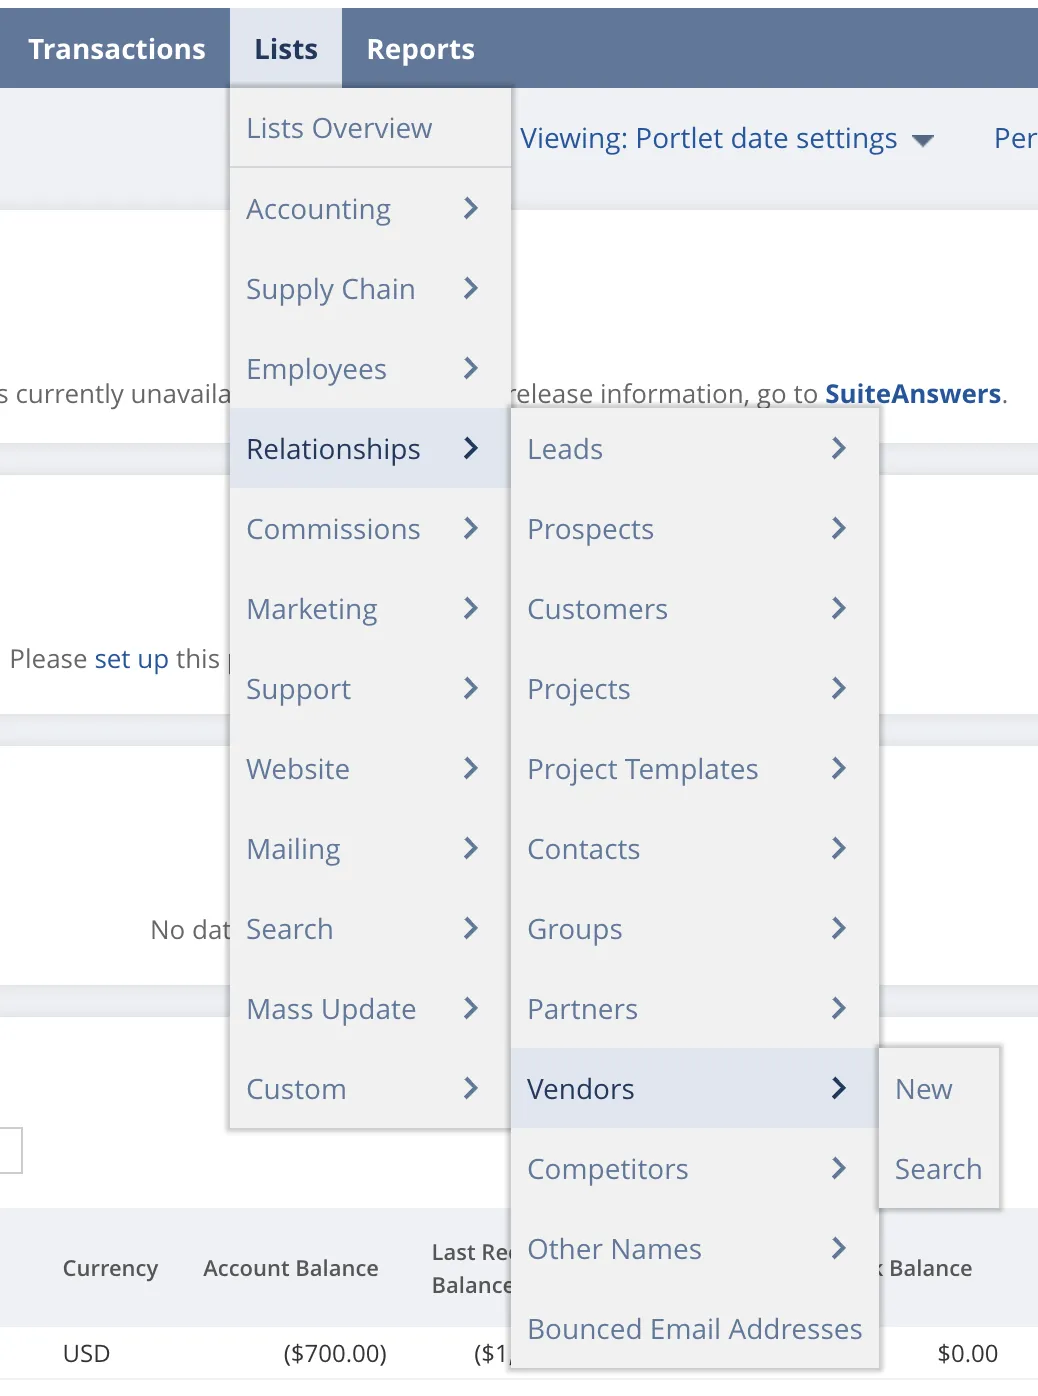
Go to Vendors
Go to Lists → Relationships → Vendors.
Access the Plugin Tab
On the Vendor’s page, turn on the Edit option, then select the Citizens tab.
Add Email Addresses
In the Email Addresses (Comma Separated) field, you can add up to 5 email addresses to which you’d like remittances sent for this Vendor.
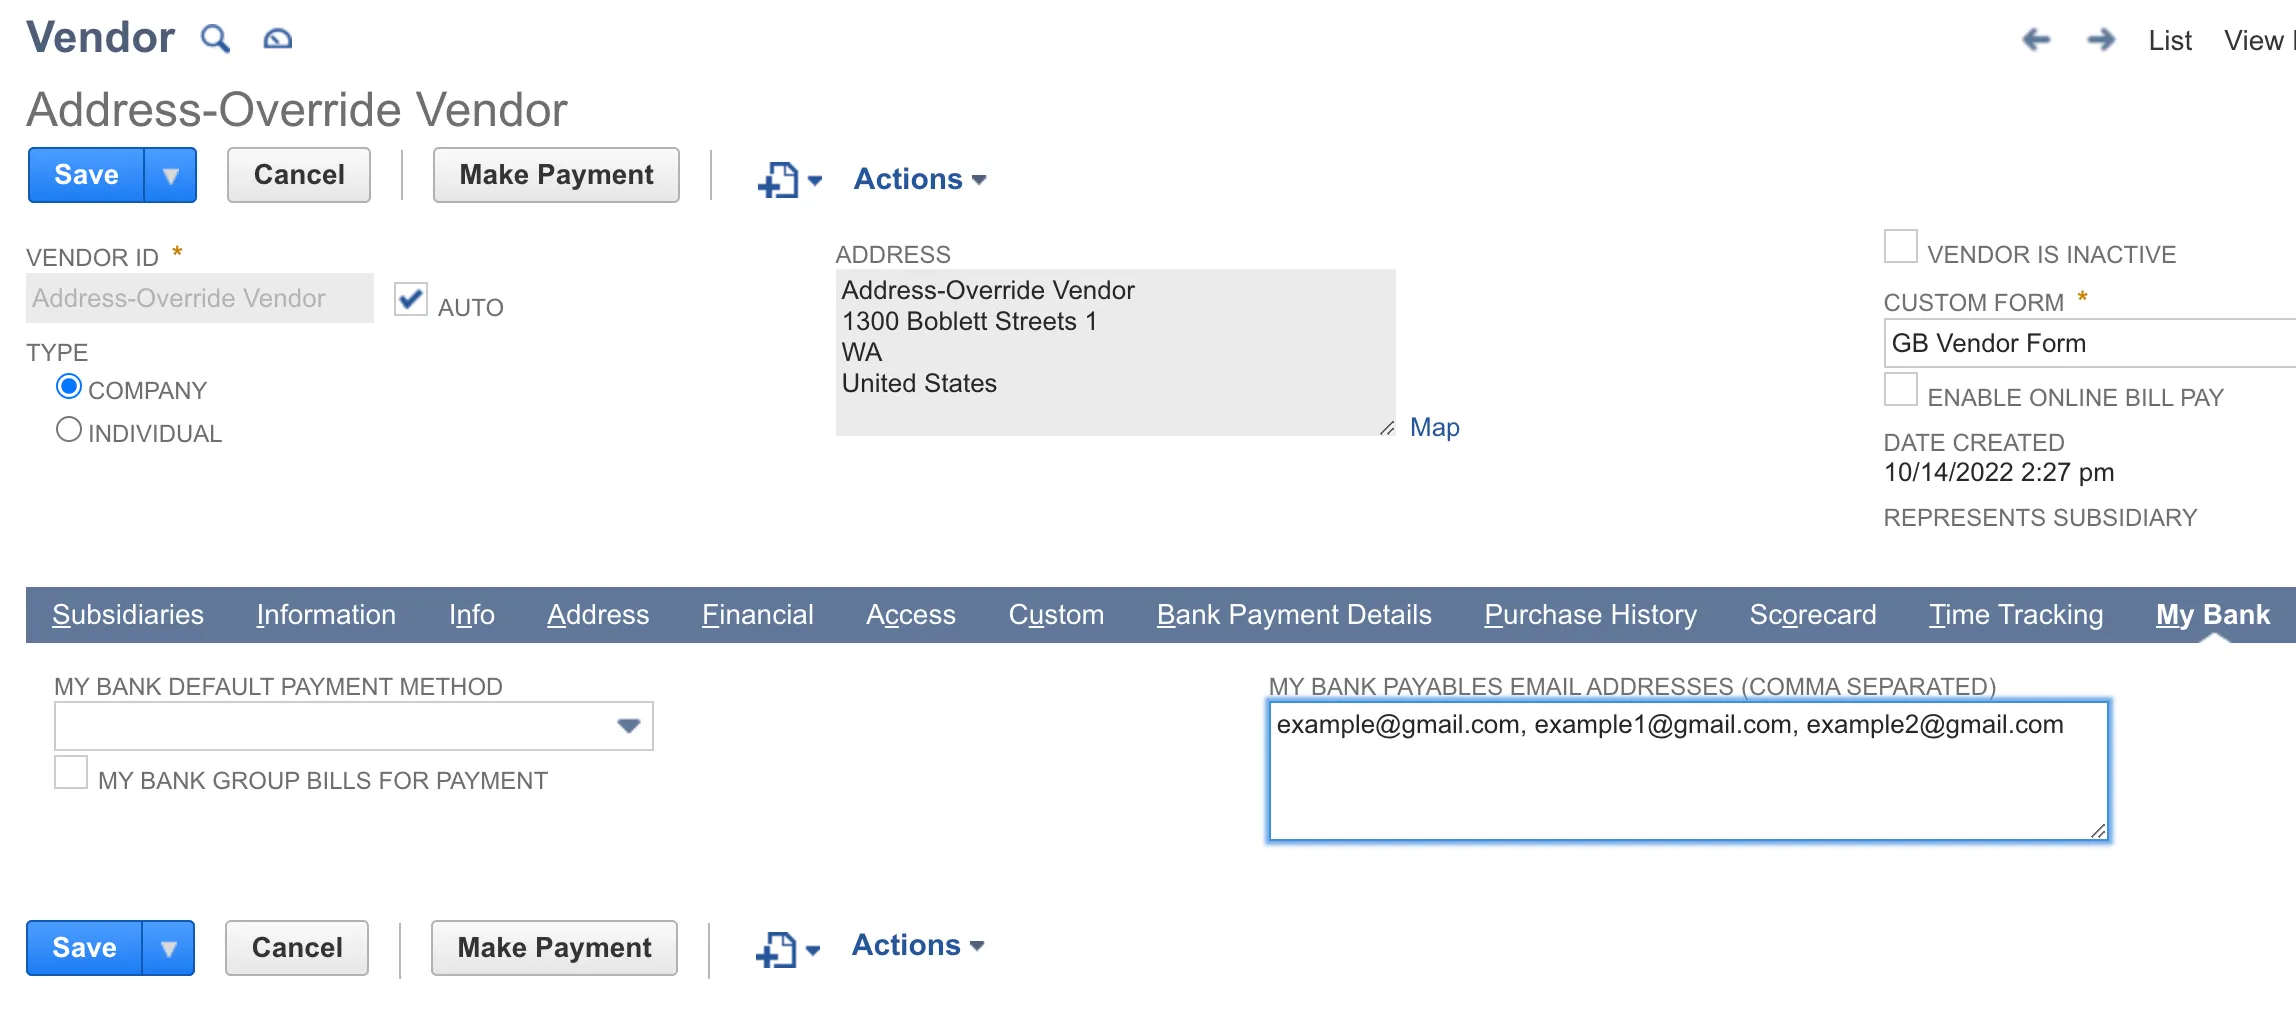
If the field Payables Email Addresses (Comma Separated) is left blank, the system will look for a recipient address using the logic Vendor Primary Email. If both of these fields are empty, no remittance email will be generated or sent. If you wish to completely opt out of sending remittance notices for a specific vendor, both of these email fields should be left blank within that vendor's record.