Positive Pay (NetSuite)
The Positive Pay feature in your Citizens enables the secure transmission of payment details for checks cut in-house to your bank. It automatically extracts data from checks printed using NetSuite, allowing you to send a Positive Pay file for your entire check run to the bank in just a few simple steps. Follow this guide to get started.
Supported Record Types
The Positive Pay feature supports the transmission of check payment details for the following record types:
- Vendor Payments
- Expense Reimbursements (if included)
- Check Payments to Customers (made from the Write Checks page in NetSuite)
Customer Refunds are not supported.
Perform Positive Pay
To get started with Positive Pay, please follow these instructions:
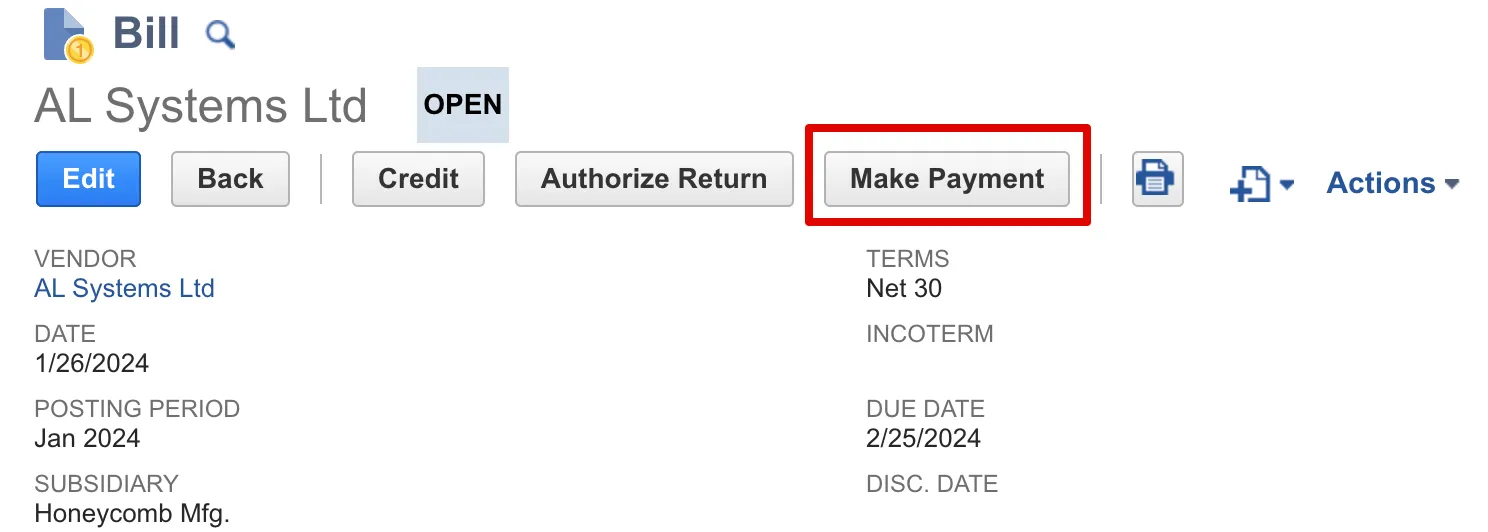
Initiate a Bill Payment
On a Bill that you would like to make an in-house check payment to, click Make Payment.
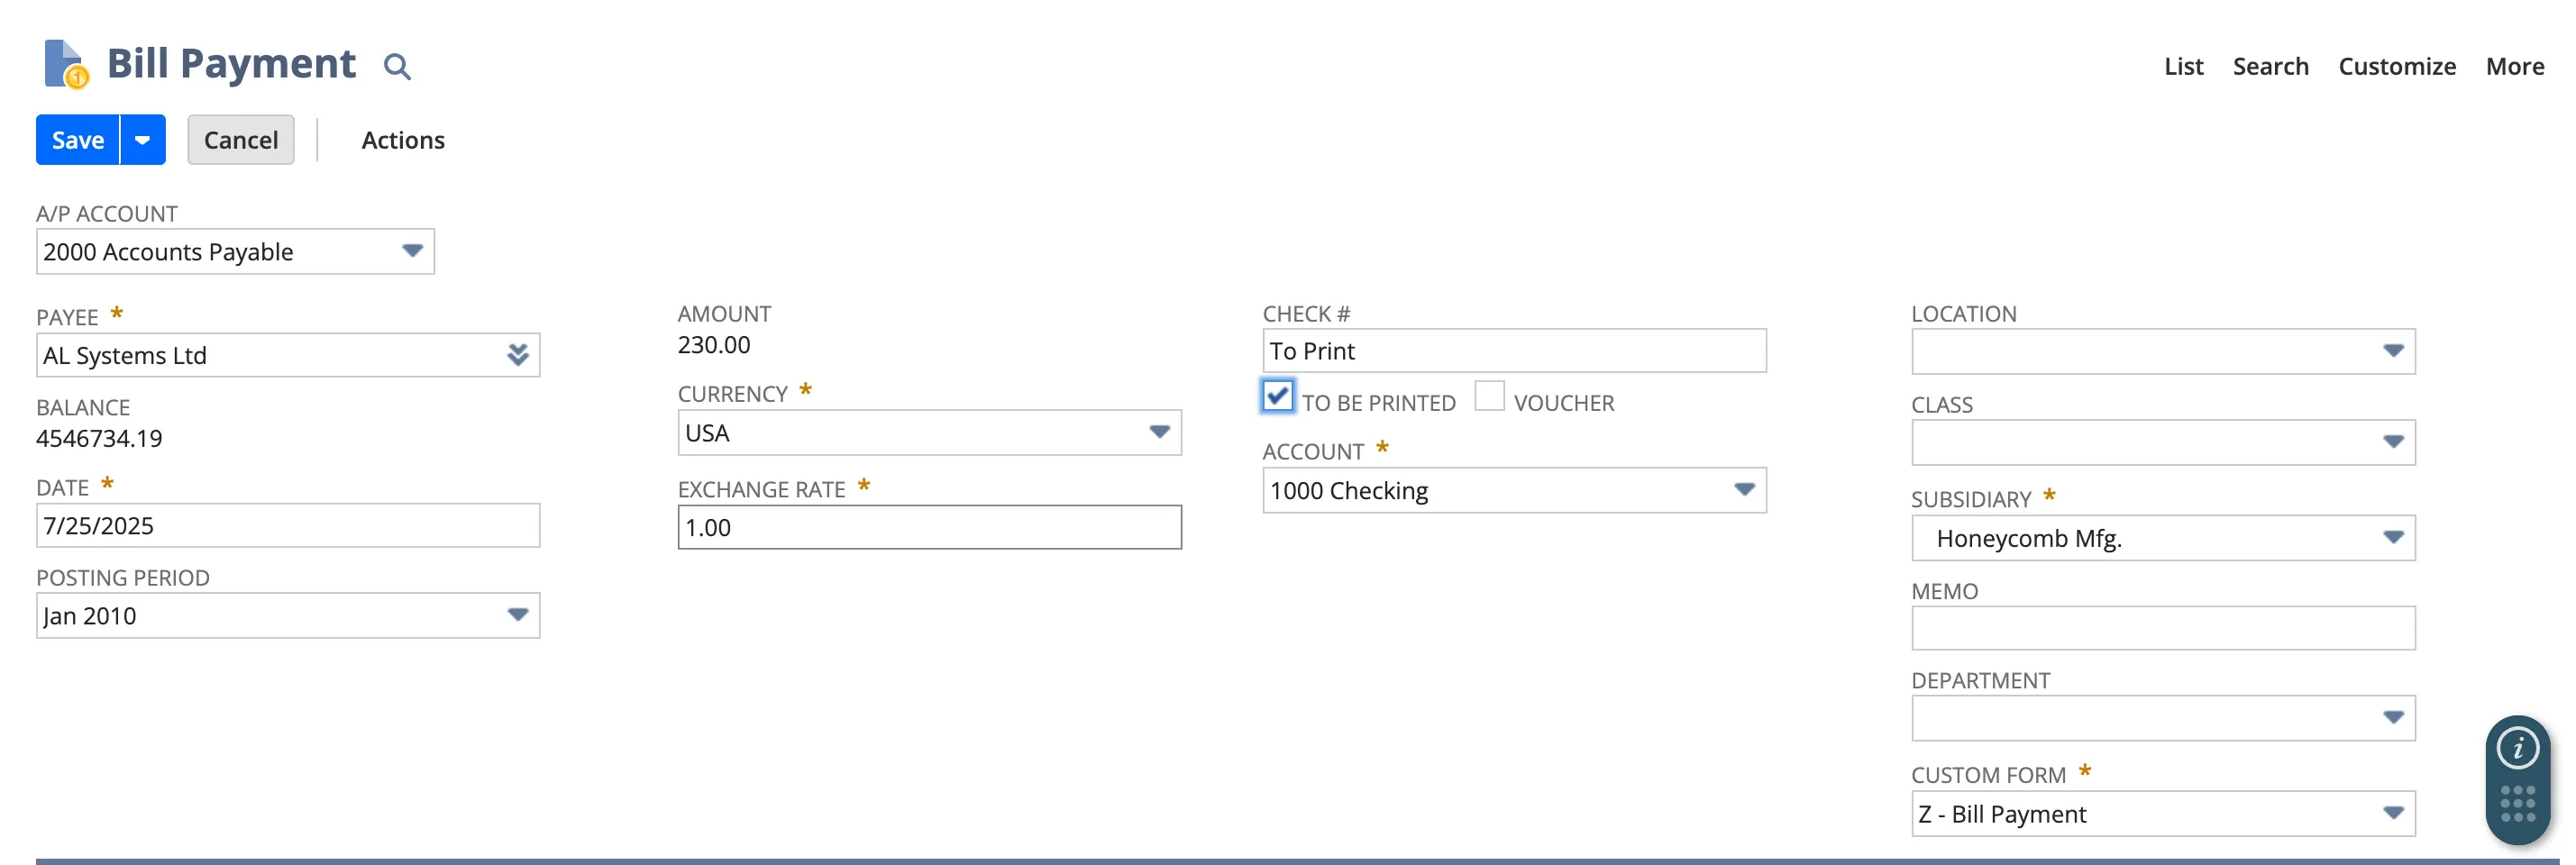
Mark Bill “To Be Printed”
Select the To Be Printed box. Once this box is selected, the CHECK # field will be replaced with the text: "To Print."
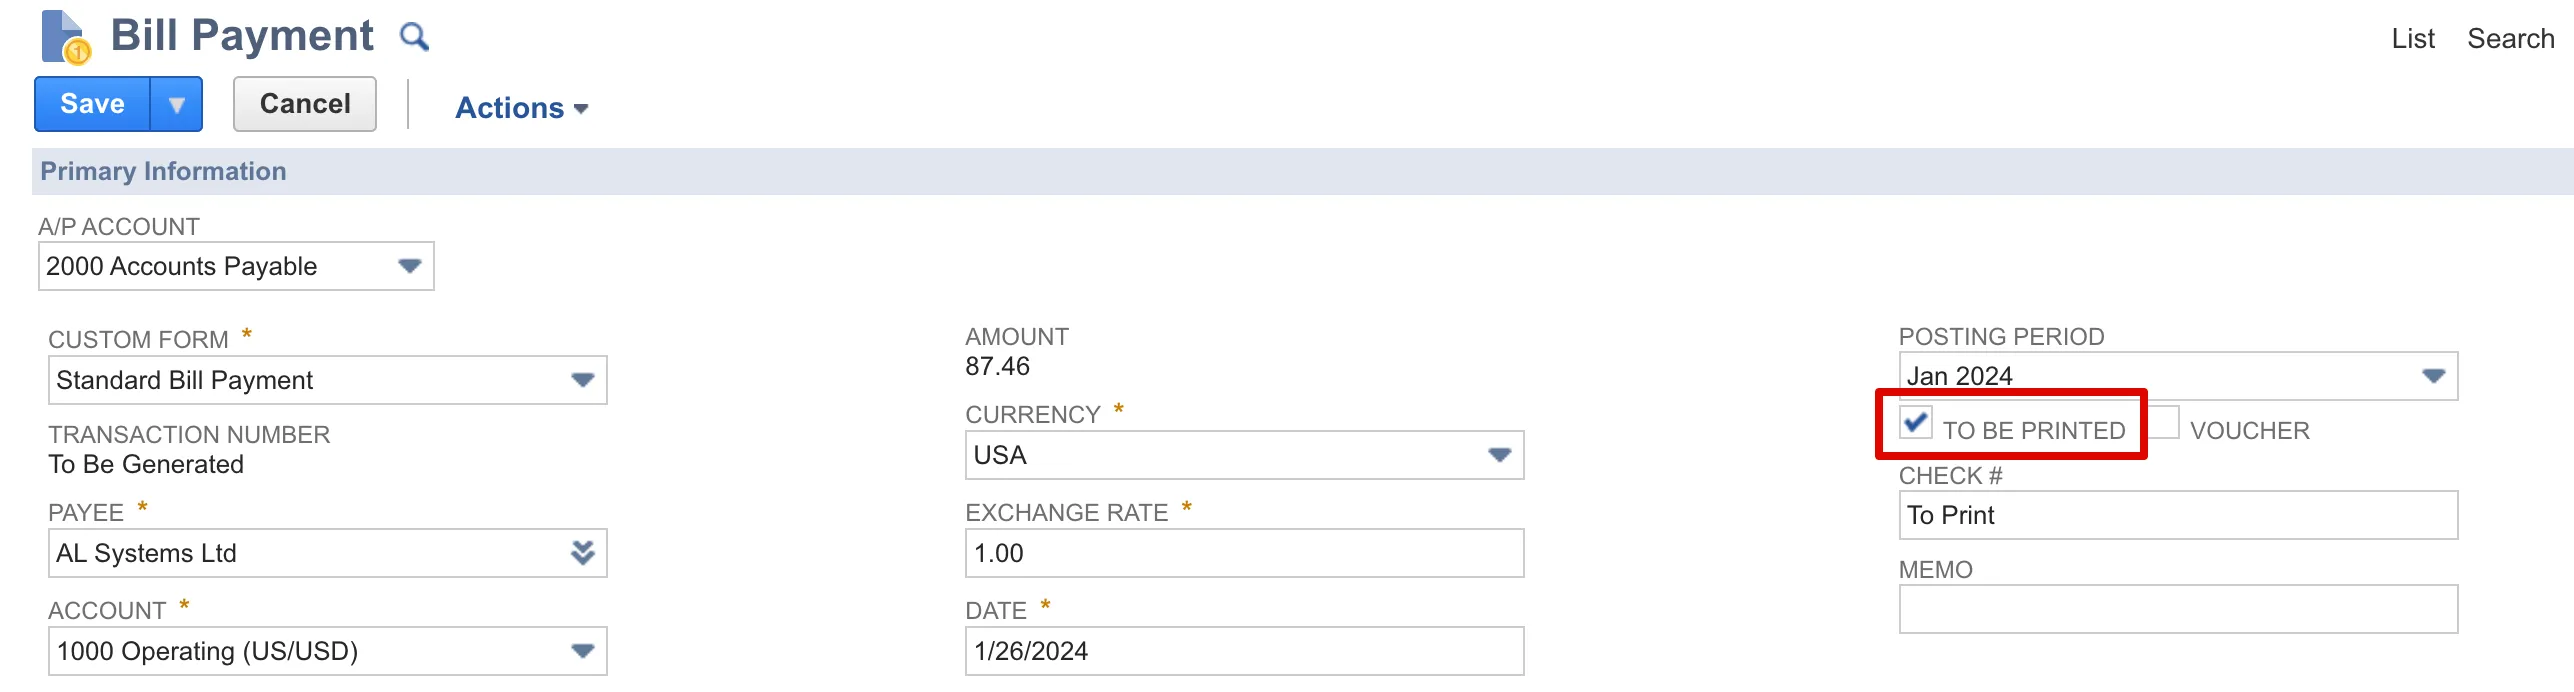
Then, select Save.
NOTE: For a Bill Payment to appear on the Positive Pay page in your bank plugin, the To Be Printed box must be selected at the same time the Vendor Bill Payment is being initiated.
If you would like to print multiple bills, select those bills from the Pay Bills page and make sure to check the To Be Printed checkbox at the top right.
Once that is done, go to the next step to print the checks.
Select & Print Checks
Go to Transactions → Management → Print Checks and Forms.
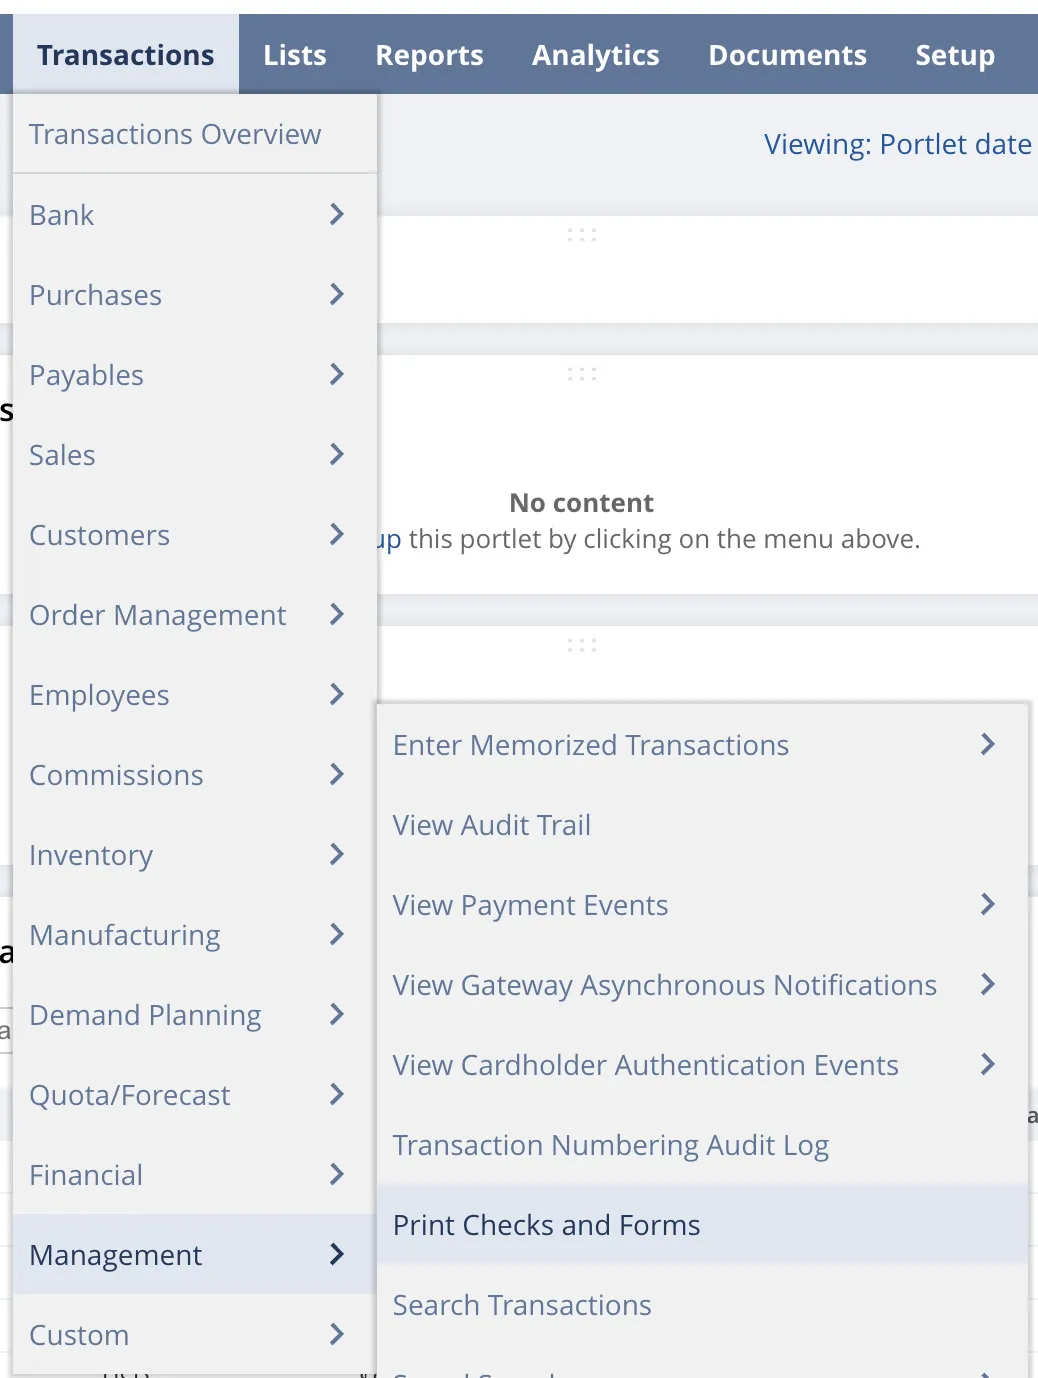
Then, select Checks.
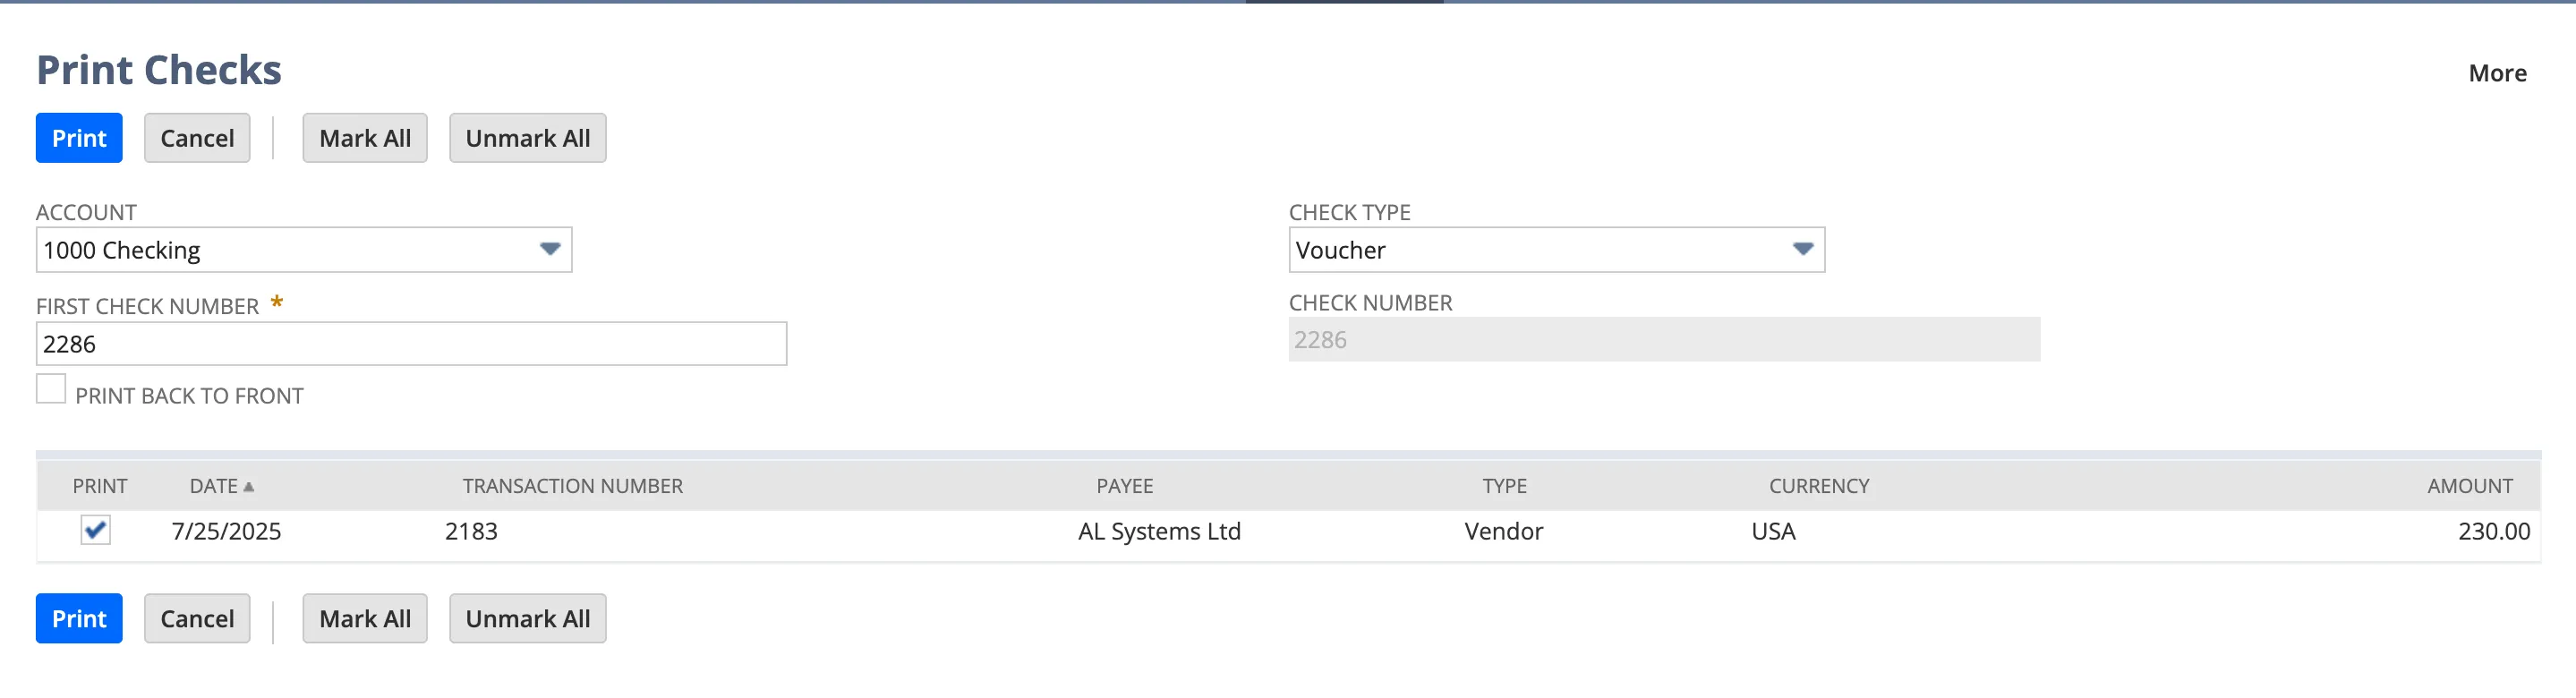
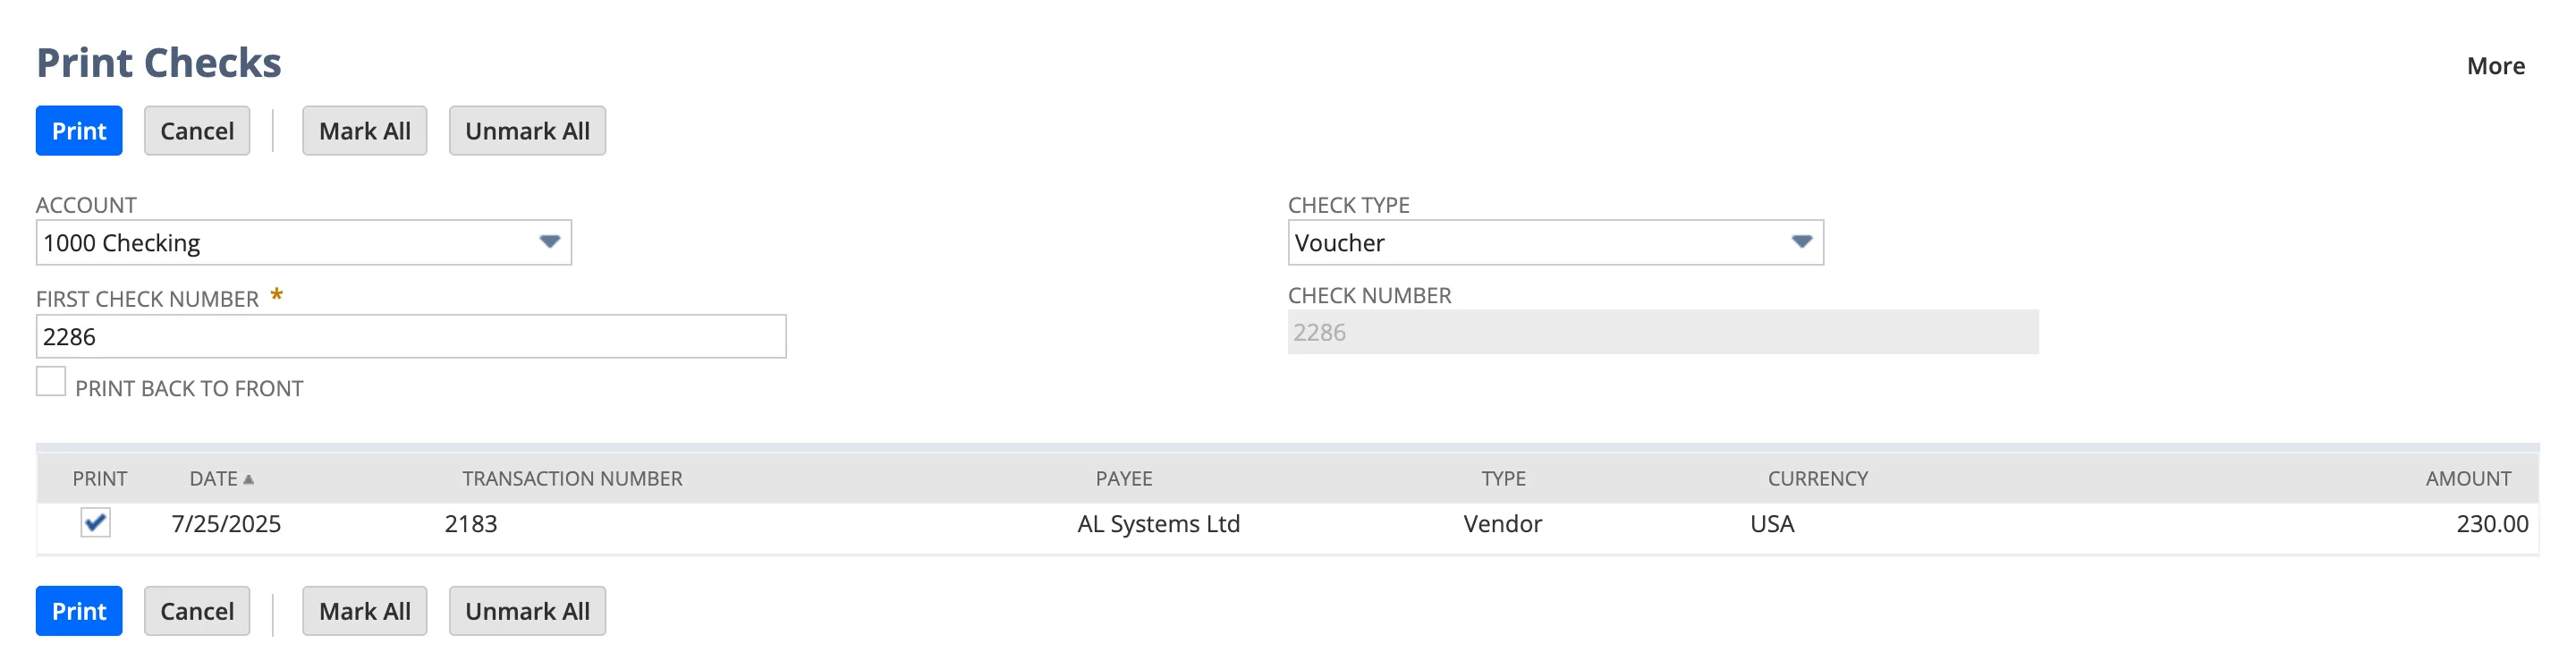
On the Print Checks page, select the account you wish to make the payment from (e.g., 1000 Operating).
Then, select the bill to be printed for the check payment. When you’ve selected the bills, select Print.
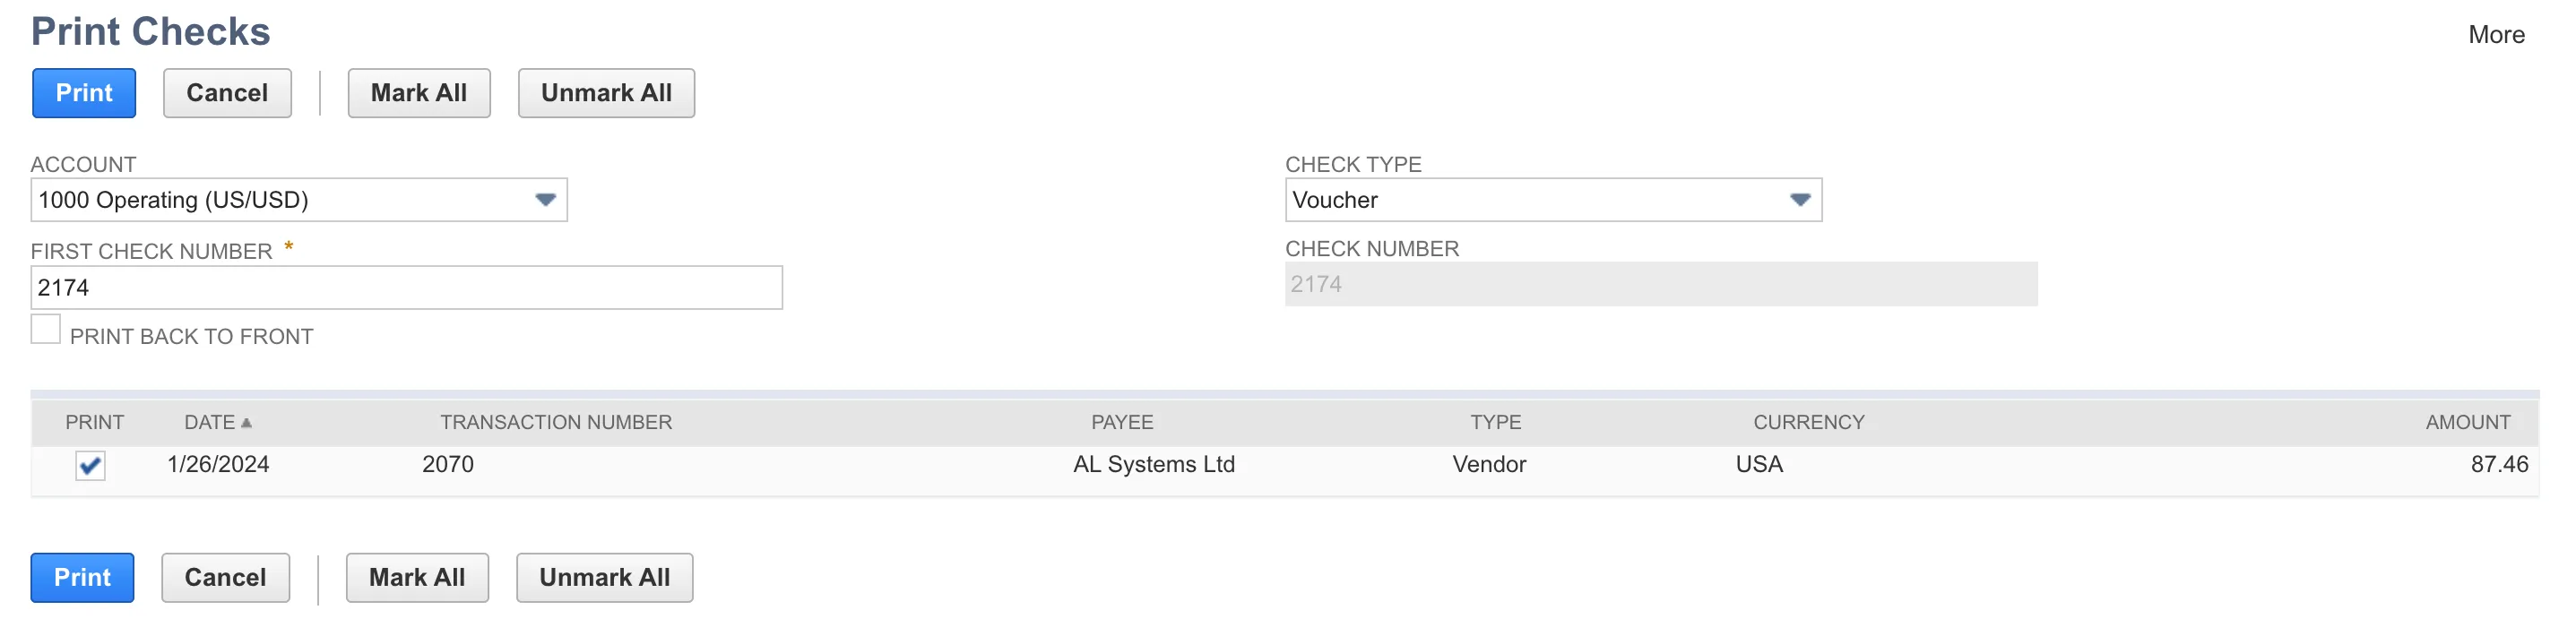
A new tab will open with a printable check PDF.
Transmit Positive Pay File
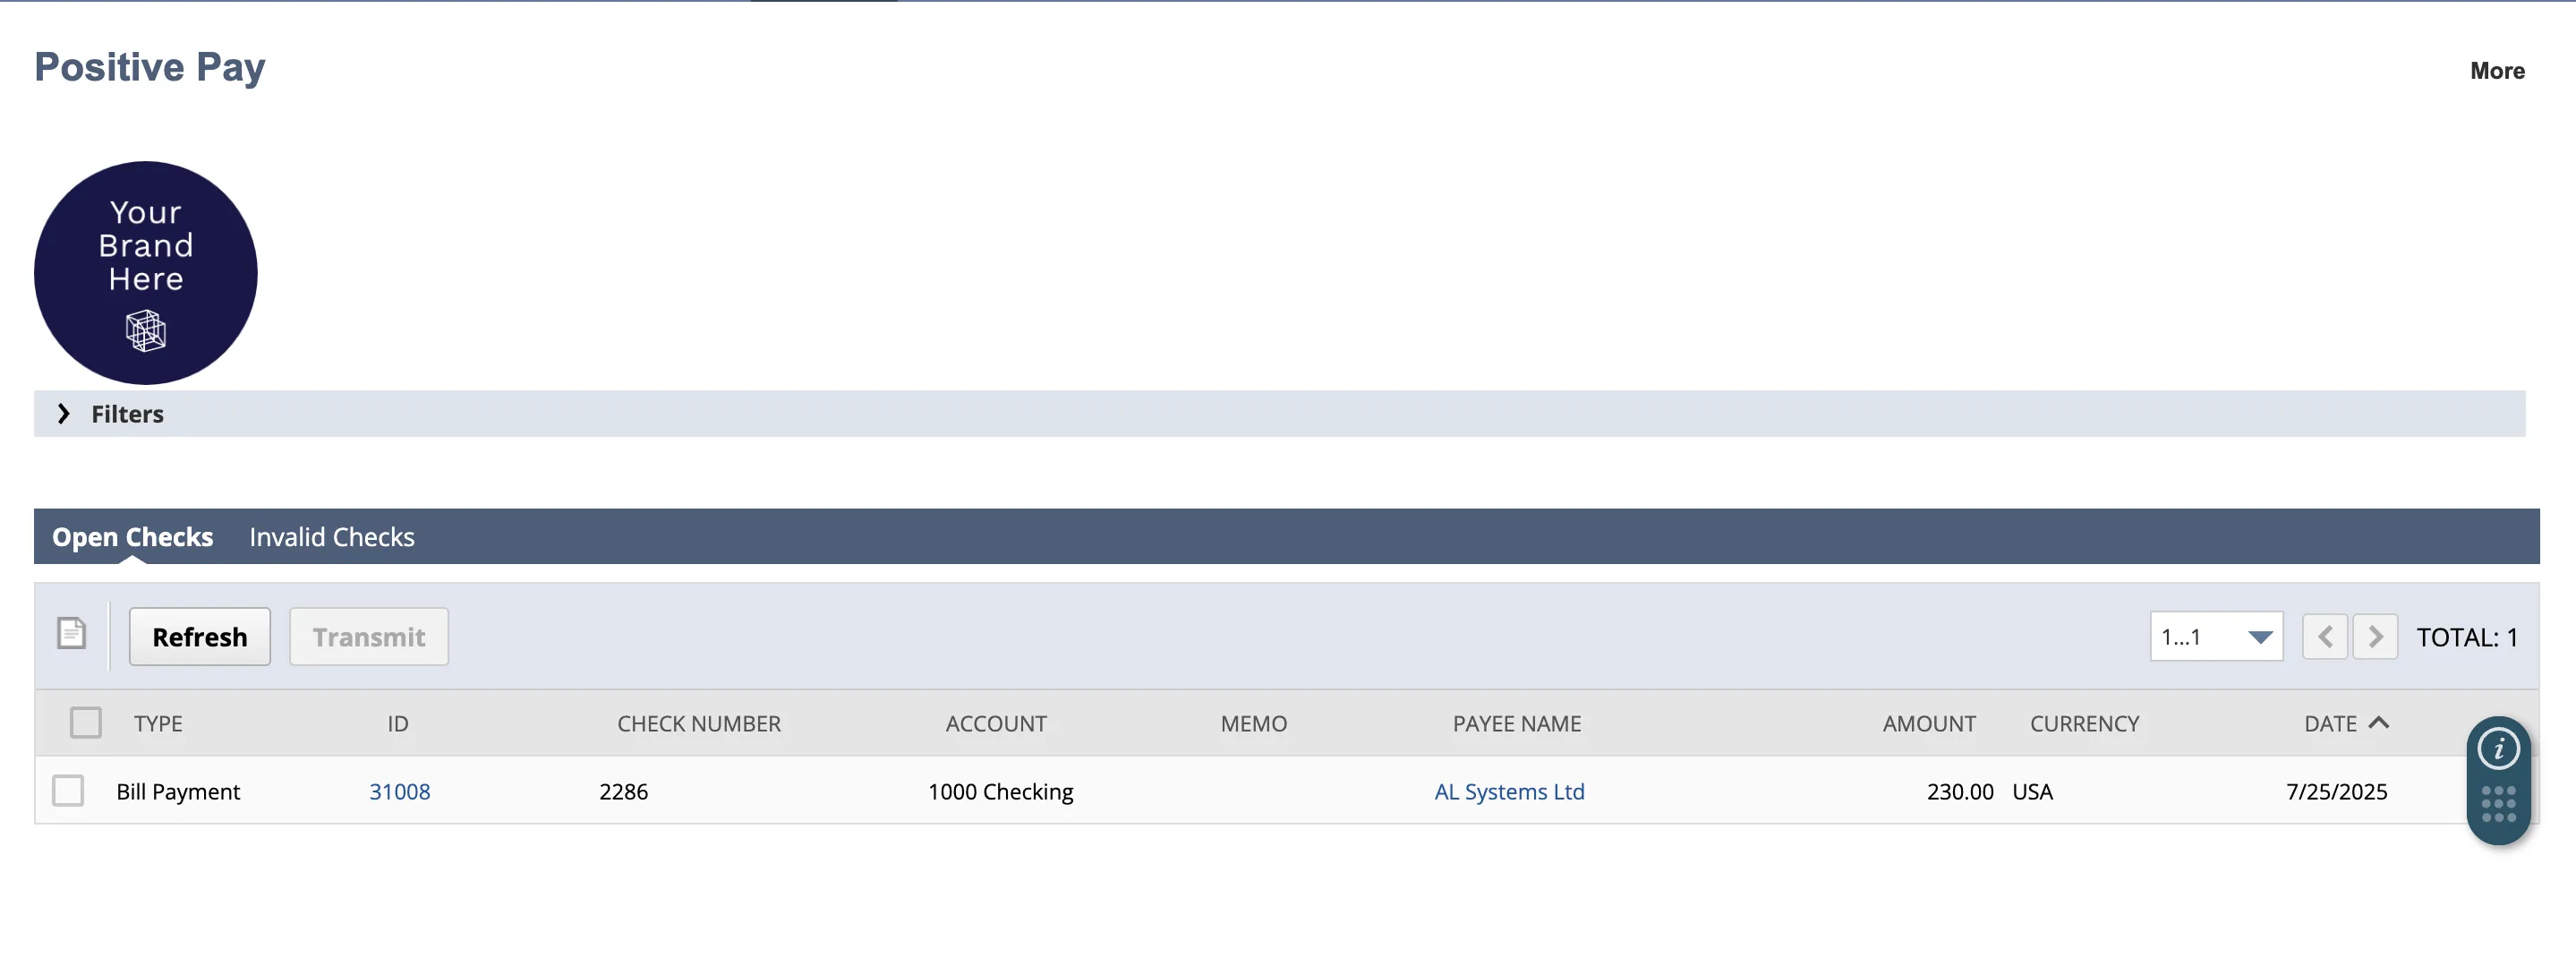
Go to Your Bank → Positive Pay → Transmit.
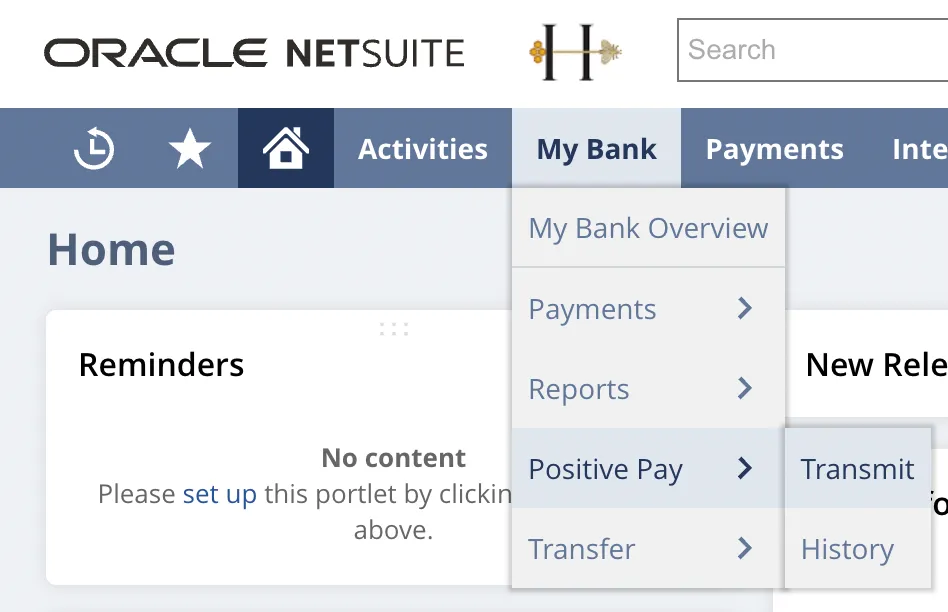
Select the items for which you would like to send a Positive Pay transmission.

Then, select Transmit.
Confirm the information is correct on the pop-up that appears, then select OK.
NOTE: To filter Positive Pay records correctly, first select your From/To Date range. Then, apply any other desired filters. If dates are not set first, the plugin will default to displaying records from the last two weeks.
Monitor Status
After selecting OK, a blue payment status bar will appear at the top of the page to show the progress of your transmission.

Go to Your Bank → Positive Pay → History to confirm the status of the transmission.

Invalid Checks
An Invalid Check is not processable by the plugin, such as a check created for a bank account not connected by the integration. If you feel that a check is incorrectly assigned as an Invalid Check, please reach out to FISPAN Support.

Reprocessing Failed Positive Pay
If a Positive Pay submission fails, you'll need to void the original bill payment and then reprocess it using the same check number. Follow these steps:
Void the Bill Payment
Find the bill payment that was associated with the failed Positive Pay.
Click the Void button for that payment.
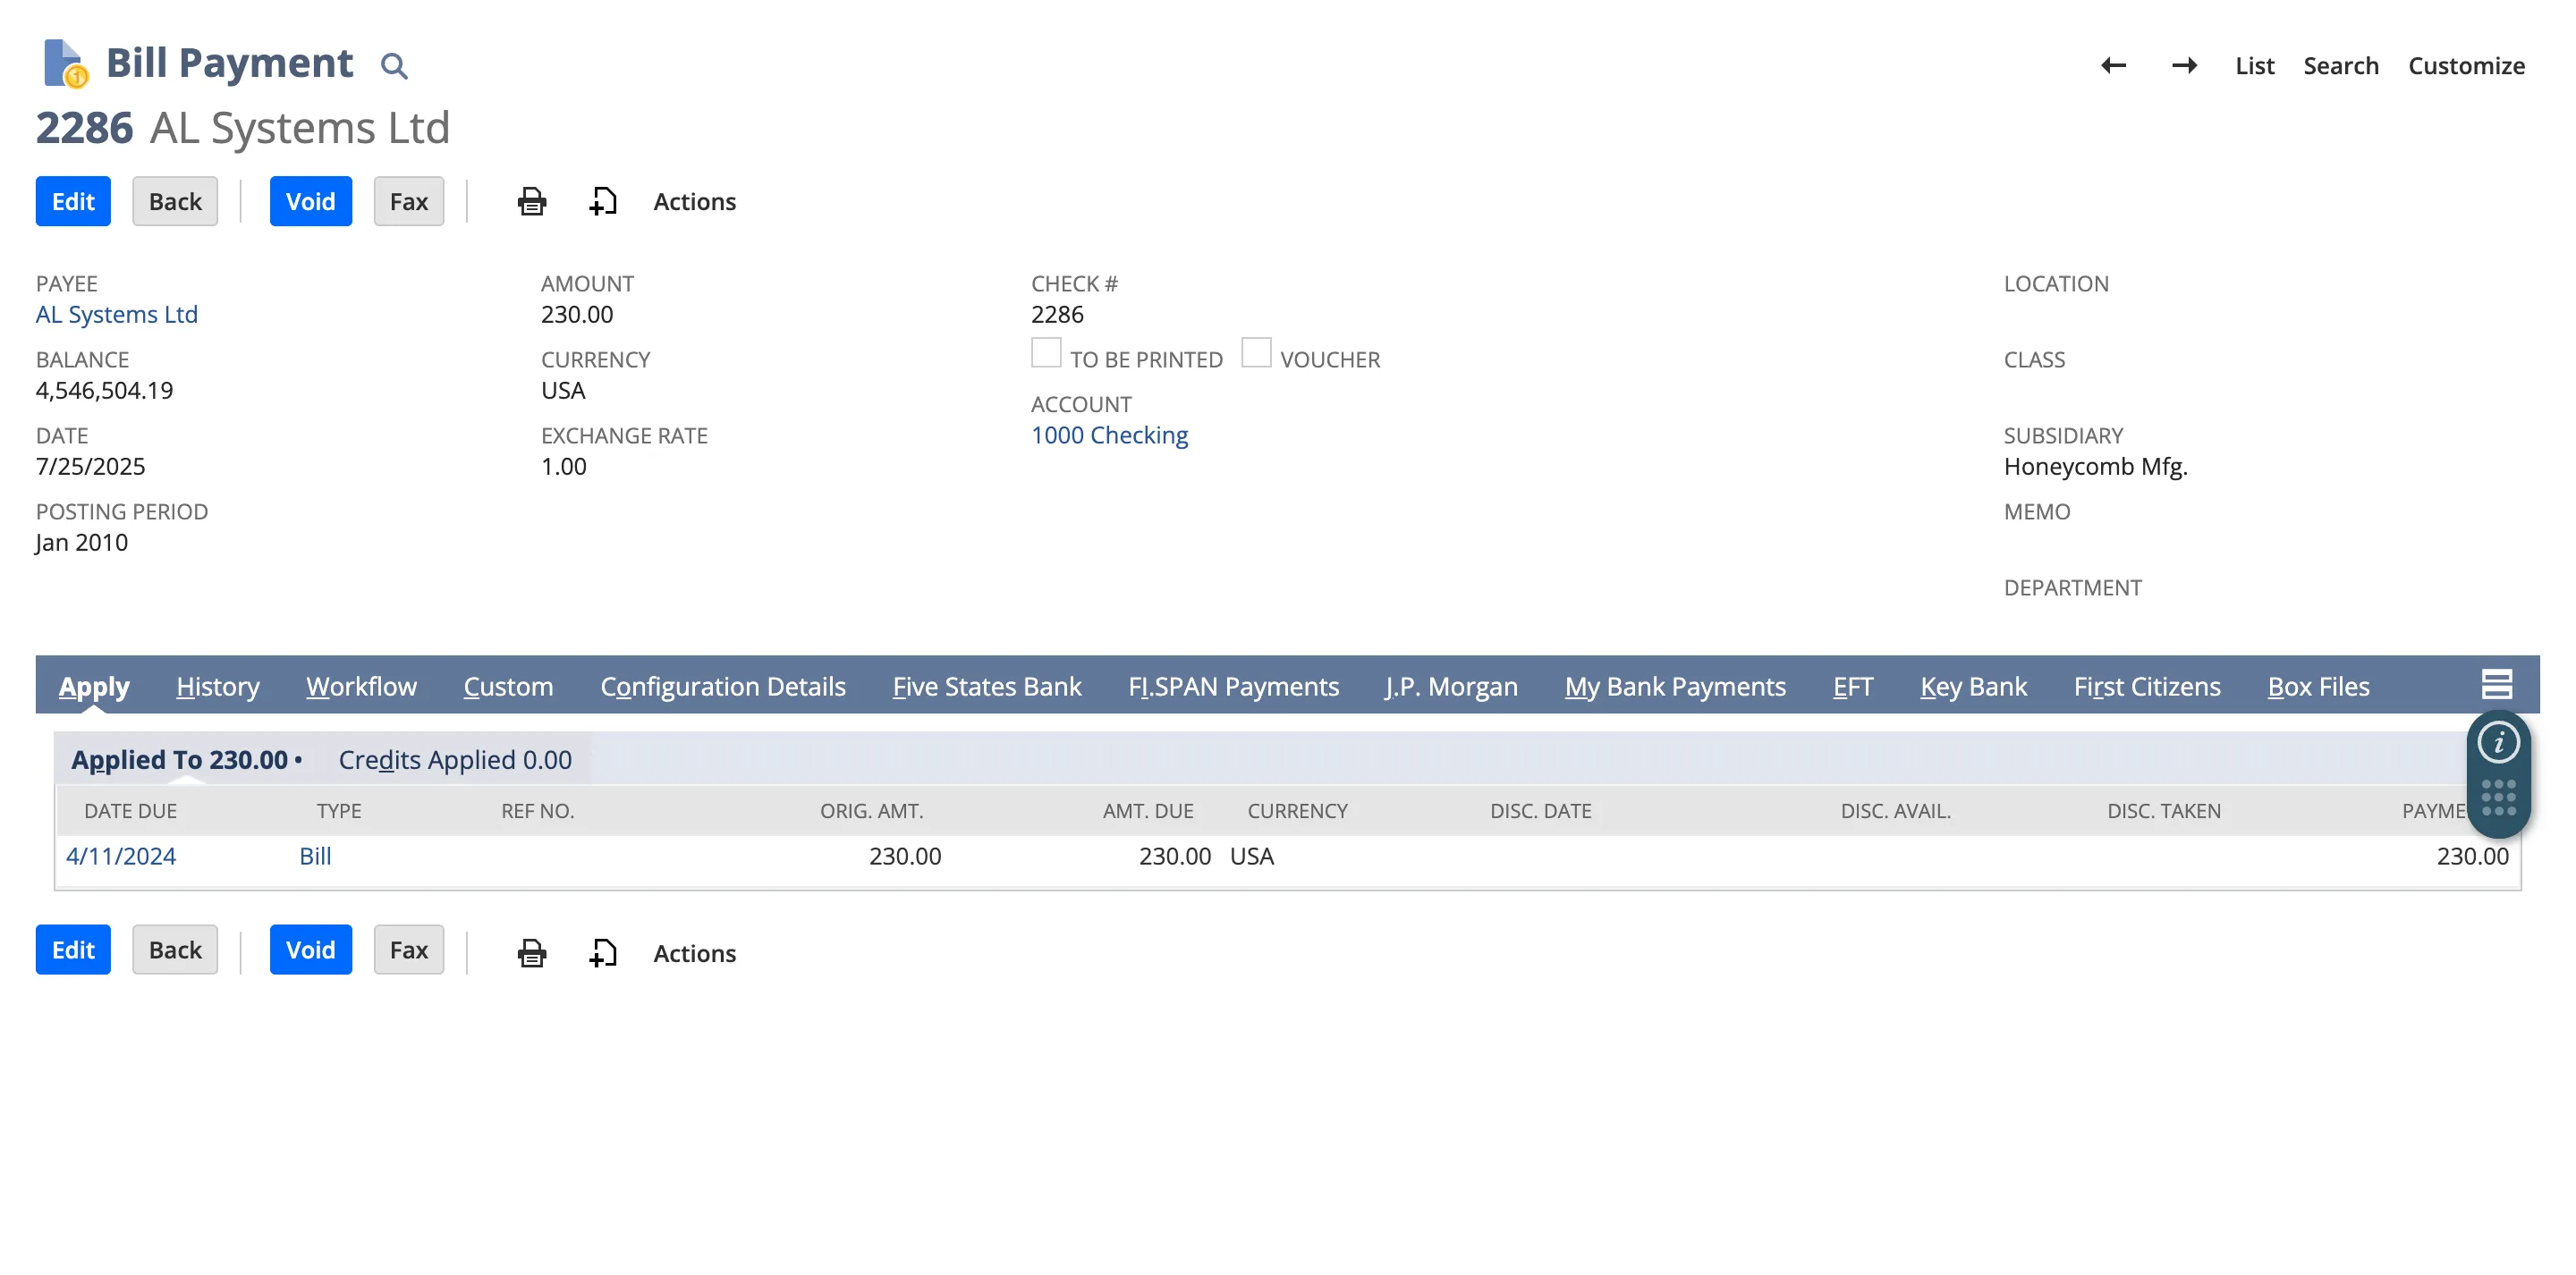
IMPORTANT: Write down or remember the original check number used for this bill payment. You will need it to complete a later step
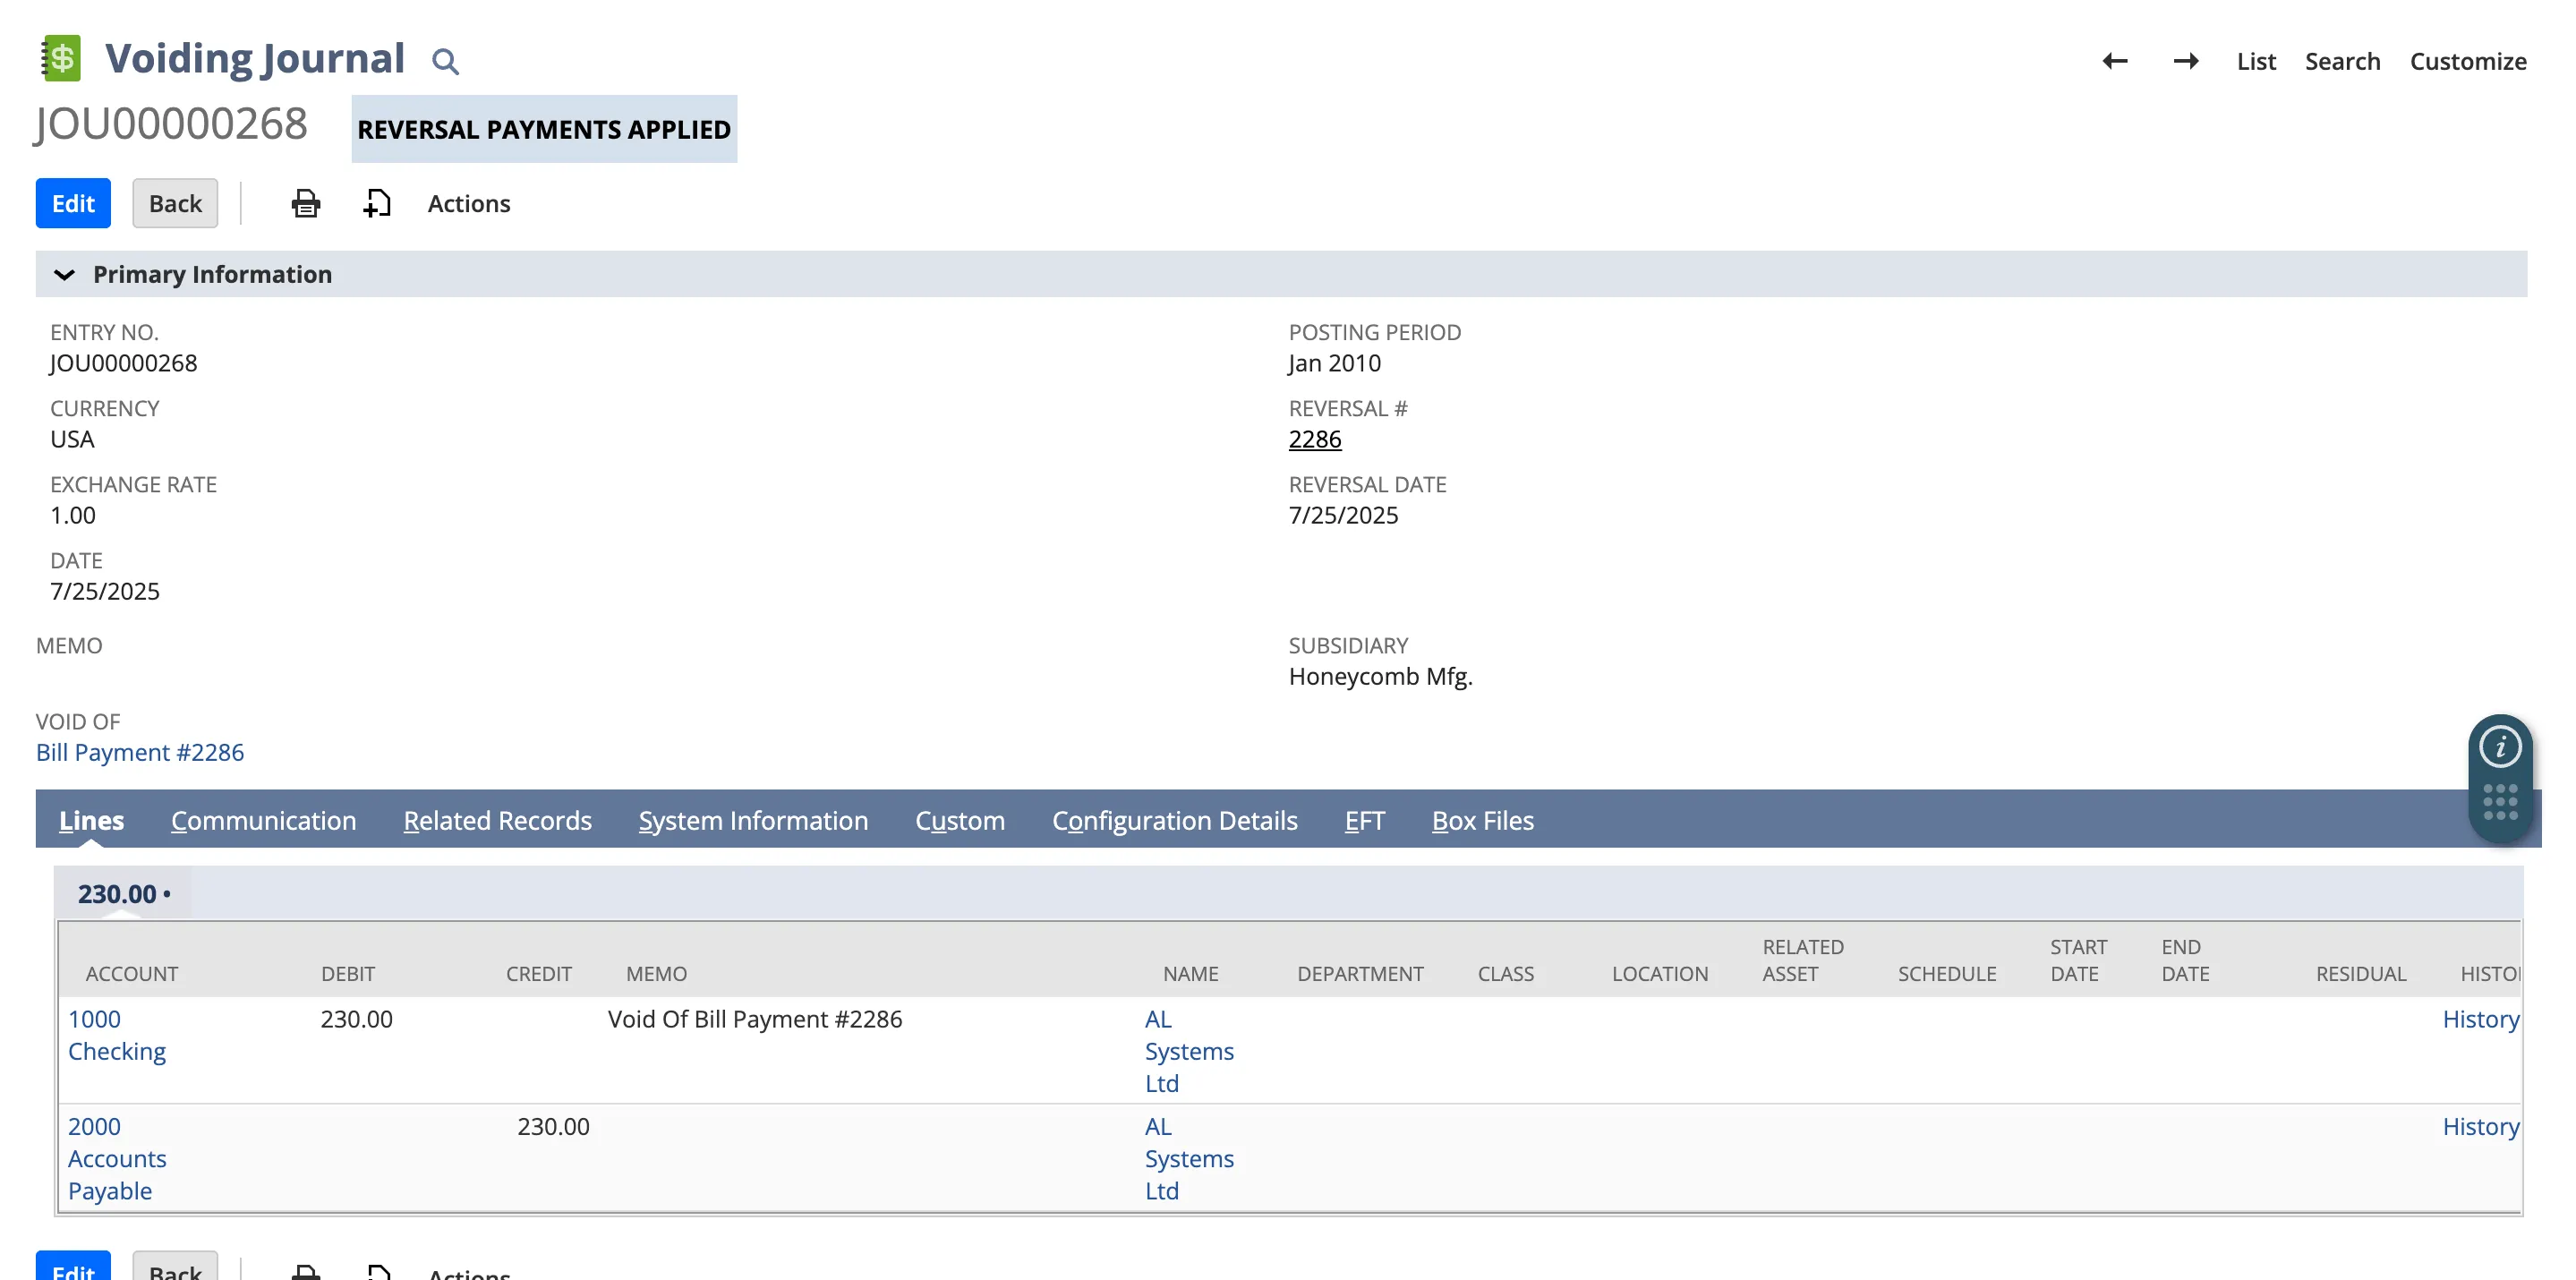
You'll receive a confirmation that the payment has been successfully voided.
Repay the Bill
Go back to the bills that were just voided and click on Make Payment for the relevant bill(s).
Ensure the To Be Printed checkbox is selected.
IMPORTANT: You may need to adjust the Bill Payment Date to match the date the check was issued.
Print Checks
Go to Transactions → Management → Print Checks and Forms. Then, select Checks.
On the Print Checks page, select the appropriate bank account (e.g., "1000 Operating"). Locate and select the bill payment you just created.
In the Check Number field, manually enter the original check number you recorded in Step 1, then click Print.
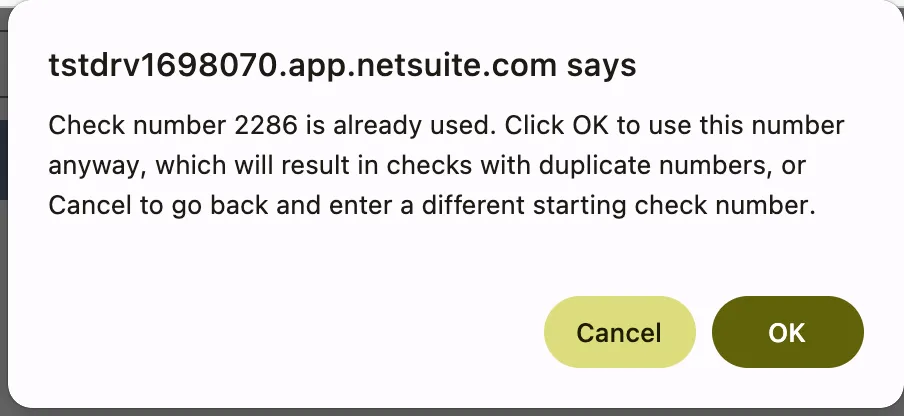
NetSuite will notify you that the check number is already in use. Click OK to proceed.
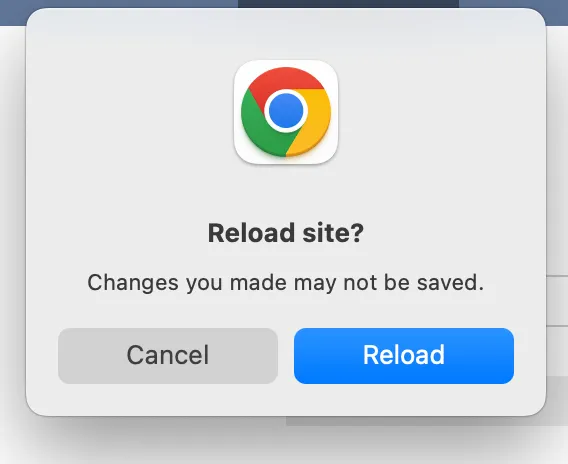
If a prompt asks you to reload the page, do not reload it; click Cancel.
Click Print again. A PDF of the check will open in a new tab or window.
Reprocess Positive Pay
Navigate to the Transmit page within your bank plugin. The reprocessed payment (showing the original check number) should now be visible. Select the checkbox for this item.
Click the Transmit button to resubmit the Positive Pay file to your financial institution.