Scheduled Payments (NetSuite)
Welcome to the Scheduled Payments feature. This feature allows you to schedule payments from within your ERP to be executed and sent to the bank on a chosen future date.
This guide will walk you through how to schedule your payments, giving you greater control over your cash flow and automating your payables process.
Scheduling a Payment
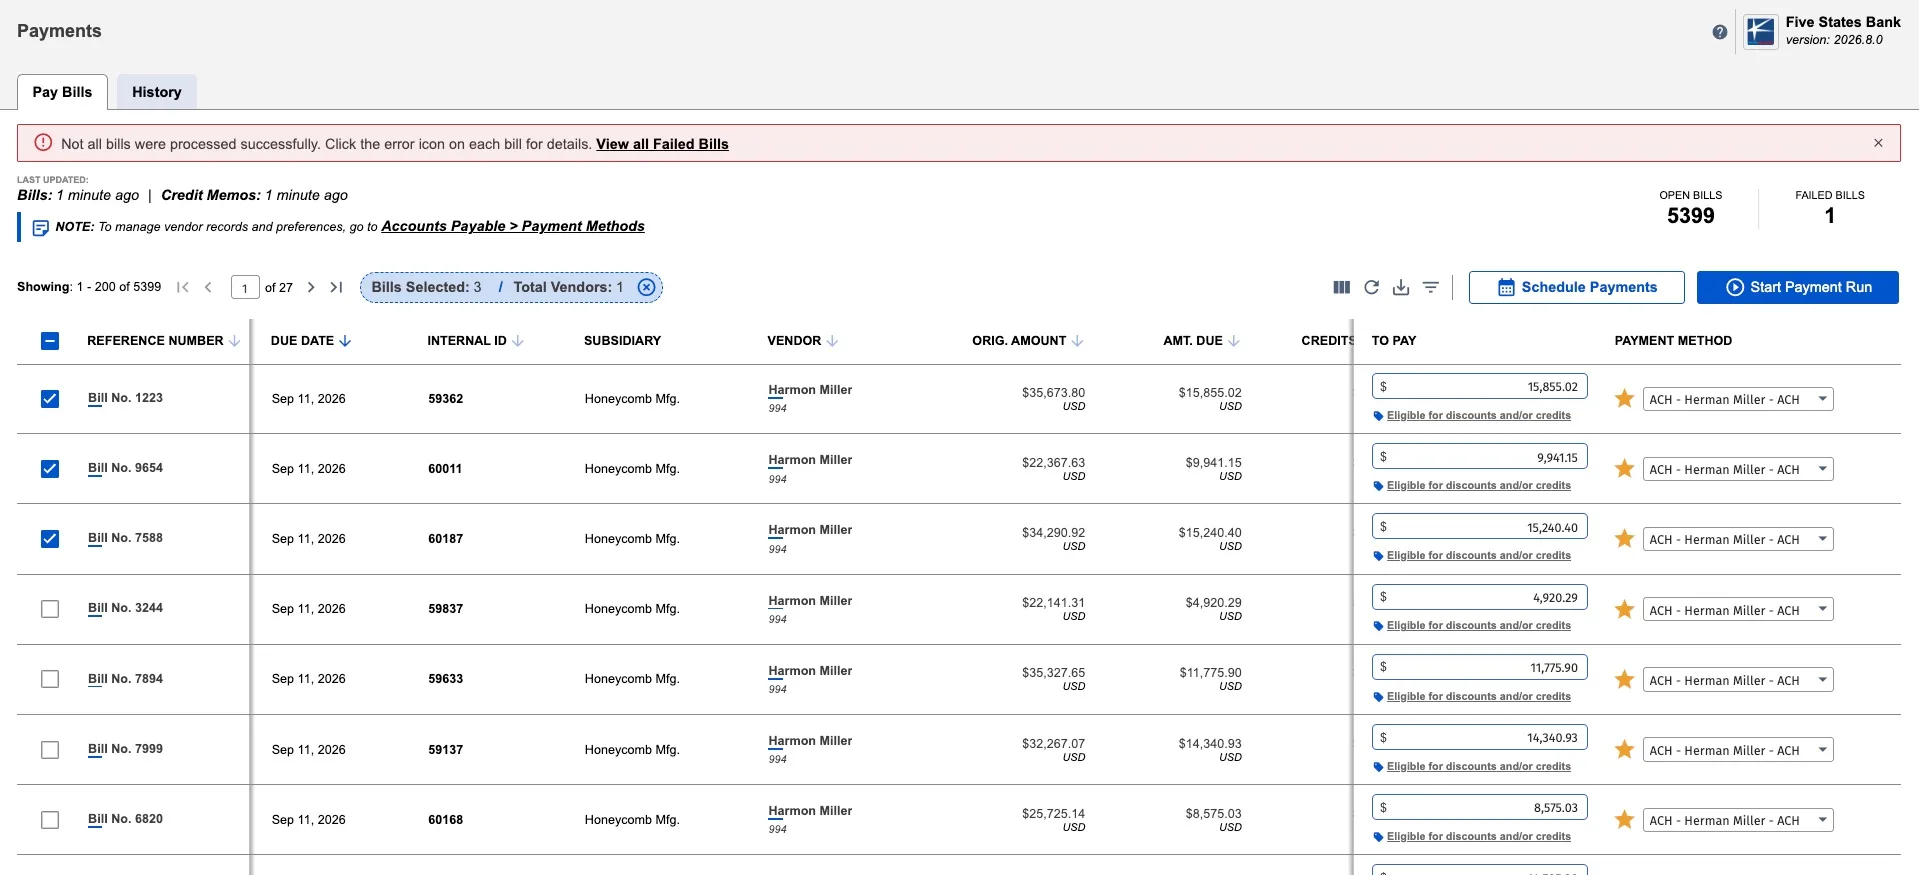
The process begins on the Payments page, where you will select the bills you wish to pay.
Select Your Bills & Initiate Scheduling
Start by selecting the bills you want to pay from the list. Once selected, the Schedule Payments button will become active. Click it to begin.
Select the Source Account
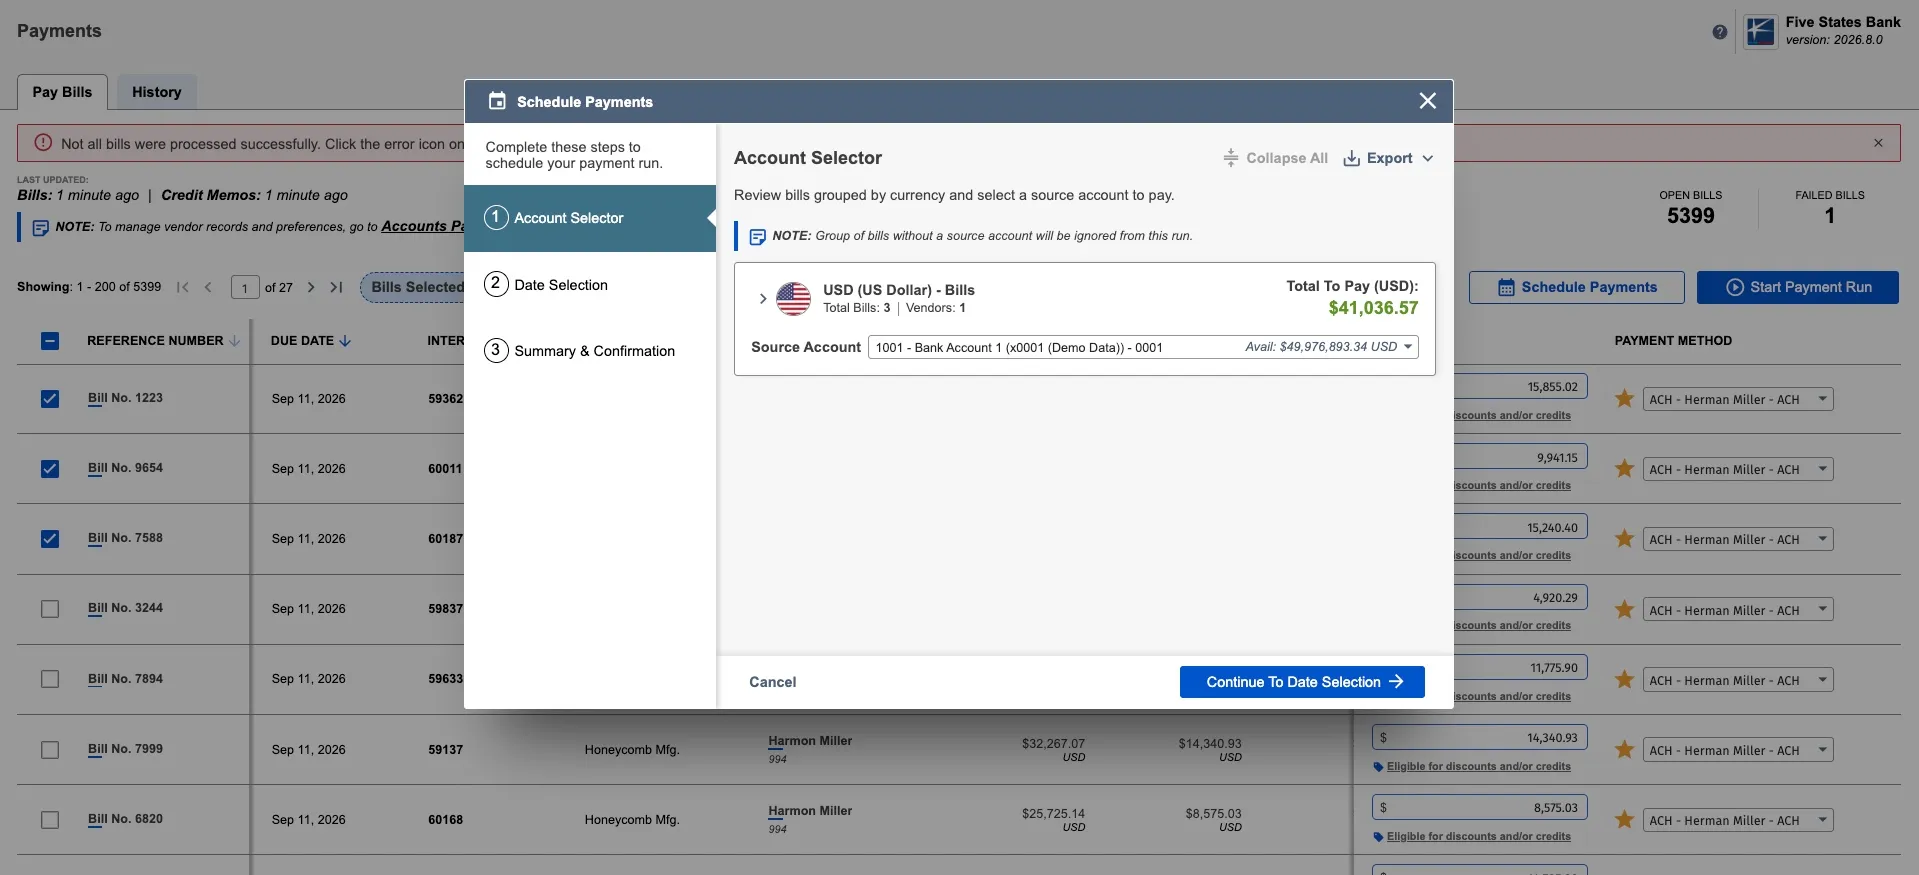
Proceed with the regular payment run step of selecting source accounts for the intended payment & click Continue to Date Selection to proceed.
Select a Processing Date
Here is where you can select your desired processing date. The calendar automatically disables and makes unselectable any dates that are weekends or already in the past from your bank's local timezone perspective.
Click on the Select Date input to begin.
Select your desired processing date.
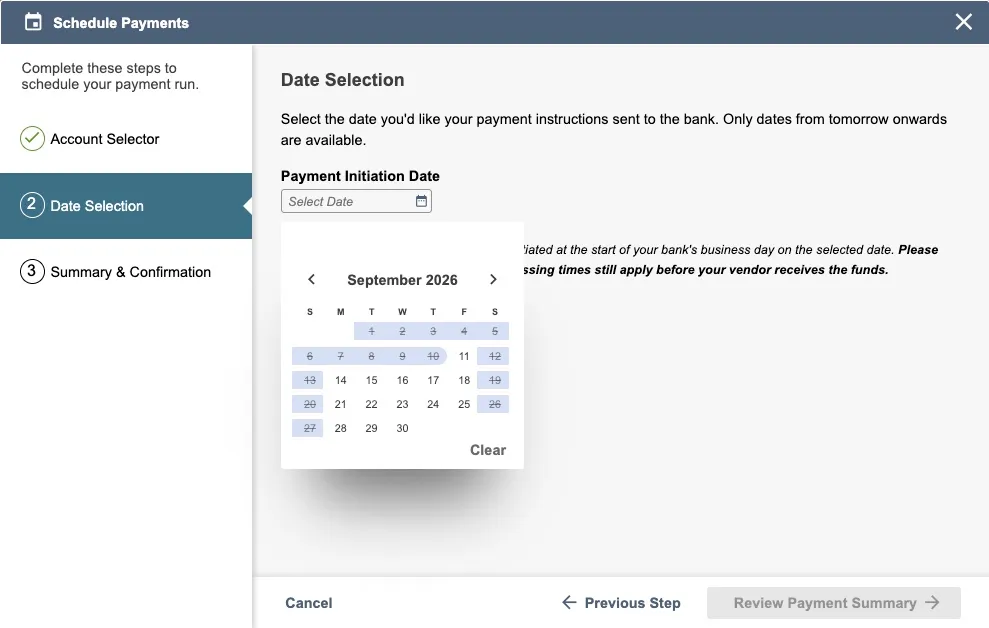
Click Review Payment Summary to continue.
Confirm Your Scheduled Payment
A final confirmation screen will appear, summarizing the total payment amount, the number of bills and vendors, and the future date you have chosen for processing.
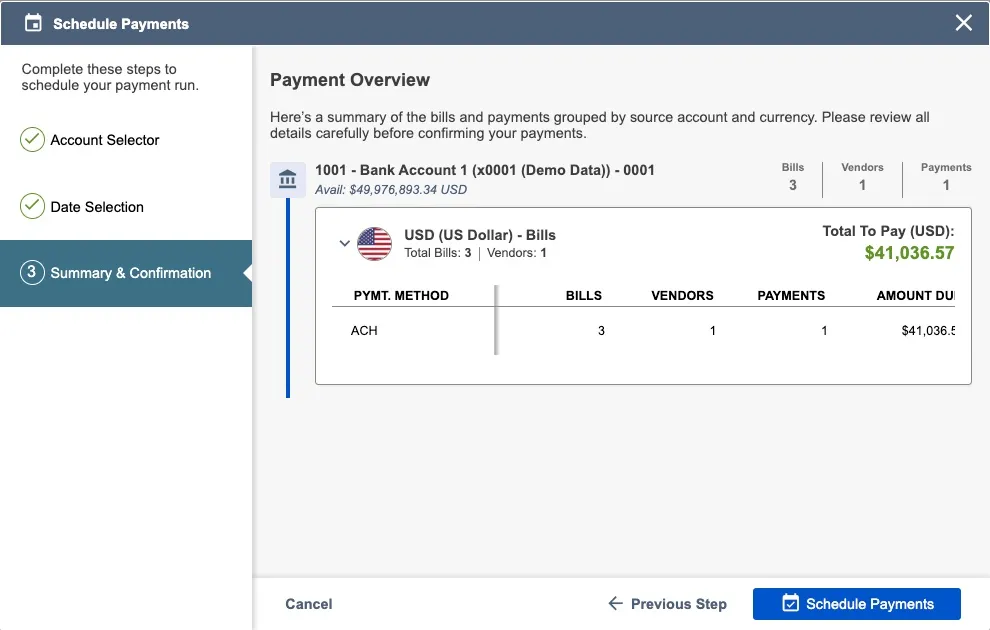
Click Schedule Payments to complete the process.
Managing Your Scheduled Payments
You can easily view and manage all your upcoming payments after they have been scheduled.
Viewing Scheduled Payments
You can find all your upcoming payments on the main Payment History page.
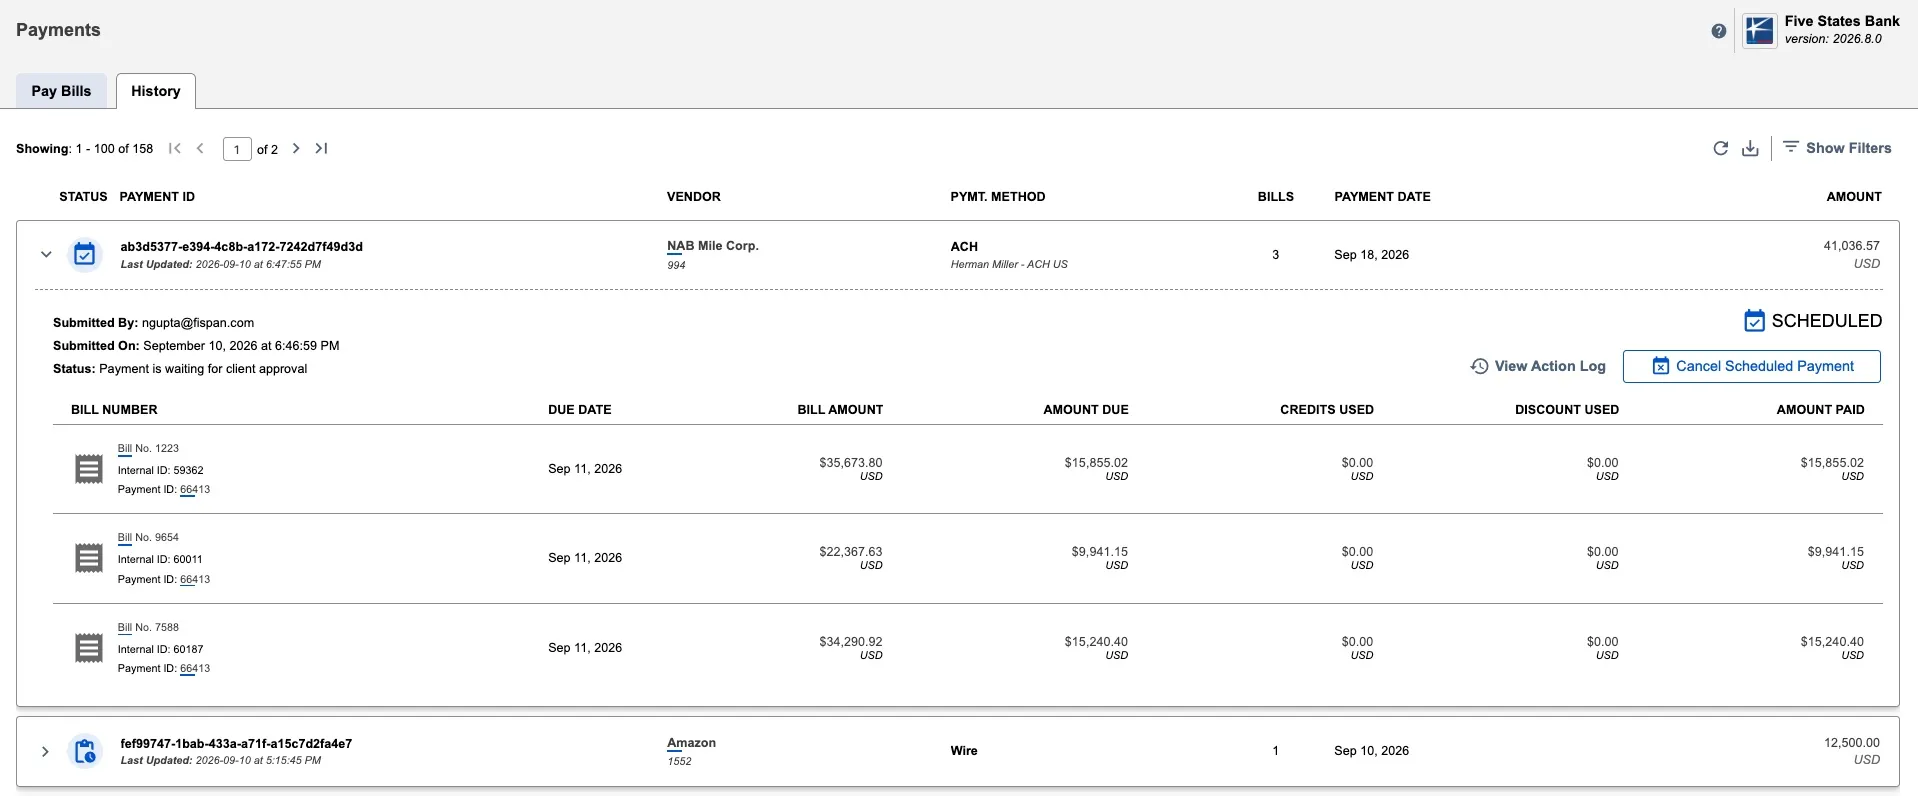
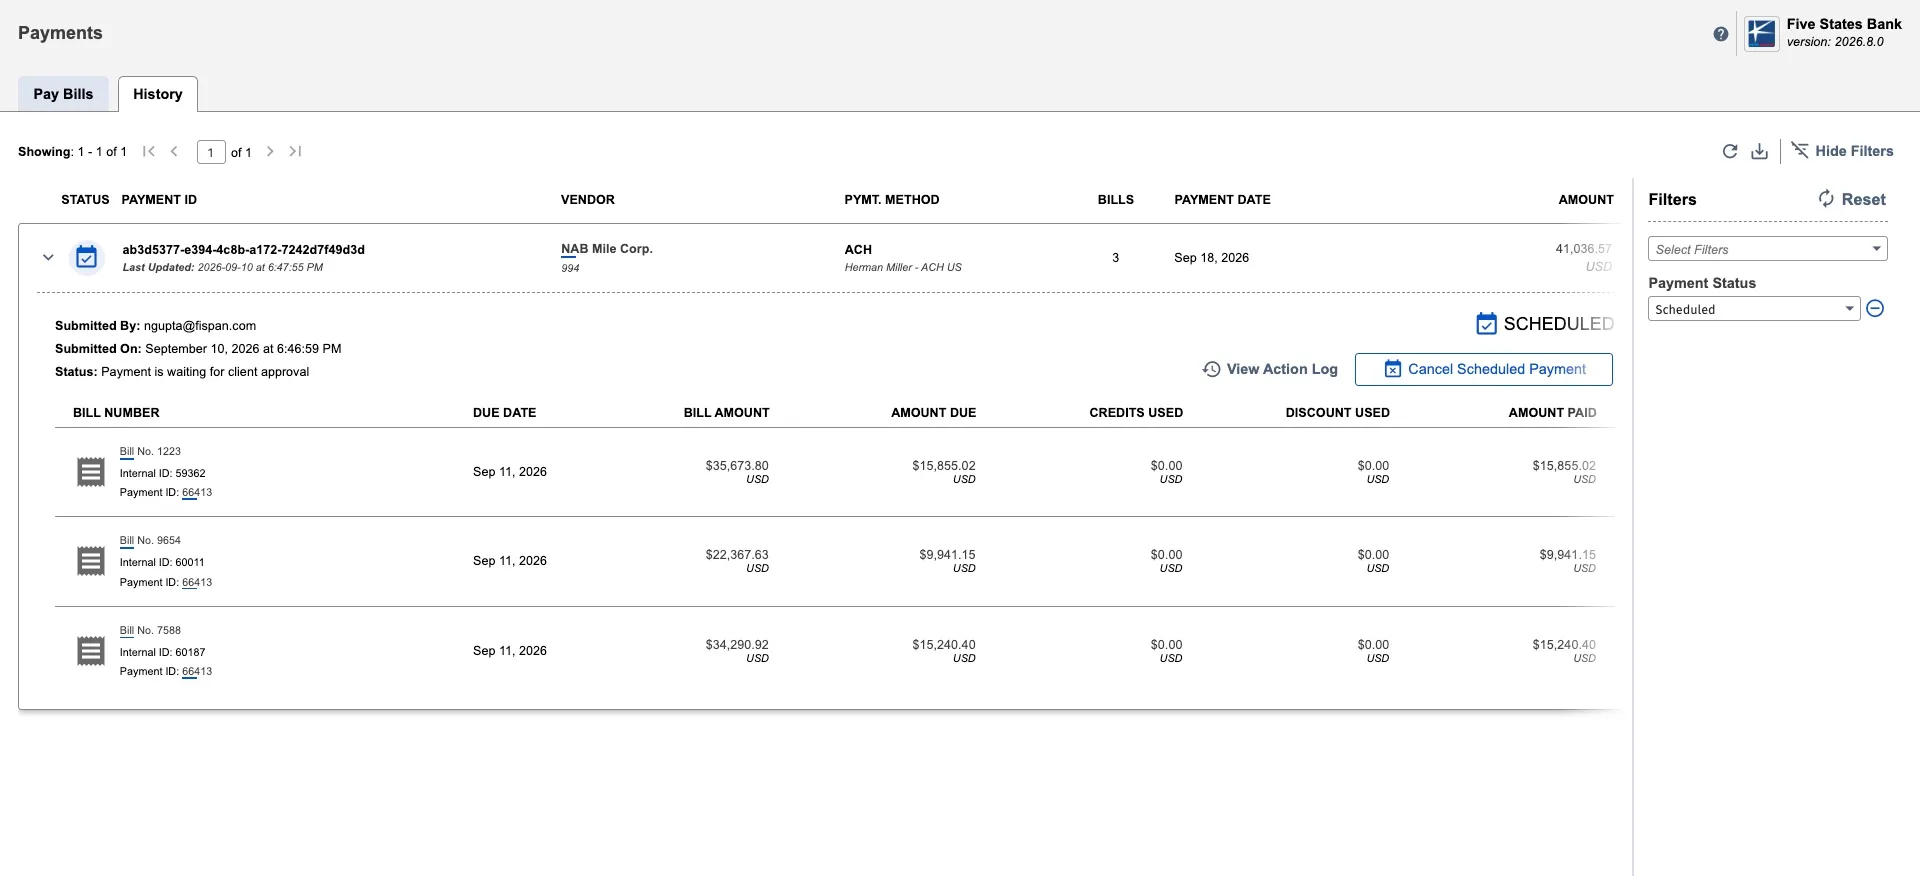
To see only your scheduled payments, click on the Show Filters button, select the Payment Status option, and select Scheduled.
Canceling A Scheduled Payment
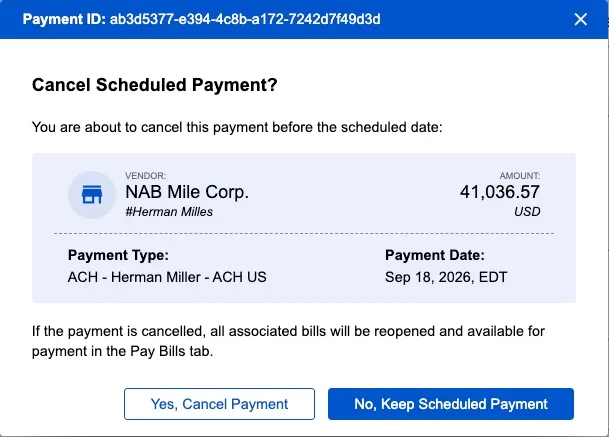
If you need to cancel a payment before its processing date, you can do so directly from the Payment History page.
Find the payment you wish to cancel and expand the payment content.
Click the Cancel Scheduled Payment button.