Payments (NetSuite)
NOTE: This guide is for users using Accounts Payable (New) module.
Paying bills in NetSuite allows you to remain within your ERP system without needing to access your bank account separately. The new Payments page offers improved performance, multi-page bill selection, support for partial payments and many more features. You can pay a bill individually or process them in groups for improved efficiency.
Pay a Bill
Follow these steps to pay your bills with the plugin.
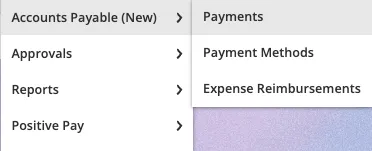
Navigate To Payments Page
Set Payment Methods (If Needed)
Before selecting bills to pay, ensure vendors have payment methods set.
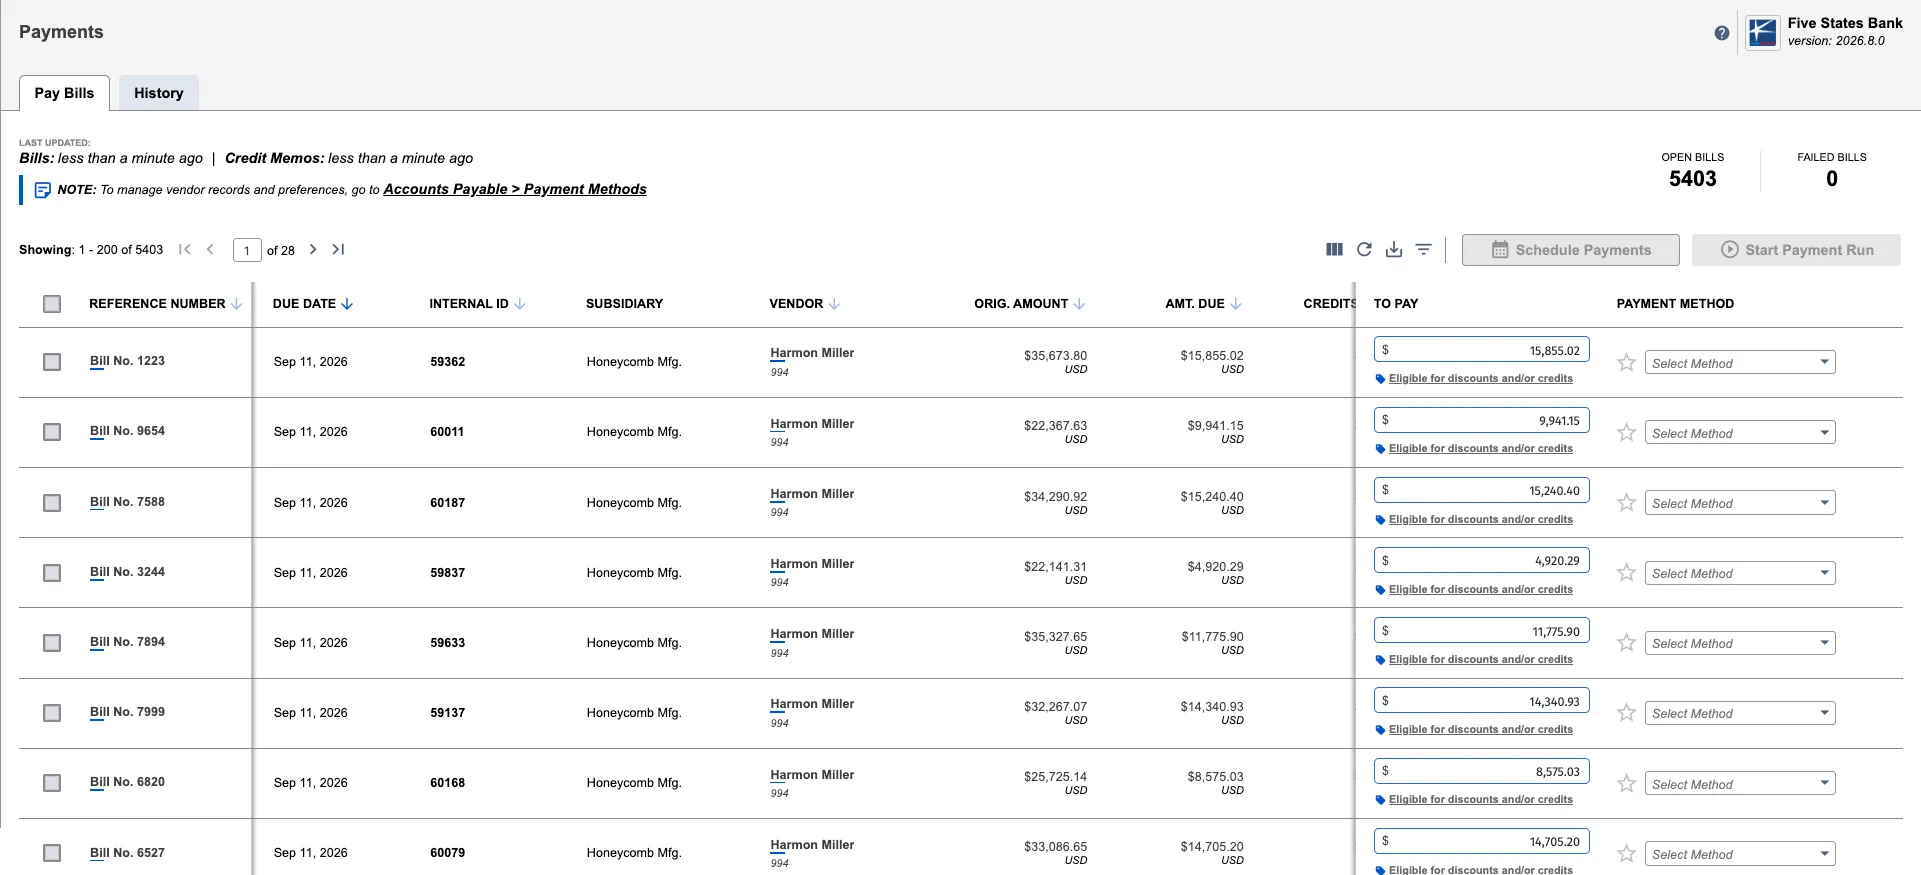
If a vendor doesn't have a default payment method, you can:
- Select a payment method from the Payment Method column for individual bills
- Click the star icon next to a payment method to set it as the default for that vendor
- Manage all vendor payment methods via the Payment Methods page
Select Bills To Pay
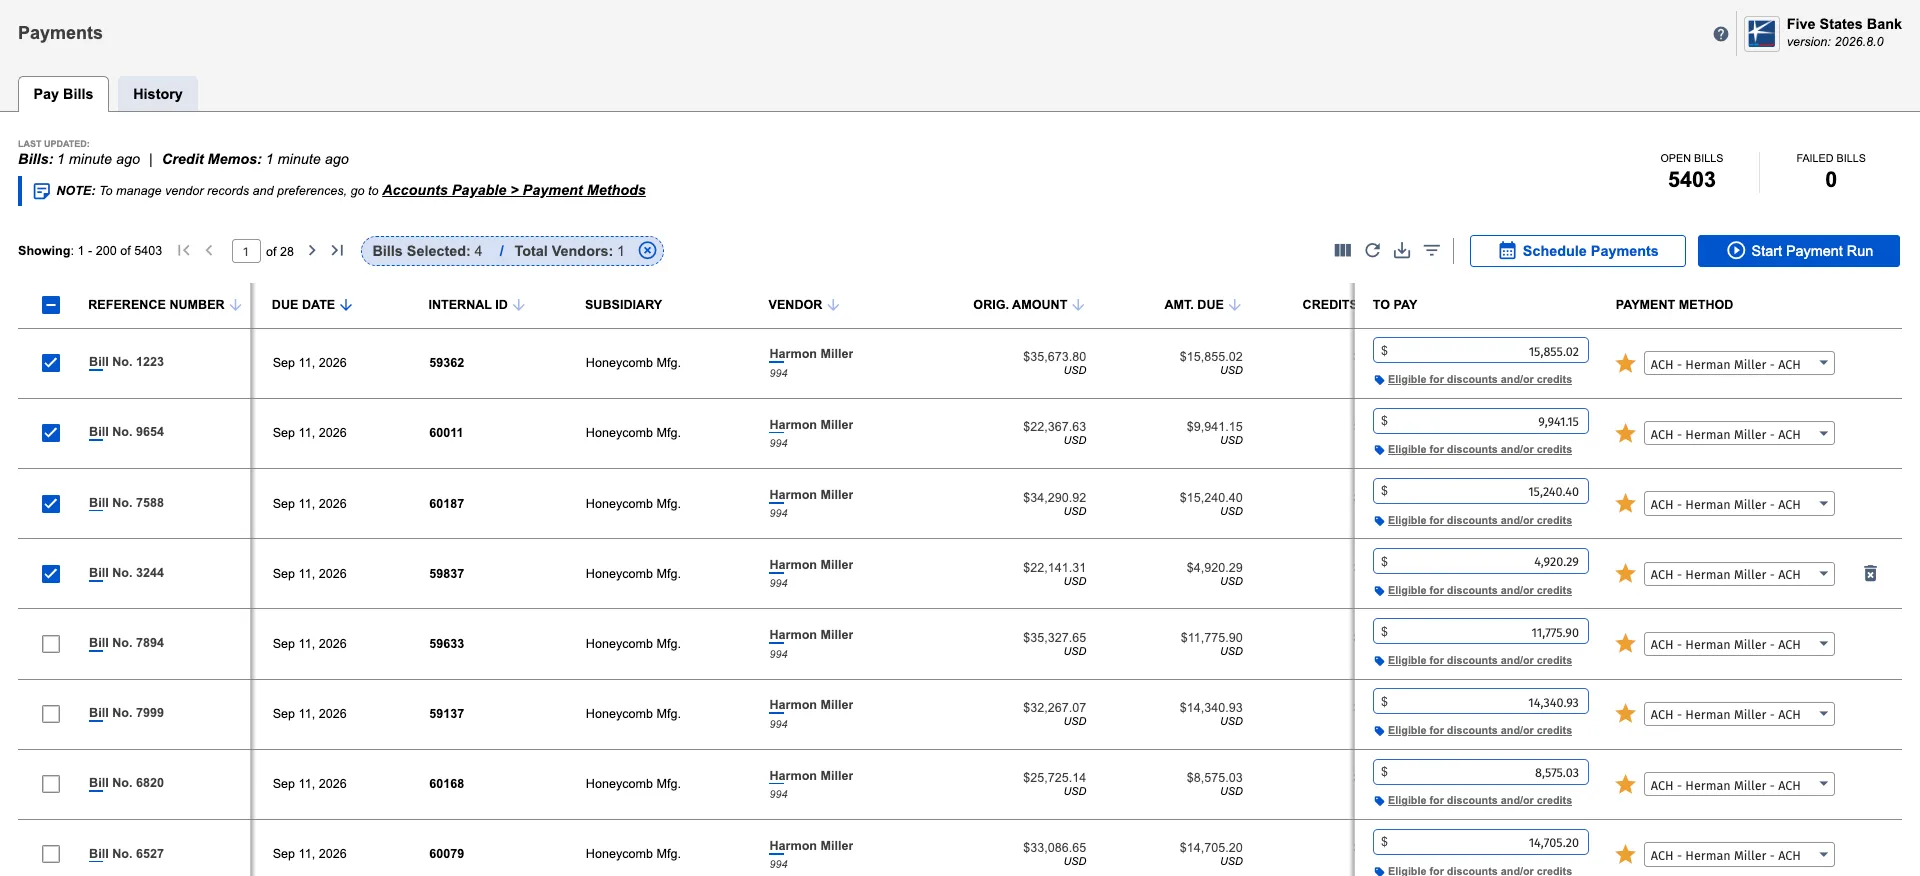
The Payments page displays all Open bills in your company.
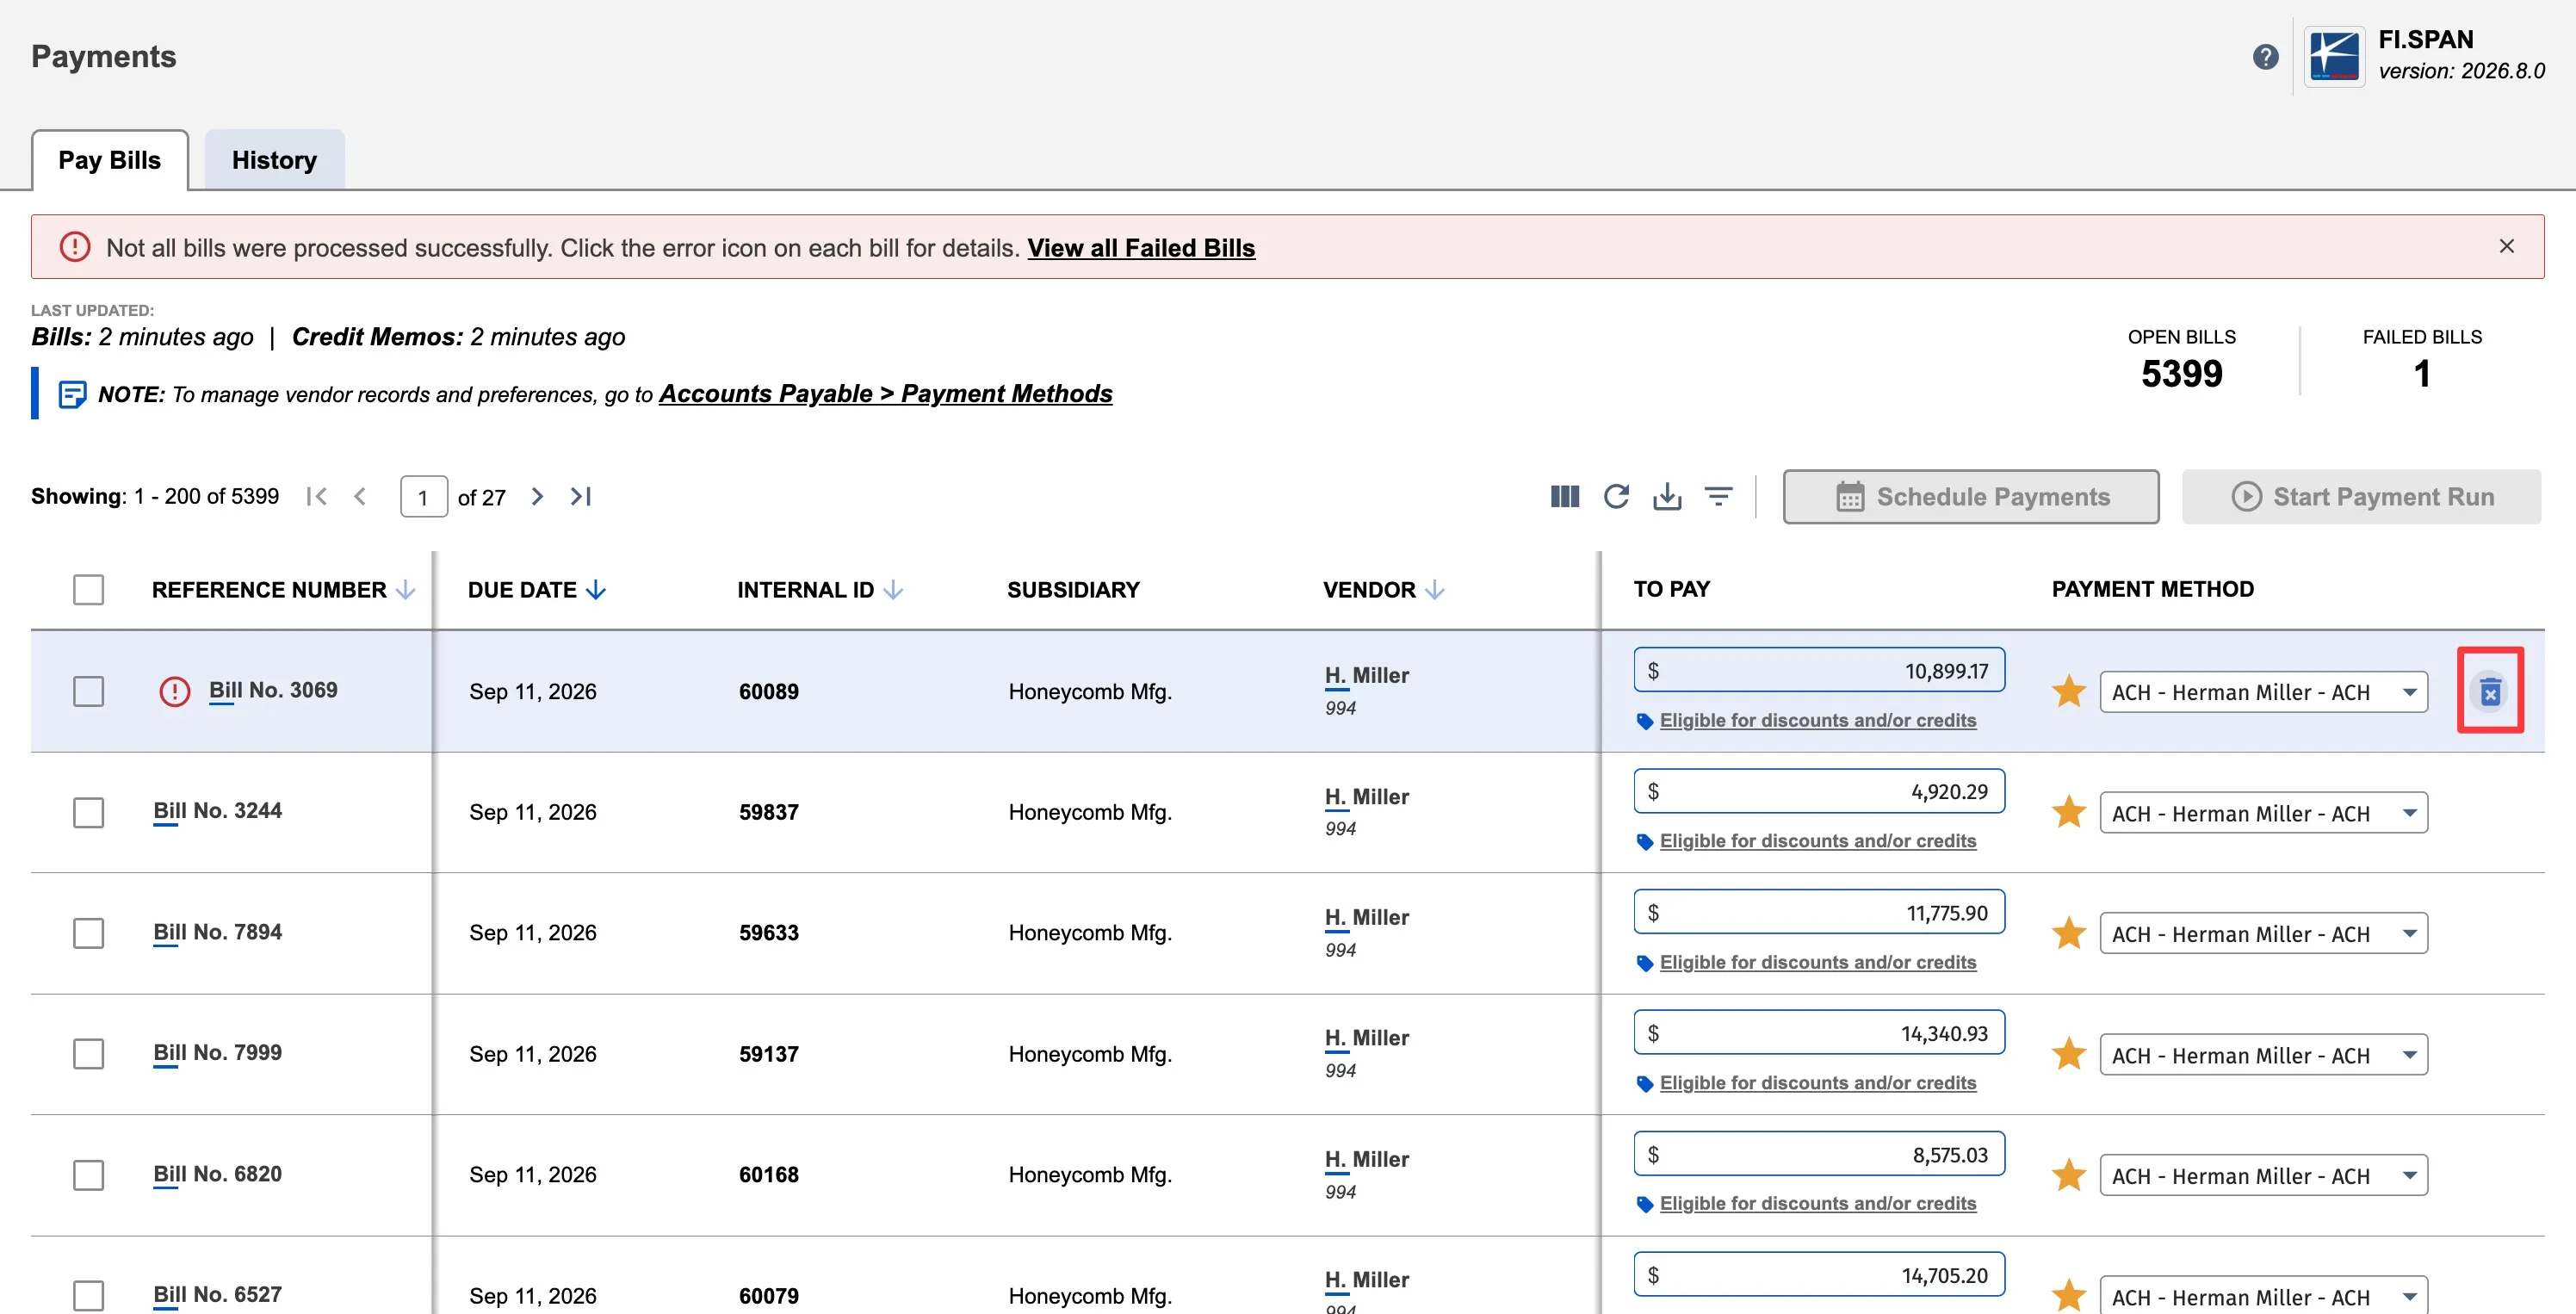
Failed bills: If you have previously failed payments, a banner will appear at the top of the page. Click the banner to filter and view only failed bills.
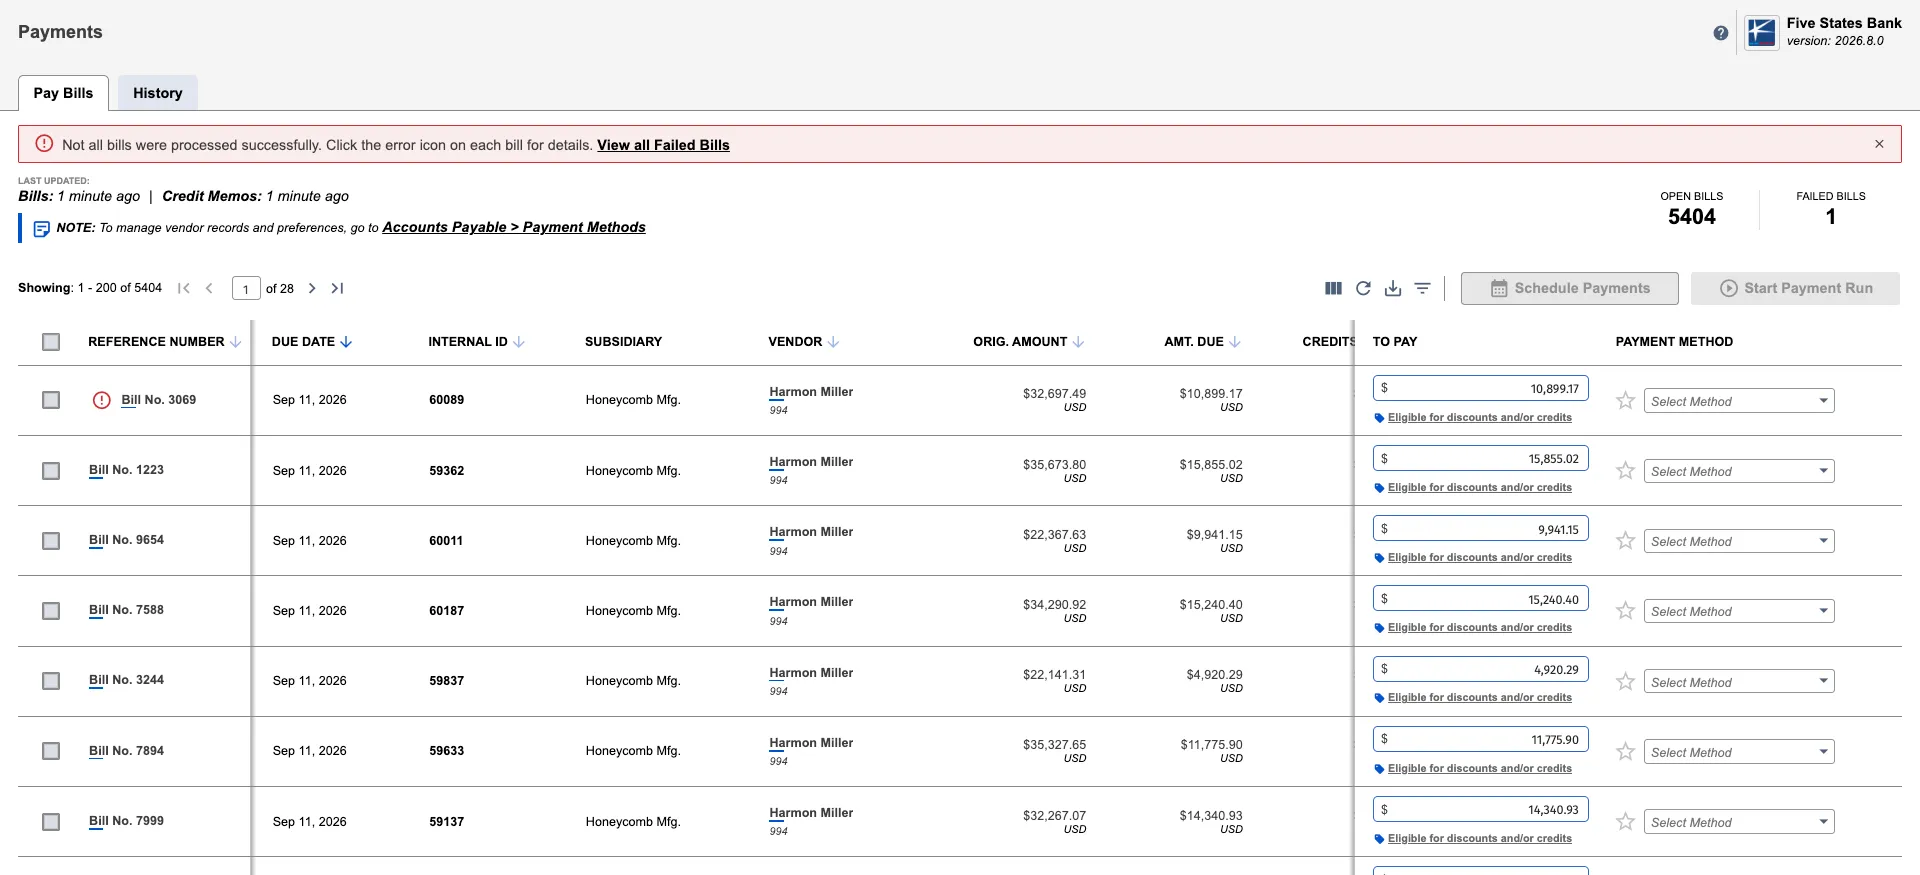
Finding and viewing bills:
- Use filters to narrow down bills by any column (vendor, amount, due date, etc.)
- Customize which columns are visible to focus on the information you need
- Sticky columns keep key information (like Bill Reference Number) visible while scrolling horizontally
Once you have set of bills ready to be paid, select the bills you want to pay using the checkboxes on the left.
Review Selection Summary
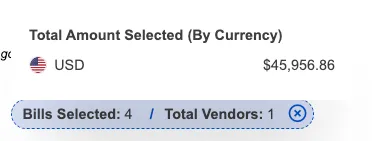
As you select bills, a Selection Summary appears at the top of the list. Hover over this panel to view the total and currency breakdown for your selected bills and vendors.
You now have two options for processing your selected bills: select Start Payment Run for immediate processing or Schedule Payments for a future date.
Start Payment Run
If you've decided to go with the immediate processing option, select Start Payment Run to initiate payments immediately.
With multi-source capability, you can include bills across various currencies and bank accounts within a single batch. The system intelligently bundles these payments, eliminating the need for multiple separate runs.
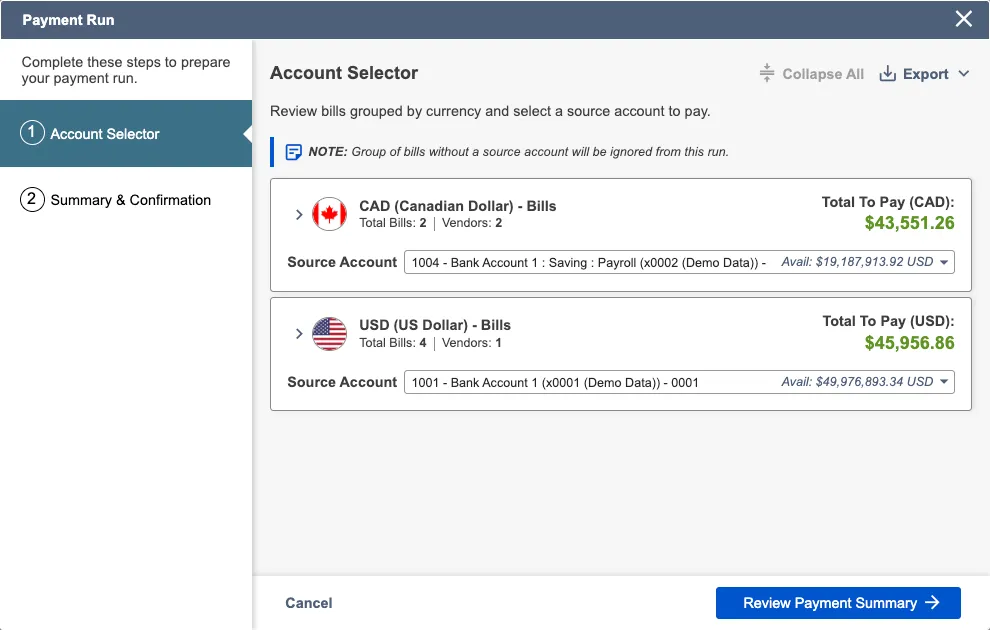
Select the account from the dropdown menu. Before proceeding, confirm that the number of bills, payments, and amounts are correct, and ensure all applicable credits and discounts have been applied.
Click Review Payment Summary to continue.
Review Payment Run
Once you have validated your bills to be paid, select Confirm.
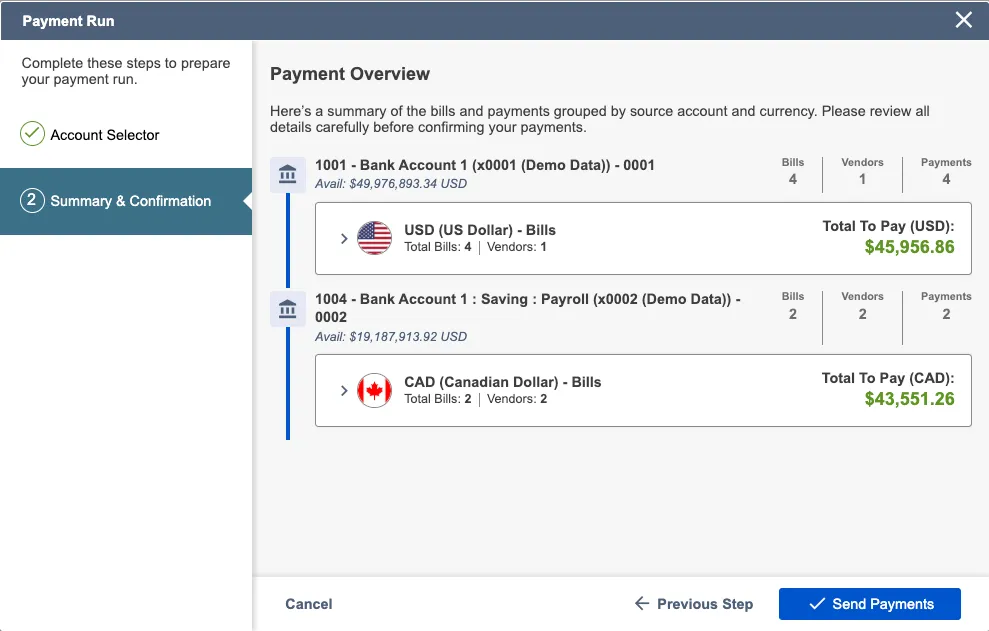
Confirm Payment Run
Once submitted, you will receive a confirmation dialog.
Navigate to the History tab to track the status. Scheduled payments will appear here with a distinct "Scheduled" status until they are processed.
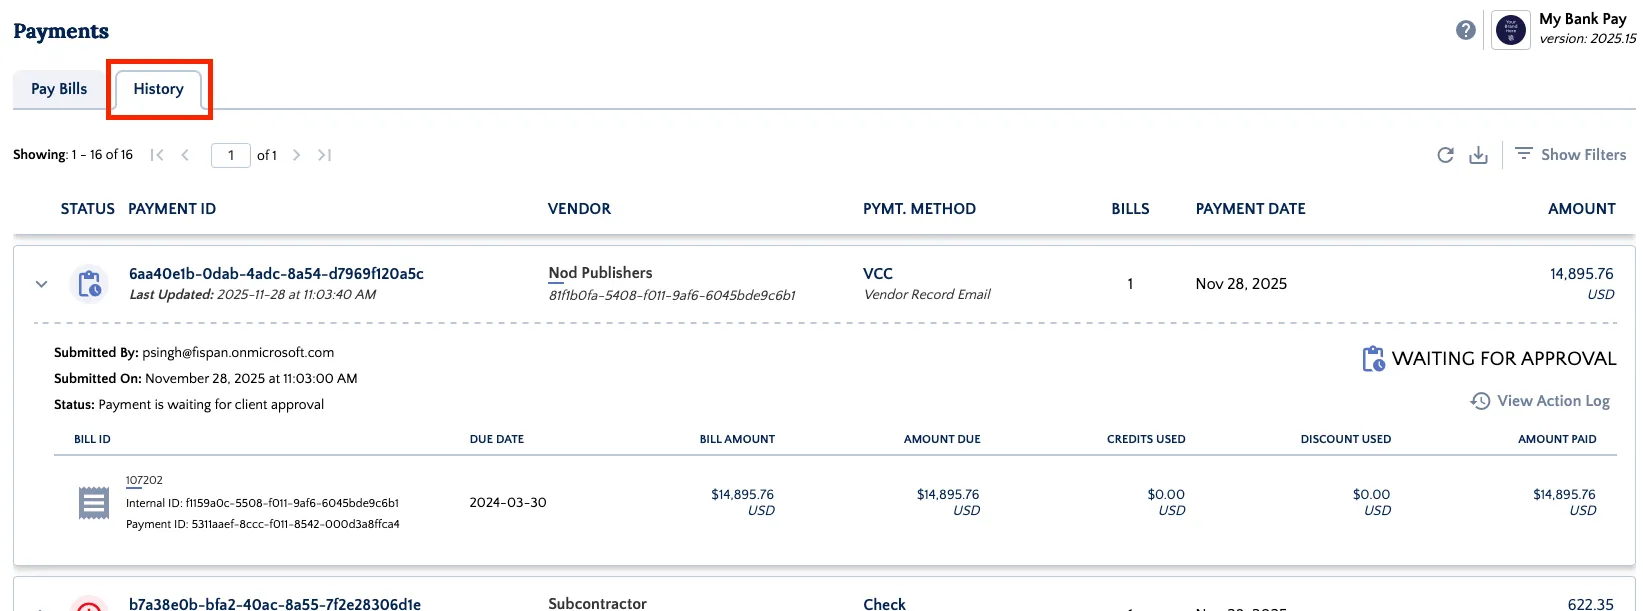
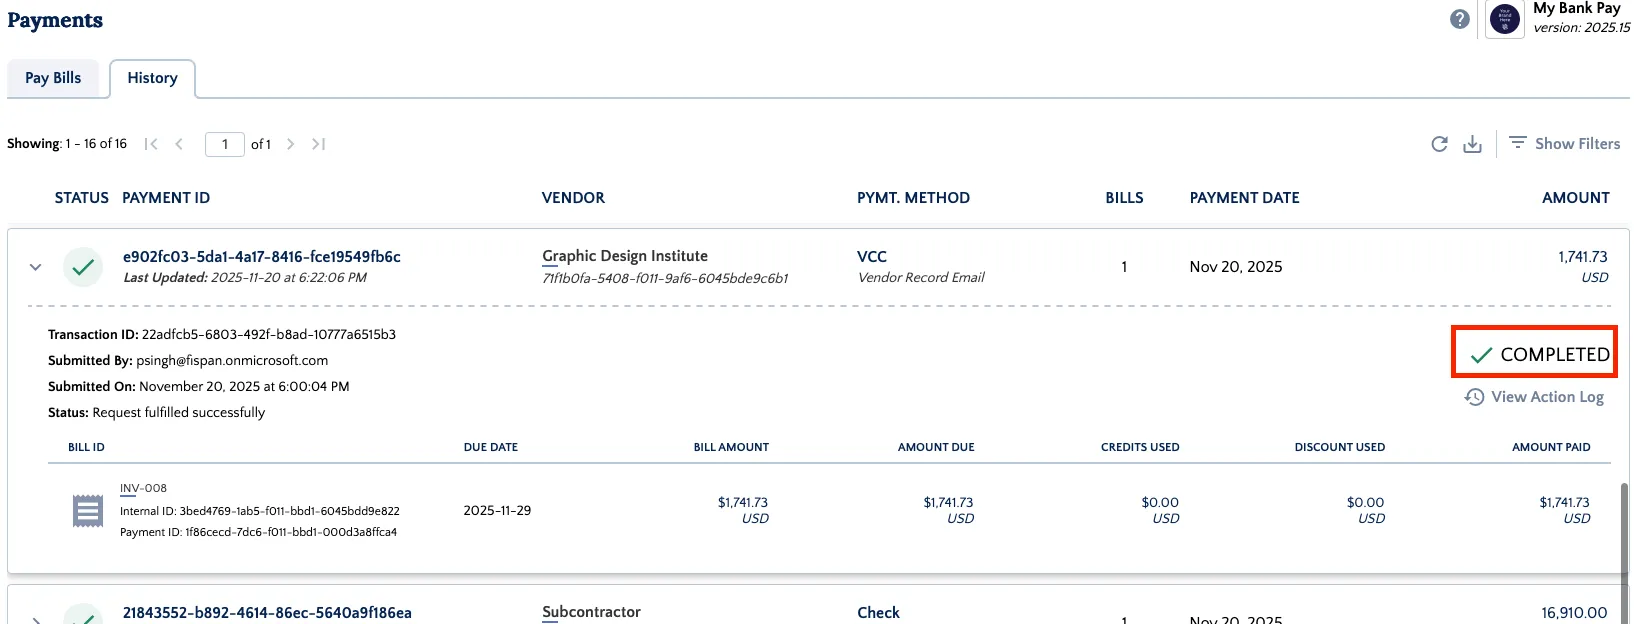
The status will appear as Received until the payment has been Sent for Processing. Once the payment is complete, the status will display as Completed
.
If any payment fails during the run, a banner on the Payments page will alert you immediately.
A failed bill remains open on the Payments page and can be resubmitted for payment.
Paying Grouped Bills
Grouped bills allow you to combine multiple bills from the same vendor into a single payment. This reduces the number of individual transactions and simplifies remittance.
Follow these steps to group bills into a single payment.
Enable Combined Bills for Vendor
Before you can group bills, you must enable the Combined Bills setting for the vendor.
- Open the plugin and click Payment Methods
- Select the Vendors tab
- Find the vendor you want to enable grouped bills for
- Toggle Combined Bills to ON
You can enable this setting for as many vendors as needed. Once enabled, all bills from that vendor will be eligible for grouping
Navigate to Payments Page
On the Pay Bills page, select all the bills you wish to pay, and click Start Payment Run.
The Confirmation Payment window appears. You can select the Source Account and verify the number of bills against payments. Click Send Payments to send the payments.
When grouped payments are enabled for a vendor with multiple bills, the total number of payments will be less than the number of bills being paid.
After clicking Send Payments, your payment will begin transmitting.
Confirm Payment Run
Once submitted, you will receive a confirmation. Navigate to the History tab to track the status.
The status will appear as Received until the payment has been cleared. Once the payment is complete, the status will display as Completed.
If any payment fails during the run, a banner on the Payments page will alert you immediately.
A failed bill remains open on the Payments page and can be resubmitted for payment.
NOTE: If using remittance advice, enabling the Combined Bills function means only one remittance email will be sent. This email covers all the multiple bills that were grouped into a single payment.
If you do not enable this feature, each paid bill is treated as a unique, separate payment. This results in multiple payments being created and, consequently, multiple remittance emails being sent to the vendor.
Viewing Failed Bills
If you have previously failed payments, a banner will appear at the top of the Payments page alerting you to failed bills.
Failed bills display an error icon (⚠️) before the Bill Reference Number. Click the icon to open a popup showing the specific error details and reason for failure.
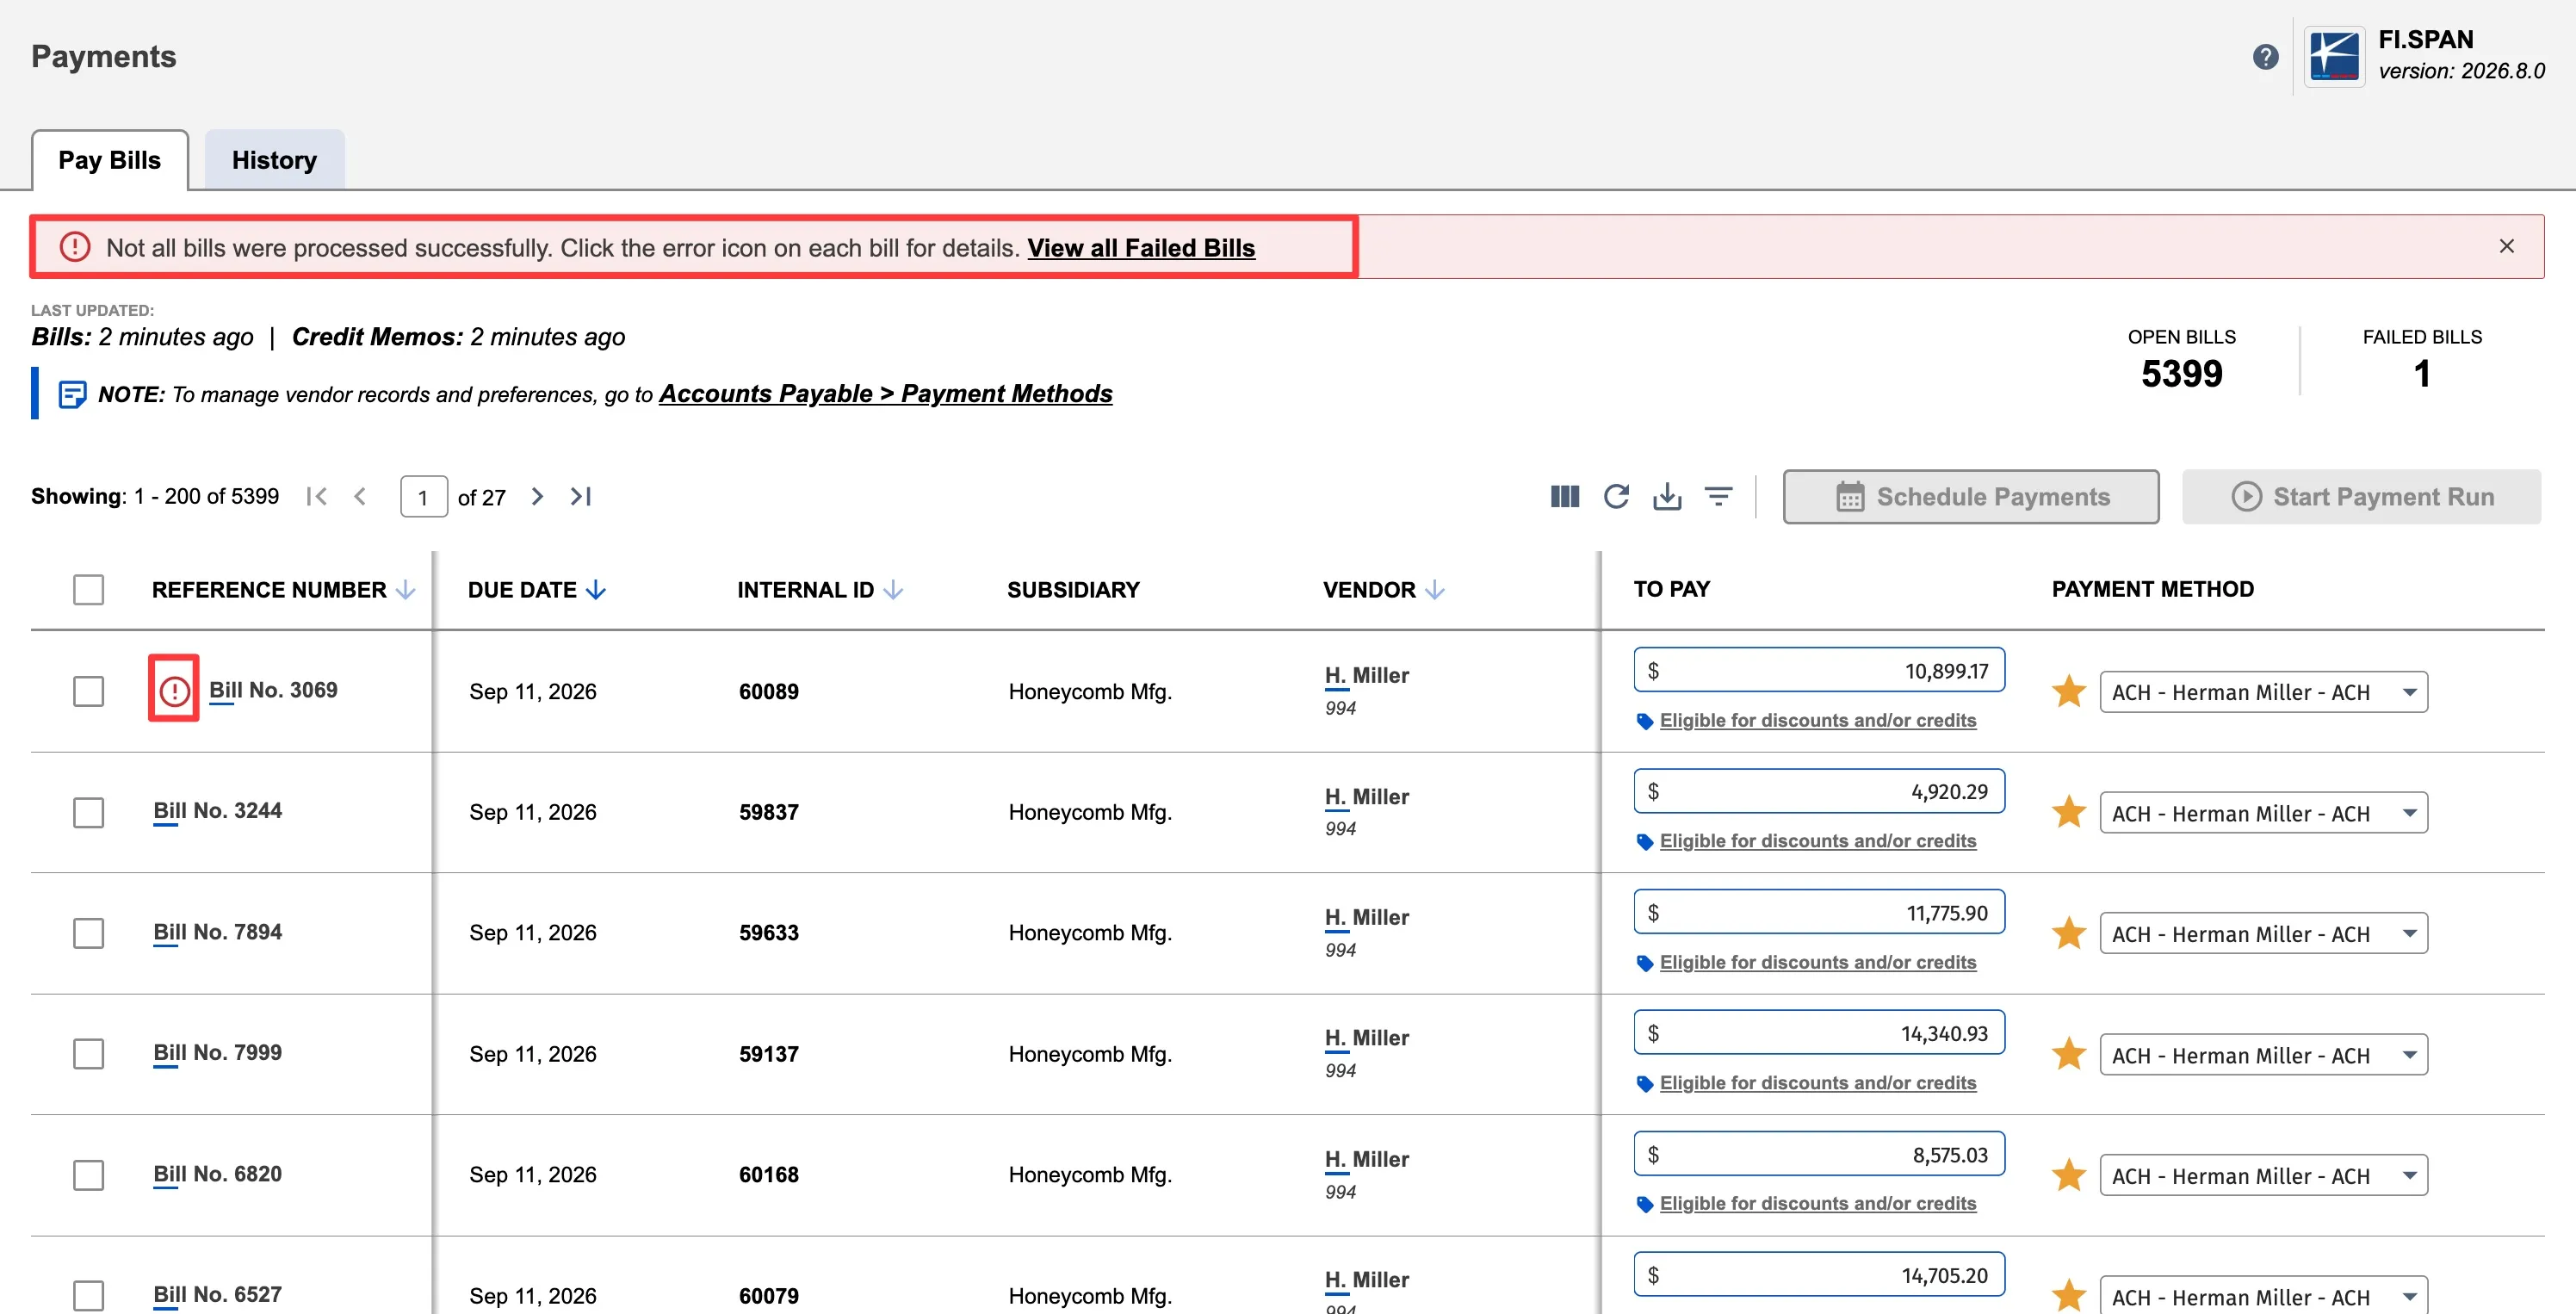
To view failed bills:
- Click the "View failed bills" link in the banner at the top of the page
- The page will filter to show only bills with failed payment status
- A blue informational banner confirms you're viewing failed bills
- To return to viewing open bills, click the "View open bills" link in the banner
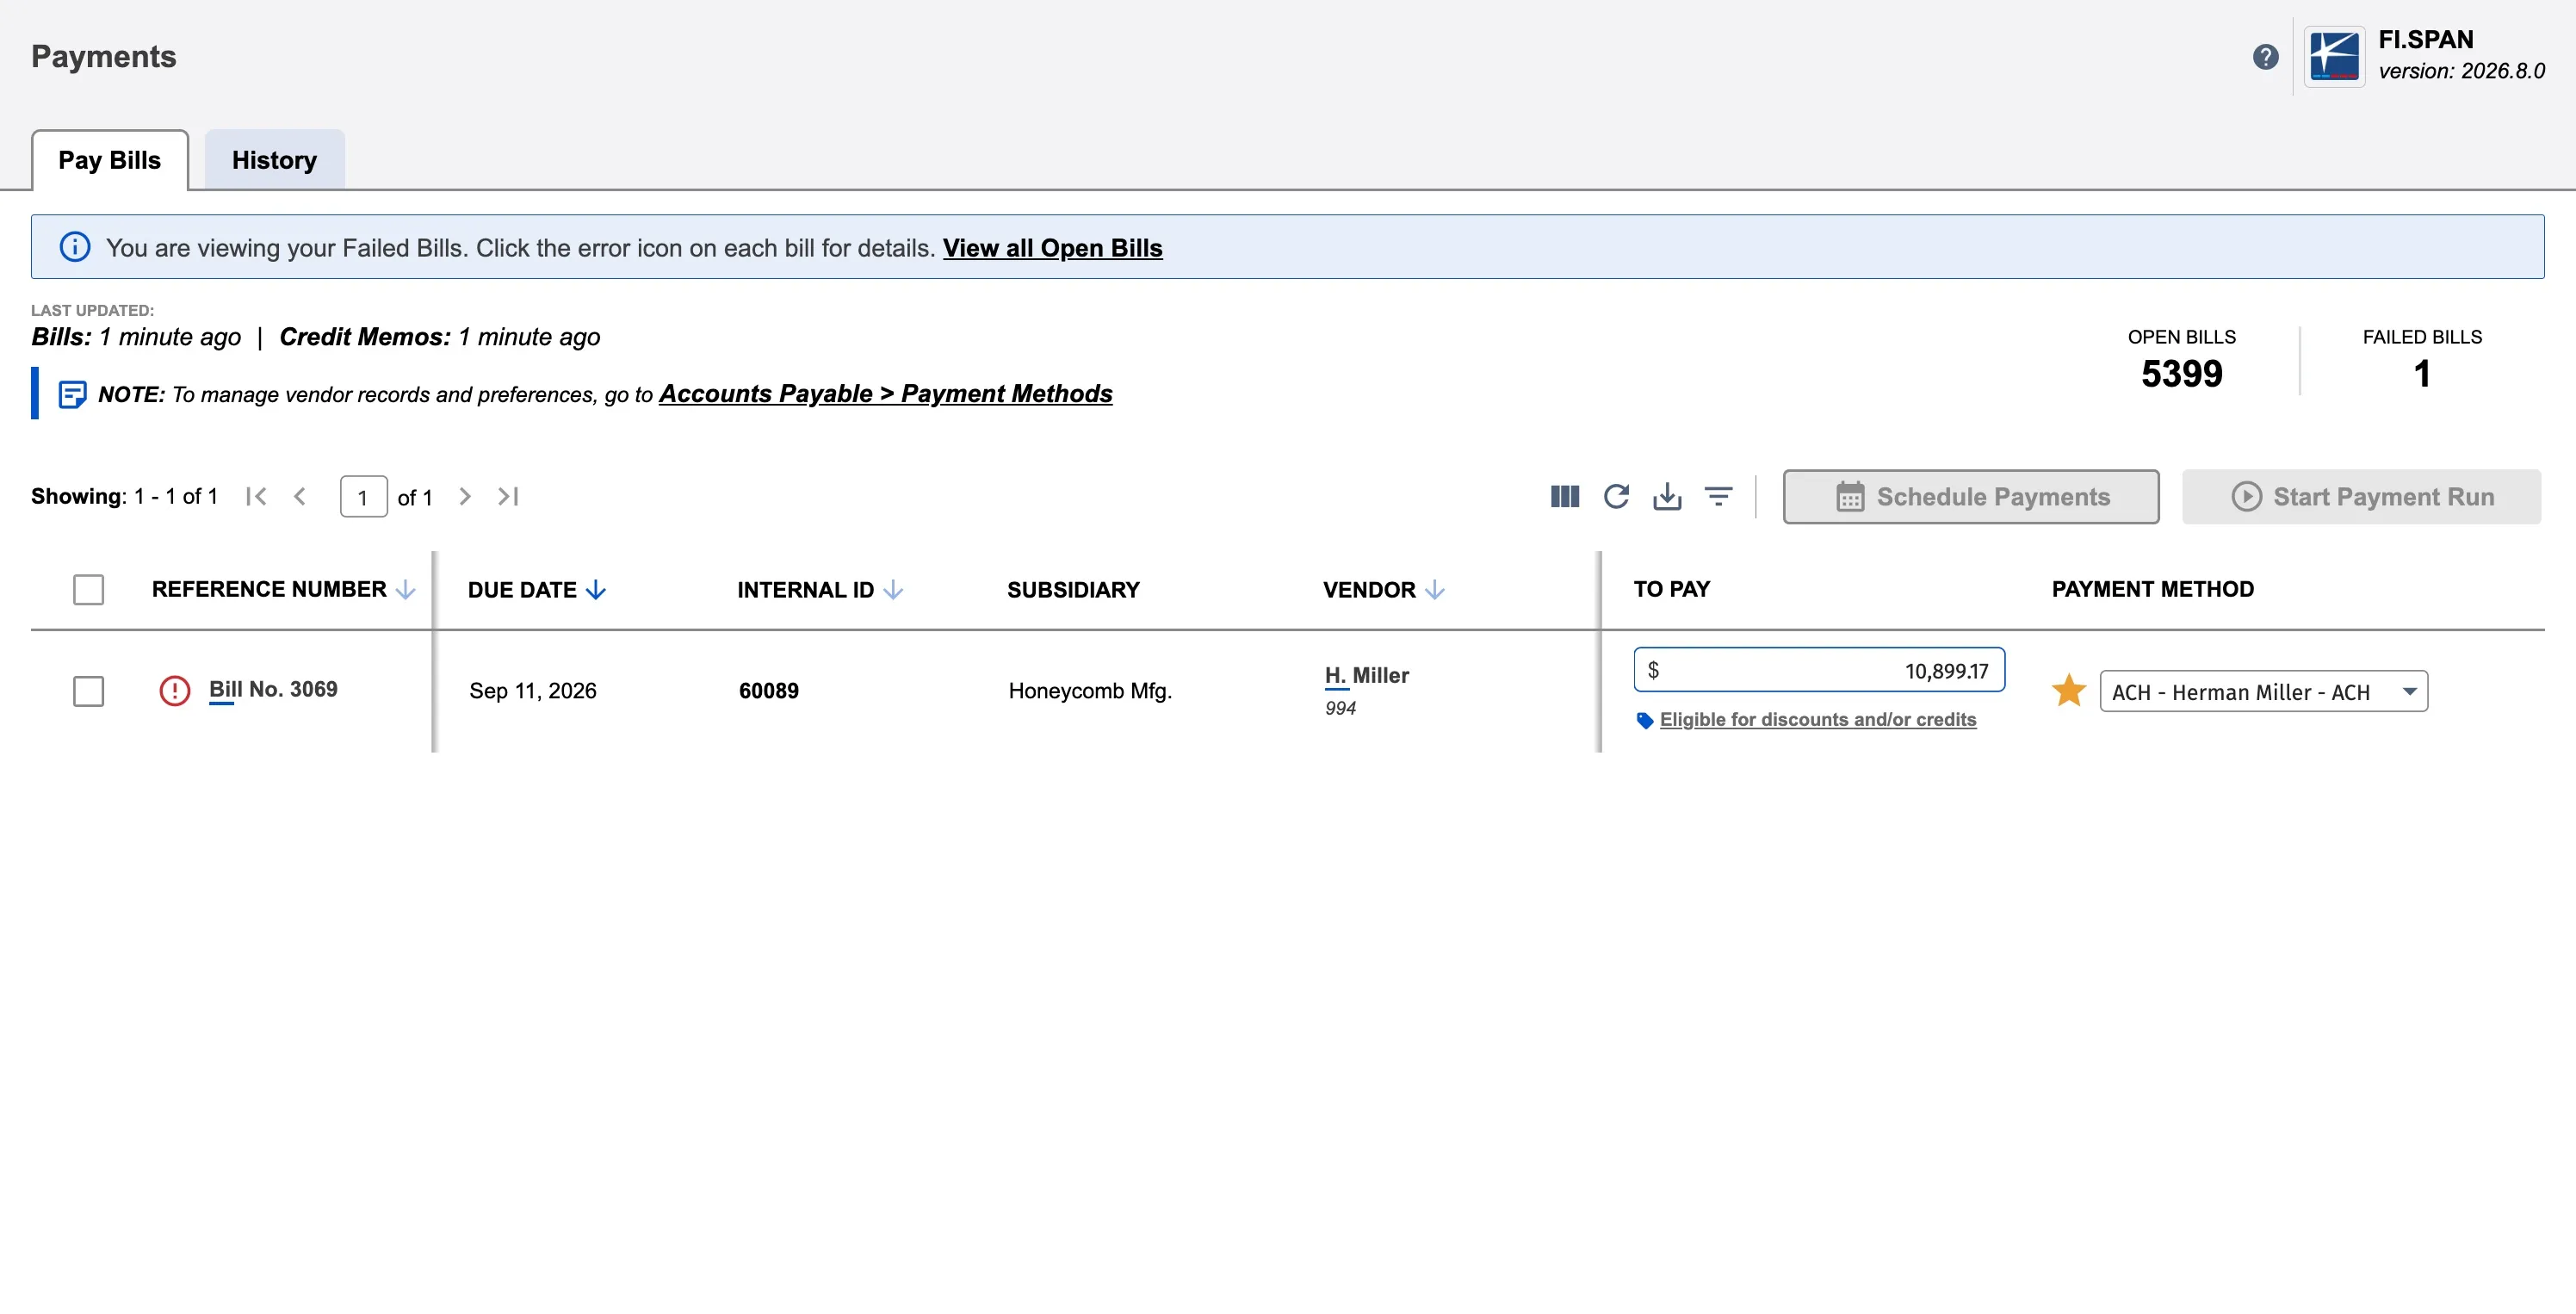
Retrying Failed Bills
A failed bill remains open on the Payments page and can be resubmitted for payment:
- Switch to the failed bills view using the banner link
- Click the error icon next to the Bill Reference Number to open the error details popup
- Review the error message to understand why the payment failed
- Correct any issues (e.g., update payment method, verify vendor bank account)
- Select the bill using the checkbox
- Click Start Payment Run to retry the payment
- Follow the normal payment submission process
Deleting or Excluding Bills
You can control which bills appear on the Payments page. Delete individual bills temporarily, or exclude all bills from a specific vendor permanently.
Deleting Bills from Payment Runs
Remove a bill from the Payments page without deleting it from NetSuite.
To delete a bill:
- Find the bill you want to remove on the Payments page
- Click on the garbage icon on the right side of the bill row
- Select Yes, Delete from the pop-up
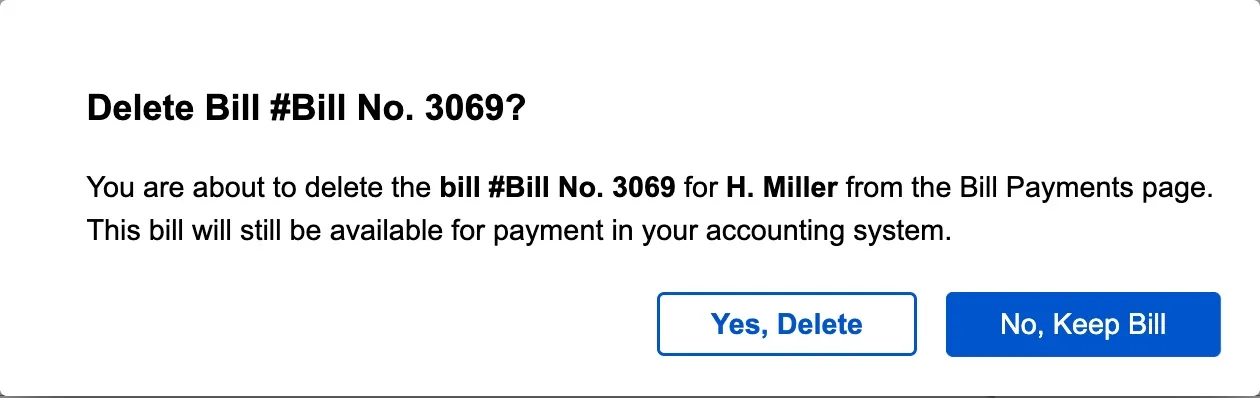
- The bill will be removed from the Payments page but remains in NetSuite
IMPORTANT: Deleting a bill from the Payments page does NOT delete it from NetSuite. It only removes it from the plugin's view. The bill record still exists in your NetSuite account.
To restore a deleted bill:
Edit the bill record in NetSuite (e.g., change the memo field). The plugin will re-sync and display it again.
Excluding Bills for a Vendor
If there is a specific vendor that you process payments outside the bank plugin, you can hide all bills for that specific vendor from the Payments page.
To exclude bills:
- Go to Payment Methods → Vendors tab
- Find the vendor
- Toggle Exclude Bills to ON
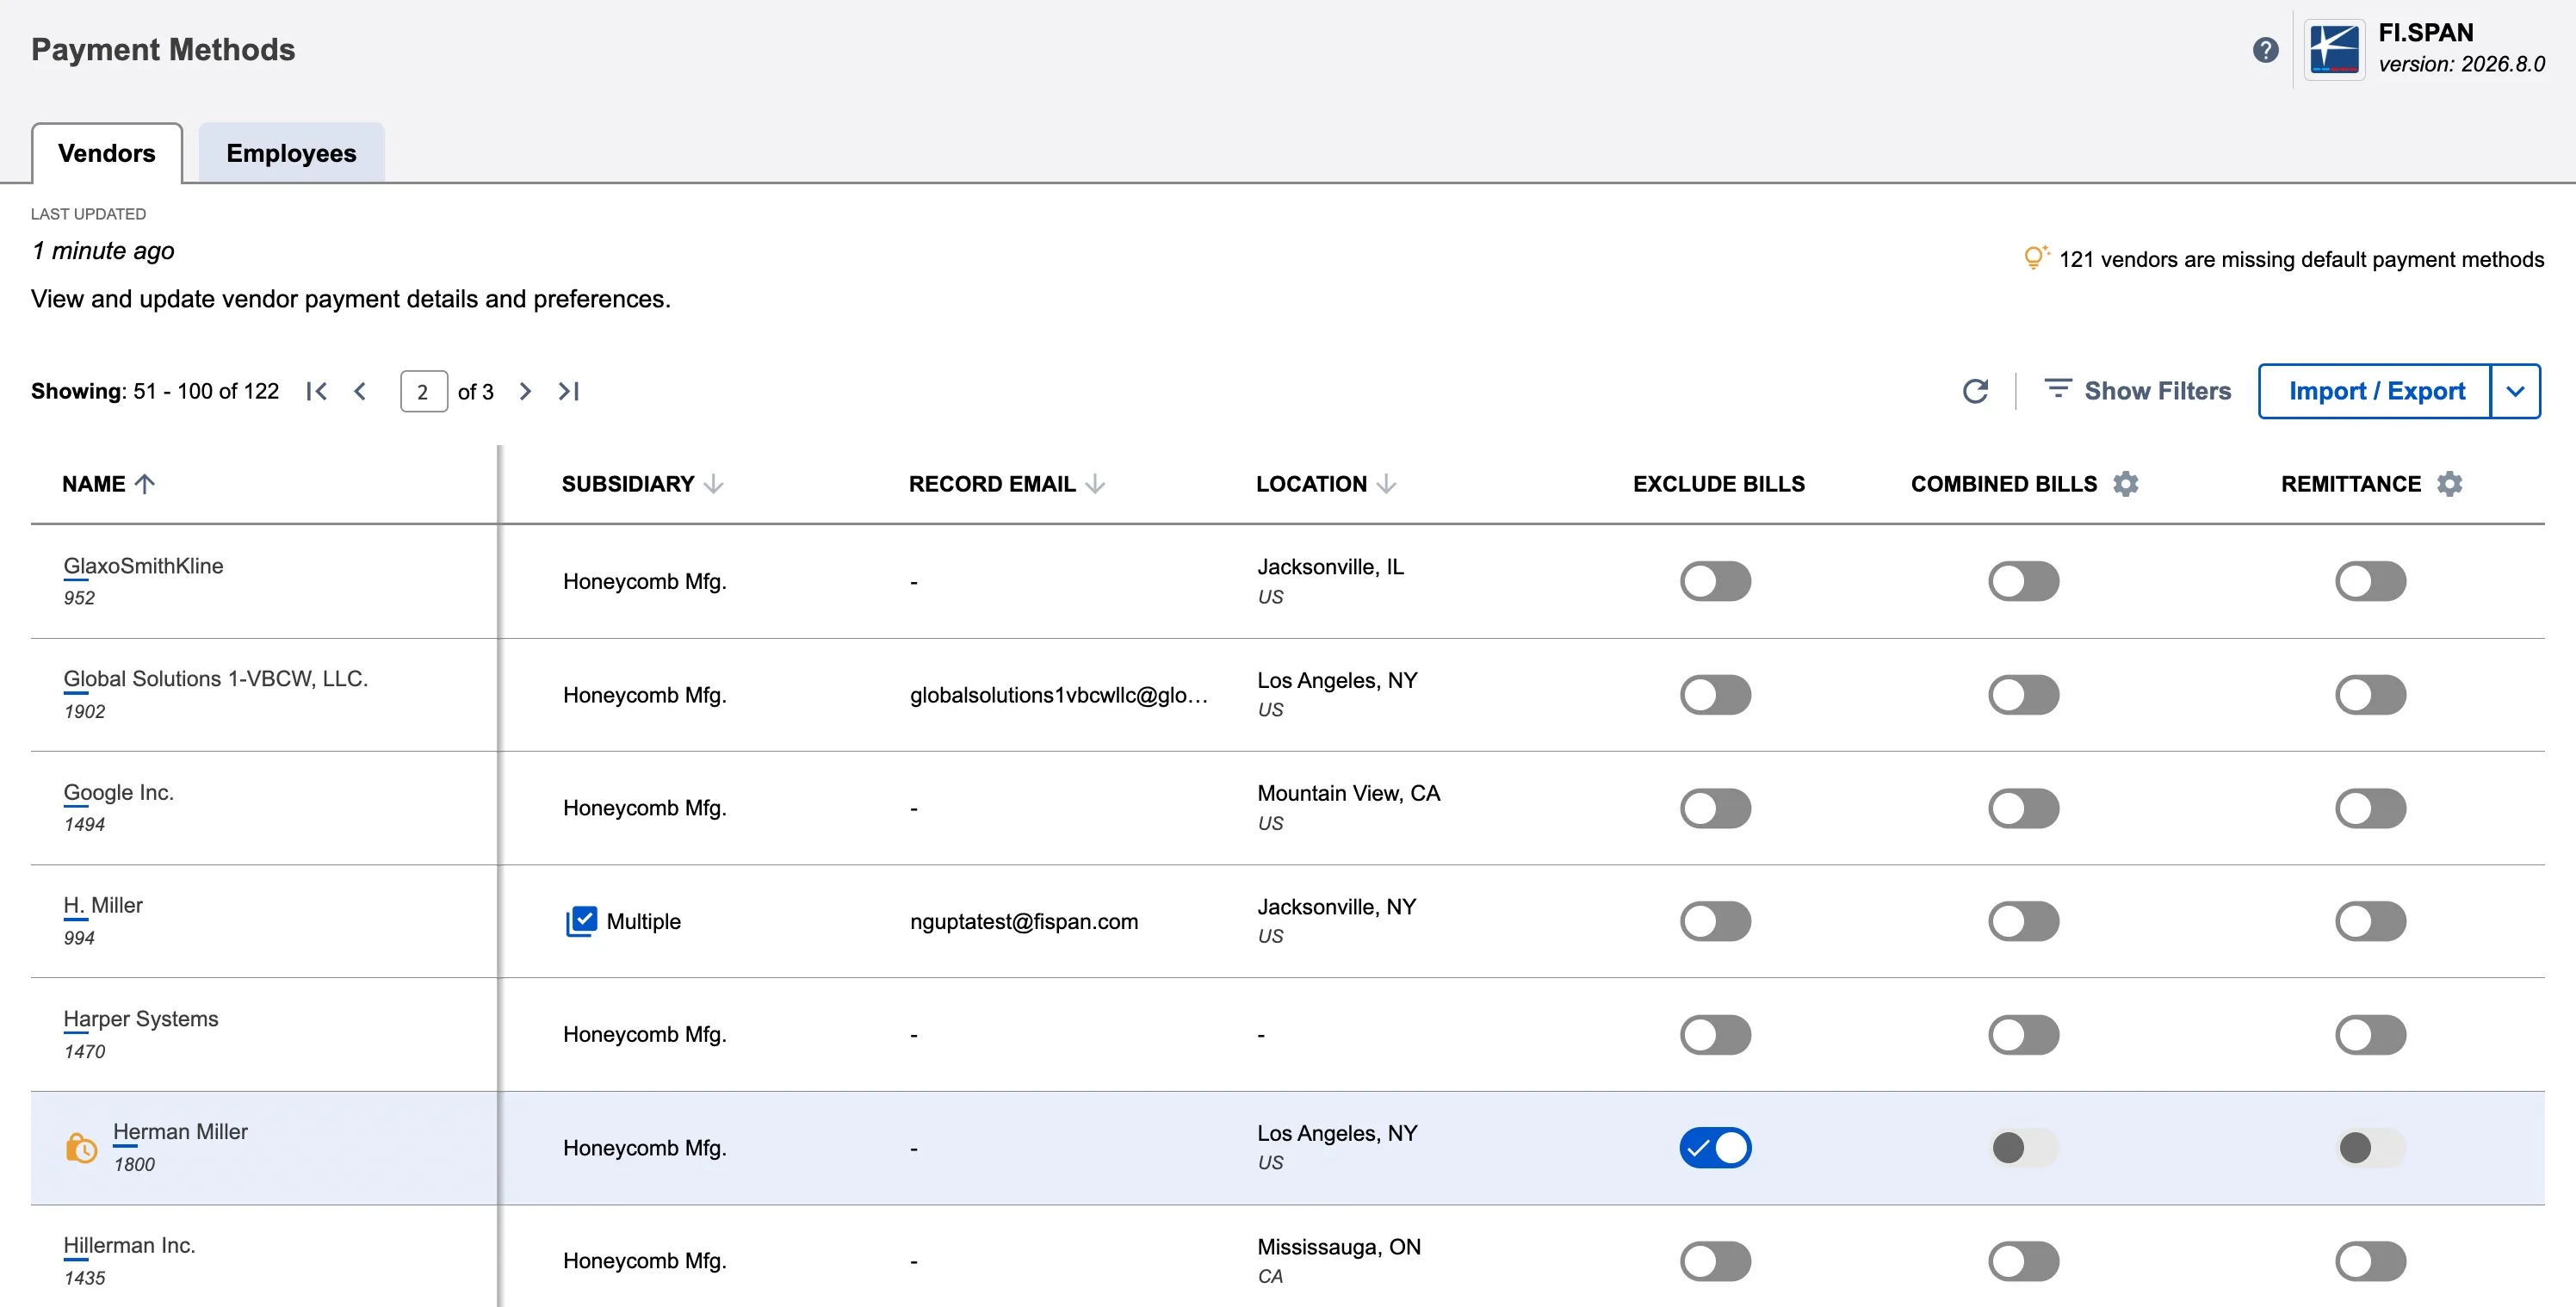
All bills for that vendor disappear from the Payments page.
To re-enable:
Toggle Exclude Bills to OFF on the Payment Methods page.
View-Only Access
Your NetSuite administrator can grant view-only access to users who need to review bill data without the ability to submit payments. This is useful for auditors, reviewers, or team members who monitor payment activity.
What You Can Do
- View all bills and details (amounts, vendors, due dates, payment methods)
- Use filters and search
- View the History tab
- Export data (if enabled for your role)
What You Cannot Do
- Select bills or submit payments
- Edit bill amounts or payment details
- Delete bills from the page
Identifying View-Only Access
If you have view-only access, action buttons like Start Payment Run will be disabled or hidden.