Payment Methods - New (NetSuite)
Manage vendor/employee payment information more efficiently on the Payment Methods page. This guide covers how to view, add, and update vendor bank accounts, addresses, and email groups.
The Payment Methods page is your central hub for managing all payment information for vendors and employees. The Payments page and Expense Reimbursements page read payment information from this page when you process payments. You can add bank accounts, addresses, and email groups directly in the plugin, or use payment information that syncs automatically from NetSuite.
For users migrating from the Legacy Experience: During migration flow, all vendor/employee payment information from Entity Bank Details (EBD) and the plugin custom vendor/employee fields was moved to the Payment Methods page. Bank accounts stored in EBD, Vendor/Employee's Default Payment Method, Payables Email Addresses, and Grouping of Bills are now managed here. The old Vendor Bills and Expense Reimbursements pages continue to use their original EBD records and custom fields.
Navigate to Payment Methods
Navigate to Accounts Payable (New) → Payment Methods
The Payment Methods page has two tabs:
- Vendors tab - Manage payment information for vendors (used when paying bills)
- Employees tab - Manage payment information for employees (used for expense reimbursements)
Select the tab for the type of payee you want to manage Payment Information. The workflow is the same for both vendors and employees.
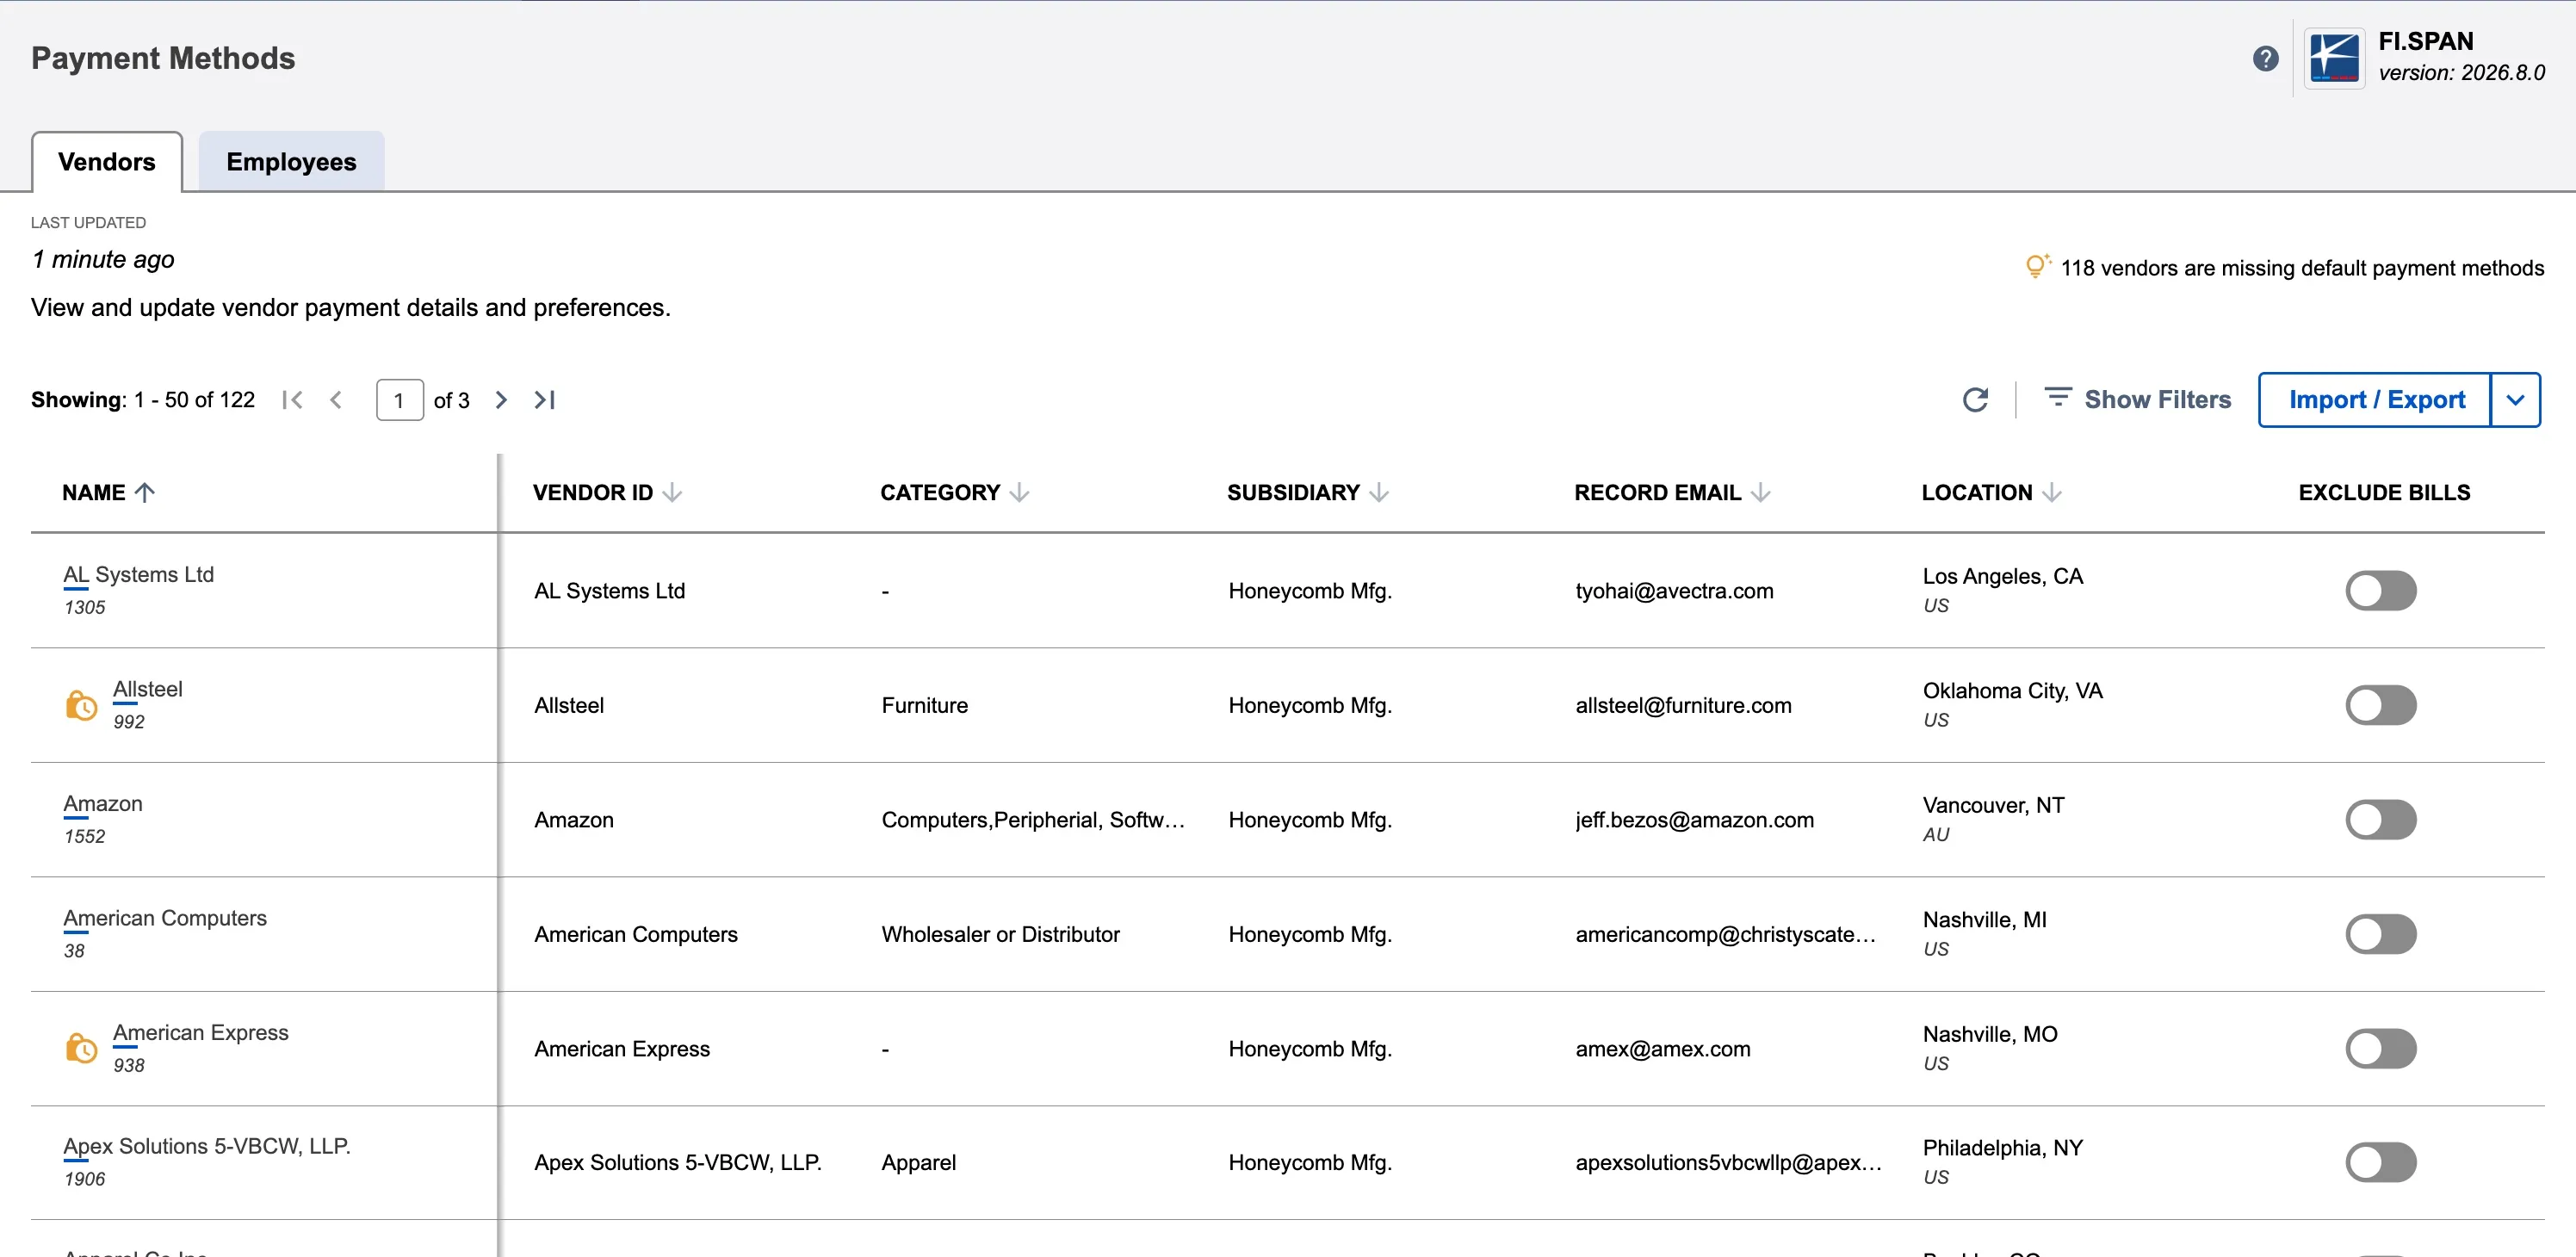
Find a Vendor/Employee
The Payment Methods page shows all vendors/employees with payment information. You only see vendors/employees from subsidiaries you have access to in NetSuite.
Use search or filters to find a specific vendors/employees by name, email, or subsidiary.
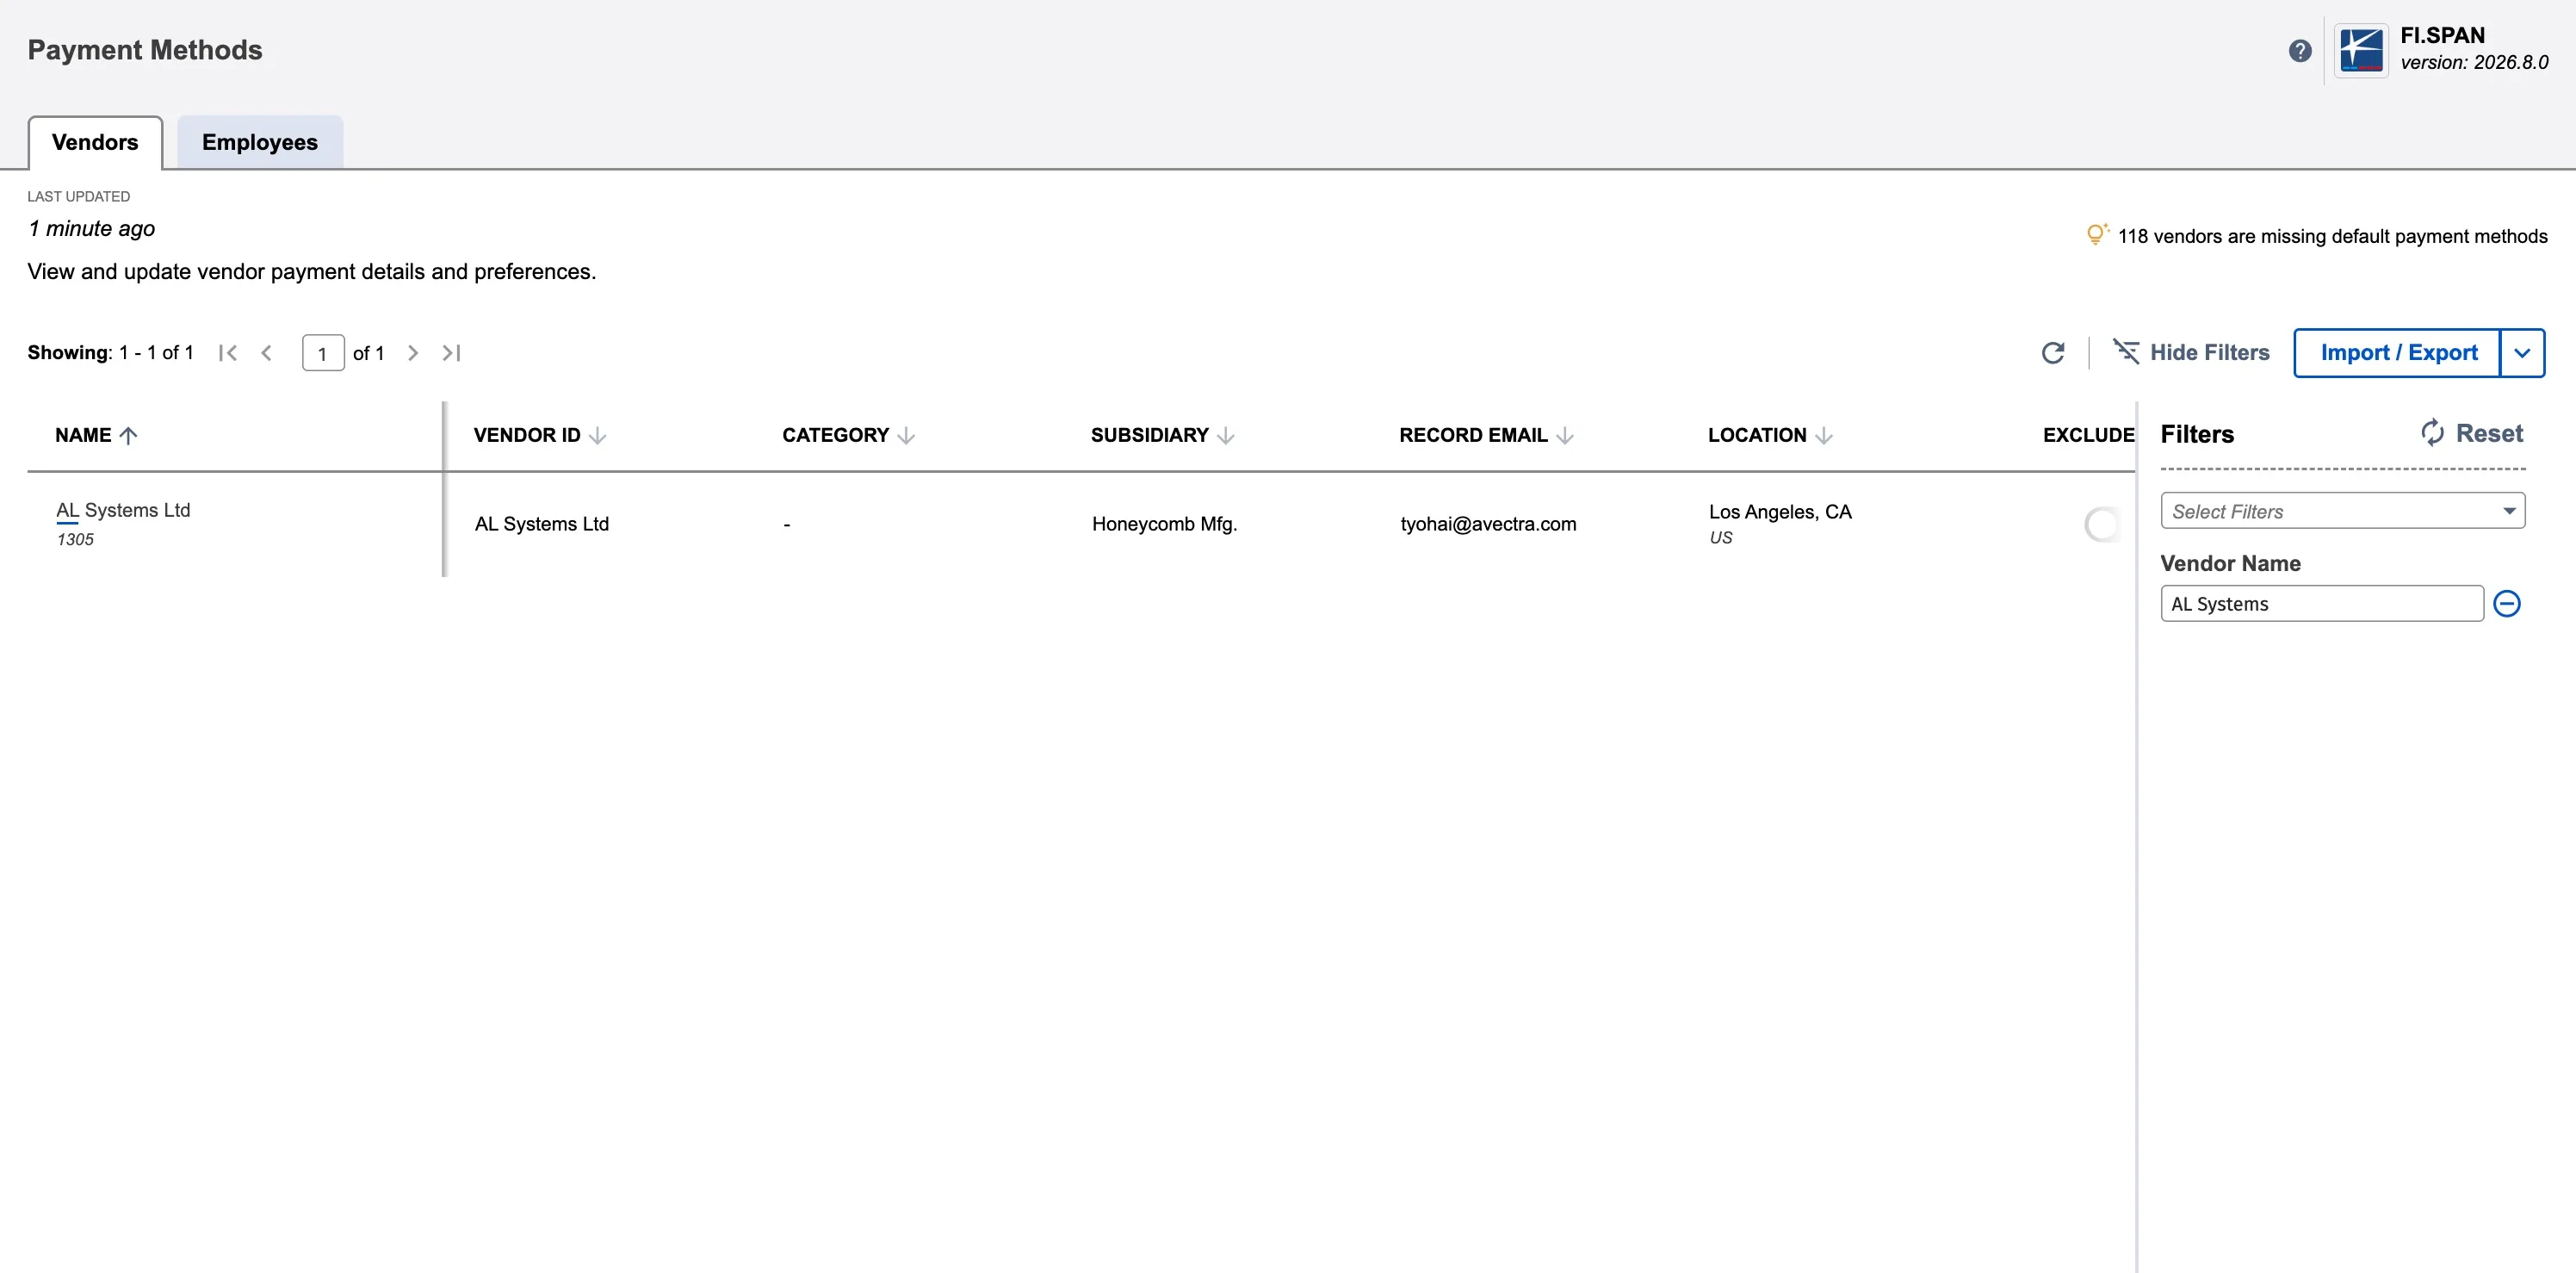
Payment Information from NetSuite
Click any vendor/employee row to open the vendor details panel, where you can add payment information or configure specific settings.
You'll see two types of payment information:
ERP-Tagged Payment Information
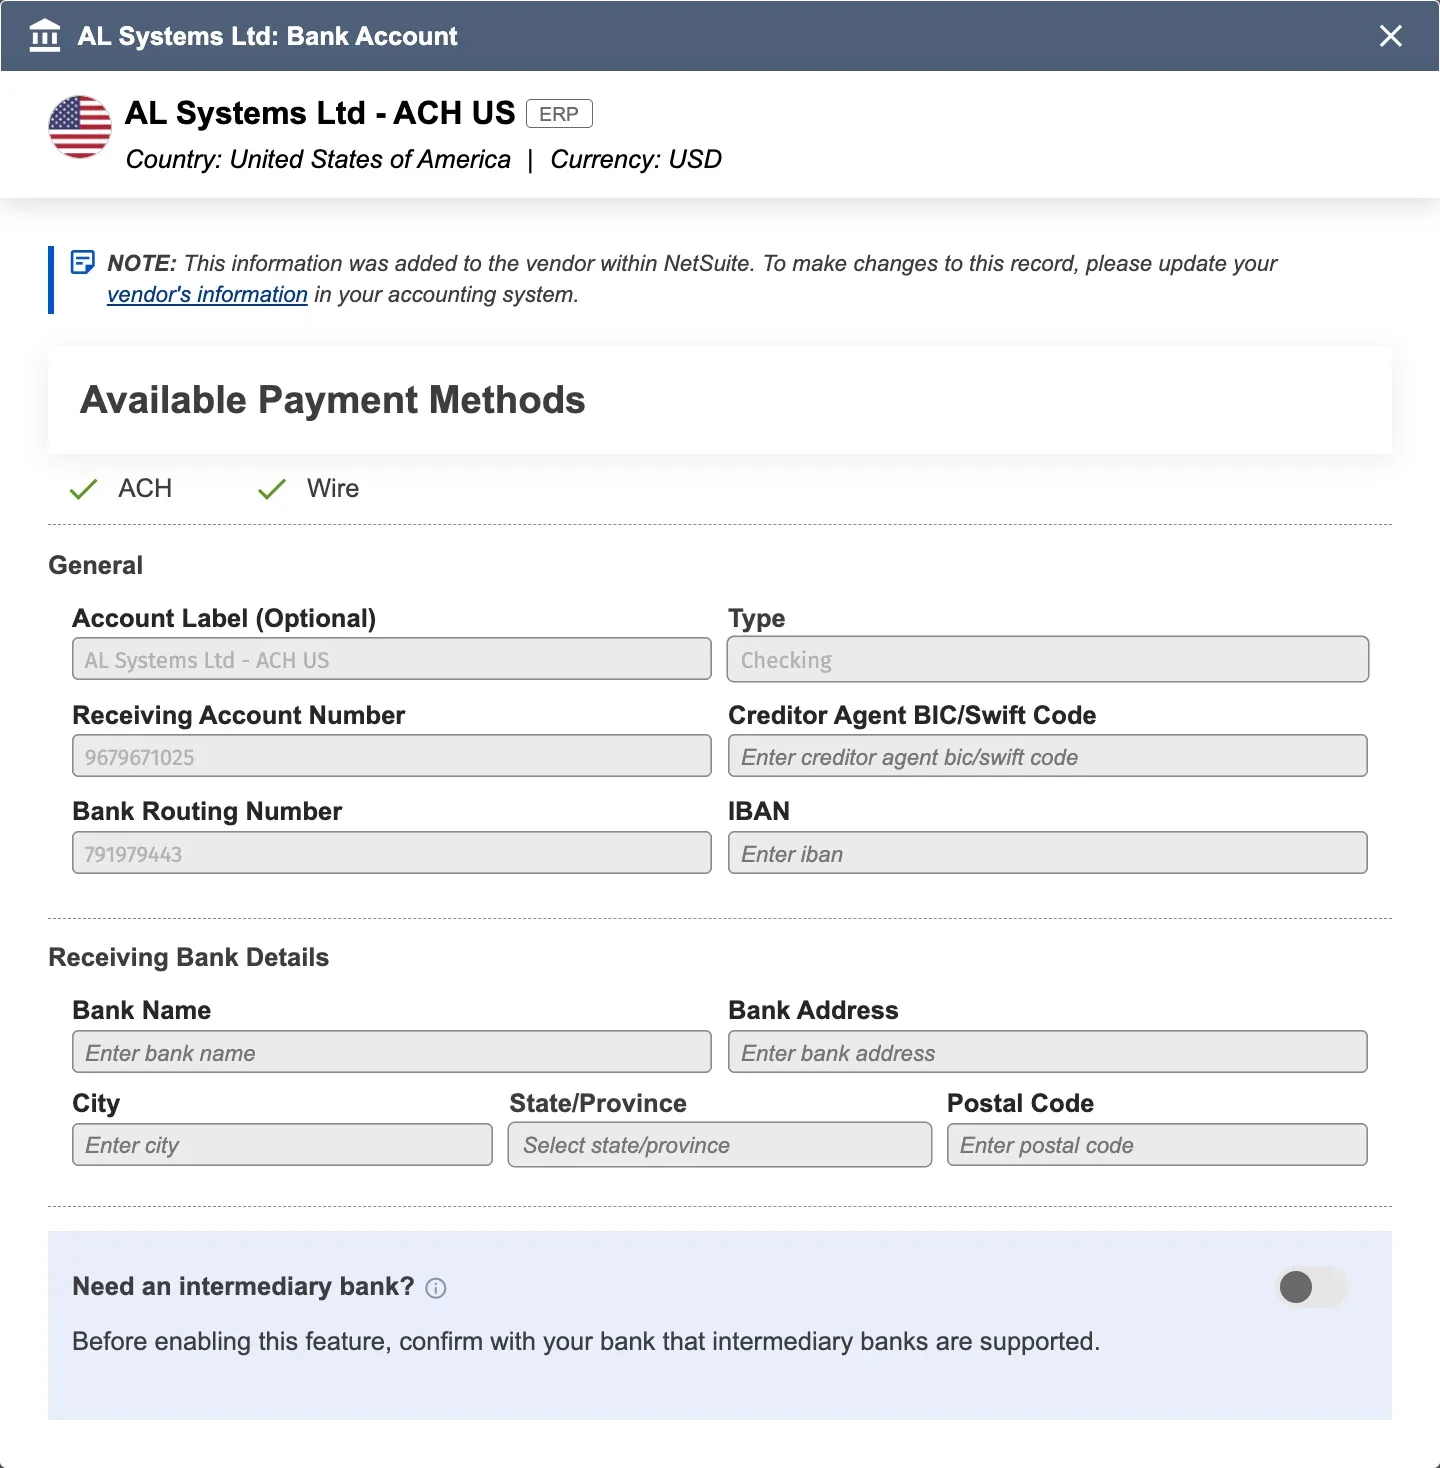
Payment information with an ERP tag syncs automatically from NetSuite and cannot be edited in the plugin. To update this information, edit the vendor or employee record in NetSuite.
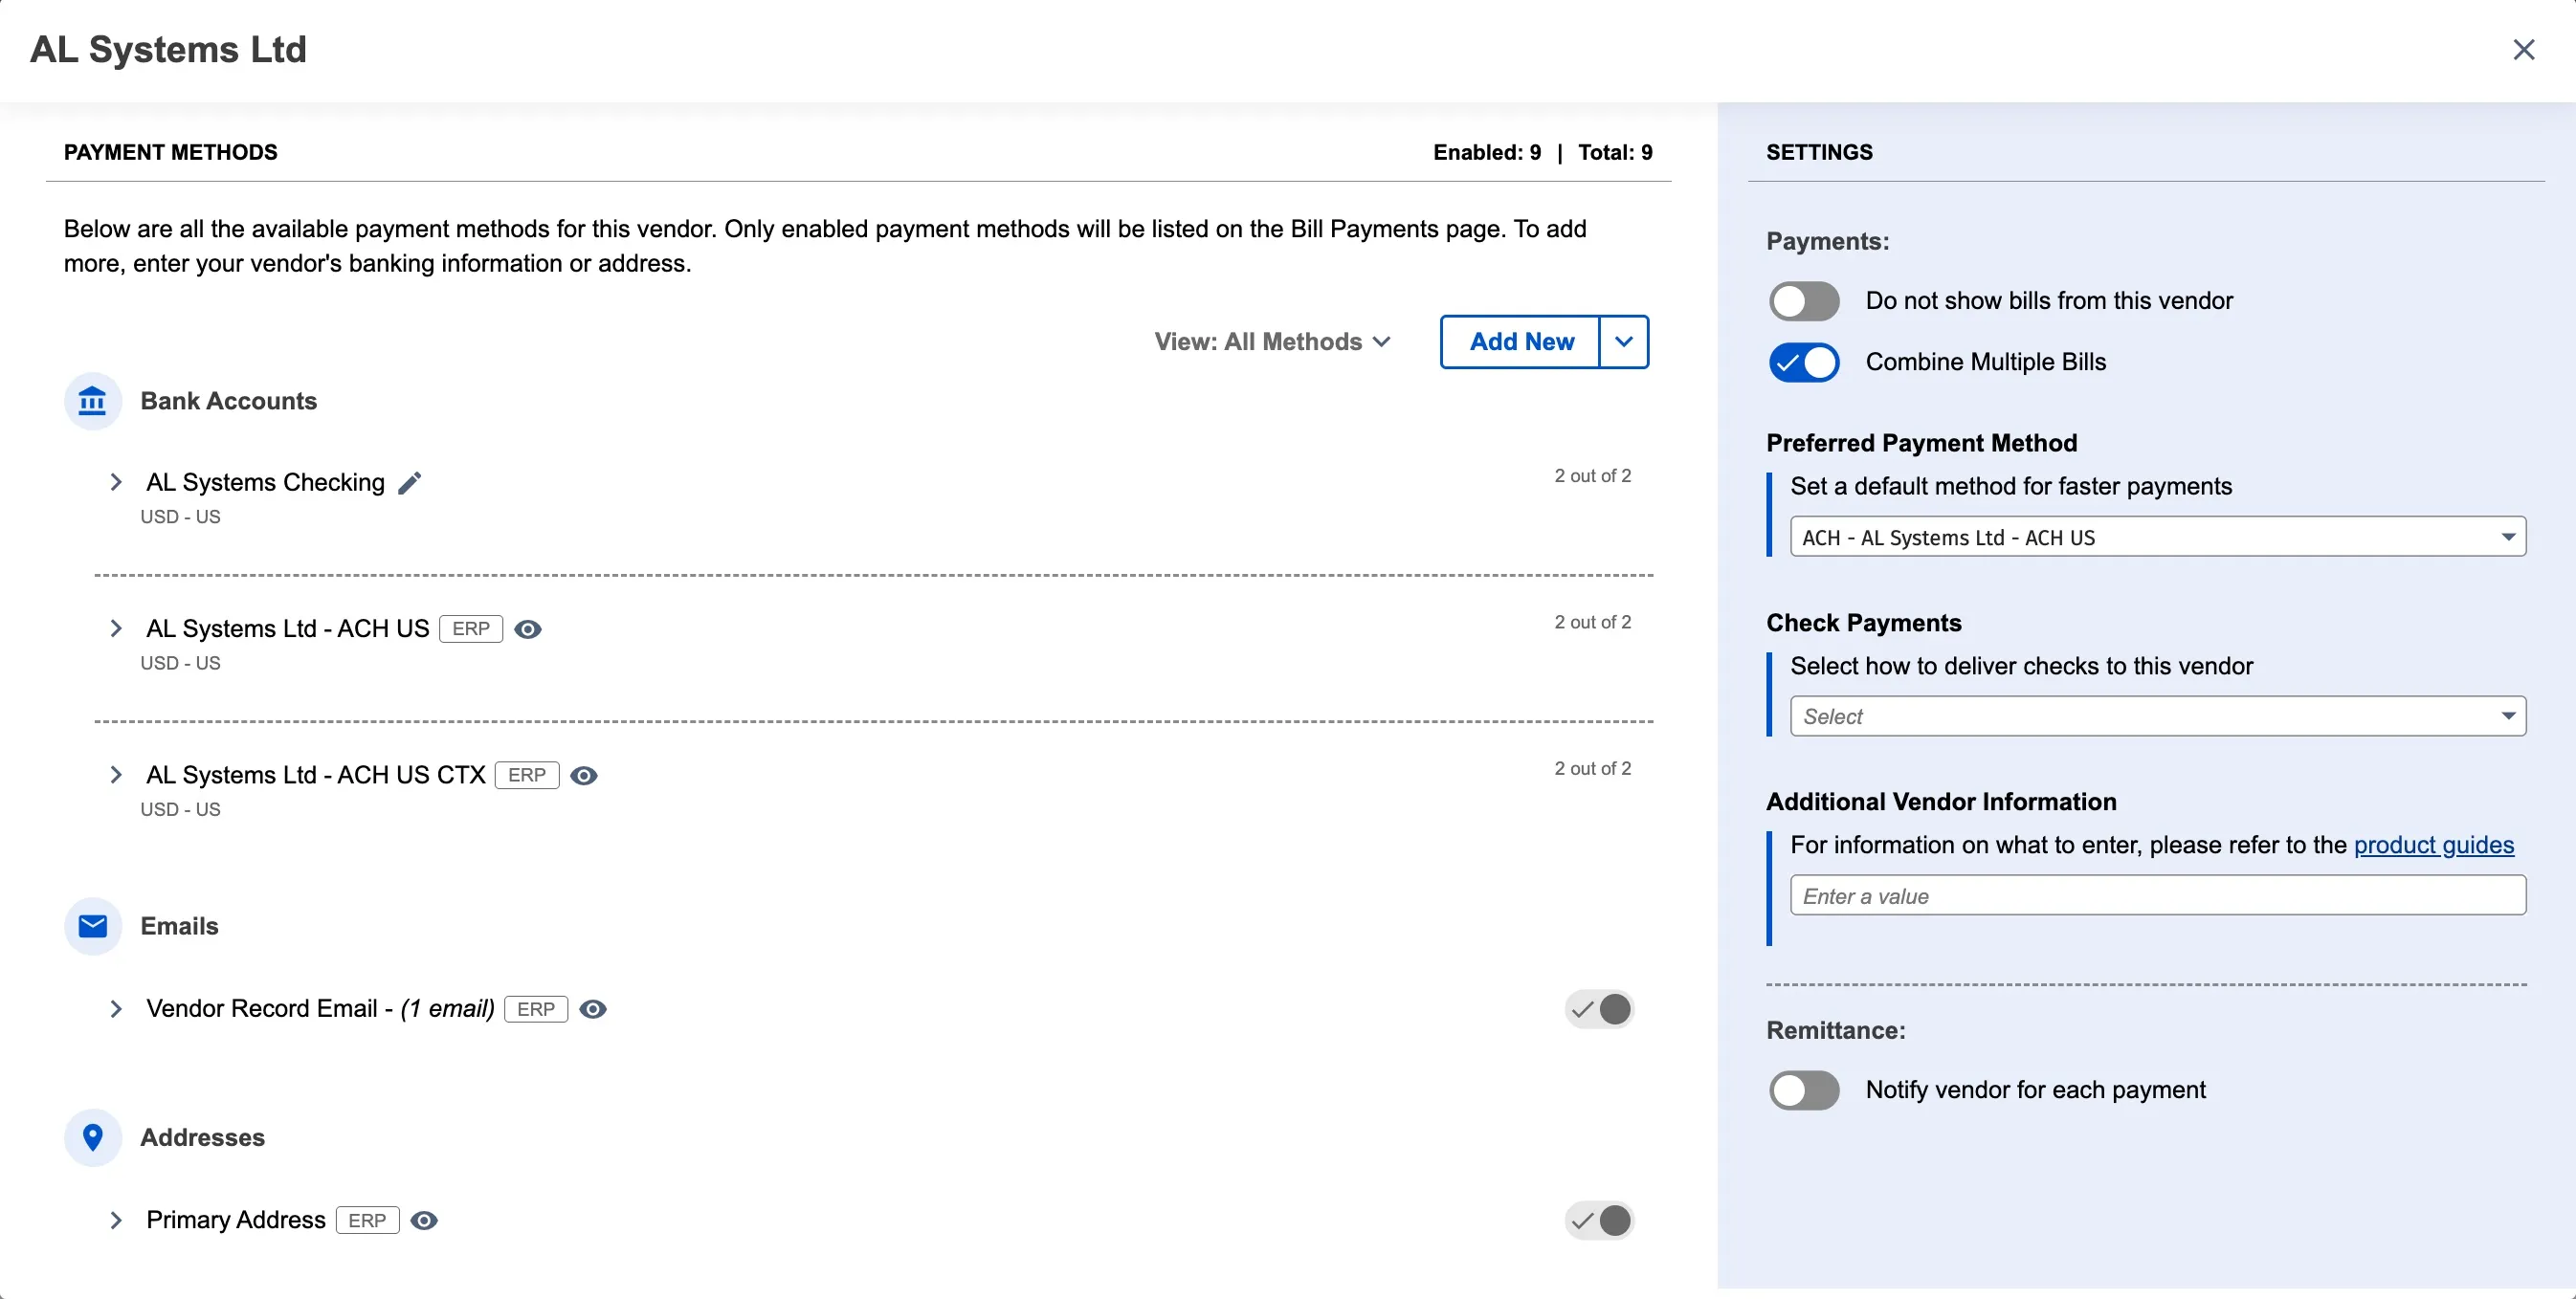
Bank Accounts
If you have Electronic Bank Payments (EBP) enabled in NetSuite, vendor and employee bank accounts from the EBP sync automatically to the Payment Methods page.
NOTE: We only sync bank accounts stored in the below Payment File Fomat:
- ACH - CCD/PPD
- ACH - CTX (Free Text)
- CPA - 005
The following fields sync from EBP:
- Account Name (used as the label in the plugin)
- Bank Name
- Bank Address (street, city, state/province, postal code, country)
- Account Type (Checking or Savings)
- Account Number
- Bank Number (becomes Routing Number for US accounts, or Institution Number for Canadian accounts)
- Branch Number (becomes Transit Number for Canadian accounts only)
- File Format (determines country - US or Canada)
- Currency (CAD for Canadian accounts, USD for US accounts)
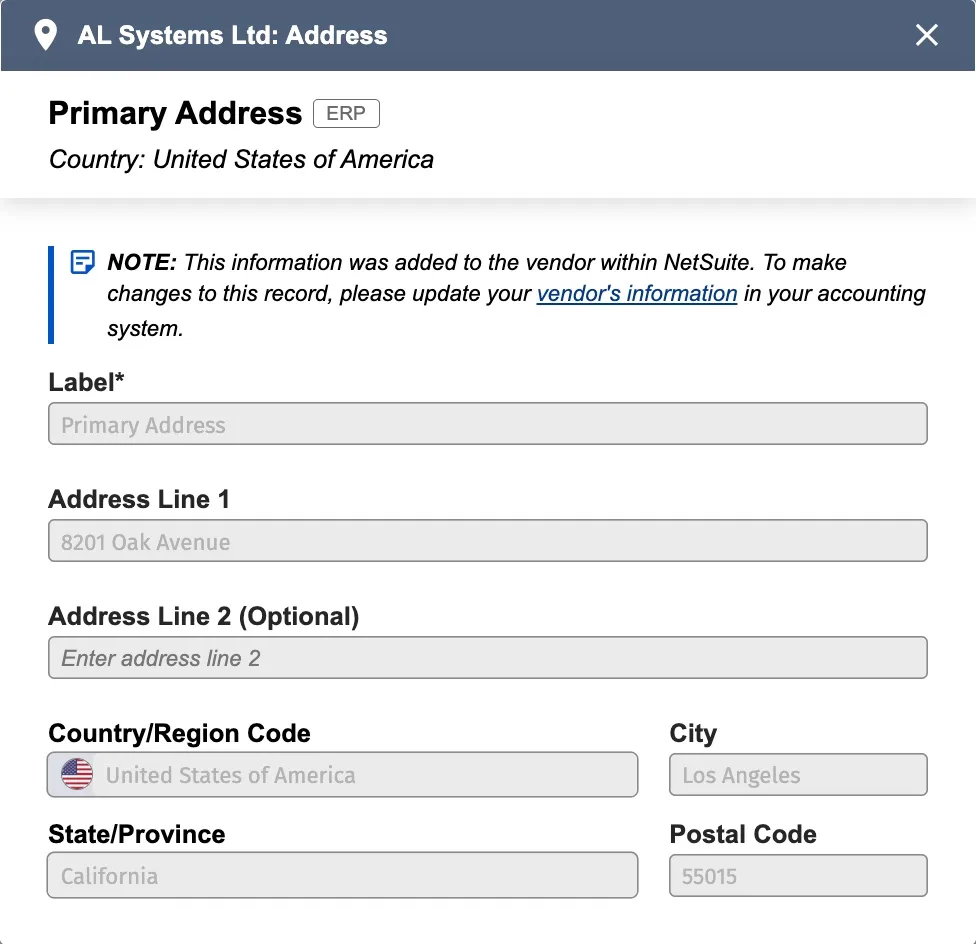
Addresses
All addresses from the vendor or employee address book in NetSuite sync automatically to the Payment Methods page. Each address includes:
- Street (line 1 and line 2)
- City
- State/Province
- Postal Code
- Country
- Label (address book label from NetSuite)
NOTE: Addresses with the Override checkbox enabled in NetSuite do not sync and must be added manually in the plugin.
Emails
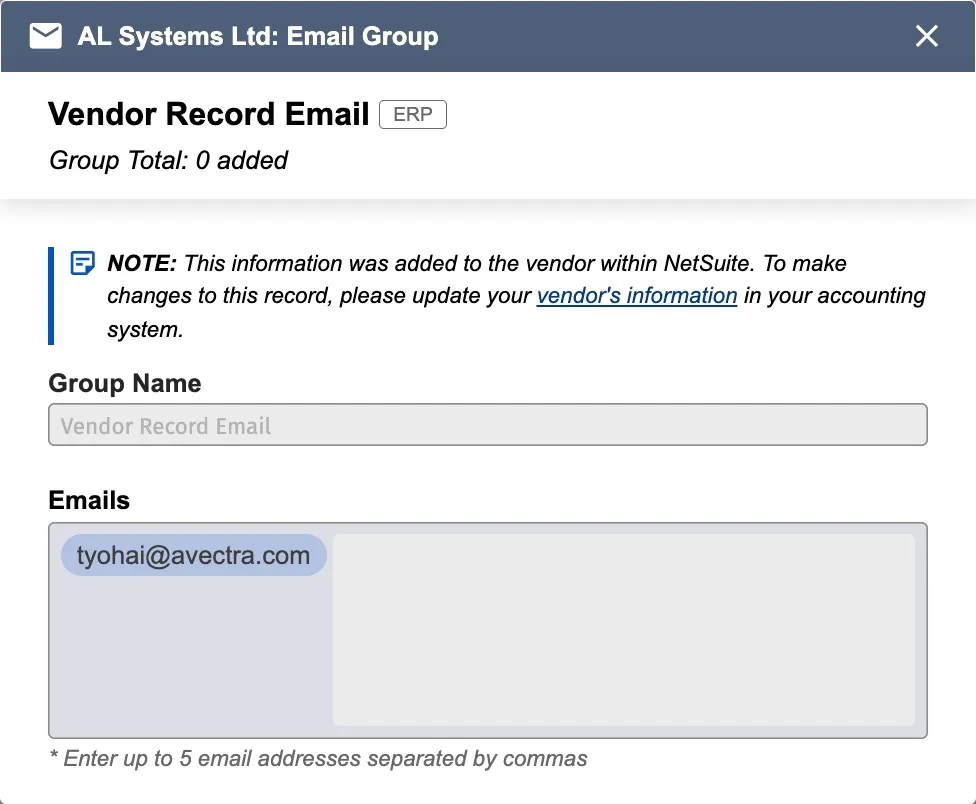
The email field from the vendor or employee record in NetSuite syncs automatically to the Payment Methods page.
How to update ERP-tagged payment information:
- Edit the vendor or employee record in NetSuite (or the EBP record for bank accounts)
- Changes sync automatically to the Payment Methods page during the next sync cycle
- The updated information becomes available for payments
Plugin-Added Payment Information
Payment information without an ERP tag is added directly in the plugin. This information can be edited or deleted in the Payment Methods page and does not sync back to NetSuite.
Add Payment Information
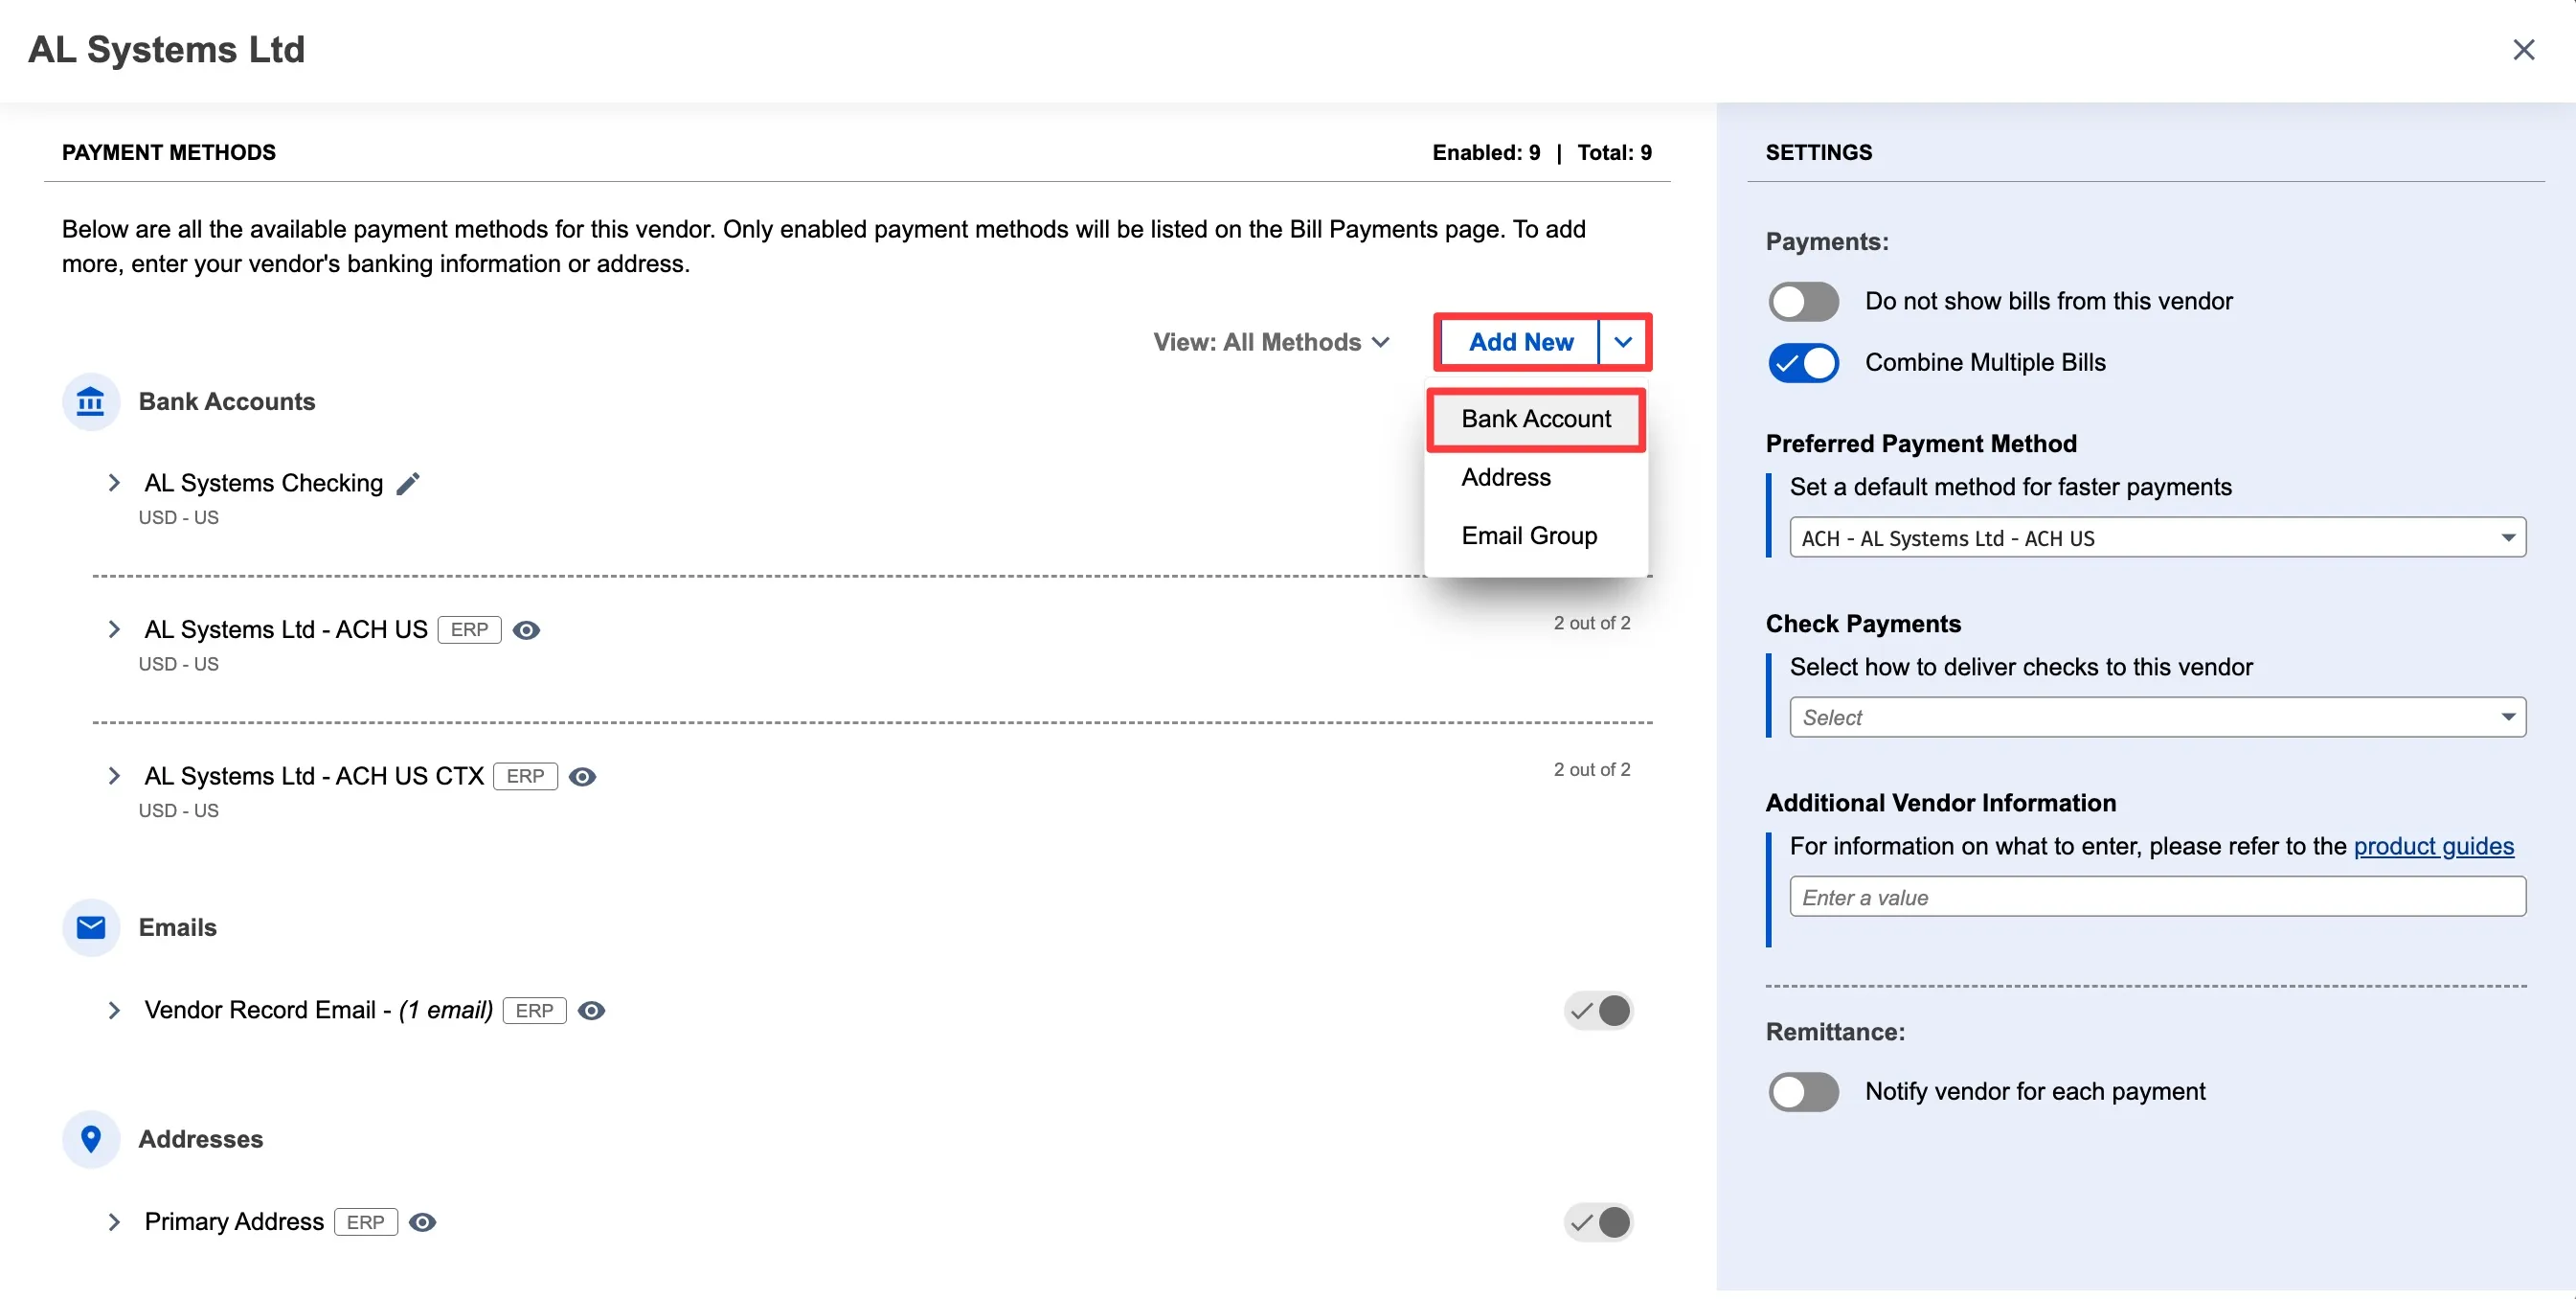
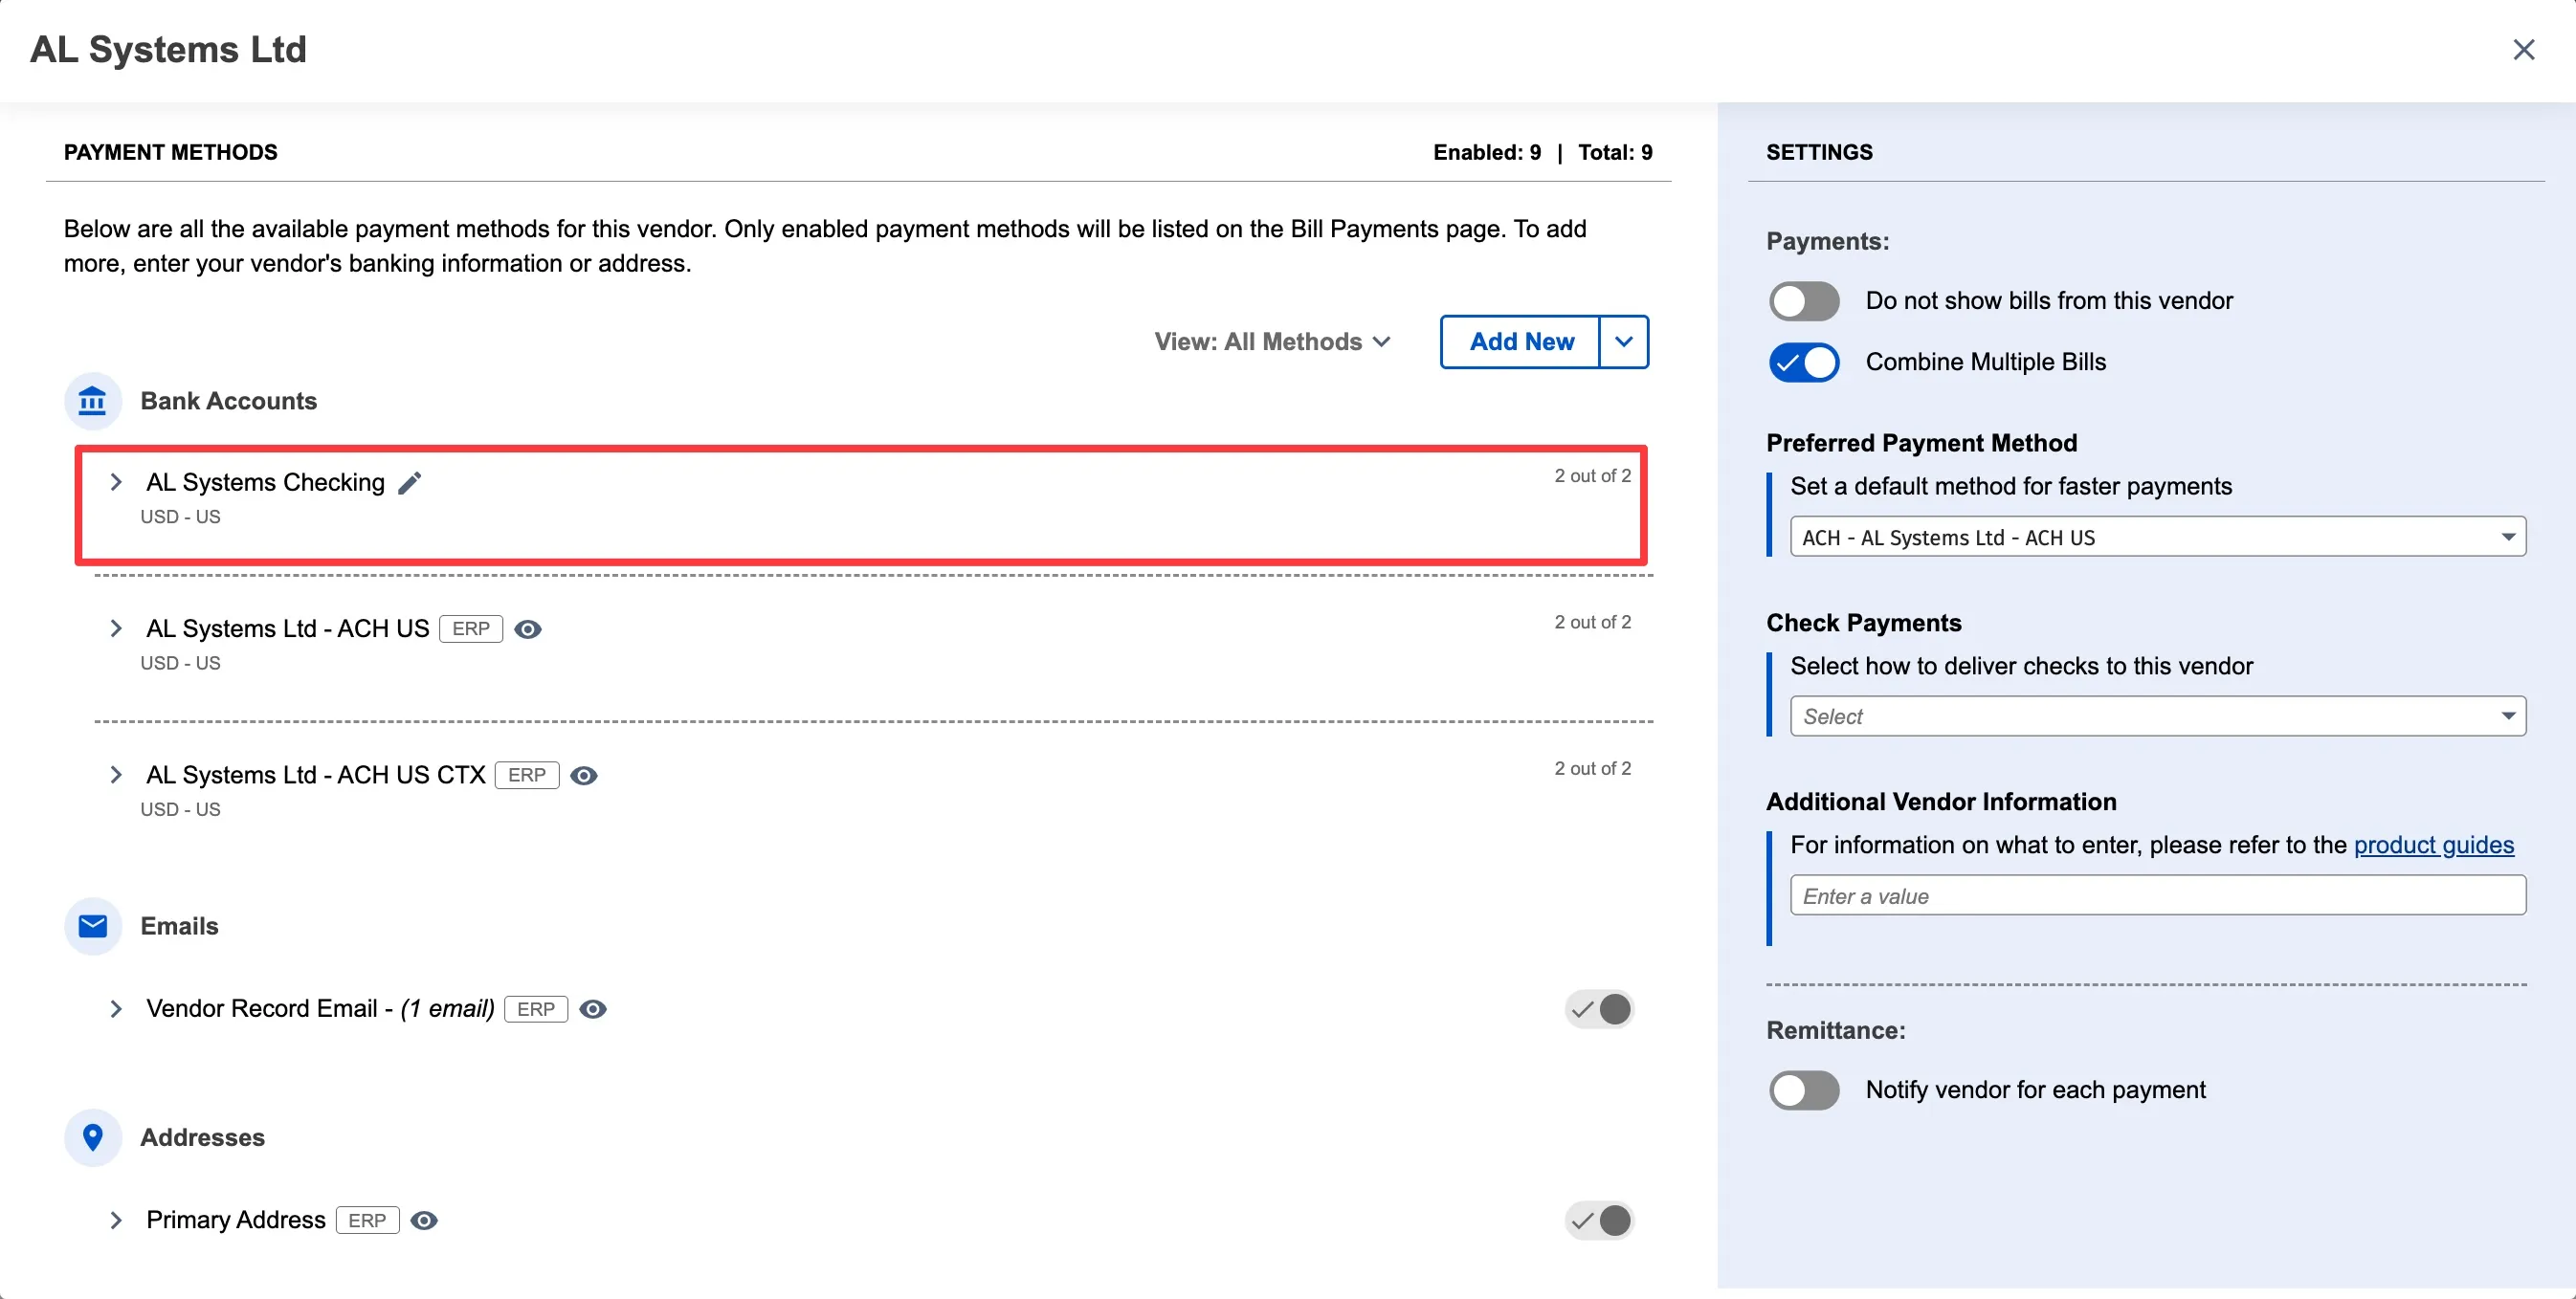
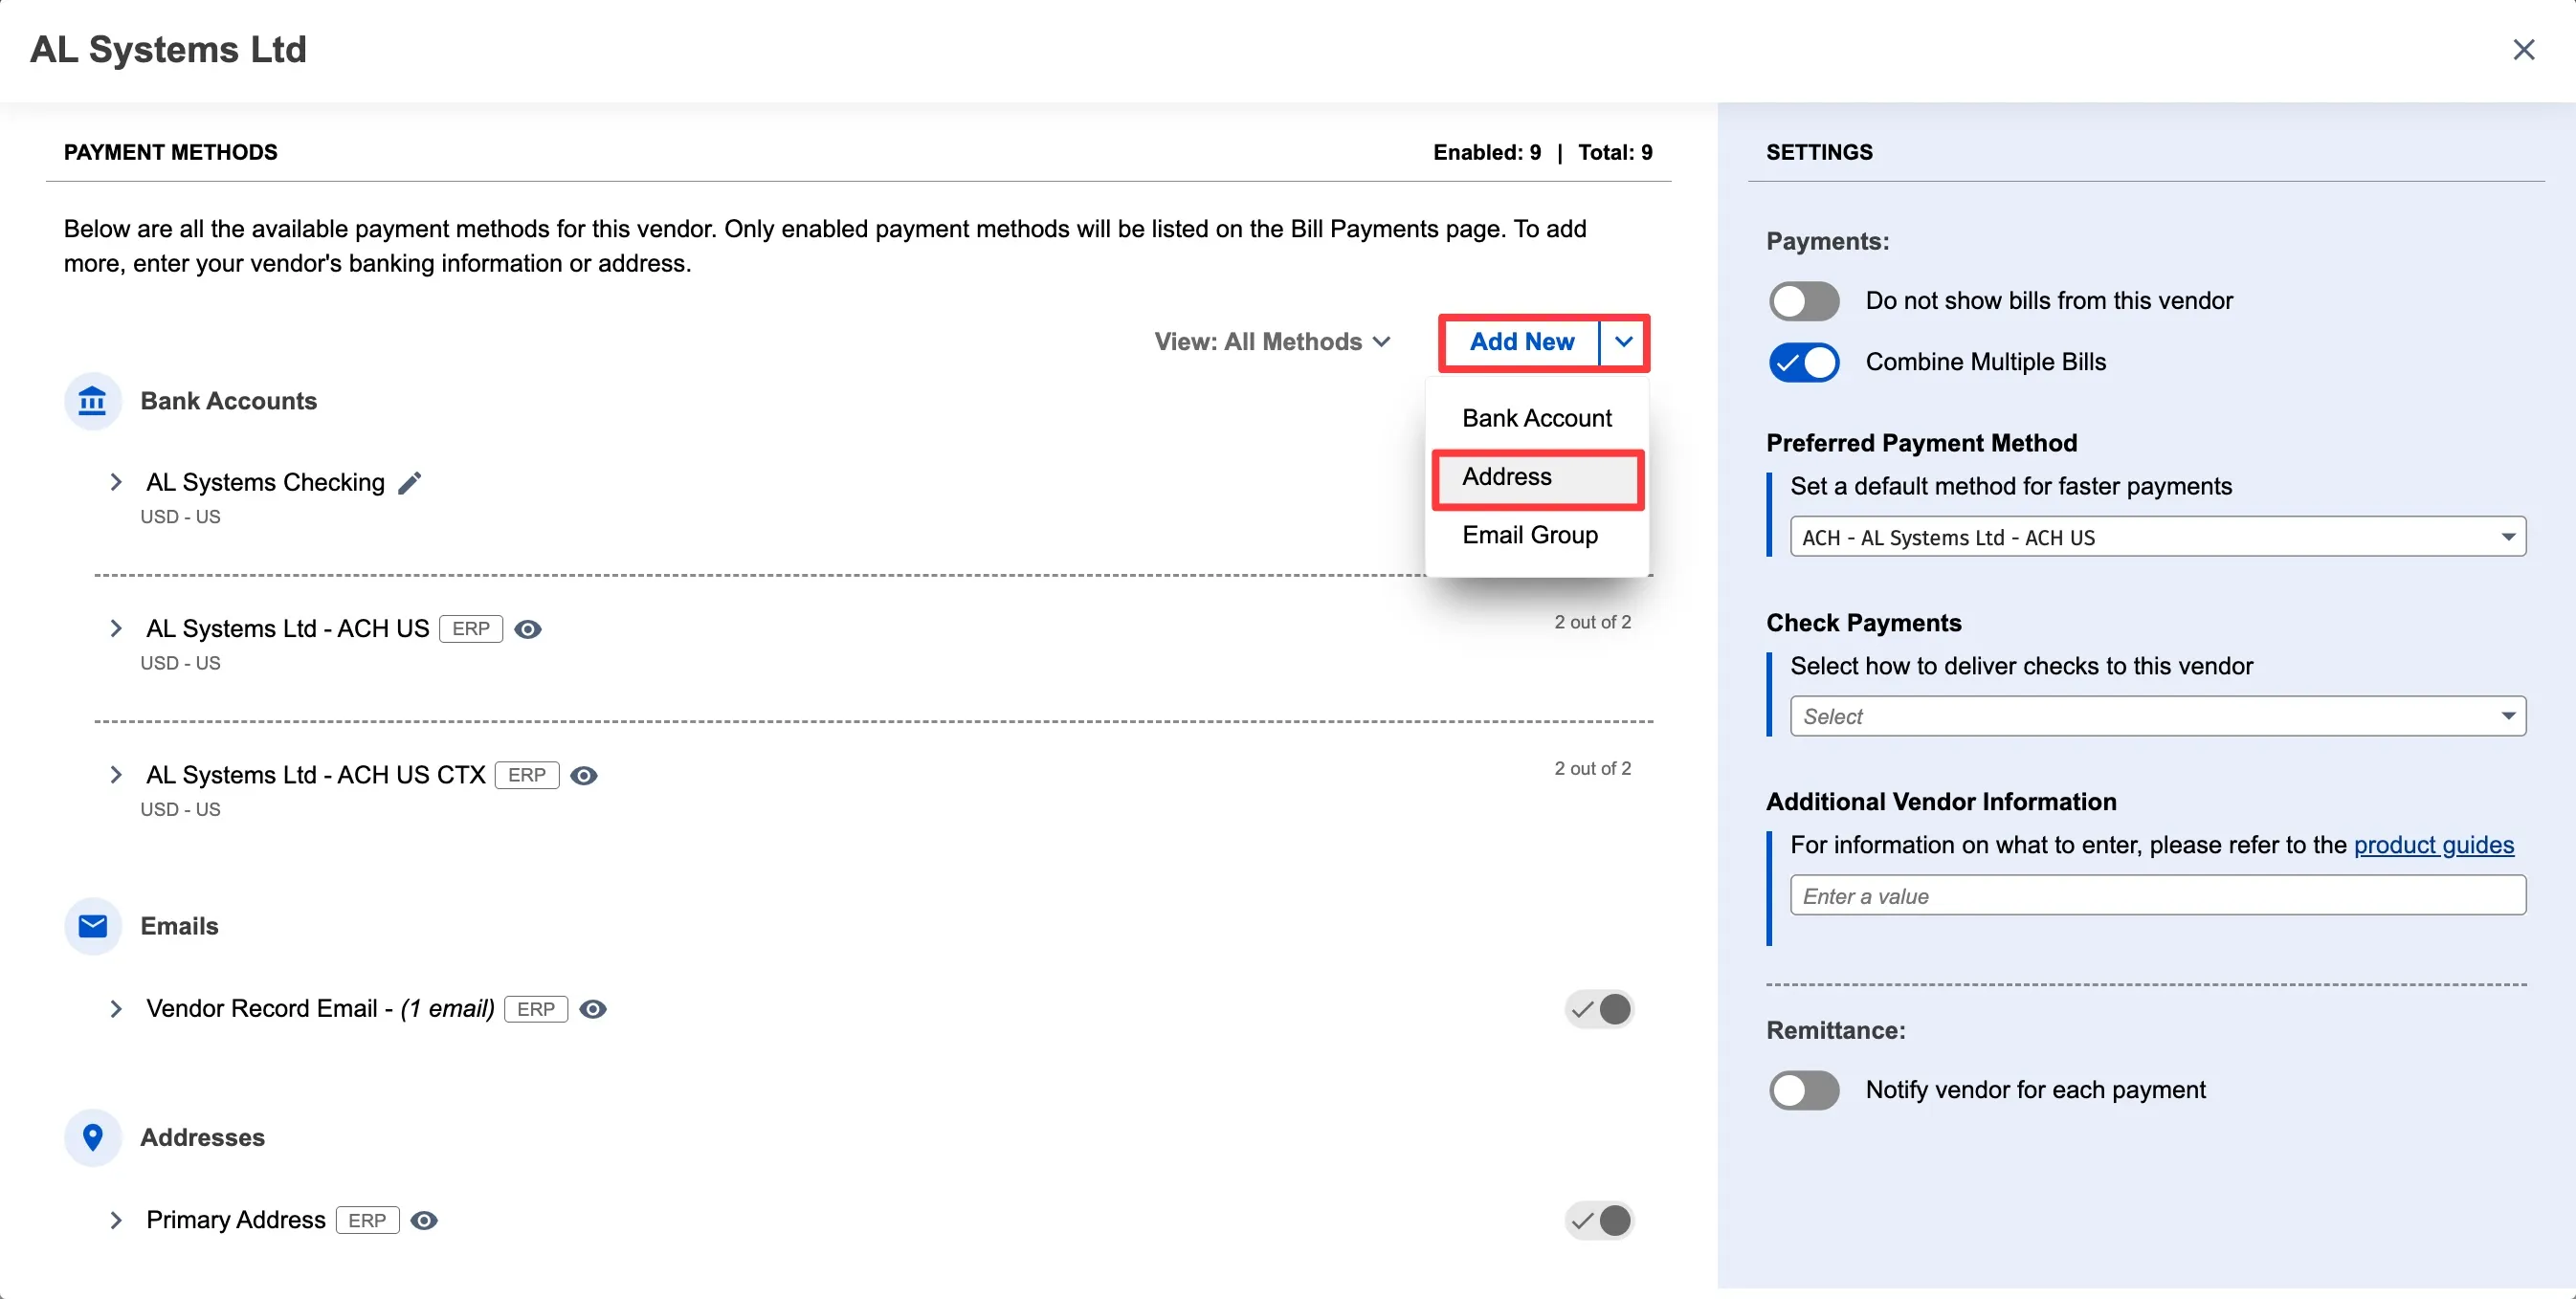
In the payment method dialog, click Add New to add bank accounts, addresses, or email groups. This payment information is managed in the Commerce Connections plugin and does not sync back to NetSuite.
Add a Bank Account
- Click Add New and select Bank Account
- Select Country and Currency
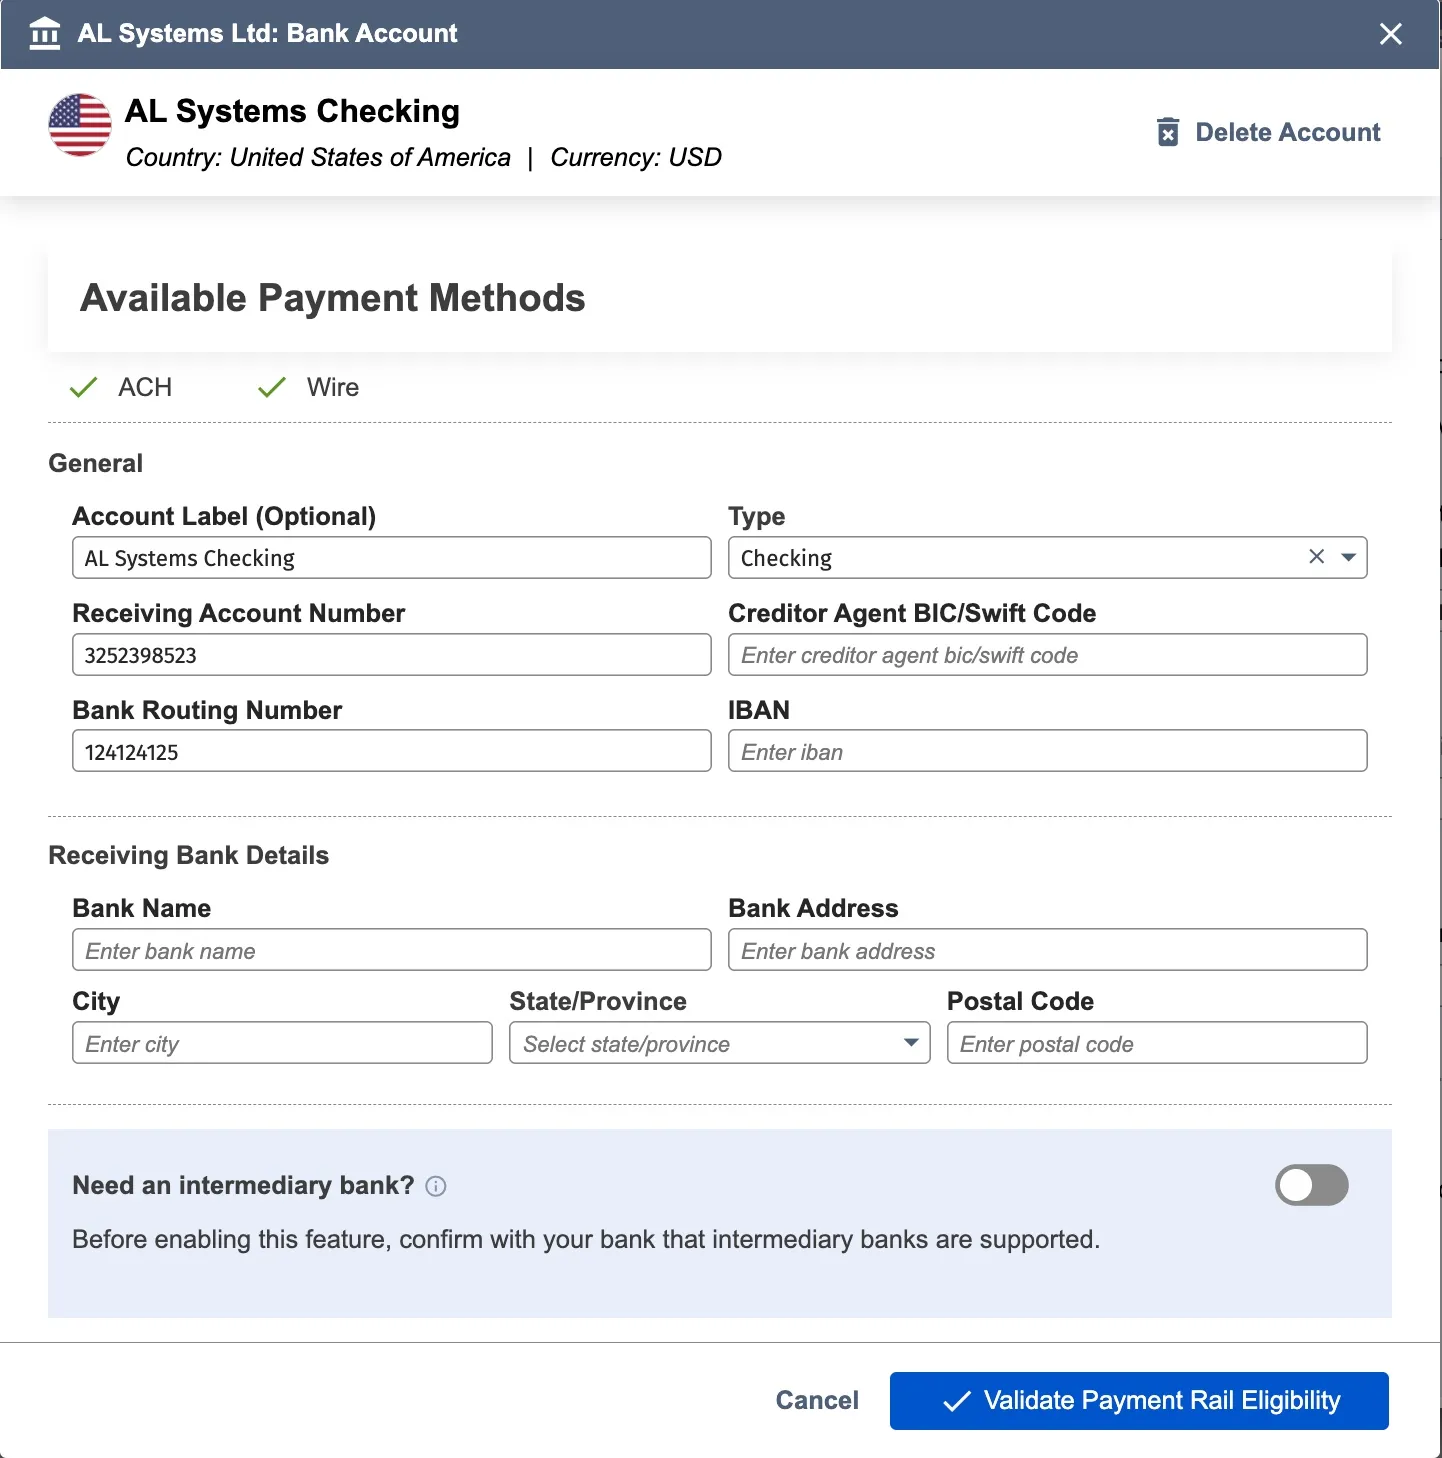
- Fill in required fields:
- Routing Number - 9-digit bank routing number
- Account Number - Bank account number
- Account Type - Checking or Savings
- Label - Nickname for easy identification (e.g., "Main Operating Account")
- (Optional) Toggle Intermediary Bank to add intermediary details for international payments
- Click Validate Payment Rail Eligibility
NOTE: Plugin runs validation based on the data format and tells what Payment Rails are available. You can enable or disable specific rail for this bank account. Additionally, these validations only check the data format, not accuracy. Verify all account numbers are correct.
- Click Save Account/Request Approval
Add an Address
Addresses are only required for Check payments. If Check is not enabled, the option to add an address will not be visible.
- Click Add New and select Address
- Fill in street, city, state, postal code, country
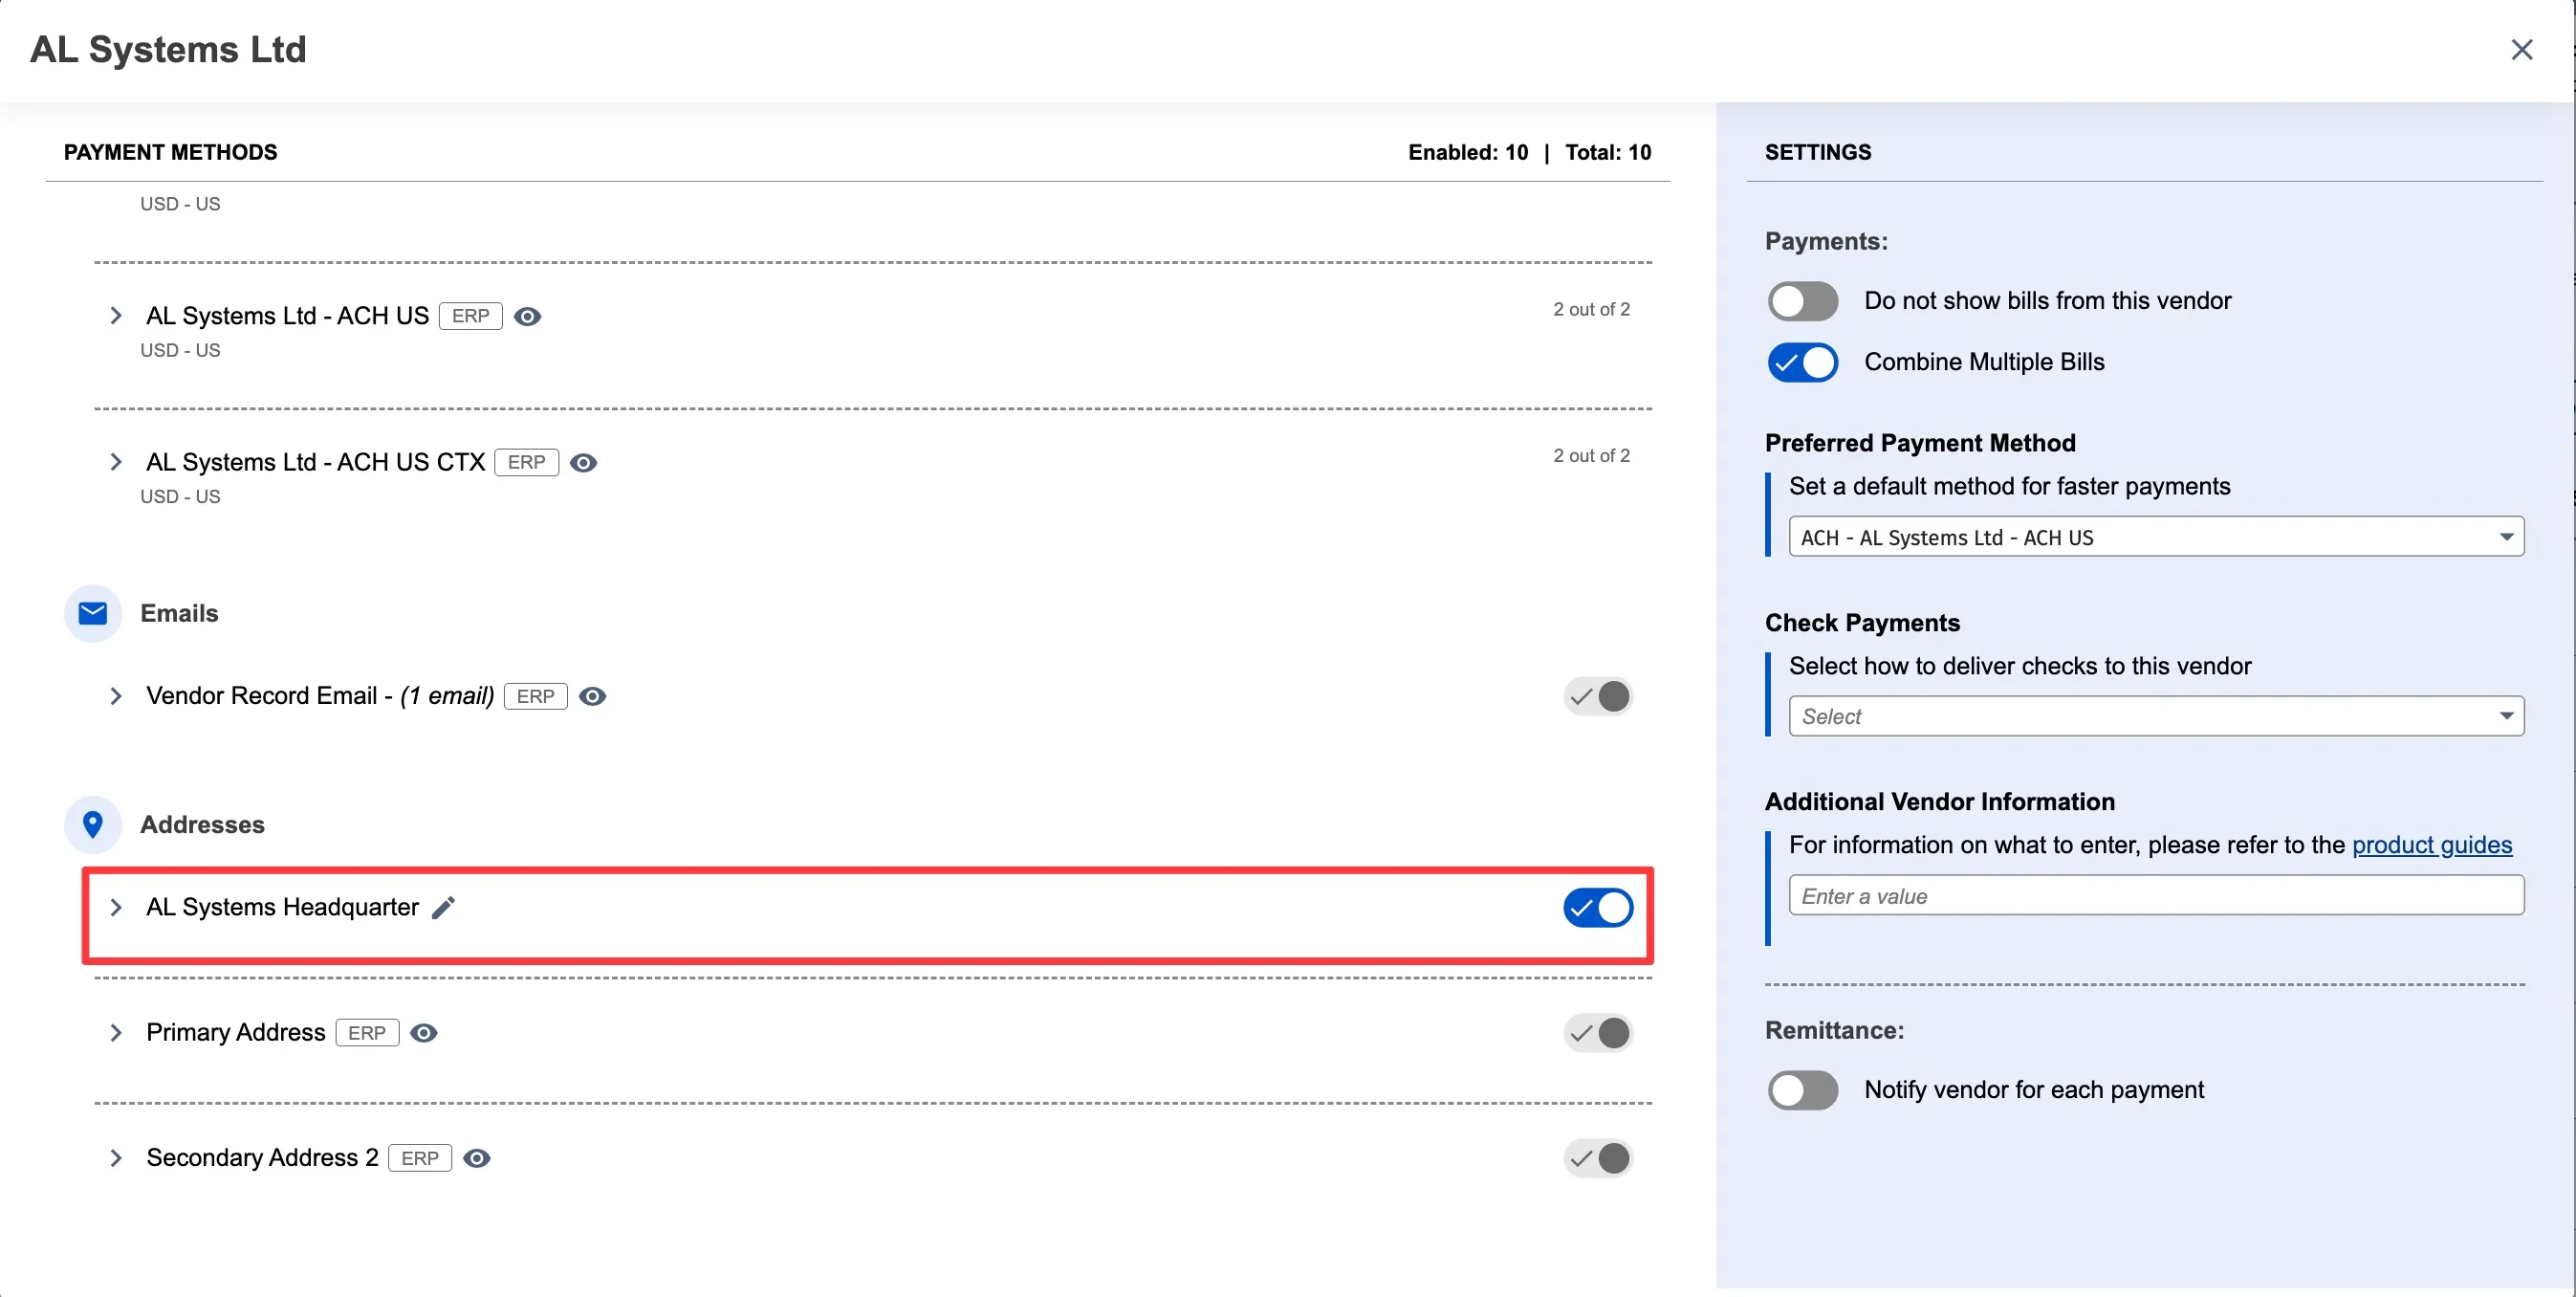
- Add a Label (e.g., "Headquarters")
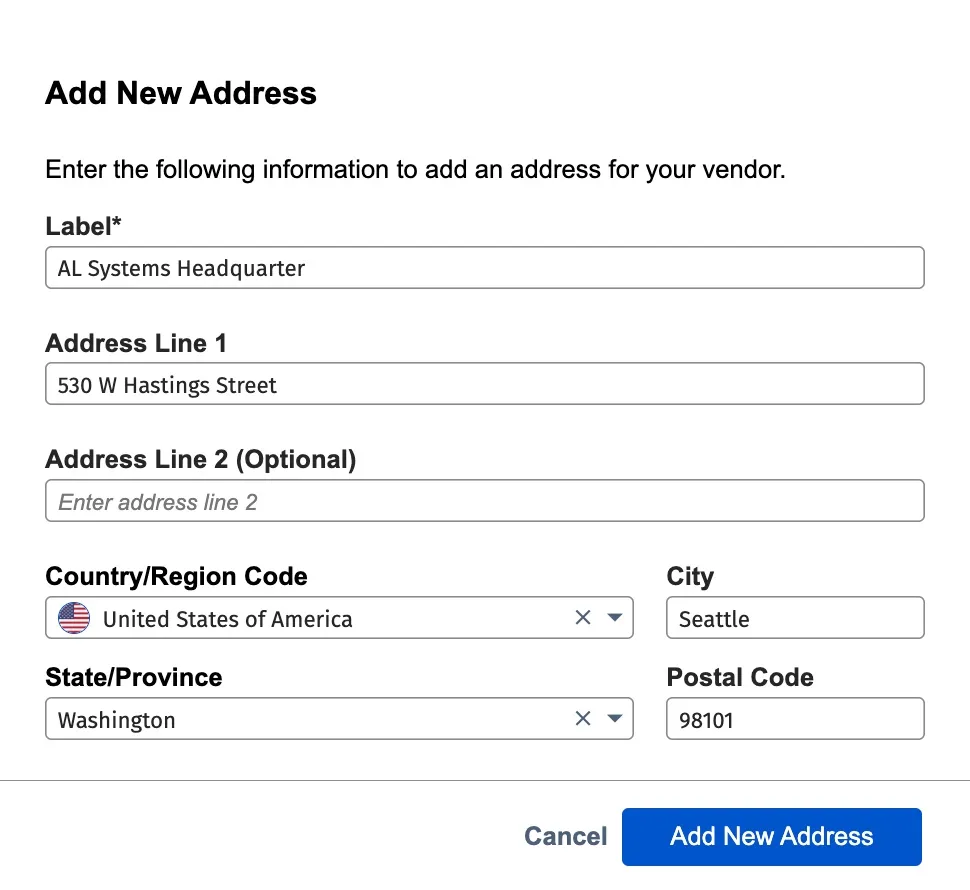
- Click Add Address/Request Approval
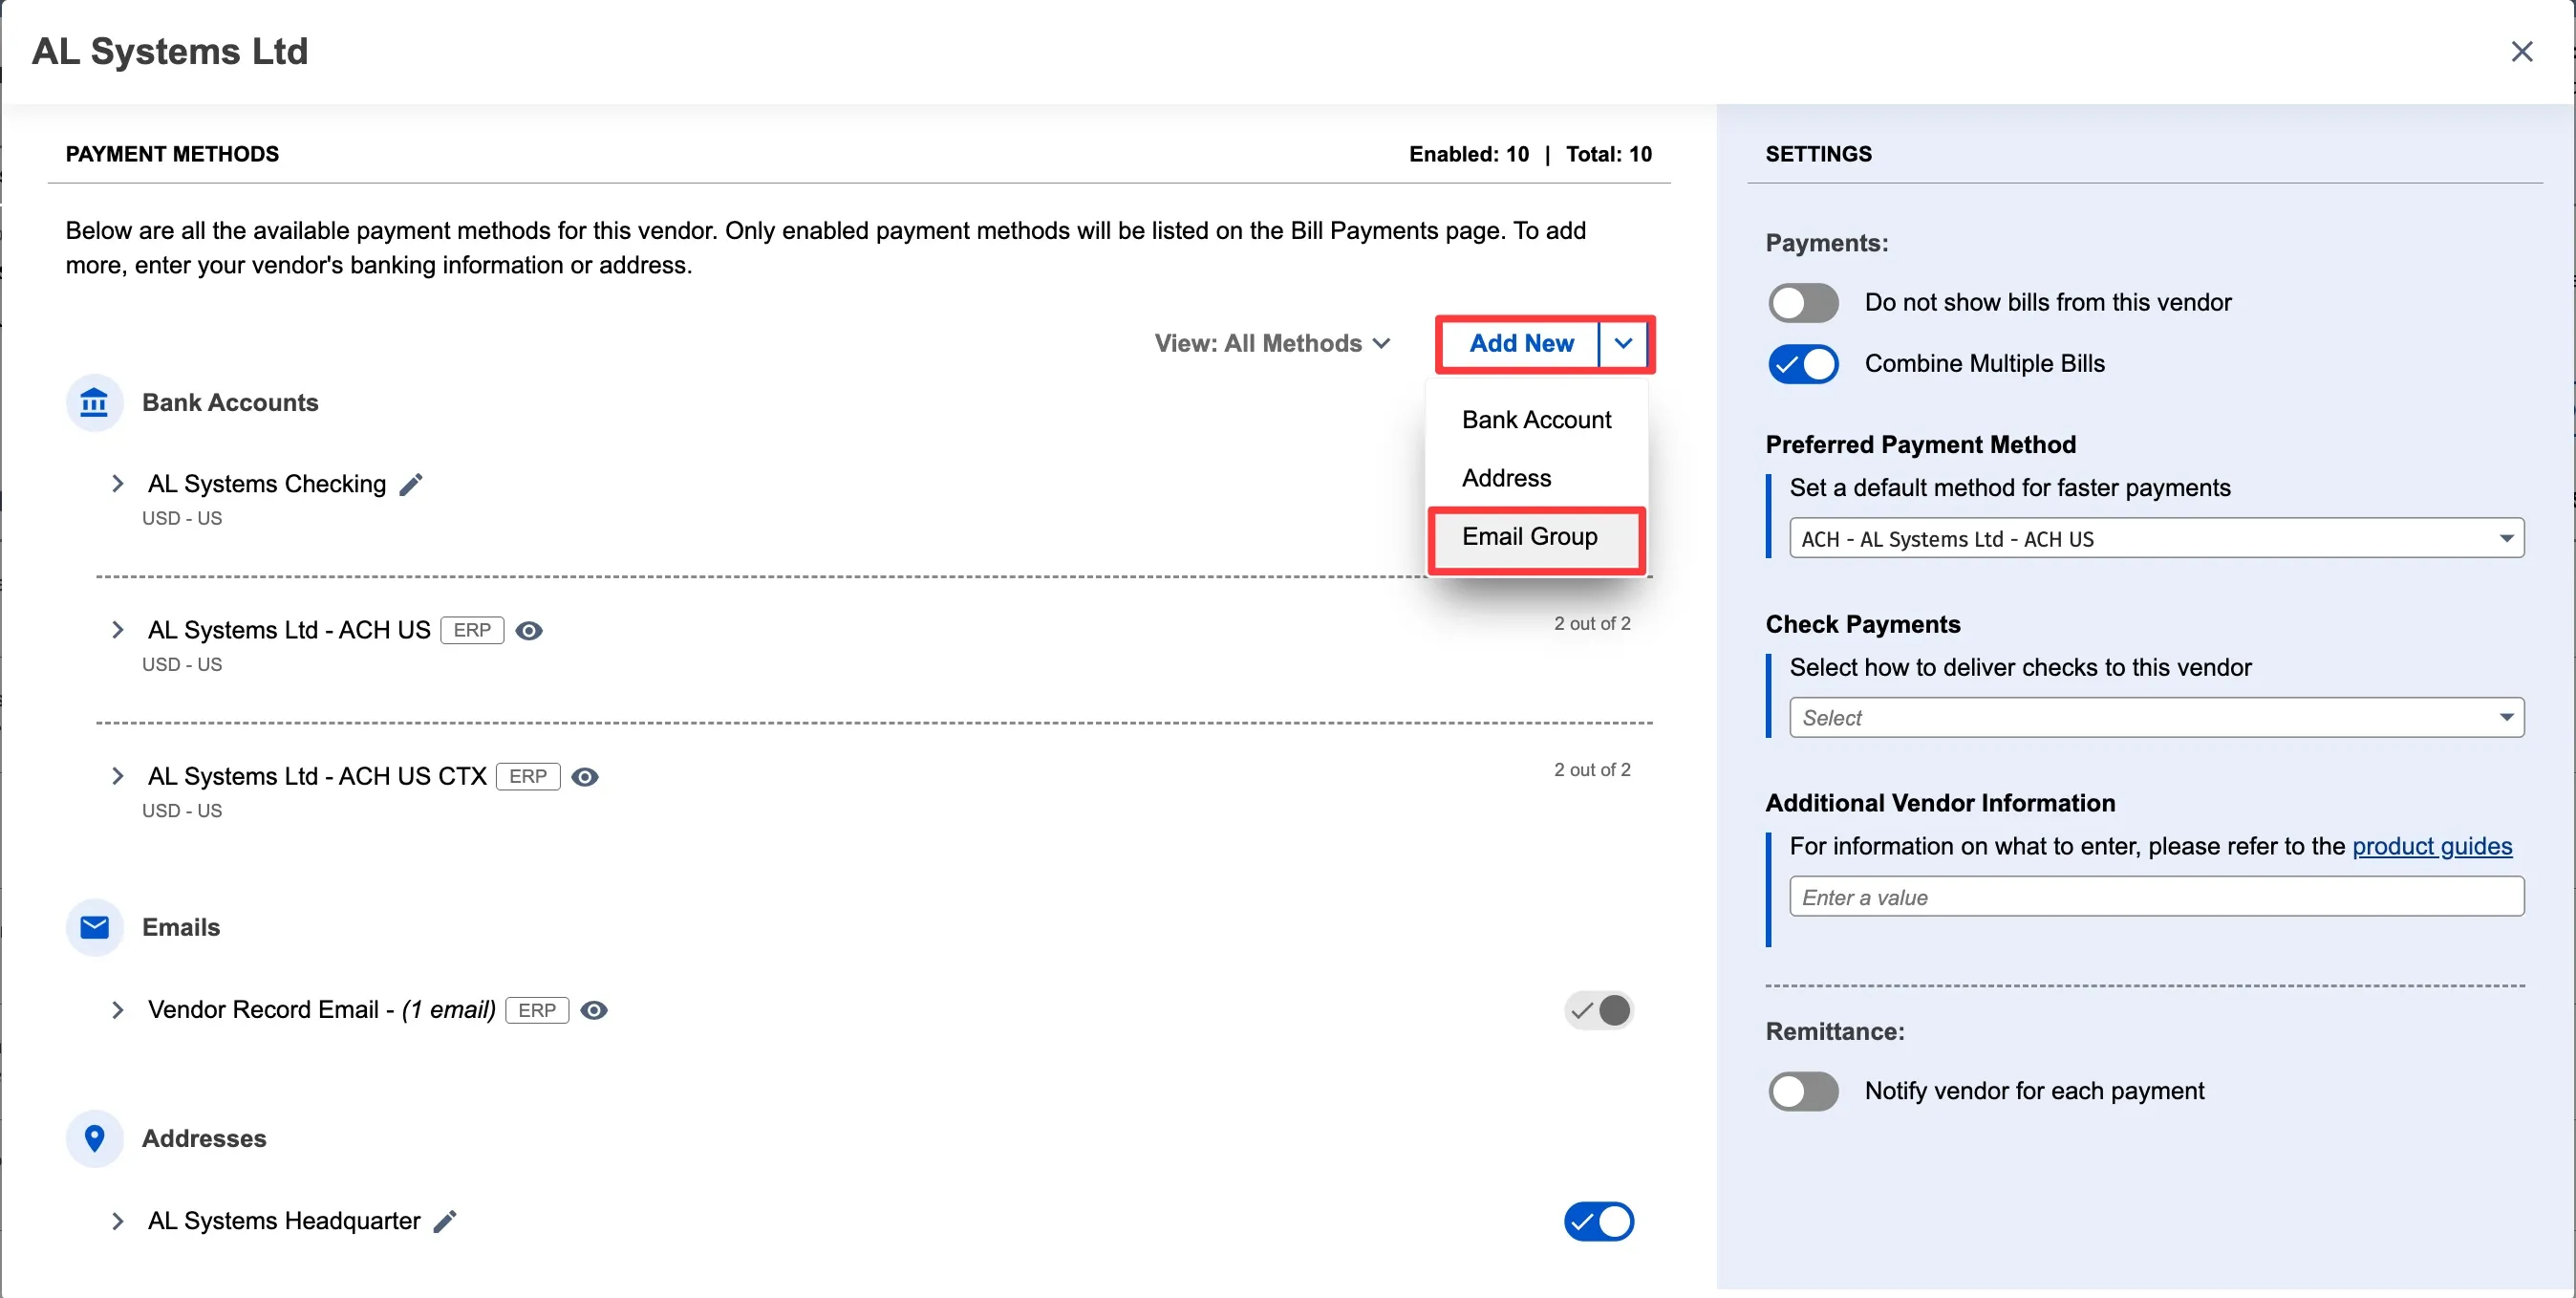
Add an Email Group
Email groups are available with the Remittance Advice product.
- Click Add New and select Email Group
- Add up to 5 email addresses (press Enter after each)
- Add a Group Name
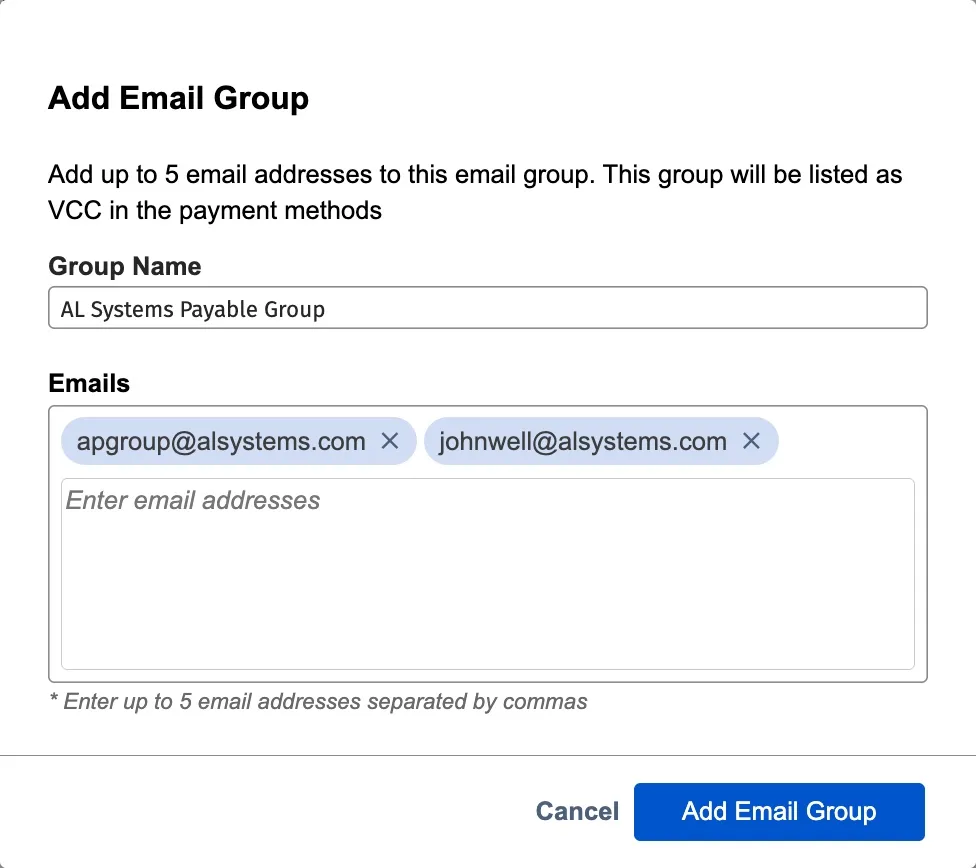
- Click Add Email Group
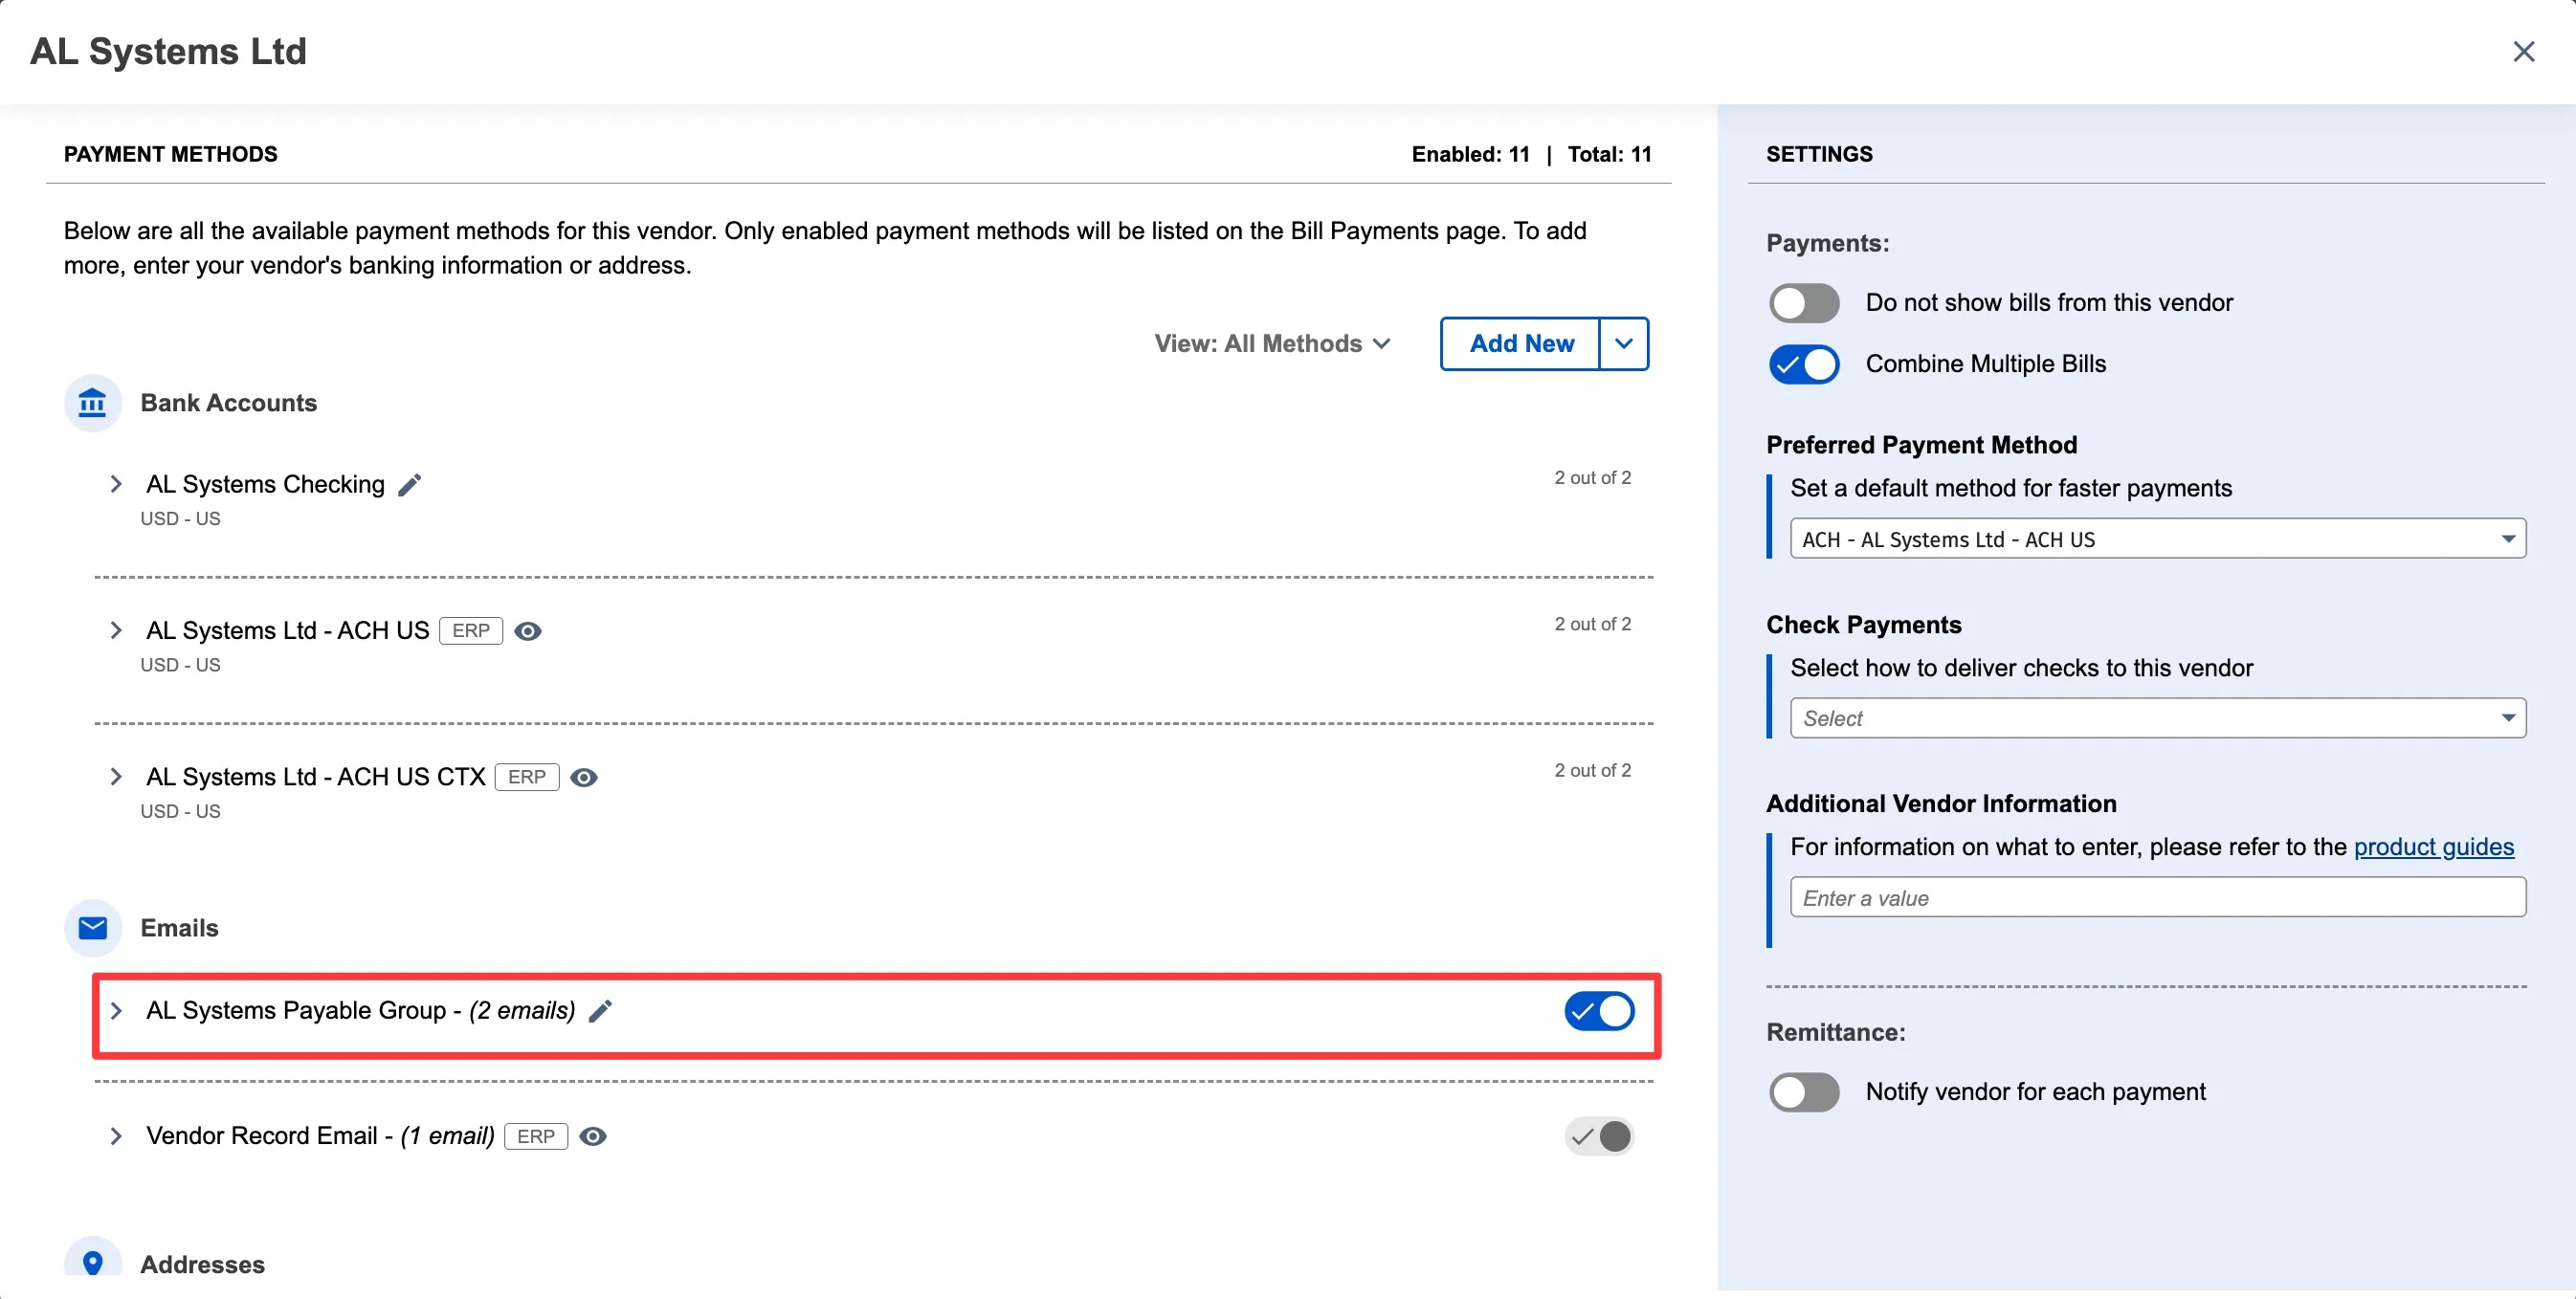
Configure Vendor Settings
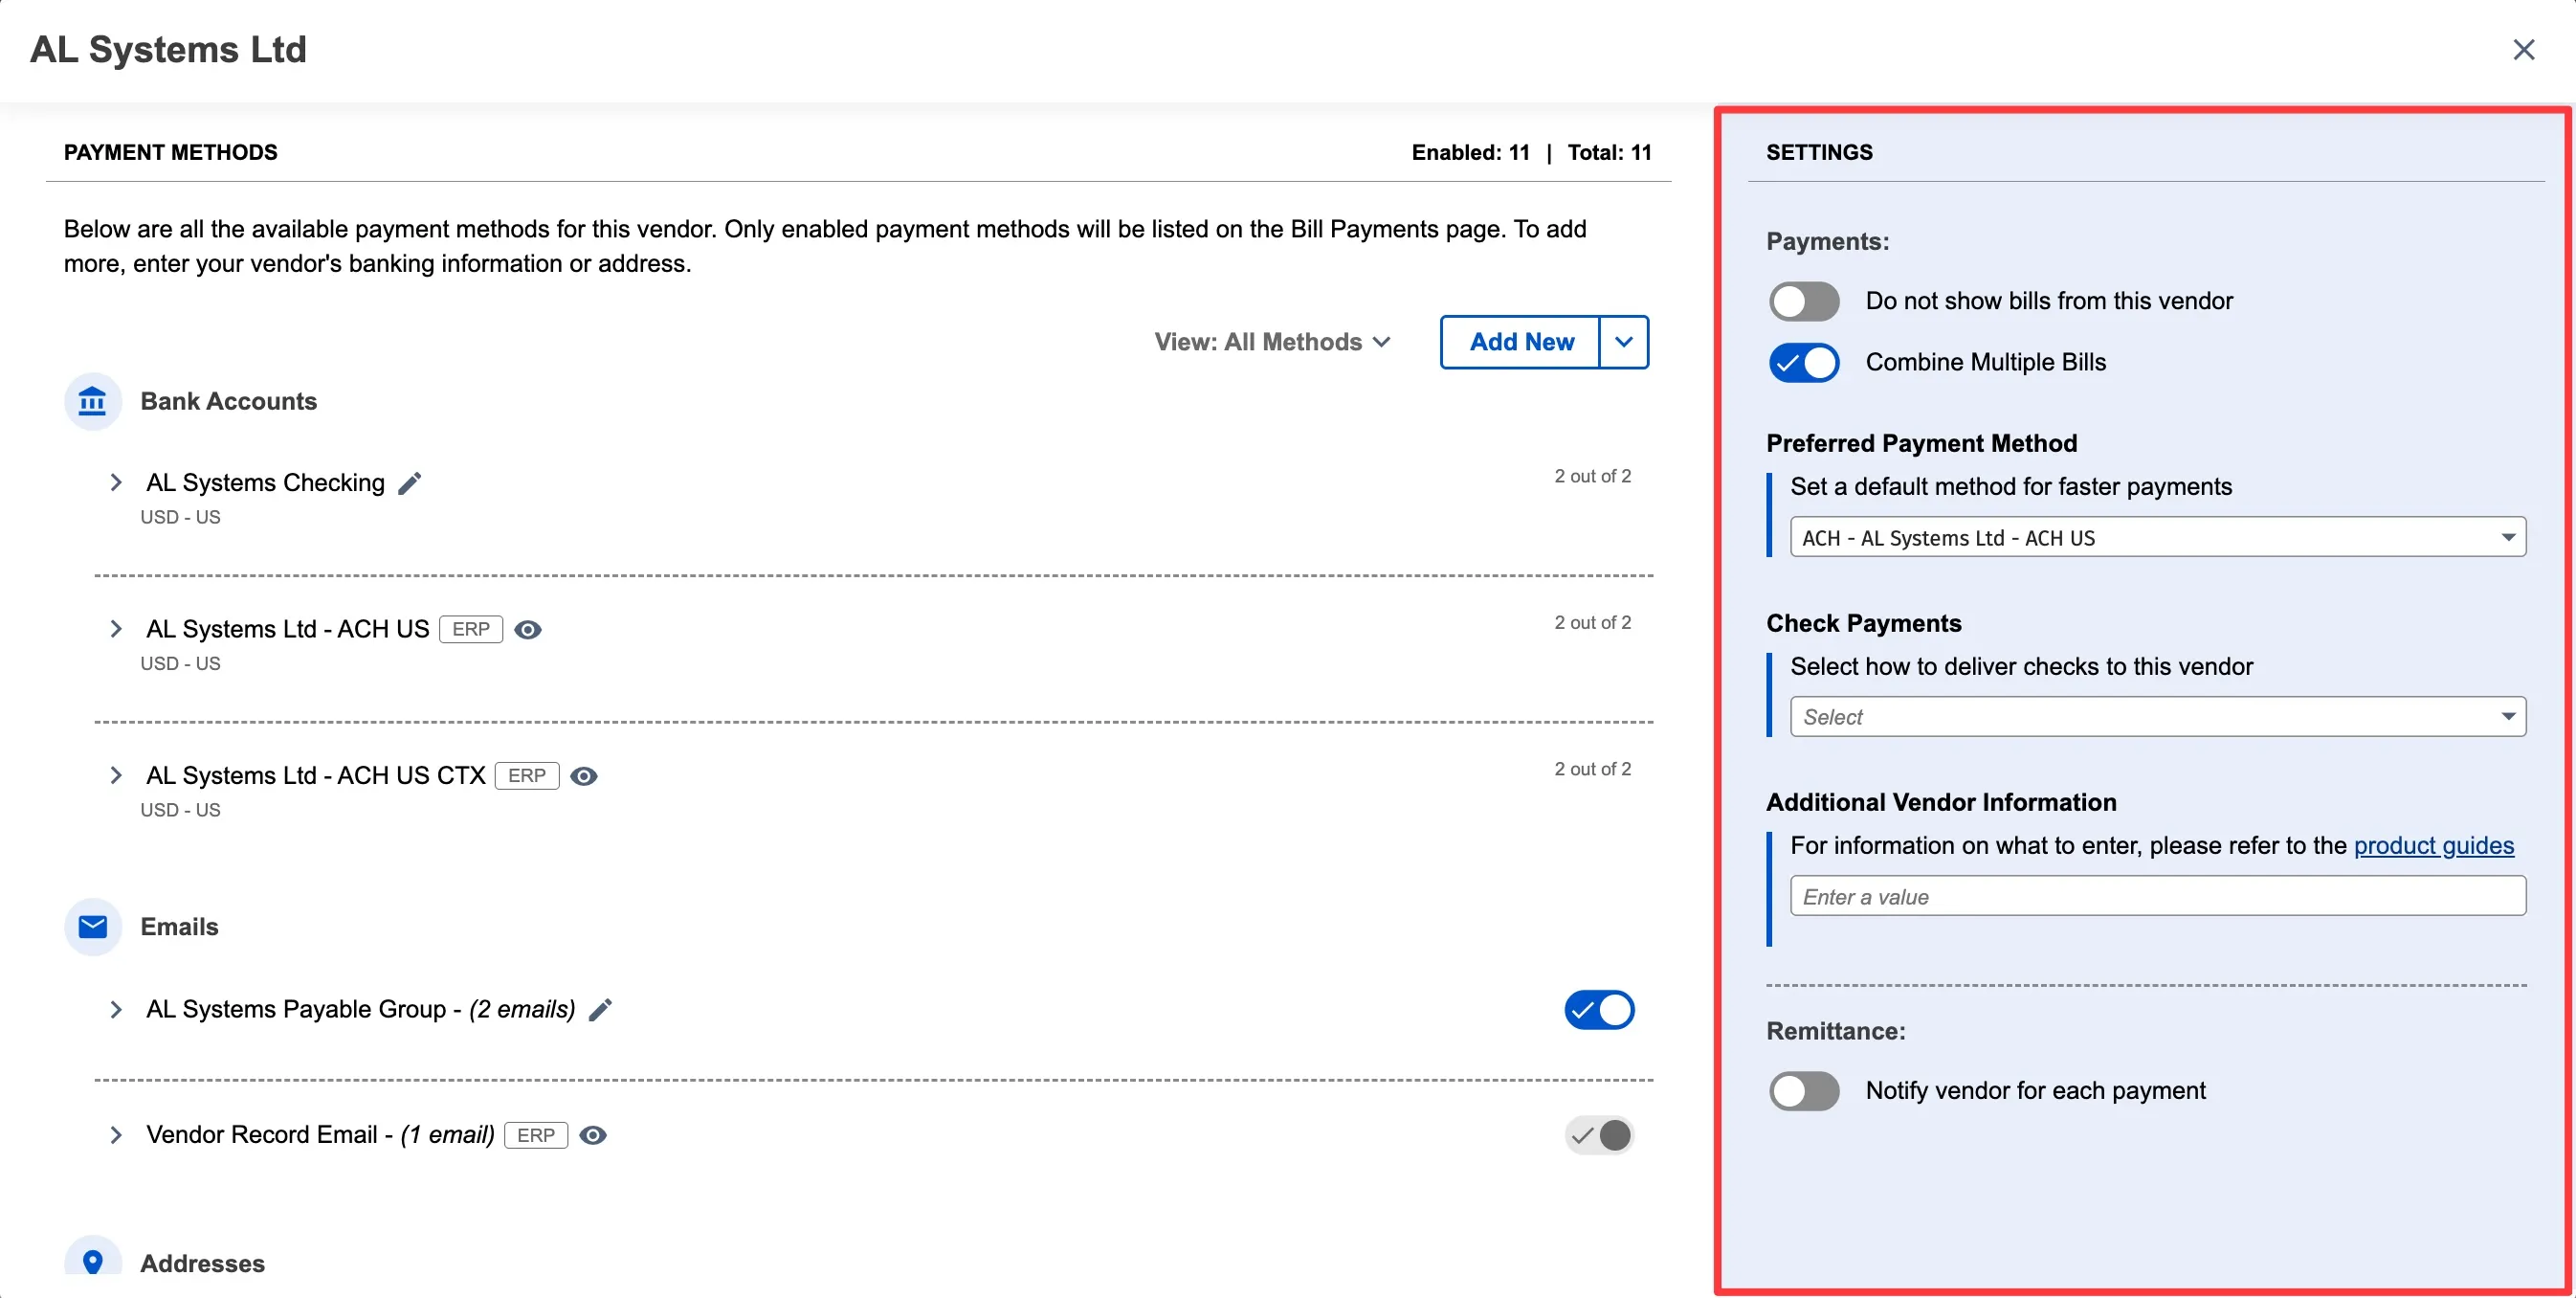
In the Settings pane (right side of payment information popup), configure vendor preferences:
Do not show bills from this vendor - Toggle ON to exclude all bills from this vendor from the Payments page
Combine Multiple Bills - Toggle ON to combine multiple bills from the same vendor into a single payment
Notify vendor for each payment - Toggle ON to enable remittance emails (select an email group from the dropdown)
Edit or Delete Payment Information
Click the pen icon next to any bank account, address, or email group to edit or delete.
To edit:
- Click the pen icon
- Update details
- Click Validate Payment Rail Eligibility (bank accounts only)
- Click Save Account or Save Changes
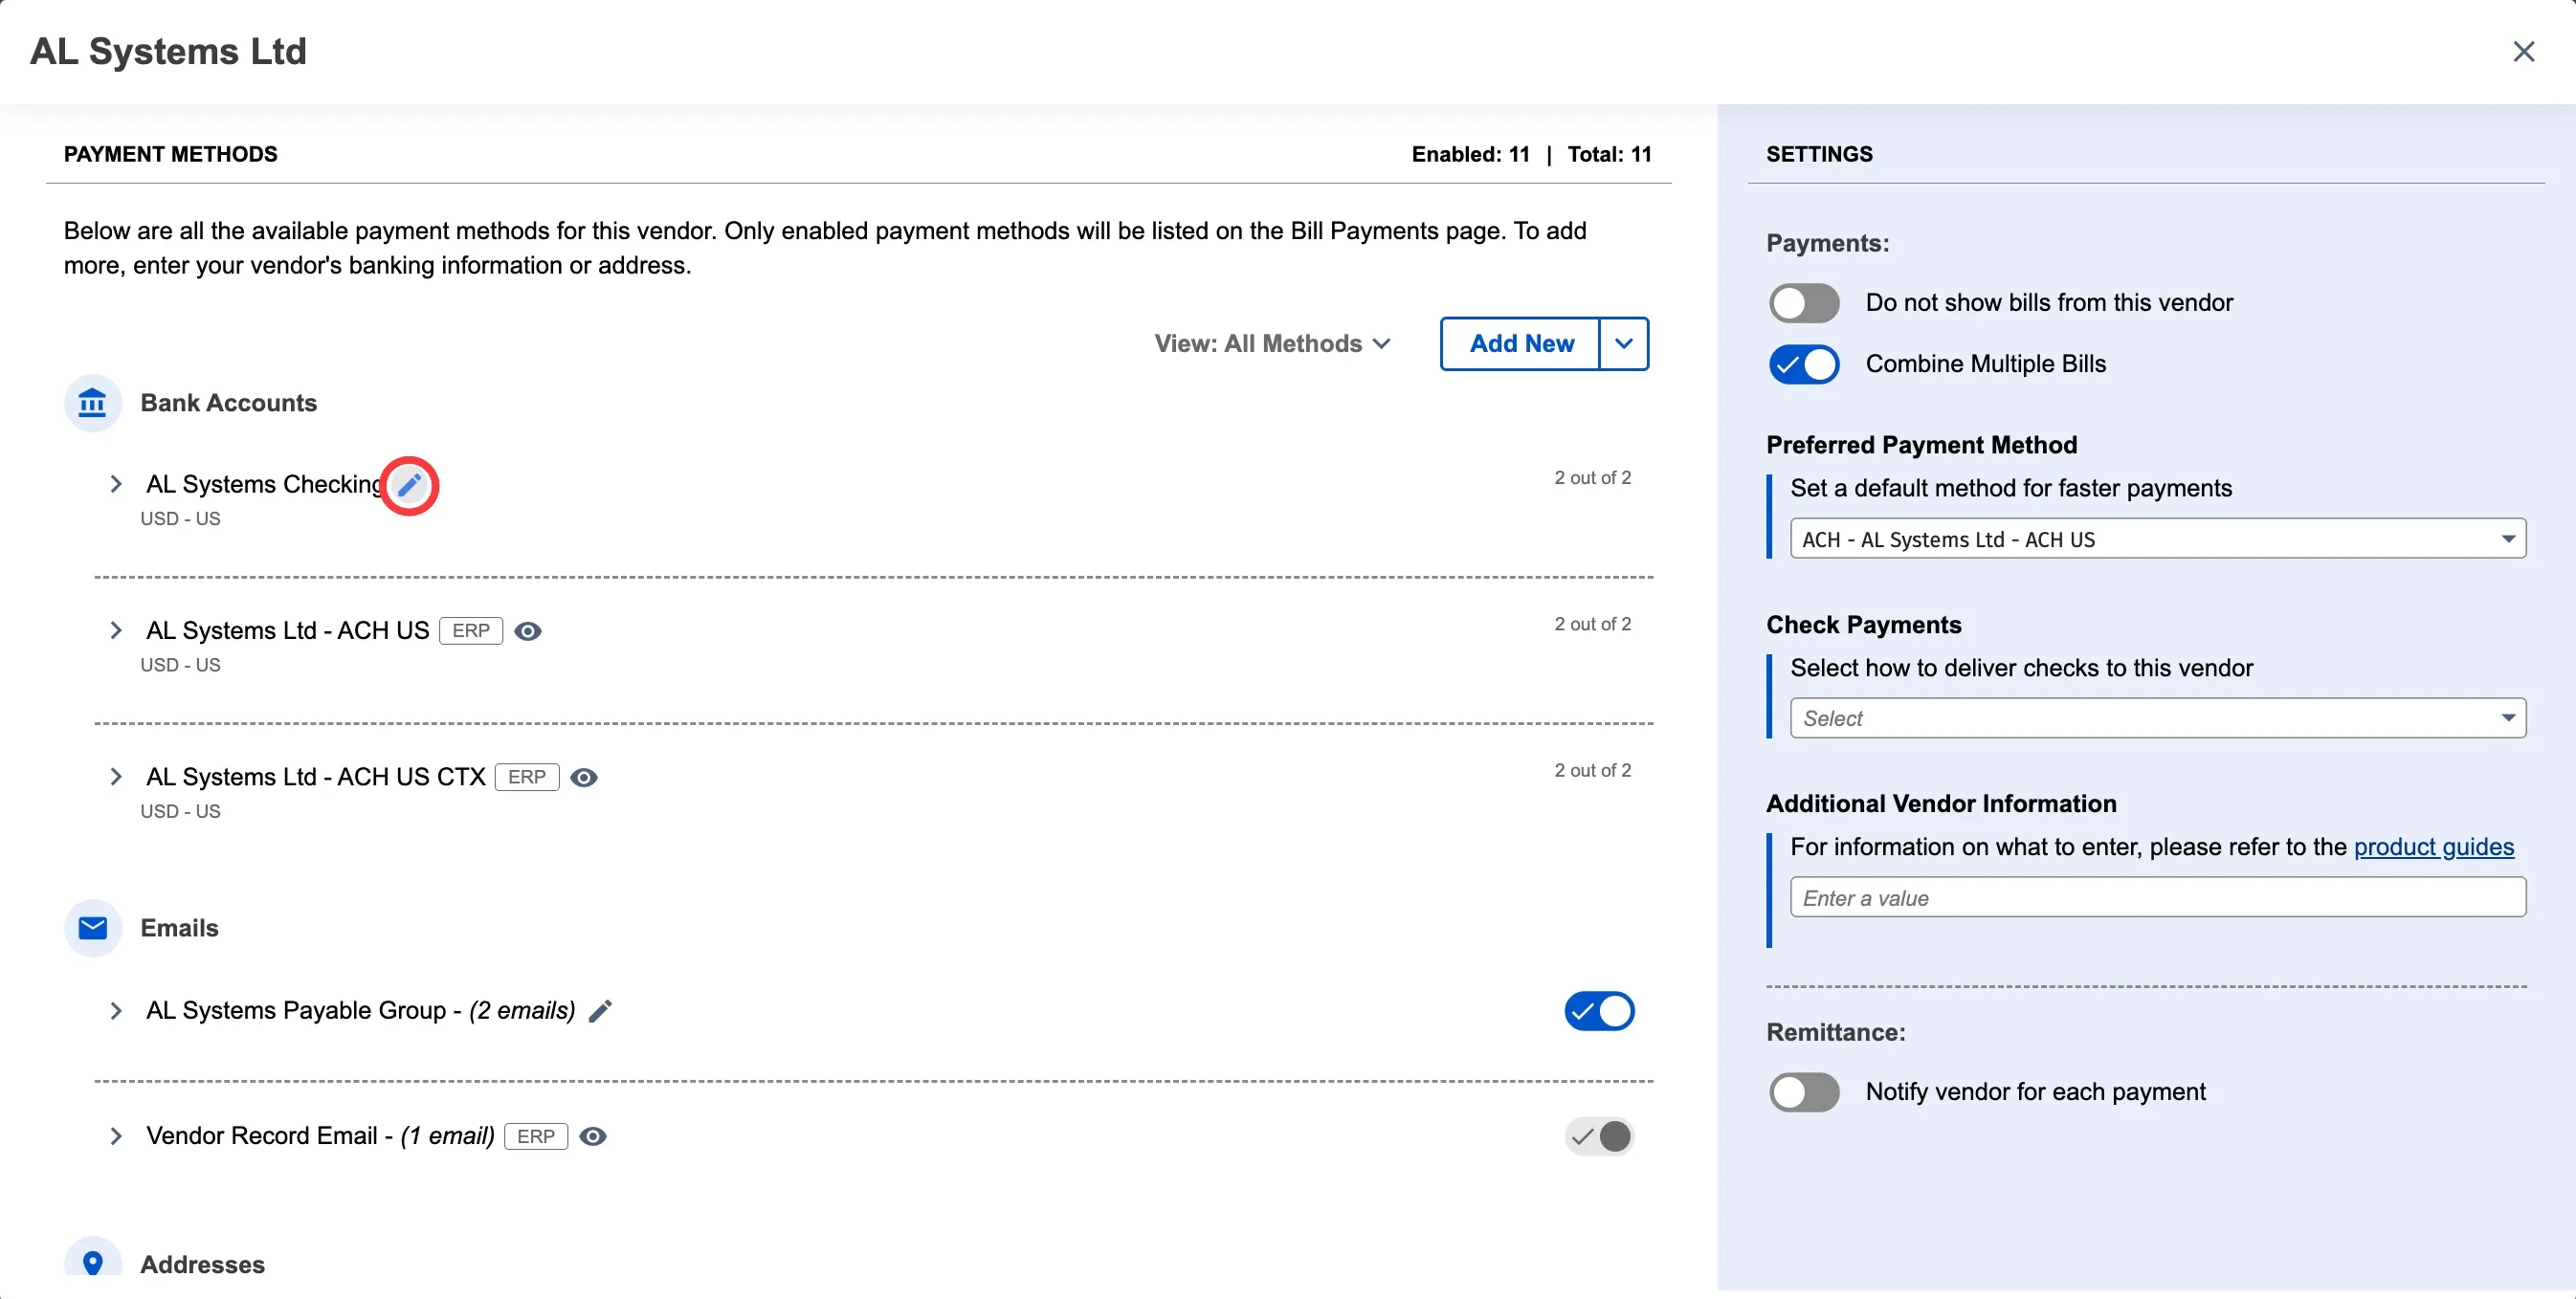
To delete:
- Click the pen icon
- Click Delete Account, Delete Address, or Delete Group (top right)
- Click Yes, Delete to confirm
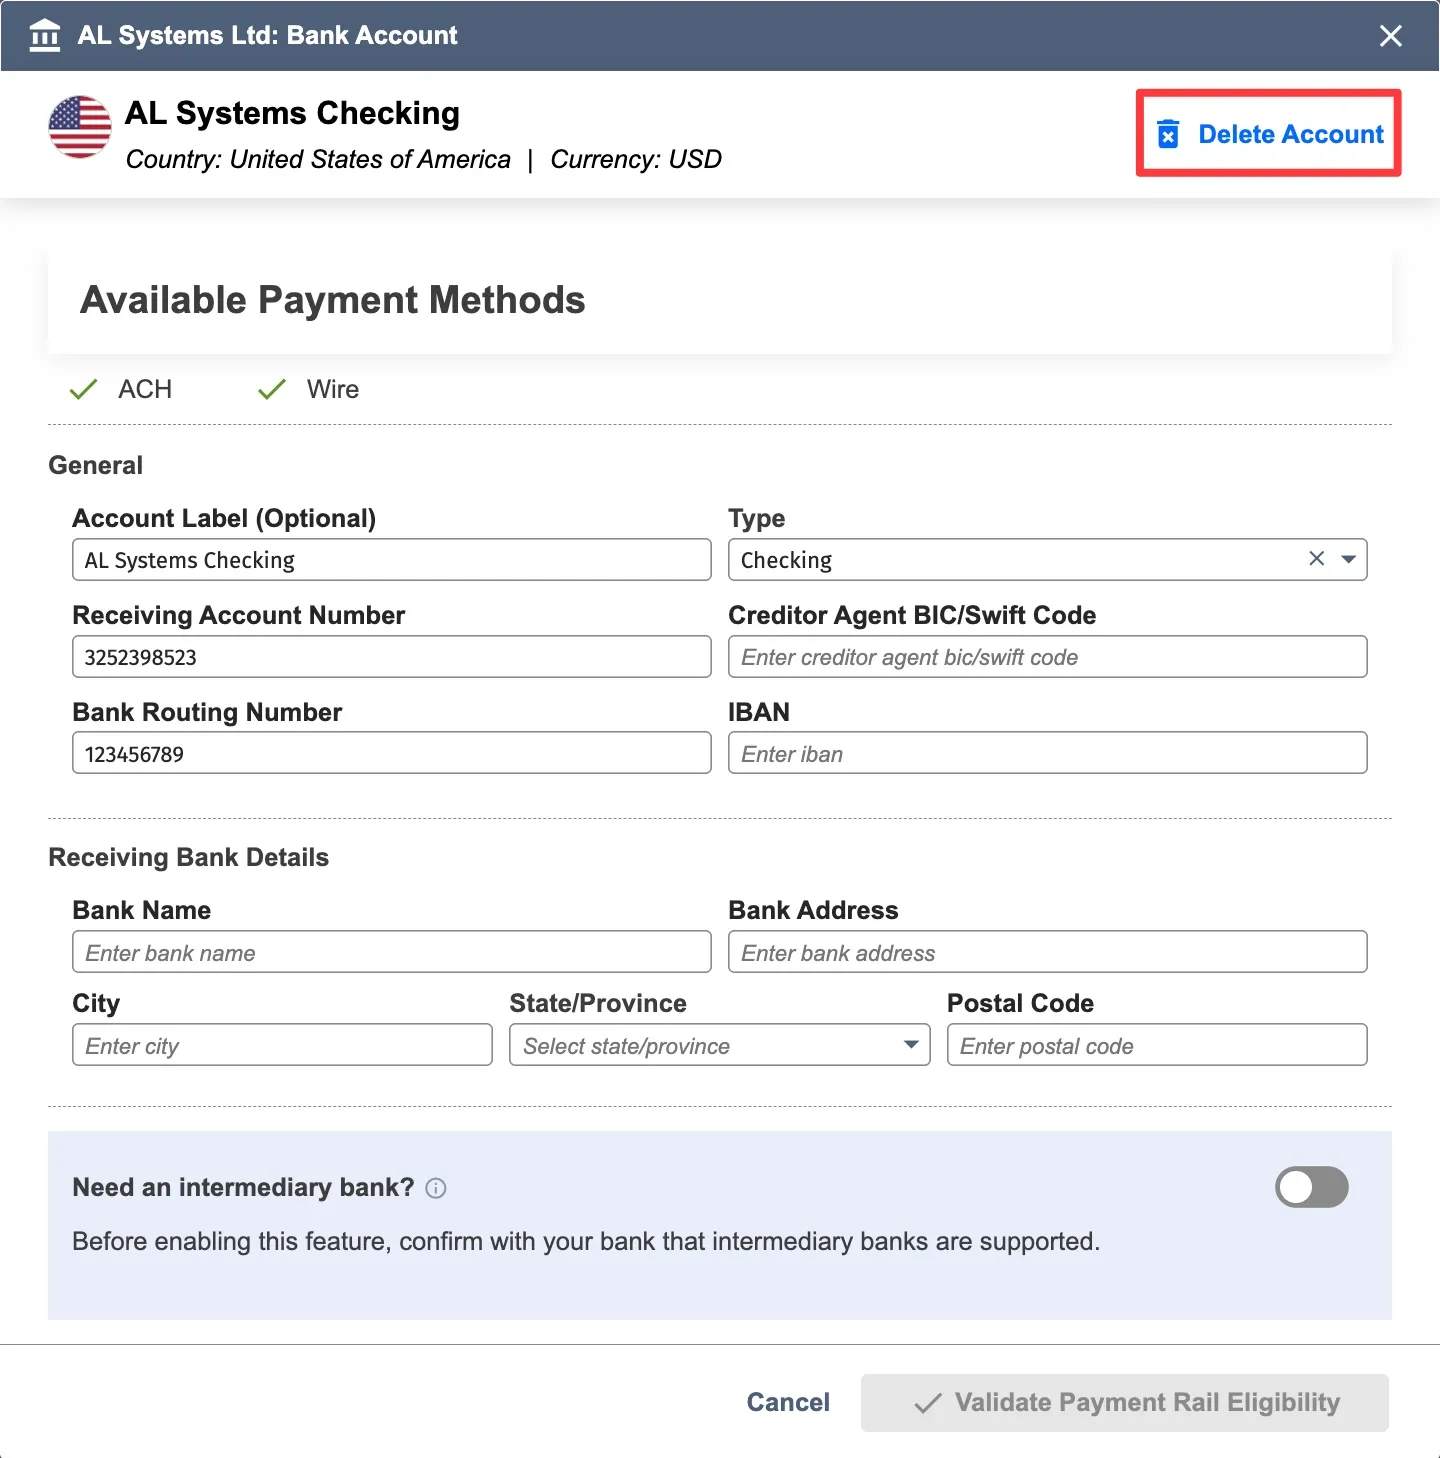
NOTE: If you delete the default payment method, the vendor will not have a default. Set a new one on the Payments page by clicking the star icon next to a payment method.
Payment Method Approvals
You can configure approval workflows to require authorization before changes to vendor or employee payment information are applied. This ensures data accuracy, enhances security, and enables an audit trail of all changes.
When approvals are enabled, changes to bank accounts, addresses, or email groups require approval before they take effect.
Pending changes indicator:
Vendors or employees with pending changes show a clock icon next to their name in the Payment Methods table. When you open the payment information popup, an info banner displays "Pending Changes" at the top. Payment information cannot be edited while changes are pending approval.
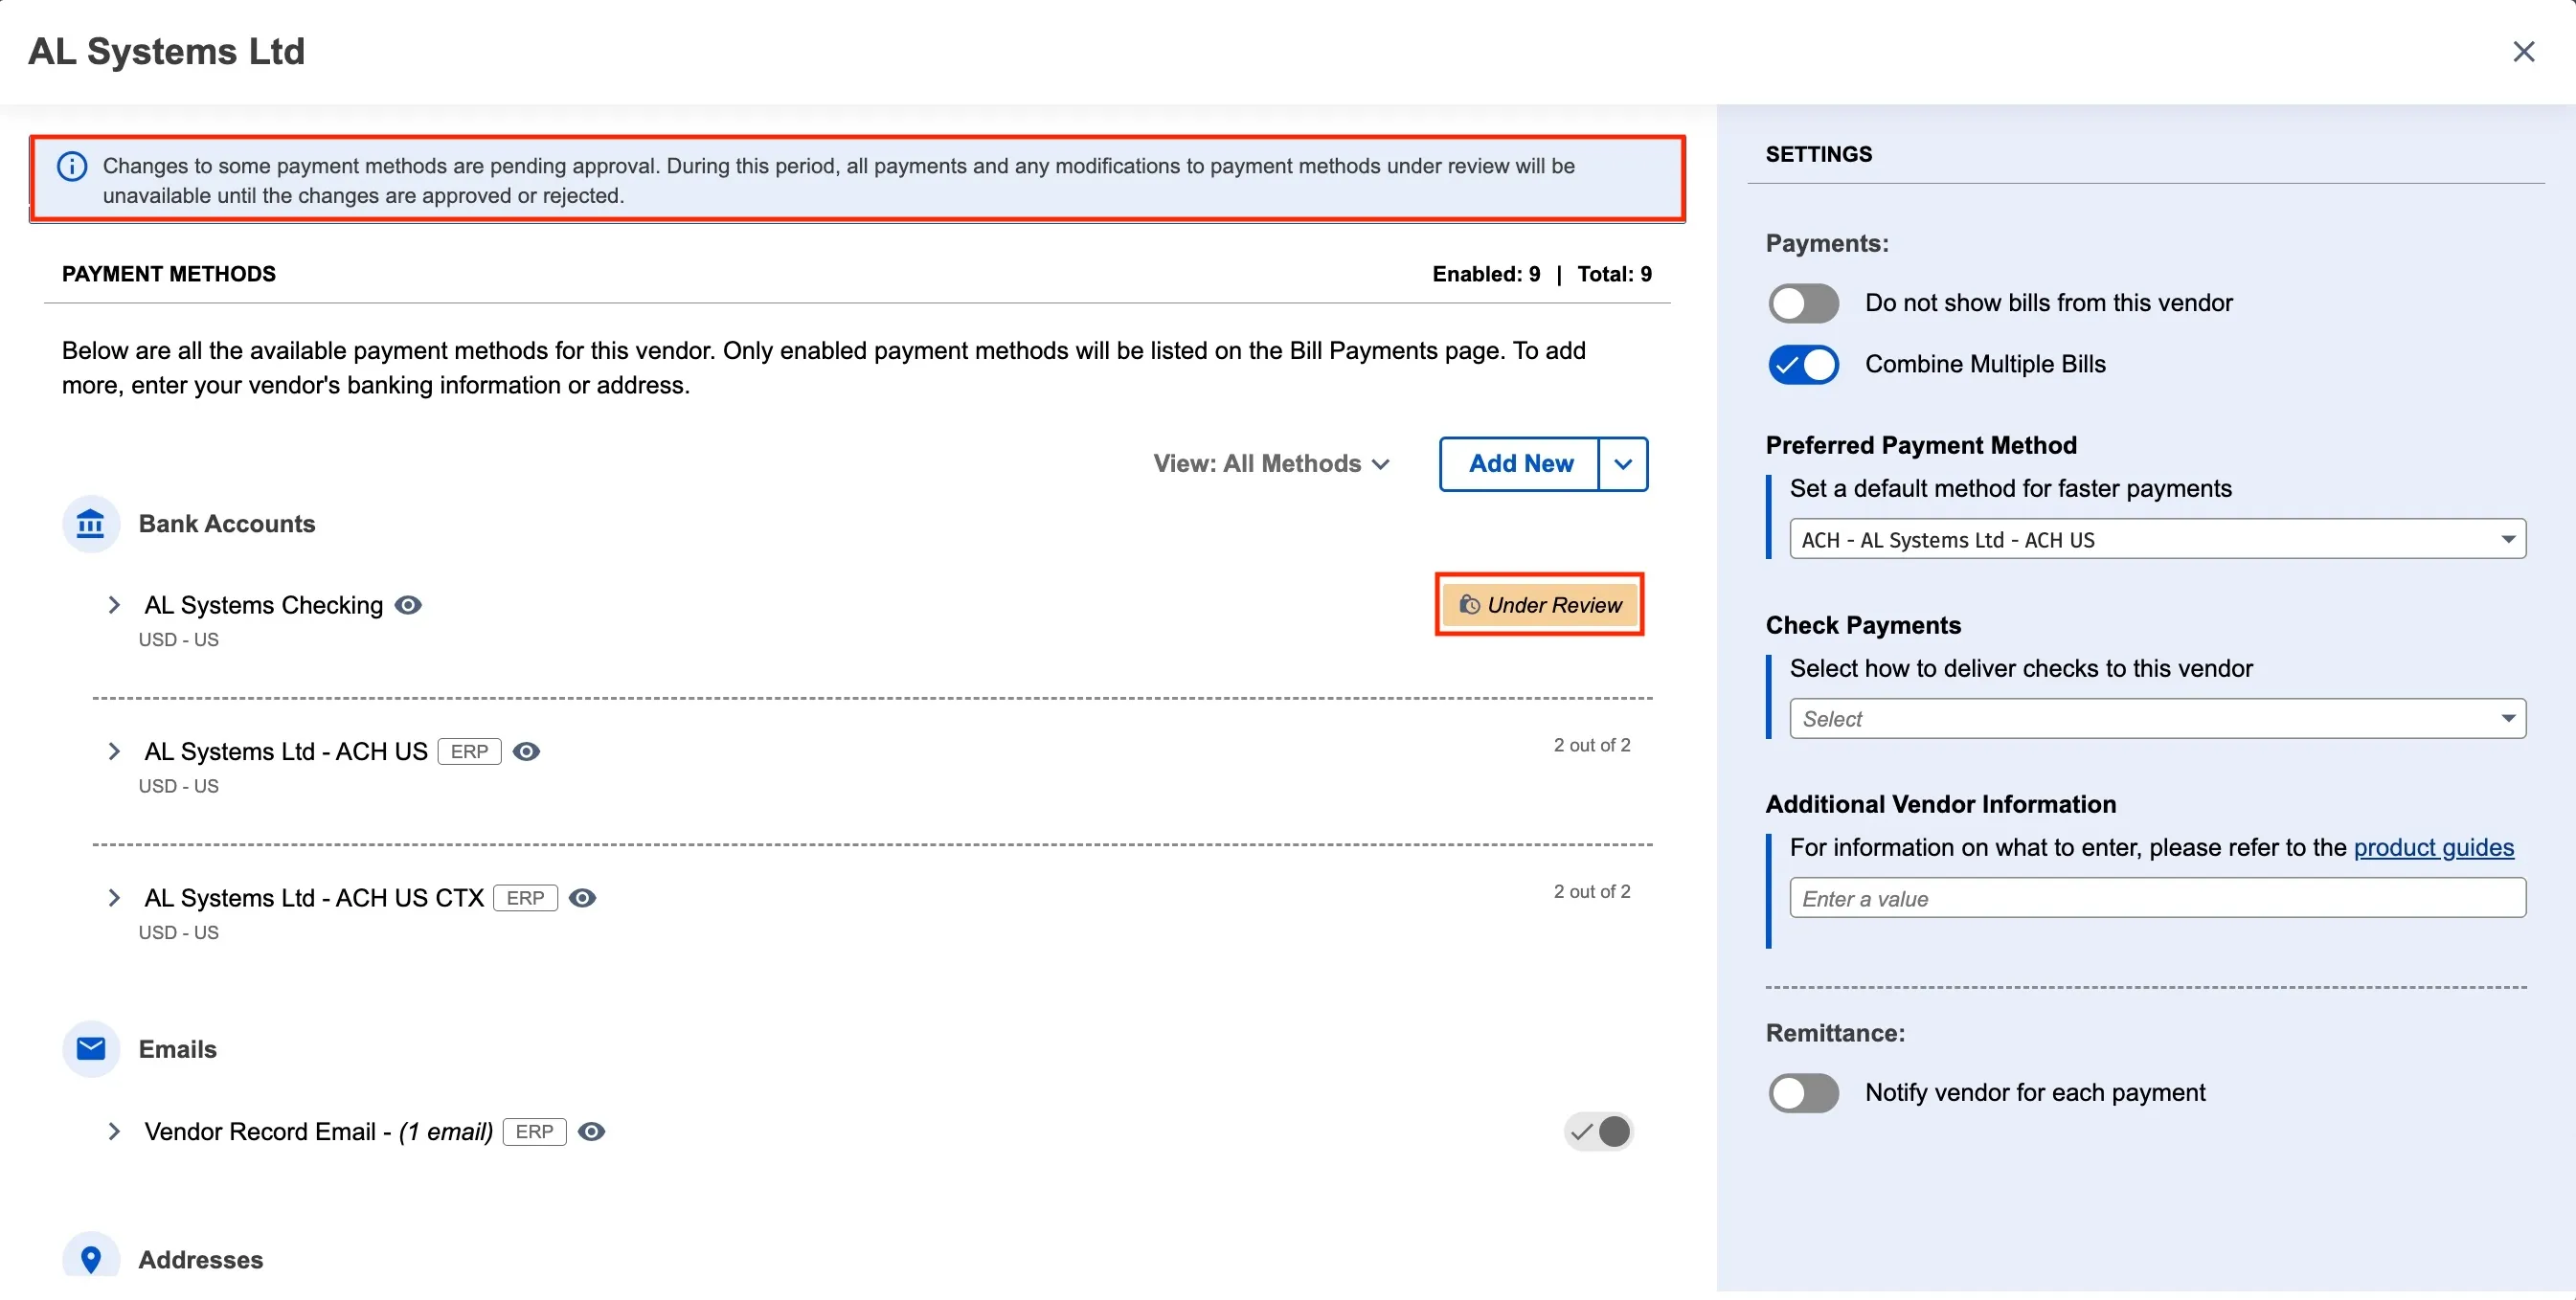
See the Payment Method Approvals guide for detailed instructions on configuring and managing approval workflows.
Setting a Default Payment Method
You can set a default payment method for each vendor in two places:
Option 1: In the Payment Methods page (Settings panel)
- Click a vendor name to open the payment information popup
- In the Settings pane (right side), find Preferred Payment Method
- Select a default payment method at the payment information level
- The selection saves automatically
Option 2: On the Payments page (while paying bills)
- Go to the Payments page
- Select a bill from the vendor
- In the Payment Method dropdown, click the star icon next to a payment method
- That payment method becomes the default for that vendor