Update Payment Methods via CSV (NetSuite)
NOTE: This page is for users of Accounts Payable (New) module
If you're using old Vendor Bills or Expense Reports pages, please refer to the Entity Bank Details Bundle Import/Export (NetSuite) guide instead.
The plugin allows you to update vendor and employee payment information in bulk through CSV files, eliminating the need for manual changes to each individual record.
You can use this process to edit existing records, to add additional line items to existing records, and to create new records.
This guide applies to both the Vendors tab and the Employees tab on the Payment Methods page.
Keep in mind that information stored inside native NetSuite cannot be updated in the plugin.
How Payment Methods Works
The Payment Methods page displays payment information from two sources:
Synced from NetSuite (Read-Only)
The plugin automatically syncs bank accounts, addresses, and emails from your native NetSuite vendor and employee records.
You cannot edit synced data in the plugin - these records are read-only and must be updated in NetSuite directly.
Added in Payment Methods (Editable)
You can add new payment methods directly in the plugin (via the UI or CSV import).
Plugin-added records are fully editable - you can edit them as needed.
How to Tell the Difference In the CSV file, the is_editable column shows:
- N = Synced from NetSuite (read-only)
- Y = Added in plugin (editable)
When to Use This Feature
Use the CSV import feature to:
- Add payment methods for multiple vendors/employees at once (faster than entering one by one)
- Edit existing payment methods that were added in the plugin (update bank accounts, addresses, or emails)
- Add additional payment methods to existing vendors/employees (e.g., add a new bank account to supplement NetSuite data)
Note: You cannot use CSV import to edit data that was synced from native NetSuite records. To modify synced data, update the vendor/employee record in NetSuite directly.
Export
From anywhere in NetSuite, click on the plugin button and then Payment Methods.
Select either the Vendors tab or the Employees tab depending on which records you want to update.
Follow these steps to begin the export and import process.
Navigate to Payment Methods
From anywhere in NetSuite, you can navigate to the Payment Methods page. Hover on the CNB Pay button, then Accounts Payable (New) > Payment Methods.
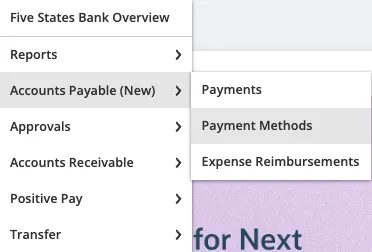
Select either the Vendors tab or the Employees tab depending on which records you want to update.
Download Template or Export Existing Data
Option A: Download a Blank Template (for new records)
Use this option if:
- You're adding NEW payment methods that don't exist in NetSuite or the plugin
- You're starting fresh and have no existing data to edit
Steps:
- Click Export Vendor Template or Export Employee Template (depending on your tab)
- A blank CSV file with the correct column structure will download
- Fill in the template with your vendor/employee payment information
Continue to Step 3: Fill the CSV Table belowClick Export Vendor Template or Export Employee Template
Option B: Export Existing Records (for editing)
Use this option if:
- You need to update payment methods that were previously added in the plugin (is_editable = Y)
- You want to add additional payment methods to vendors/employees who already have some
Steps:
- Click Export CSV File
- A CSV file containing all your current vendor/employee records will download (both synced and plugin-added)
- Edit rows where is_editable = Y or add new rows as needed
- Do not modify rows where is_editable = N (these are synced from NetSuite and cannot be changed via CSV)
- Continue to Step 3: Fill the CSV Table below
TIP: Save a copy of the exported file before making changes, so you can easily restore the original if needed.
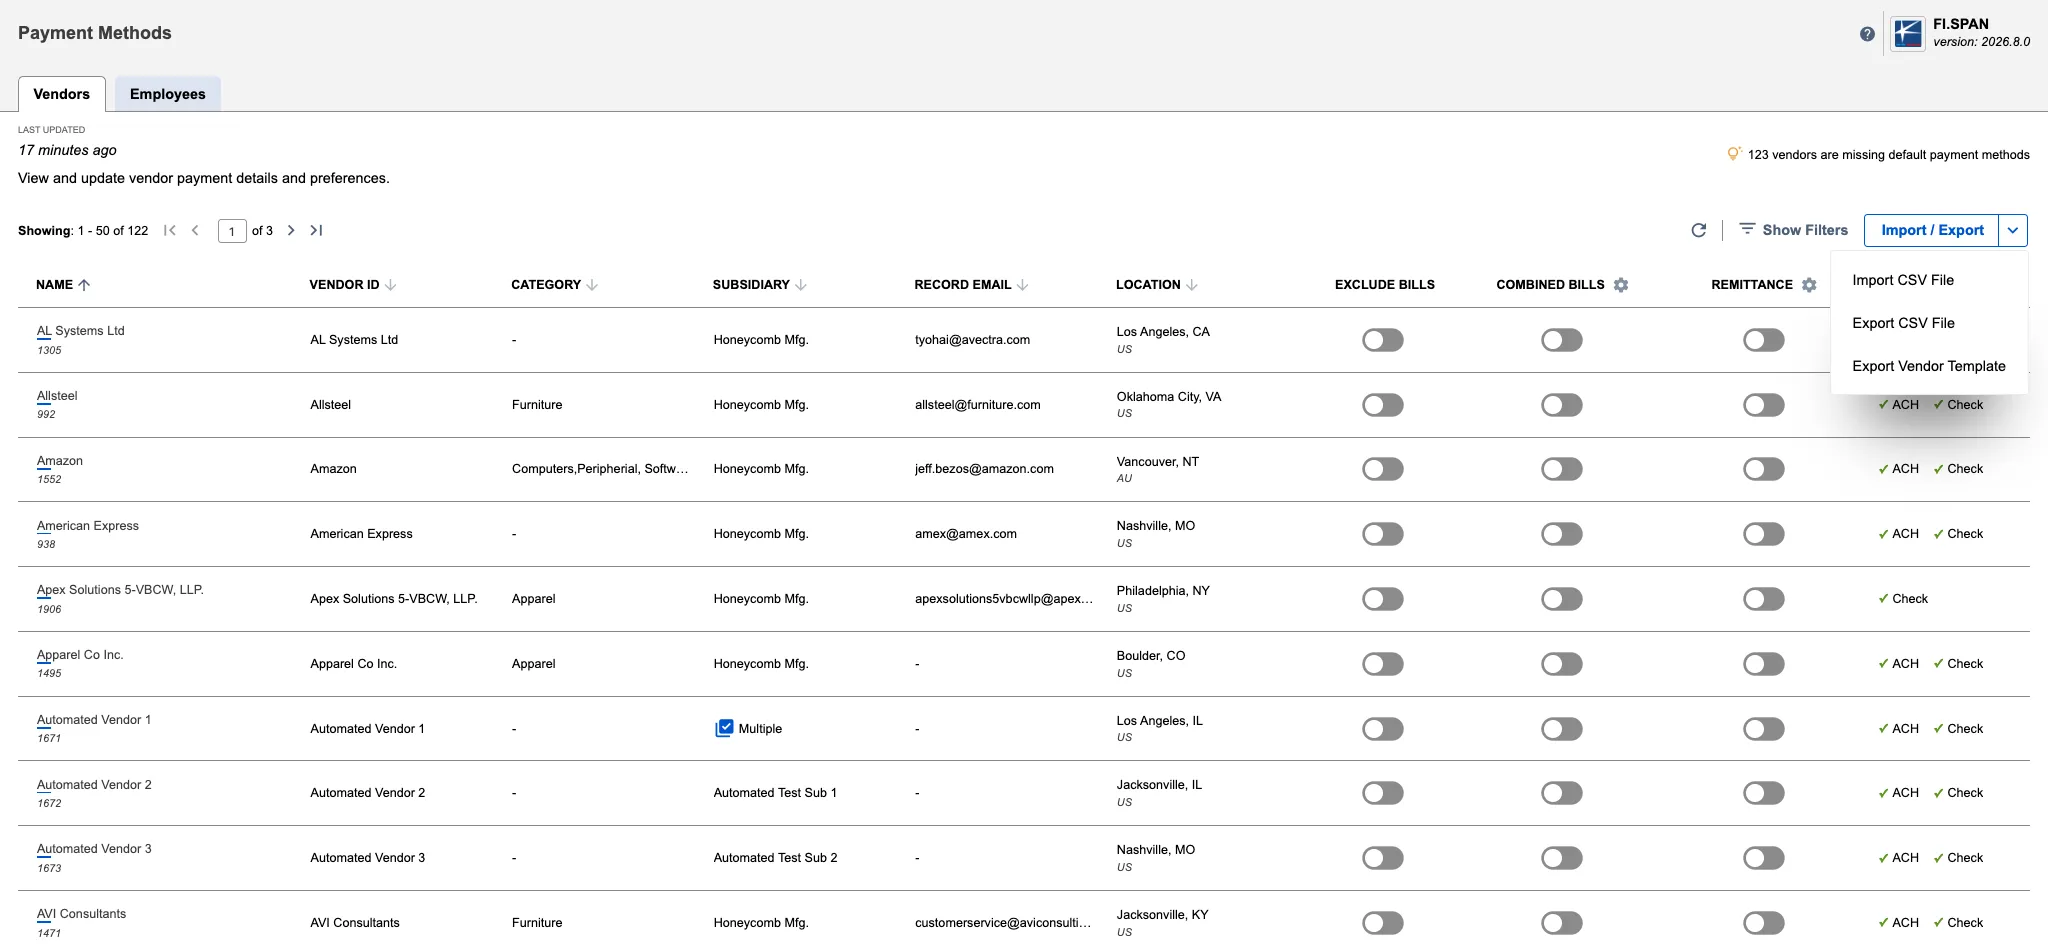
IMPORTANT: The CSV is pre-structured for import functionality; do not modfiy the column structures.
Import
Prepare the File for Import
Once you have exported the file, create the import file containing your revised vendor information by editing the data and adding new rows if you are incorporating new vendors/employees.
Do not remove any of the column headers or add additional columns; otherwise, the import will fail.
Each of the three data types requires specific data fields. Use the existing records as a guide to which columns require data, and be sure to follow the general rules to avoid errors that prevent a successful import.
- BANK ACCOUNT: To add a new bank account, add a row and enter BANK ACCOUNT in the data_type column.
- ADDRESS: To add a new address, add a row and enter ADDRESS in the data_type column.
- EMAIL: To add a new email, add a row and enter EMAIL in the data_type column.
Please do not fill in the email or address fields for these columns, and ensure that the other columns are completed according to the guidance provided in the table below.
NOTE: Only one line entry per vendor can have the is_default_account set to Y. Enter the default_payment_method for the default account address record.
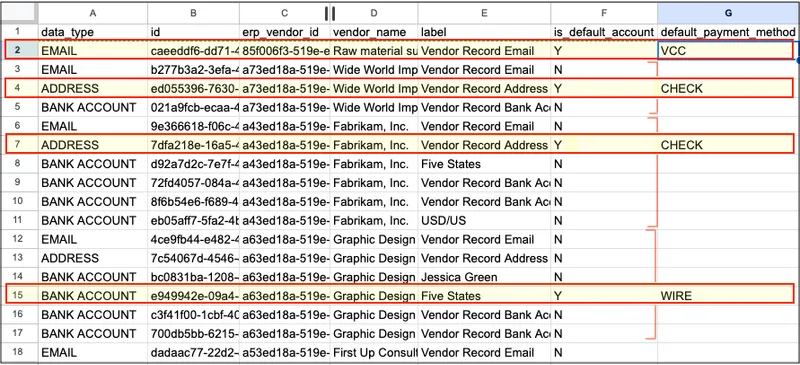
Fill the CSV Table
You need to use specific default_payment_method code values that correspond to your payment rail types.
Since a vendor can only have one default account with a default_payment_method, you must ensure the payment method you choose is compatible with the corresponding data type.
Navigate to Payment Methods and check in the table which payment methods are listed for a vendor.
Here is a complete list showing which payment rail types are supported by each data type. Use only the payment rails supported by your plugin for this specific vendor.
CSV file - table rows
data_type | Compatible default payment_method(s) for this data type | Other rules |
|---|---|---|
BANK ACCOUNT | ACH ACH_NEXT_DAY CPA BACS SEPA WIRE EFT_AU WIRE_AU EFT_SG WIRE_SG WIRE_NZ EFT_NZ WIRE_ZA EFT_ZA INTERNATIONAL_WIRE INTERNATIONAL_ACH UK_FPS | Leave the email and address fields empty. |
ADDRESS | CHECK | Leave the bank account and email fields empty. |
VCC | Leave the bank account and address fields empty |
CSV file - table columns
Column Name | Allowable Values (CASE SENSITIVE) | Notes |
|---|---|---|
data_type | Either: ADDRESS, BANK ACCOUNT, EMAIL | Required Field For BANK ACCOUNT, leave the email and address fields empty. For ADDRESS, leave the bank account and email fields empty. For EMAIL, leave the email and address fields empty. |
id | Internal ID | Leave empty if adding a new payment method. Do not modify the value if modifying existing payment information. |
erp_vendor_id | NetSuite vendor/employee Internal ID | Required Field Do not modify. This field protects against duplicate records. |
vendor_name | NetSuite vendor/employee name |
|
is_default_account | Y/N | Required Field Can only have one default Y per vendor. All others must be N. |
default_payment_method | Please confirm that they are in capital letters (e.g., ACH, ACH NEXT DAY, CHECK, INTERNATIONAL ACH, INTERNATIONAL WIRE, SEPA, VCC) | Anything from the list of available payment methods. To see what is enabled on the vendor, navigate to Plugin → Payment Methods and check in the table which payment methods are listed for that vendor. Any unsupported payment type will result in the line failing to import. If you would like to add some payment methods to the plugin, please contact your bank. |
is_editable | Y/N | Required Field For any new lines, please enter "Y". Do not modify an "N" and change it to a "Y"; doing this may break the import. |
email_addresses | Any email addresses, up to 5 | Separate each email address with “,” |
country | Required Field For Bank Accounts This field accepts upper, lower, and mixed case values. Please enter the ISO alpha-2 country codes format. The import will error if the user enters the full country name (i.e., New Zealand). | |
currency | Required Field For Bank Accounts Please enter the currency following the currency code list. This field accepts upper, lower, and mixed case values. | |
account_type | CHECKING or SAVINGS | Required Field For Bank Accounts This field accepts upper, lower, and mixed case values |
account_number | Vendor's account number | |
institution_number | Vendor's institution number | |
transit_number | Vendor's transit number | |
routing_number | Vendor's routing number | |
bank_code | | |
iban | Two letter country code, followed by two check digits, and up to 35 alphanumeric characters | |
bic | Vendor's BIC or SWIFT code for the country and bank | |
bank_name | Anything | |
address_line | Anything |
|
address_line_2 | Anything | |
address_city | Anything |
|
address_state_province | Anything |
|
address_postal_Code | Anything |
|
local_branch_code | Valid branch code for this bank | Use this field for BSB codes if the country requires it |
payment_purpose_message | Anything |
|
payment_purpose_code | Valid purpose code |
|
payment_payment_iso_code | Valid sender country code |
|
payment_payment_codeword | Valid receiving entity codeword |
|
payment_payment_party_type | P, T, G, N | P = Parent, T = Subsidiary, G = Group, N = Non-related |
payment_residential_status | resident, nonresident |
|
sort_code | Valid sort code for this bank | |
Import CSV
Once the file is ready, select the Import CSV button.
Attach the file that is ready to import and enter one valid email address to receive a status update.
NOTE: You are not able to modify this email address after clicking Import. If the email is incorrect, you will not get the status email, but the import will complete.
Once the file has been uploaded, a checkmark will appear. You can expect an email with a status update within a few minutes.
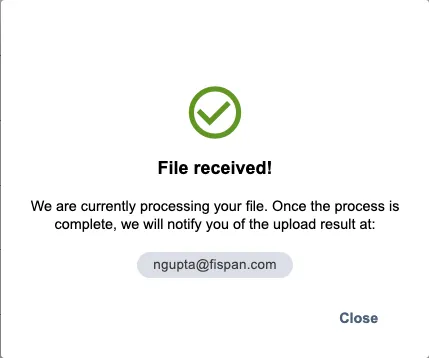
Import Confirmation Email
Once the import status changes, you will receive an email notification.
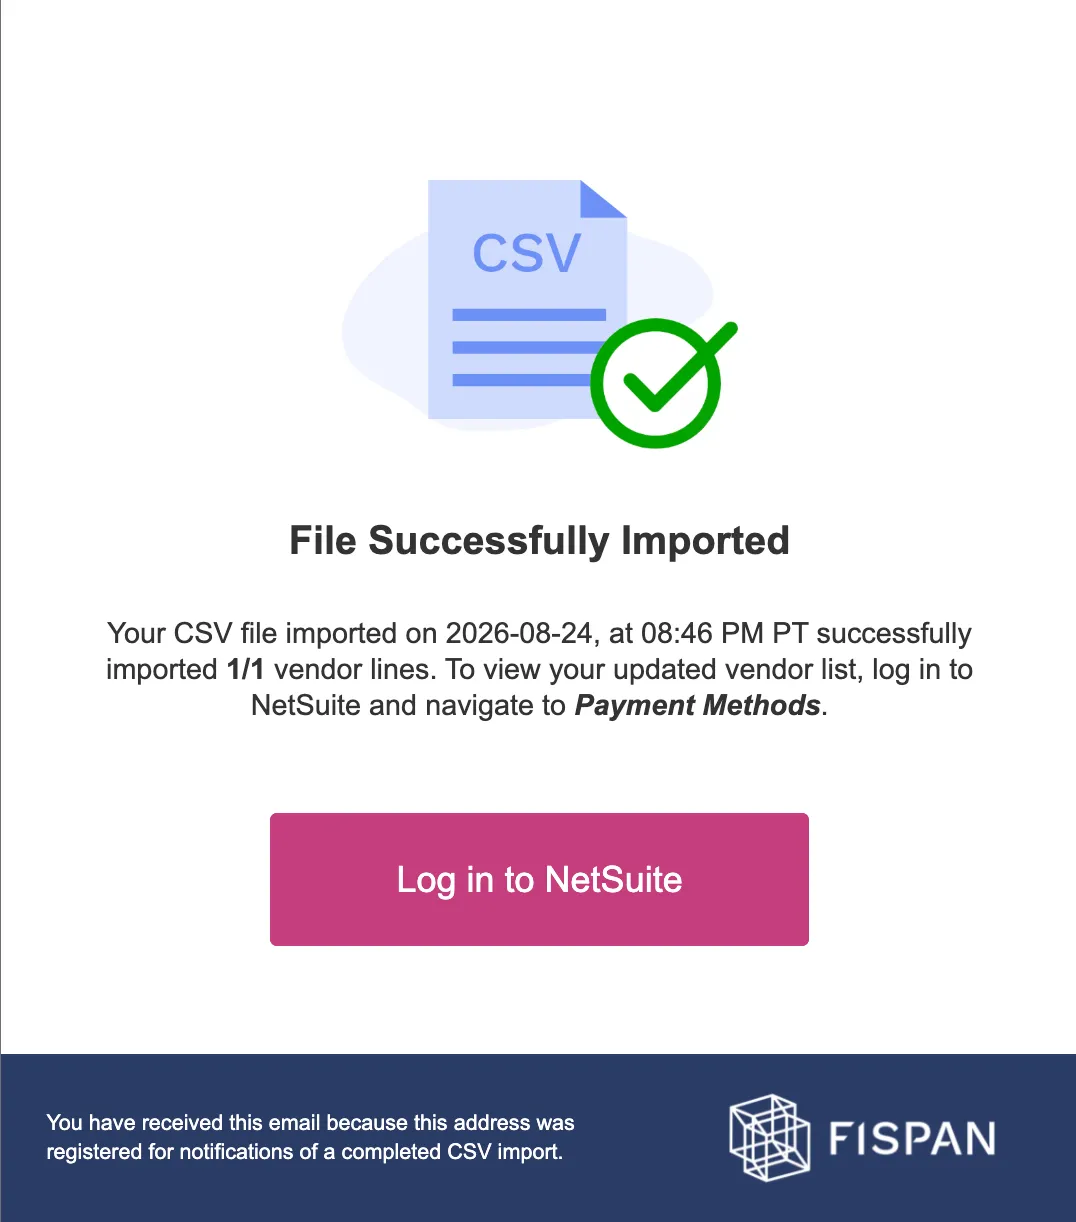
This email notification will let you know if the import has been successful. There are 3 options:
File Successfully Imported
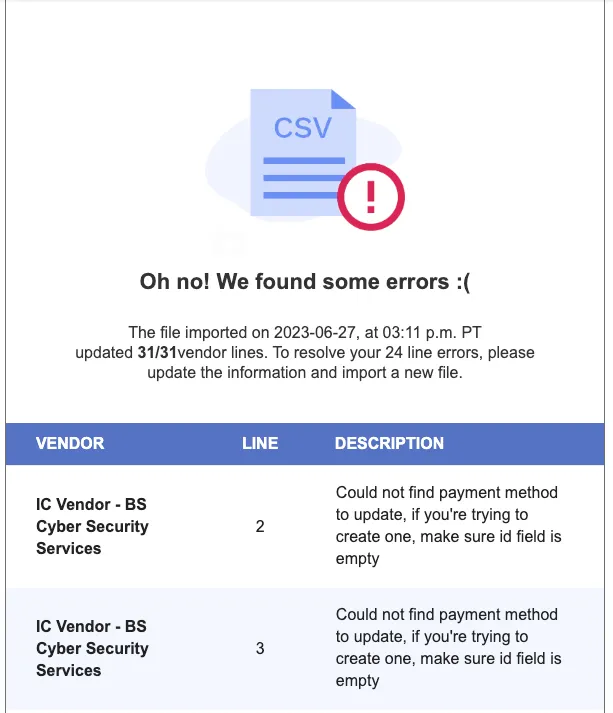
Import is successful, but there are line errors.
- In that case, please download the CSV attached to the email that lists those errors and submit the file again. You may leave the error column in the newly uploaded CSV. Please note that if an error is found in one of the rows, none of the information present in that row will be updated.
Import was not successful.
- This issue may be caused by internet connectivity problems or unsupported file formats. Please verify your internet connection, refresh the page to attempt again, or contact support if the problem persists.
Import CSV Example
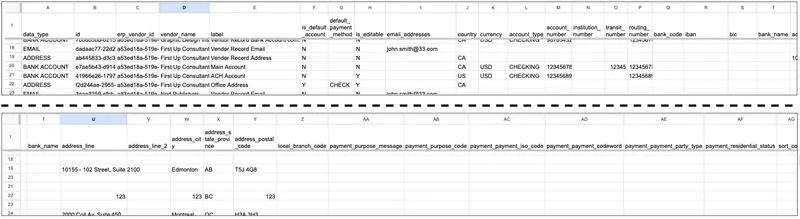
This file shows an example of what the import file can look like for one hypothetical vendor.
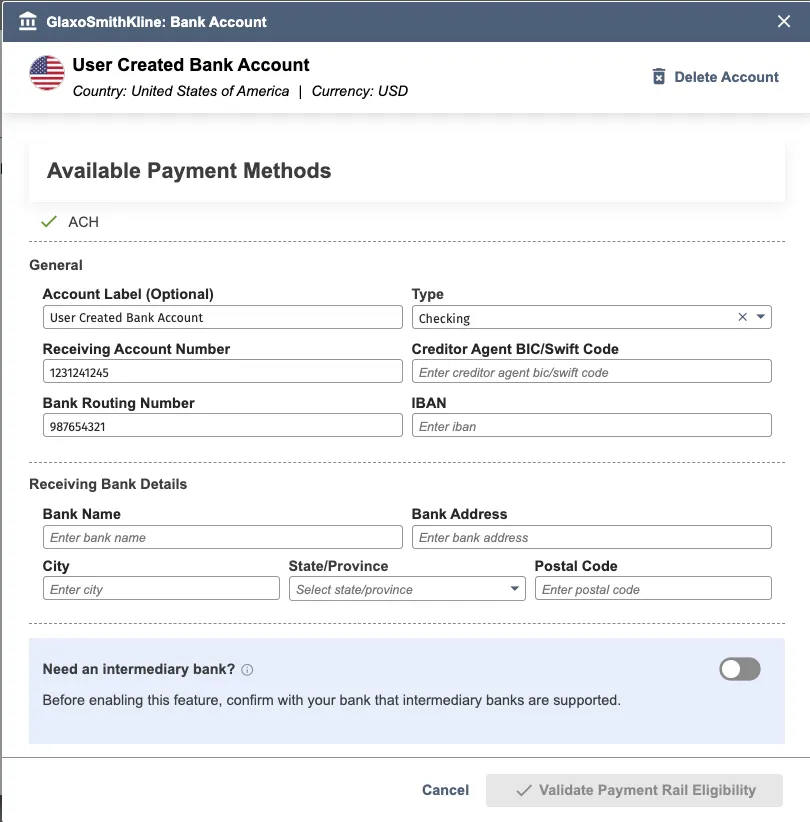
On the Payment Methods page, when you select the vendor, it shows that the bank account has been added.
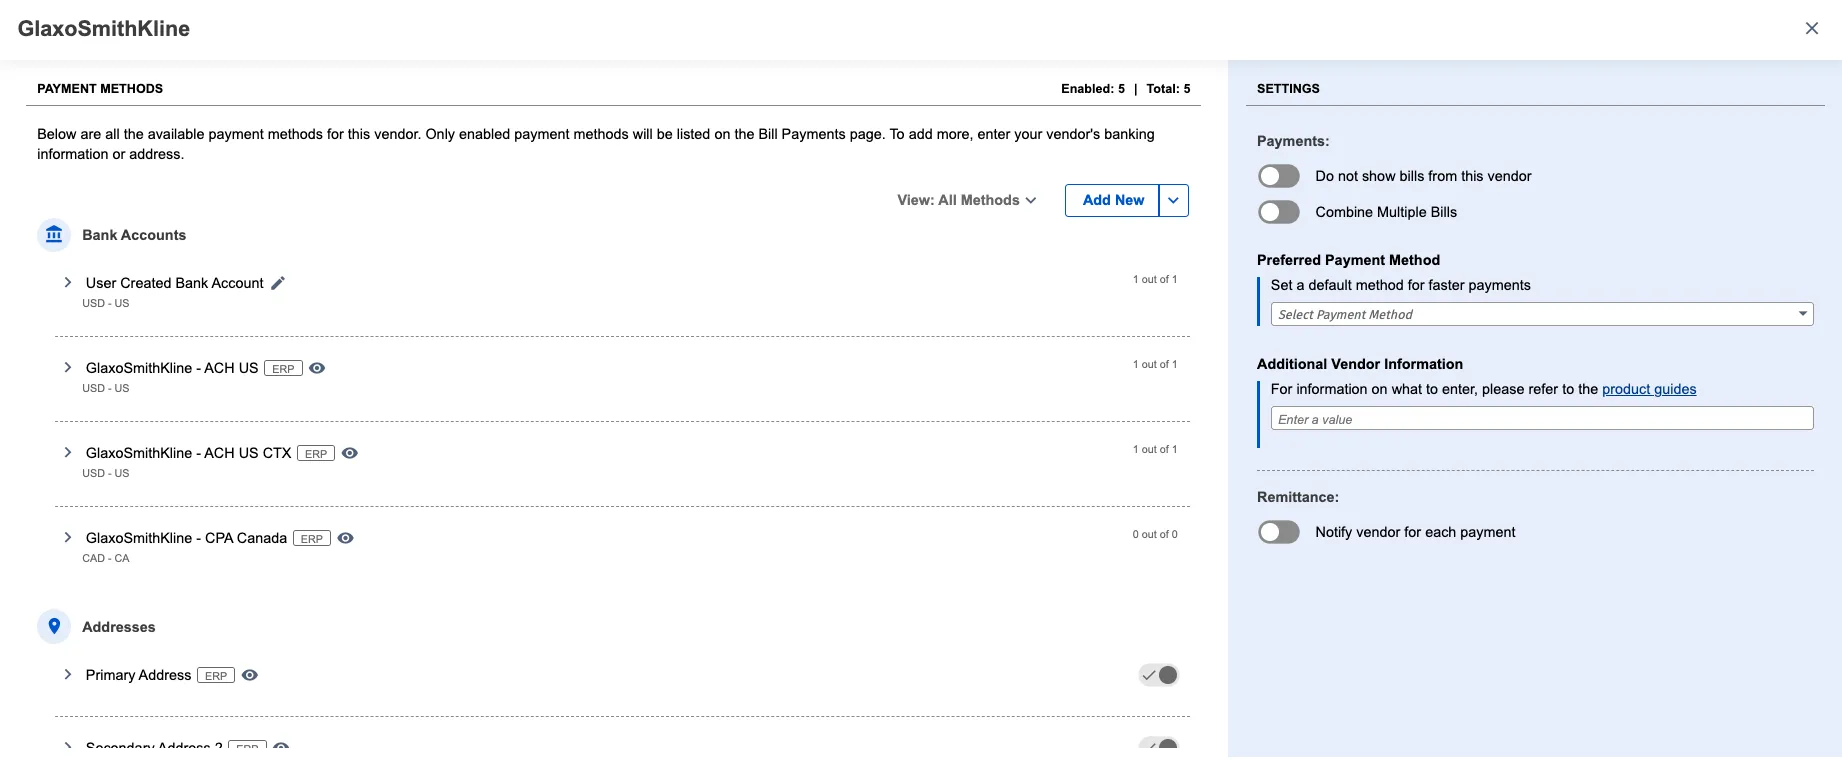
When you open up the bank account, you can see the values match the import.
Potential Errors
Potential errors | Explanation | Steps to fix the error |
|---|---|---|
data_type must be: ADDRESS, BANK ACCOUNT, or EMAIL | data_type was not filled in. | Always include a data_type, this is a mandatory field. |
erp_vendor_id must be filled in. | erp_vendor_id was not filled in. | Always include a erp_vendor_id, this is a mandatory field. |
default_payment_method must be of a valid Payment Type. | default_payment_method was not correctly filled in. | Ensure your account has this payment method enabled. |
email_addresses contains email(s) with an invalid email format. | Email address format was not respected. | Follow the following format: [email protected] If you would like to add multiple email addresses, ensure they are comma-separated as below: [email protected], [email protected] |
Both country and currency must be filled in. | Country and currency both need to be filled in. | |
country contains invalid country code | Country code is not valid. | Select a valid country code from this list: ISO alpha-2 country codes |
currency contains an invalid currency code. | Currency code is not valid. | Select a valid currency code from this list: Currency codes |