Payment Methods (QBO)
Get started managing your vendor payment information. This guide will walk you through accessing the Vendors page in FISPAN Sync, setting default payment methods, and leveraging existing data imported from QuickBooks Online.
Navigate to Vendors
From anywhere in FISPAN Sync, you can navigate to the Vendors page by clicking on Vendors in the navigation bar. The Vendors page is where you can manage payment information for each vendor.

Click on the vendor you wish to view by hovering over the vendor or clicking the Eye icon.

The Payment Method pop-up will appear. This is where you will add and manage three types of vendor information: Bank Accounts, Email Groups and Addresses.
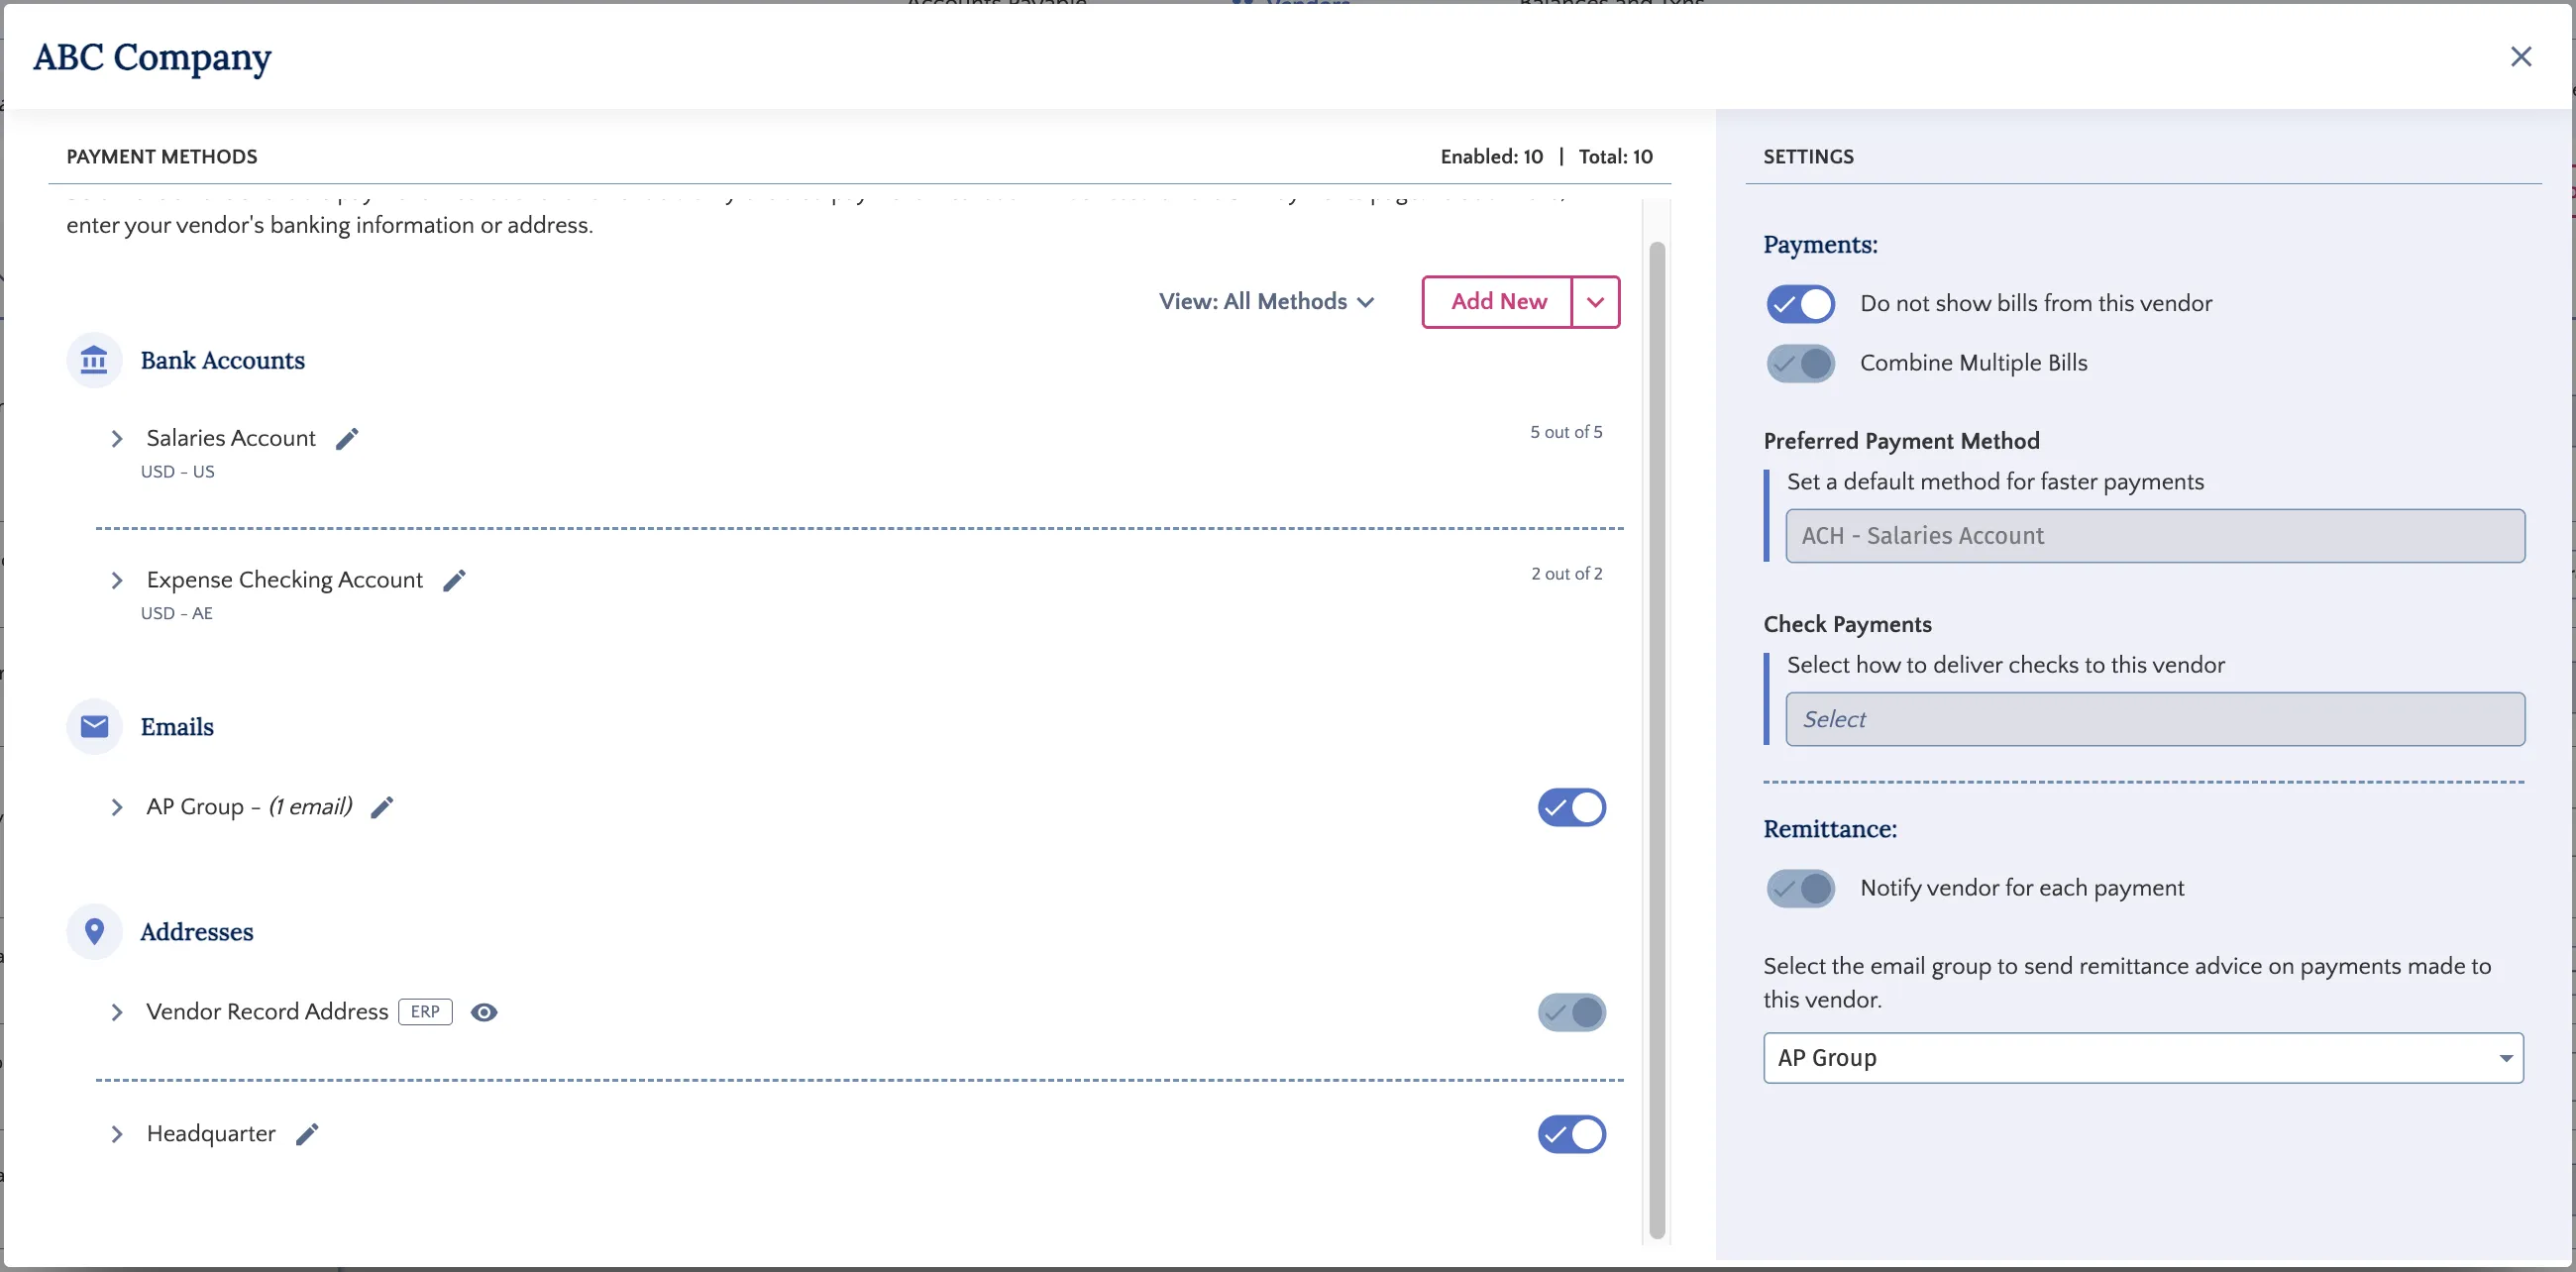
NOTE: If you have addresses or emails stored in QuickBooks Online, they will be automatically imported. Imported accounts are marked with the ERP icon. The imported data cannot be edited within FISPAN Sync.
Setting Default Payment Method
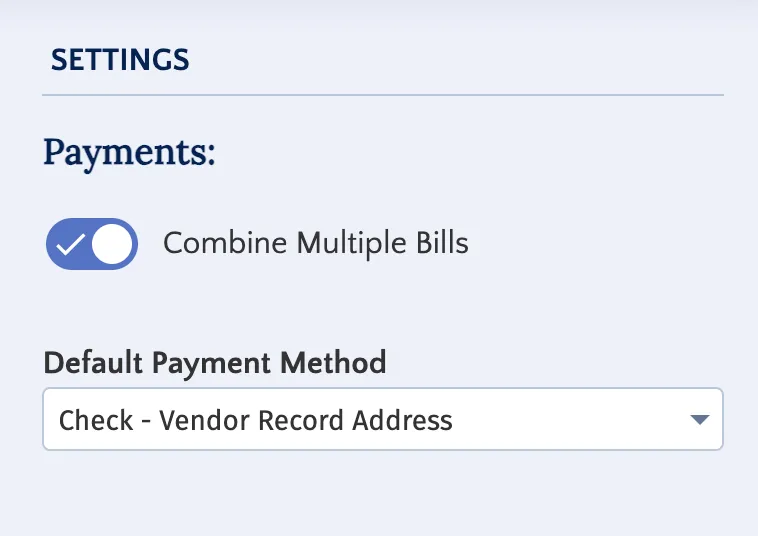
In the Payment Method pop-up, you can configure two key settings:
- Combine Multiple Bills: Toggle this option on to consolidate several bills for the same vendor into a single payment. For example, processing five separate bills would be processed as one payment.
- Select a Default Payment Method: Use the dropdown menu to choose a default payment method. This method will automatically populate for this vendor every time you access the Pay Bills page. You can always change the payment method on the Pay Bills page for one-off payments. Changing it there will not update the default setting for future bills.
Adding Bank Accounts
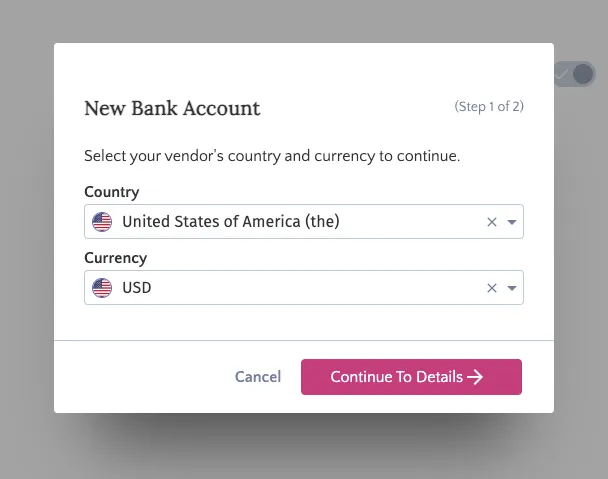
To add bank accounts, click on the Add Bank Account button.
Select the Country and Currency of the bank account you would like to add
Next, fill in the banking information, ensuring you enter a unique label for the account. Then, click Validate Account Info.
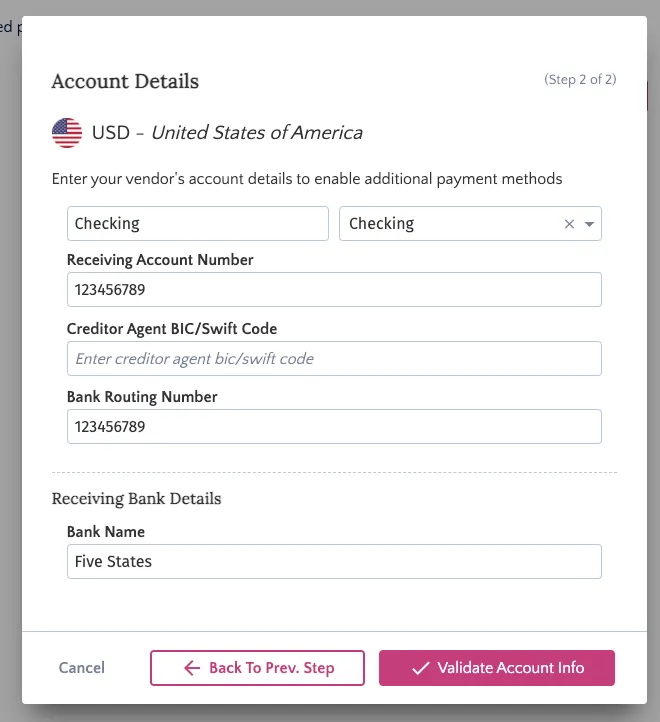
NOTE: All Bank Accounts will be saved as a Checking account unless otherwise indicated by changing the Type of Account field.
Validate Bank Account
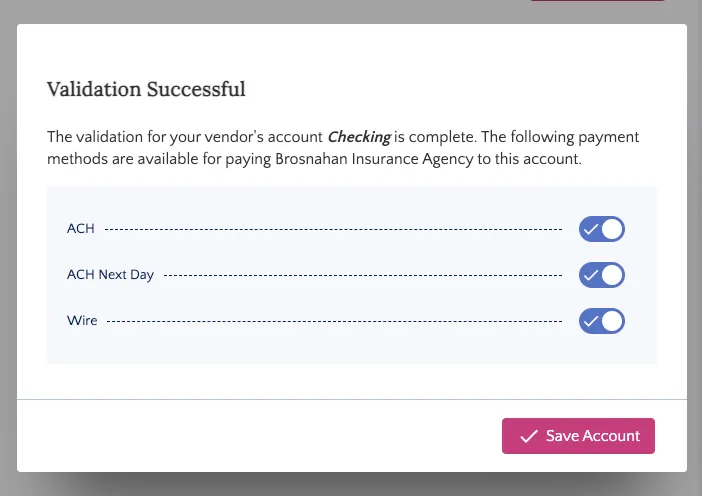
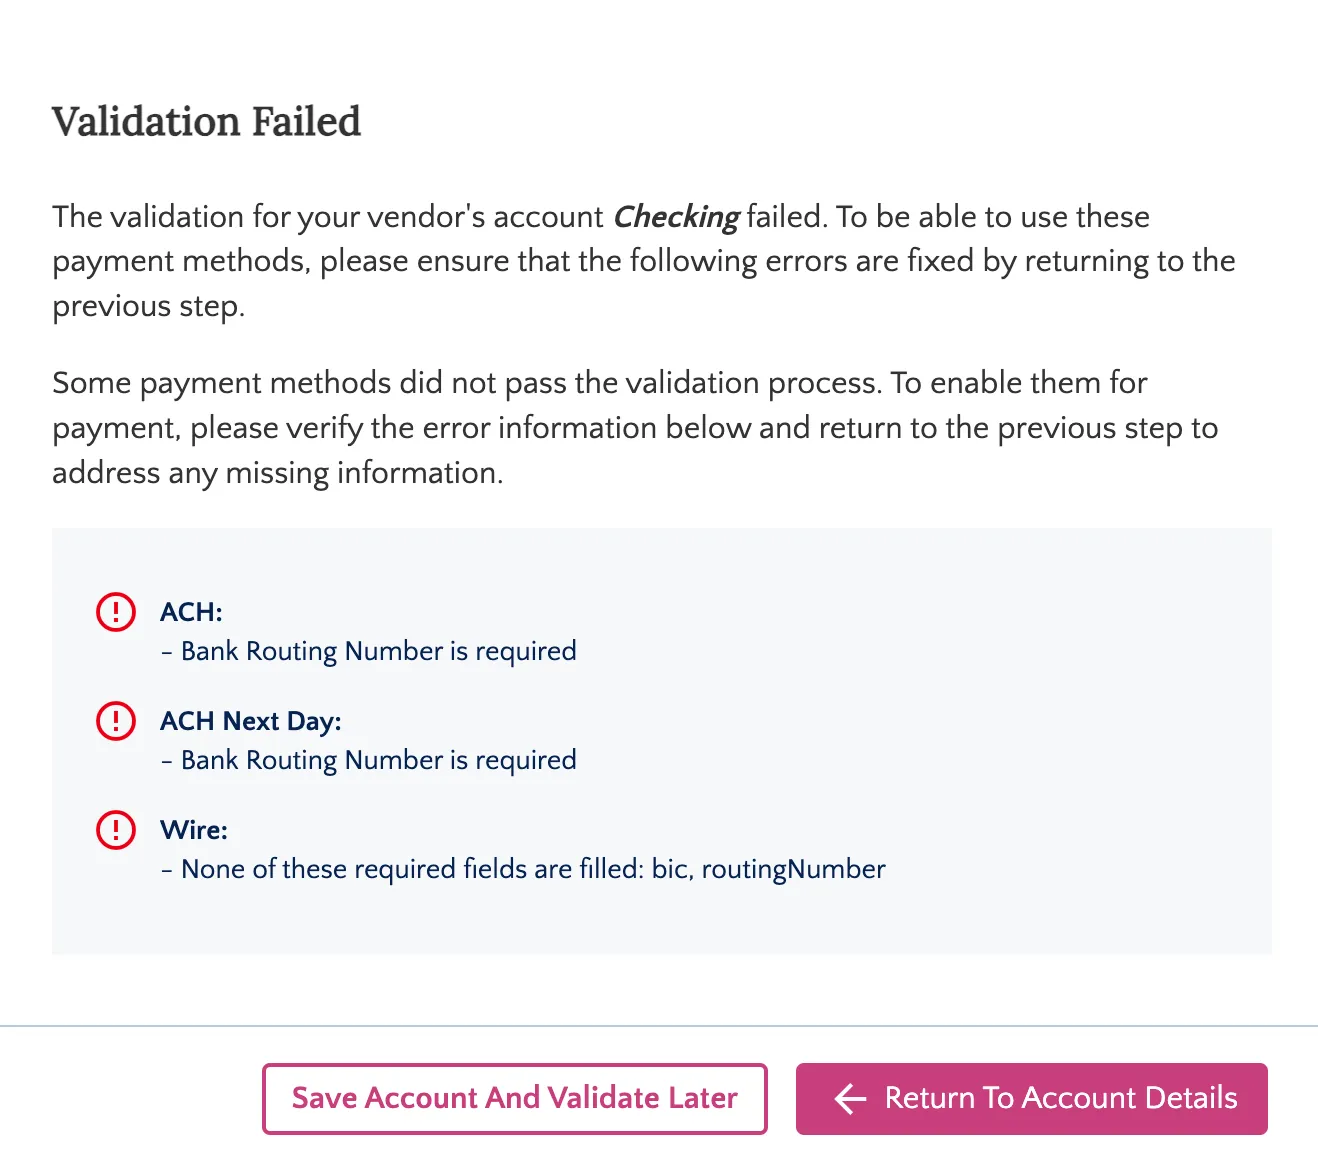
The system will validate the account information to ensure the information you entered allows for specific payment types (e.g., it confirms a Routing Number is provided for an ACH payment).
If successful, you can toggle the payment method on/off and click Save.
If it fails, you must return to the account details, modify the information, and re-validate.
NOTE: Validation only confirms the format for payment processing; it does not confirm the accuracy of the banking details (e.g., that the account number is correct).
Adding Addresses
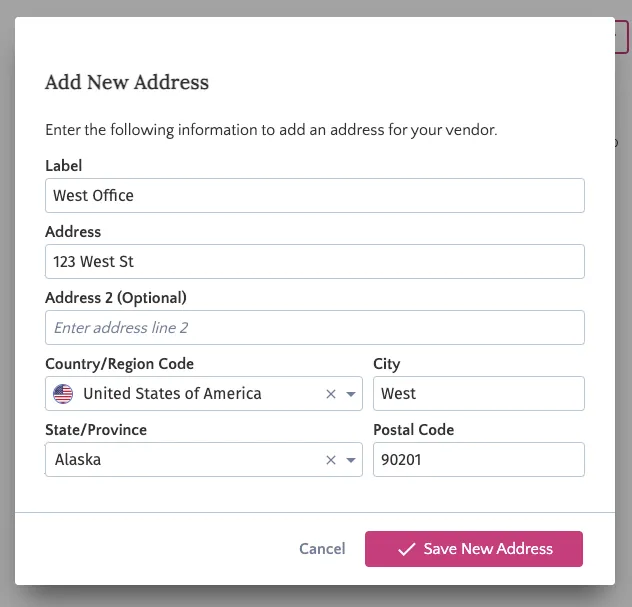
Add a vendor's address with the Address option. Add the address and click Save Address.
Adding Email Addresses
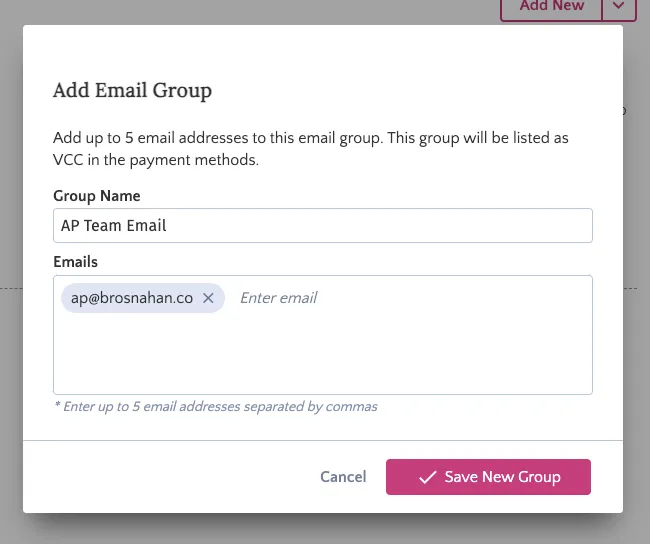
To add bank accounts, click on the Add Email Group button.
Enter the email addresses into the fields. You can add up to 5 emails. After that, click Save New Email Group.
If the remittance feature is enabled, this email group can be used to send remittance emails.