Managing Vendor Payment Methods (Intacct)
NOTE: For Payables 2.0 users, the Payment Methods button will appear as Payment Methods (beta) in the navigation menu.
Manage vendor payment information more efficiently on the Payment Methods page. This guide covers how to update vendor bank accounts, addresses, settings, and email groups. Vendor Record Approvals can be configured to require authorization for changes to vendor banking data, enable this by following the Vendor Approvals page. This approval process ensures data accuracy, enhances security and enables an audit trail of all changes.
Accessing Vendor Payment Information
Navigate to the Citizens menu and select Payment Methods for an overview of your vendors and their payment information.
Click any vendor row to open the vendor details panel, where you can add payment information or configure specific settings.
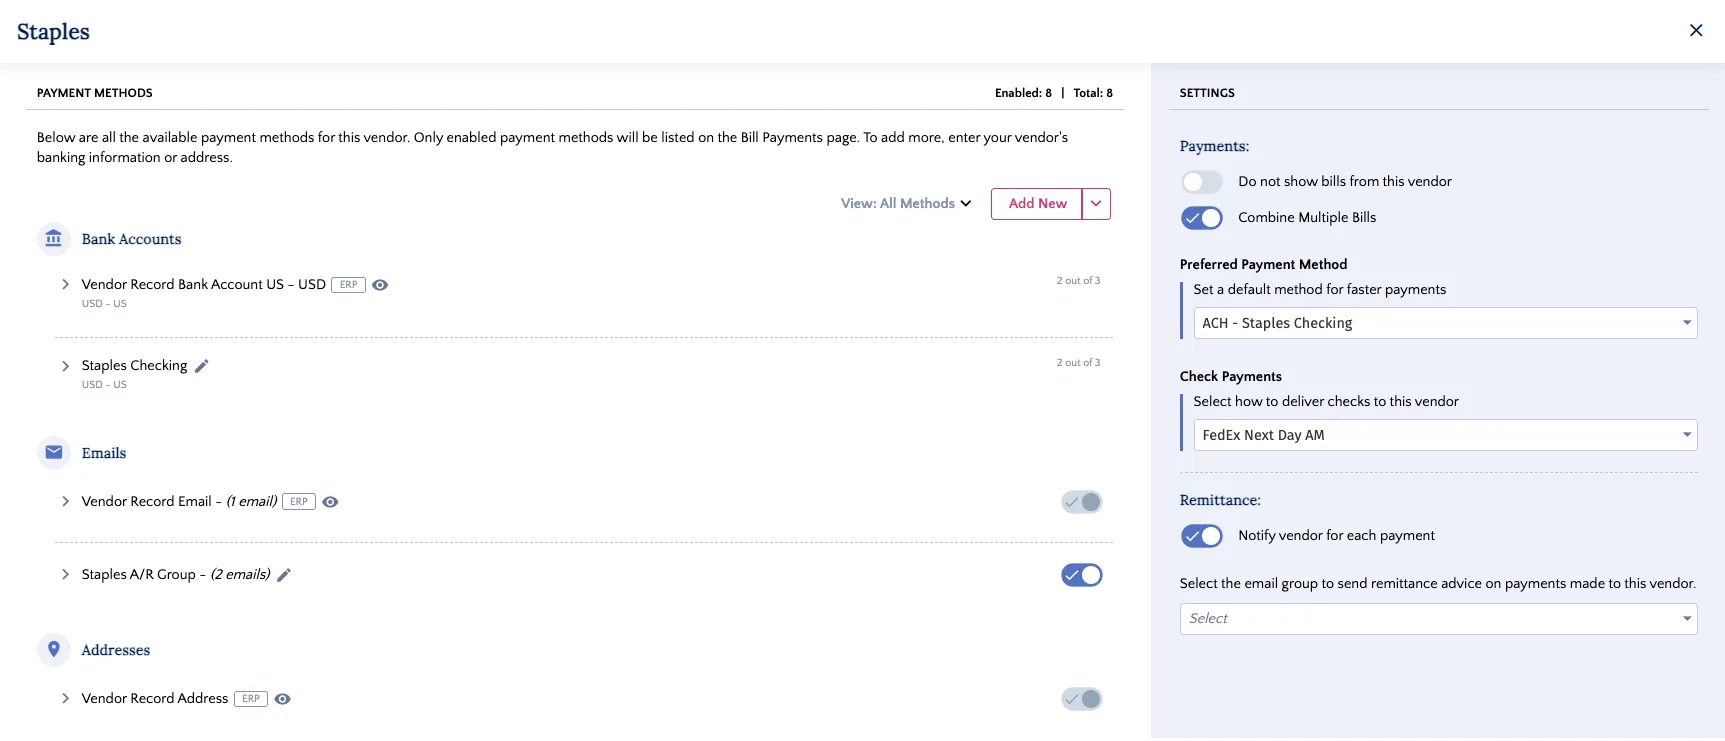
The panel is organized into Payment Methods on the left (where you add information) and Settings on the right (where you configure preferences).
Natively Stored Payment Information
Any bank accounts, addresses, or emails stored natively in your ERP will be imported automatically. These records are identified by the ERP icon next to the label.
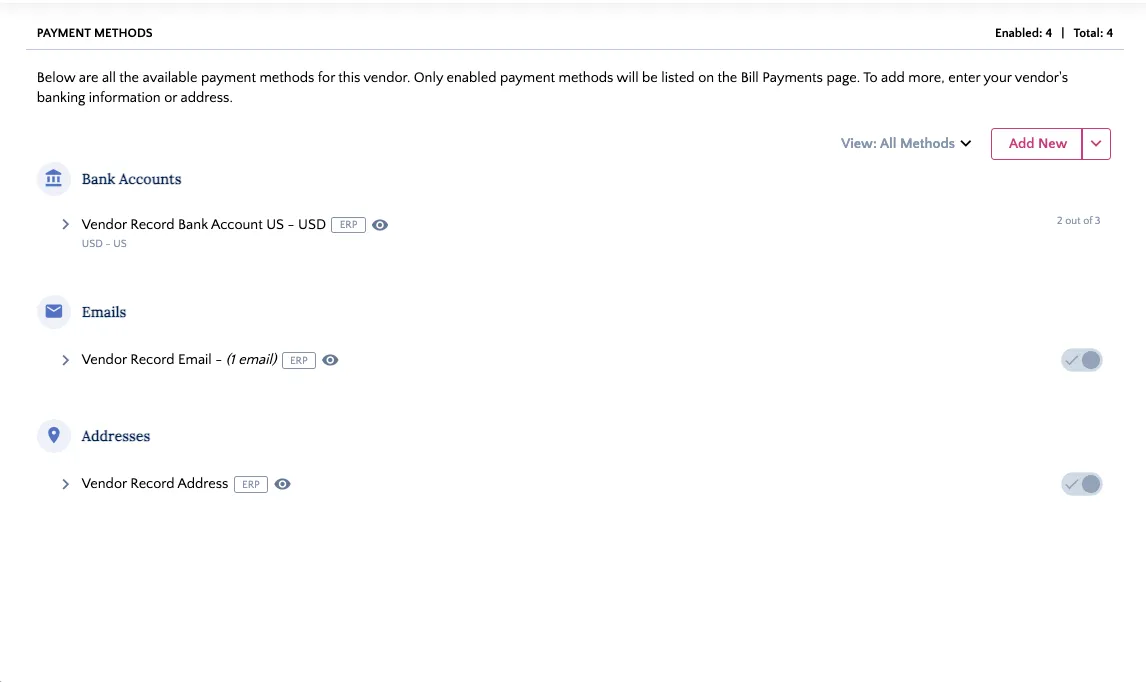
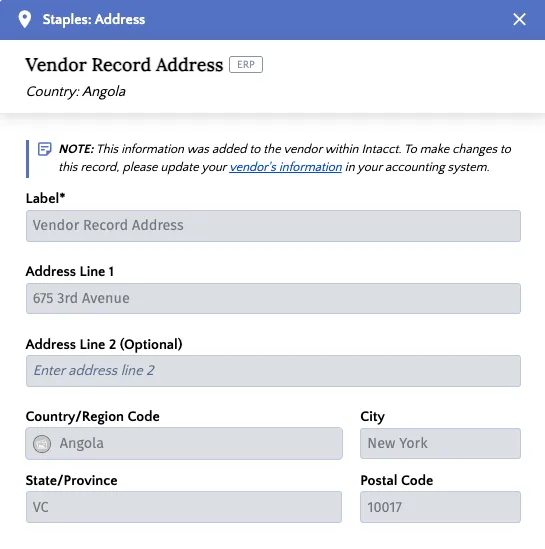
These details are not editable within the plugin. To modify this information, you must make the changes directly within your ERP’s vendor record. The updates will then sync to the plugin.
Managing Bank Accounts
Use the vendor details panel on the Payment Methods page to add, update, or delete vendor bank account information.
Adding a Bank Account
From the vendor details panel, follow these steps to add a new bank account for your vendor.
Add New Bank Account
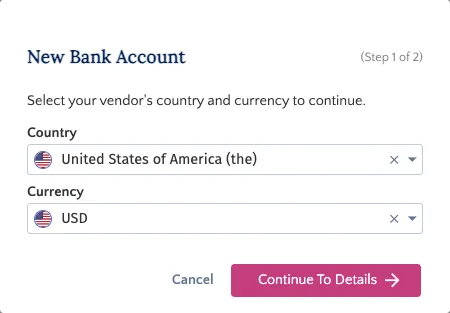
Click on the Add New button in the Payment Methods pane and select Bank Account.
Select the Country and Currency of the bank account you would like to add next.
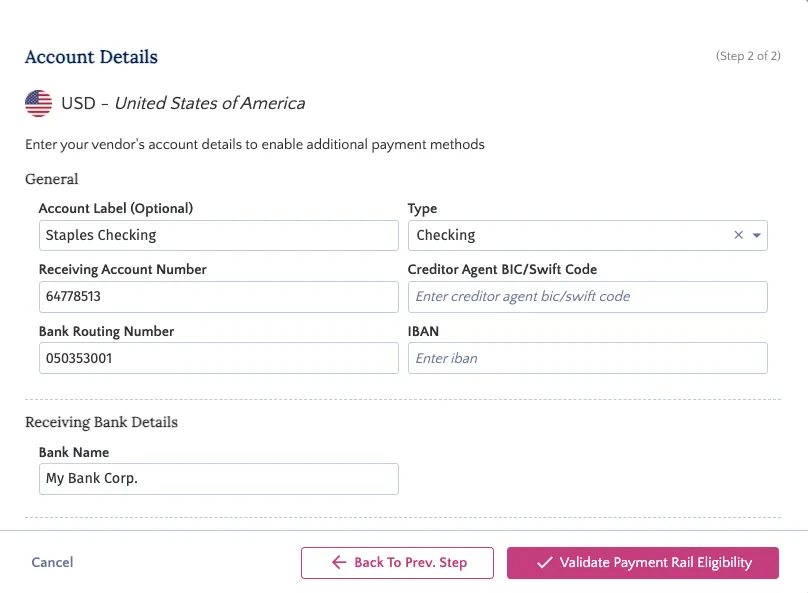
Add Account Details
Fill in the required banking information (e.g., Routing Number, Account Number) and provide a unique Label for easy identification.
Add Intermediary Bank Details
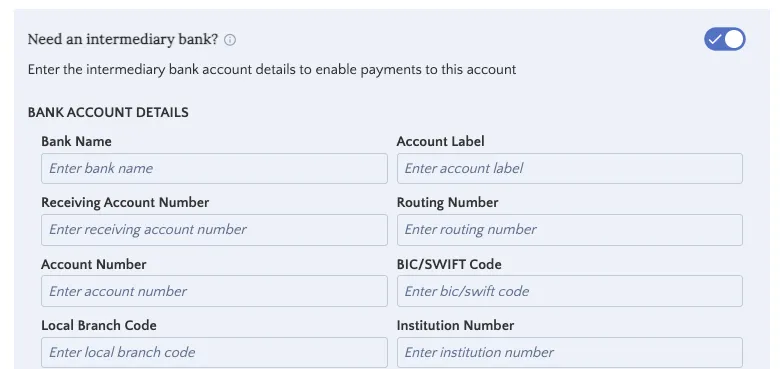
You can also add intermediary bank information. An intermediary bank account is used when making international payments to countries with which your bank may not have a direct relationship.
To add this information, click the Intermediary Bank toggle.

Once enabled, you can enter the intermediary bank account information.
Validate Payment Rail Eligibility
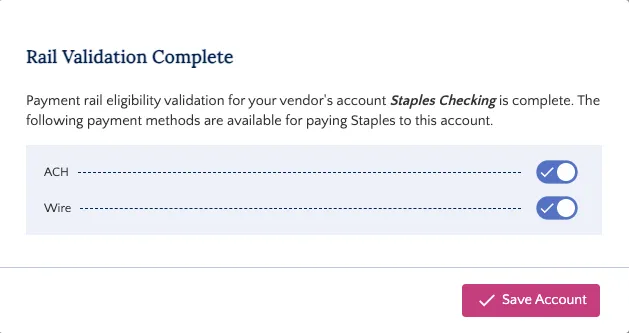
After you have added all required information, click Validate Payment Rail Eligibility.
The system will verify that the information is formatted correctly for the available payment types.
Once validation is successful, click Save Account. The new account will then appear in the Bank Accounts list.
IMPORTANT: This step validates the format of the data, not its accuracy. Please ensure all account numbers are entered correctly.
Edit a Bank Account
To edit a bank account for a vendor, navigate to the vendor's detail panel and follow these steps.
Open Bank Account Details
In the Payment Methods pane, find the bank account you wish to edit and click on the pen icon next to it.
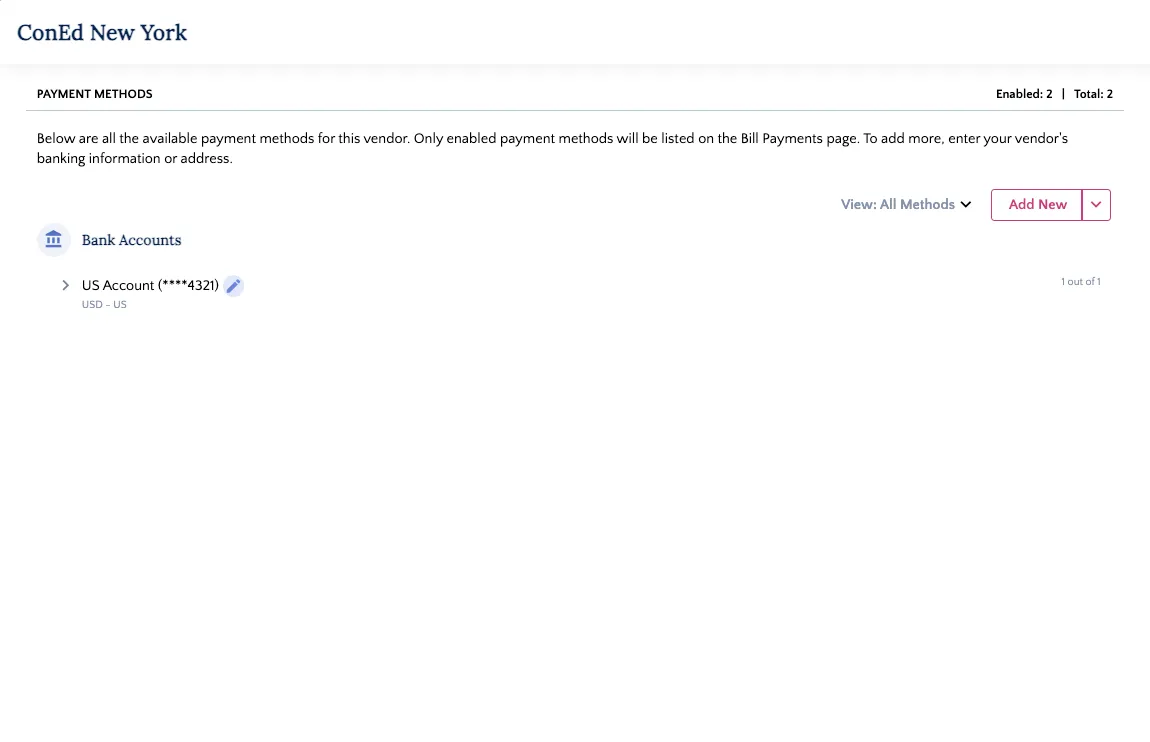
The bank account details will appear as a pop-up.
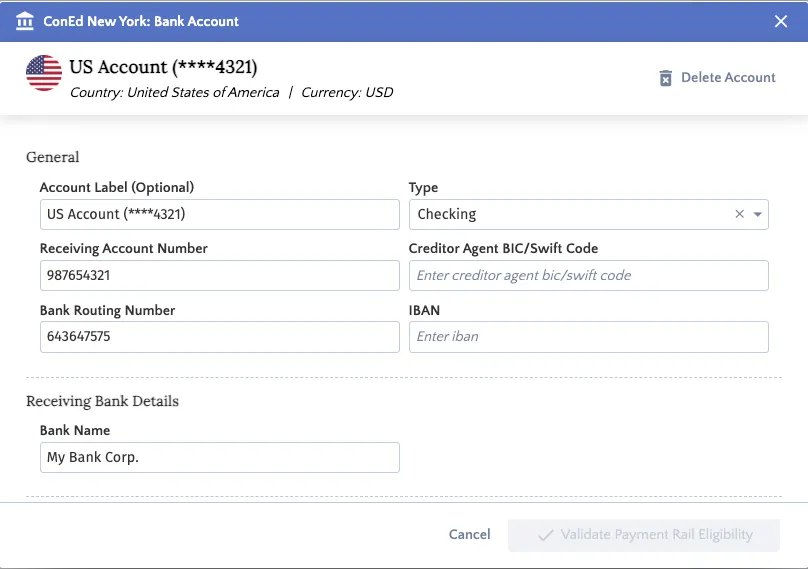
Update Bank Account Details
Make your required changes (e.g., update the Account Number, Routing Number, or Label).
Validate and Save
Click Validate Payment Rail Eligibility to re-verify the new details.
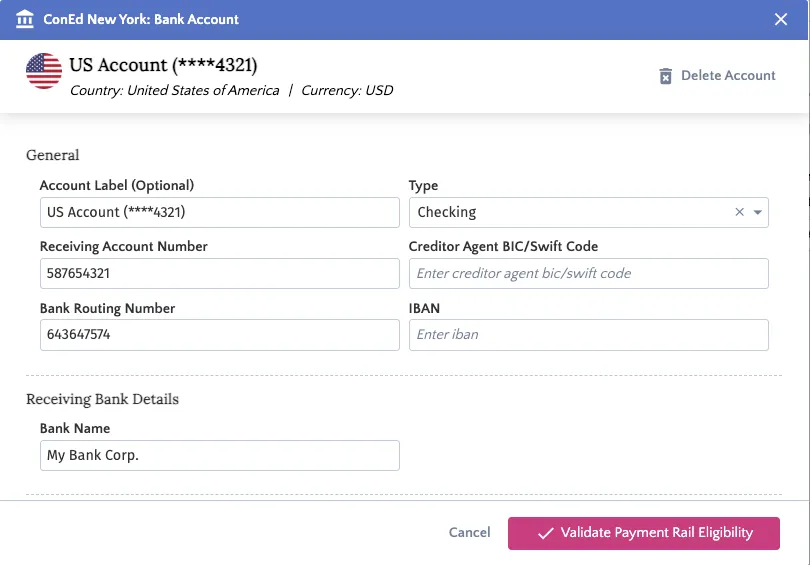
Once validated, click Save Account.
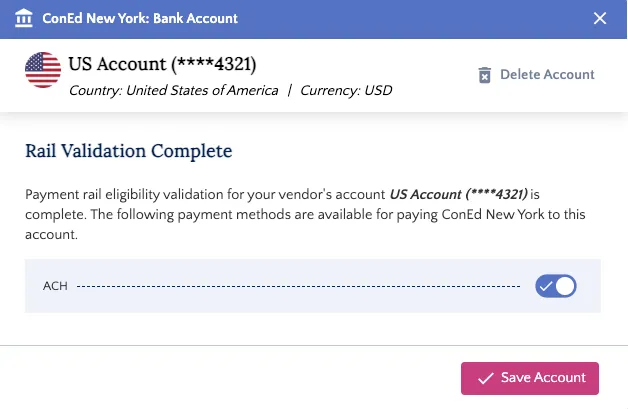
Delete a Bank Account
To delete a bank account for a vendor, navigate to the vendor's detail panel and follow these steps.
Open Bank Account Details
In the Payment Methods pane, find the bank account you wish to edit and click on the pen icon next to it.
The bank account details will appear as a pop-up.
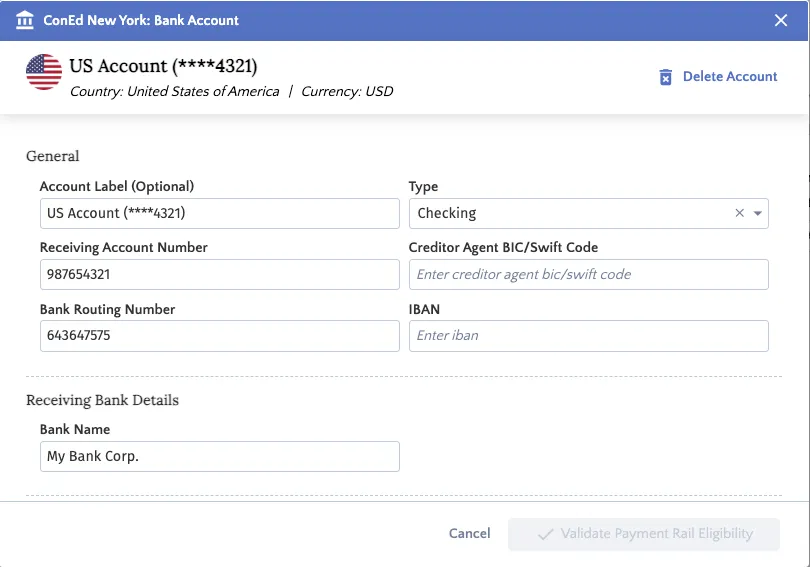
Delete Account
Click Delete Account on the top right of the pop-up. A prompt will appear. Click Yes, Delete to permanently remove the bank account from the Citizens.

NOTE: Deleting the Default Payment Method will leave the vendor without a default. You must then set a new one. You can do this either:
- Directly in the Default Payment Method column on the main vendor list, OR
- By clicking the vendor and using the Preferred Payment Method dropdown on the right side of the details panel.
Managing Addresses
Use the vendor details panel on the Payment Methods page to add, update, or delete vendor address information.
NOTE: If the Check payment method is not enabled in the plugin, the option to add an address will not be visible. Addresses are only required for Check payments.
Adding an Address
To add vendor mailing addresses, follow these steps.
Add New Address
Click the Add New button in the Payment Methods pane and select Address.
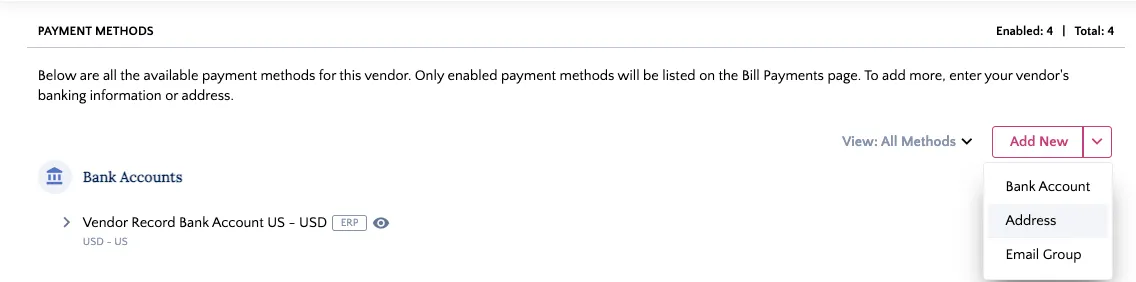
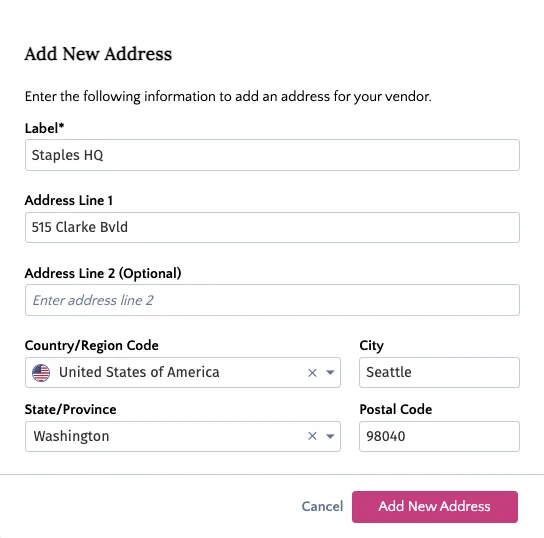
Add Address Details
Add your address details to the fields. After that, click Add Address.
Edit an Address
To edit a bank account for a vendor, navigate to the vendor's detail panel and follow these steps.
Open Address Details
In the Payment Methods pane, find the address you wish to edit and click on the pen icon next to it.
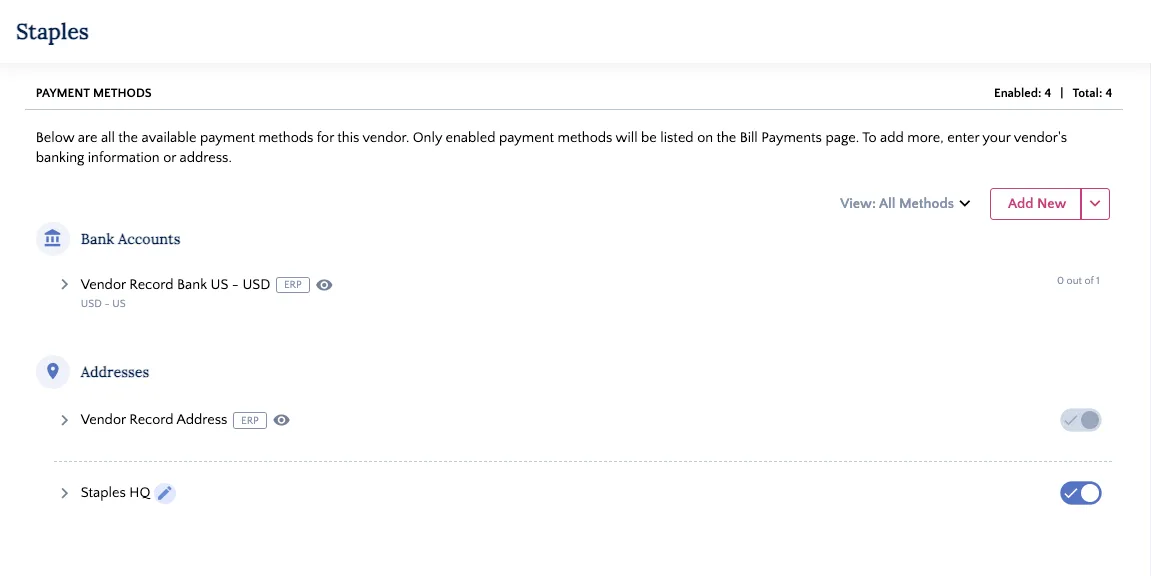
The address details will appear as a pop-up.
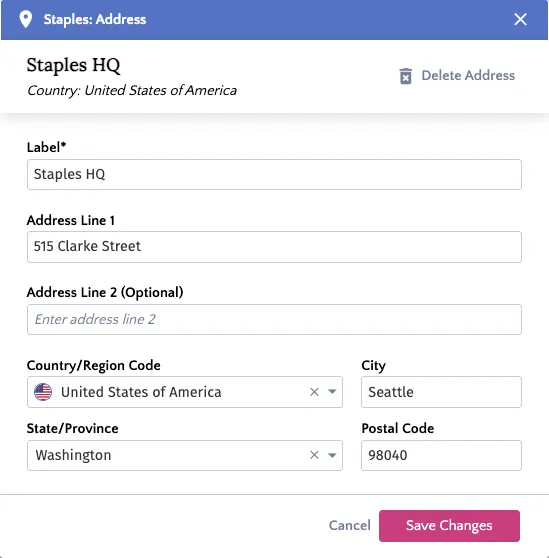
Update Address
Update the address fields as needed and click Save Changes.
Delete an Address
To delete an address for a vendor, navigate to the vendor's detail panel and follow these steps.
Open Address Details
In the Payment Methods pane, find the bank account you wish to edit and click on the pen icon next to it.
The bank account details will appear as a pop-up.
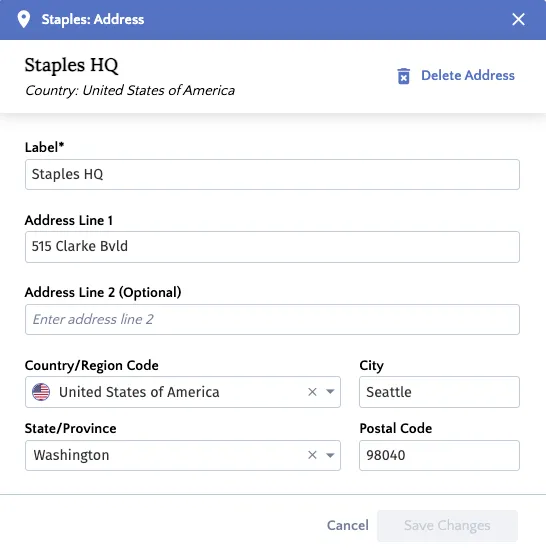
Delete Address
Click Delete Address on the top right of the pop-up. A prompt will appear. Click Yes, Delete to permanently remove the address from the Citizens.

Managing Email Groups
Group email recipients to manage your remittance more efficiently. You can add, update, or delete these groups directly on the Payment Methods page.
NOTE: Email groups are available with the Remittance Advice product.
Adding Email Groups
To add an email group for remittance, follow these steps.
Add New Email Group
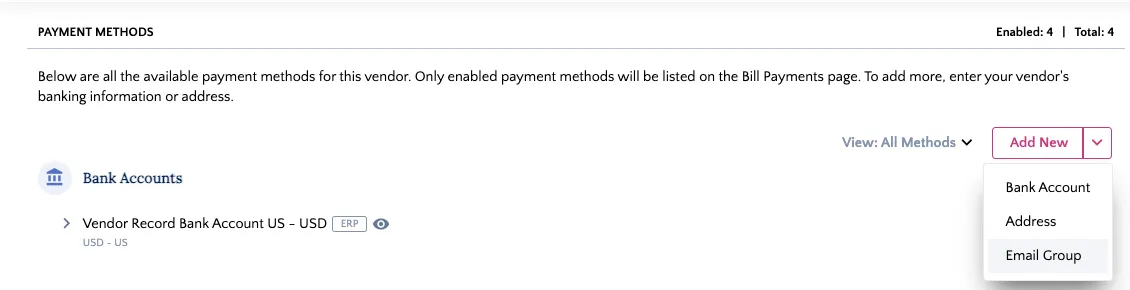
Click the Add New button in the Payment Methods pane and select Email Group.
Add Email Recipients
Add your recipients' email addresses to the Emails field. You can add up to 5 emails by clicking "Enter" after each entry.
Add a unique Label and Group Name.
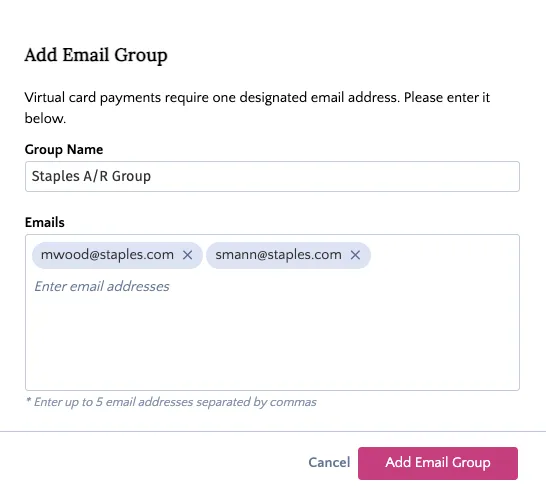
After that, click Add Email Group. This group can now be selected in the Settings pane of the vendor details panel to receive remittance emails.
Edit Email Groups
To edit an email group for a vendor, navigate to the vendor's detail panel and follow these steps.
Open Email Group Details
In the Payment Methods pane, find the email group you wish to edit and click on the pen icon next to it.
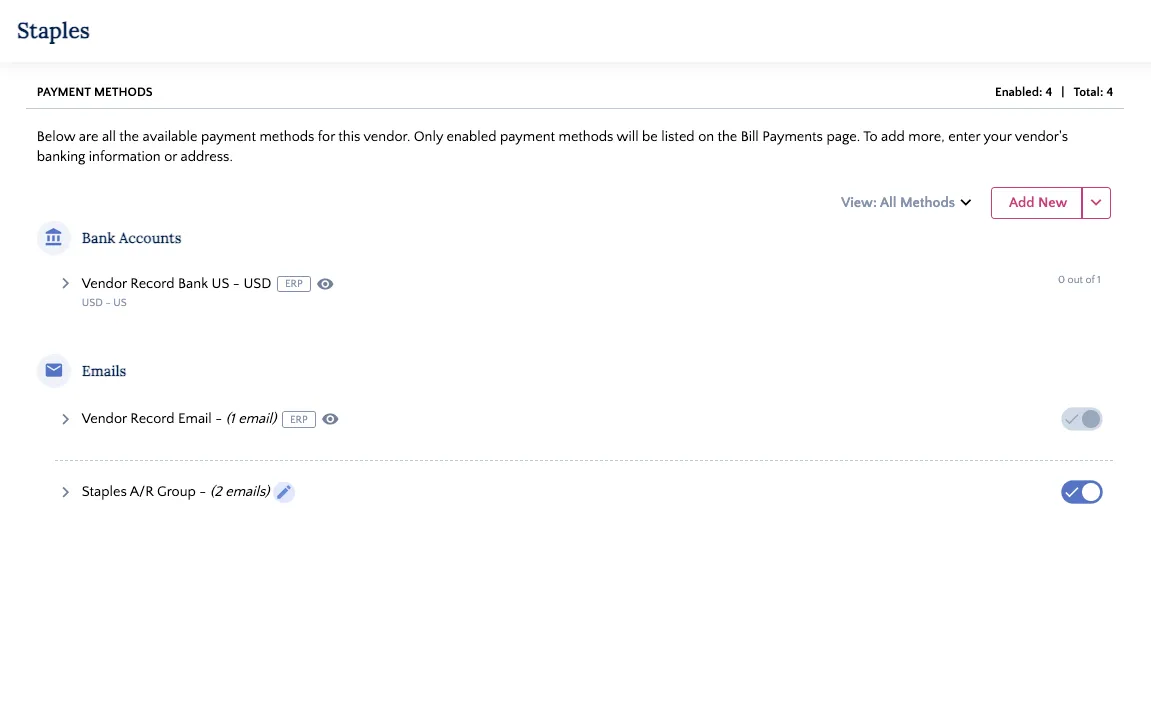
The email group details will appear as a pop-up.
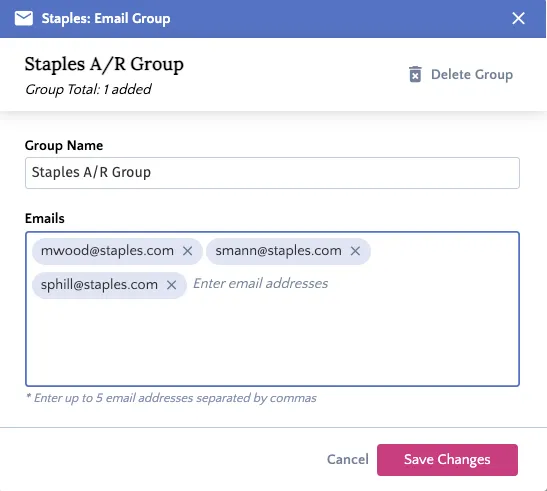
Update Email Group Details
Update the email recipients or group name as needed and click Save Changes.
Delete Email Groups
To delete an email group for a vendor, navigate to the vendor's detail panel and follow these steps.
Open Email Group Details
In the Payment Methods pane, find the bank account you wish to edit and click on the pen icon next to it.
The email group details will appear as a pop-up.
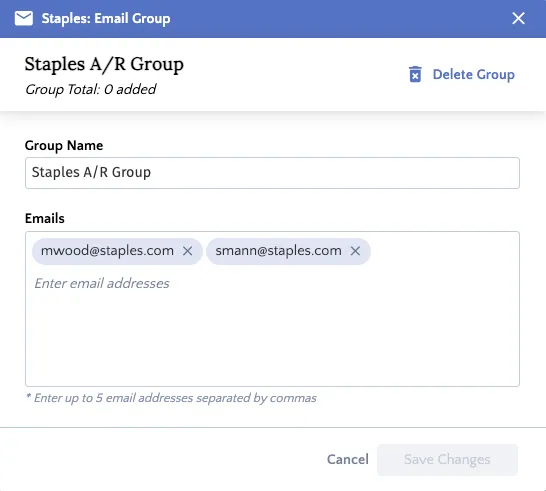
Delete Email Group
Click Delete Group on the top right of the pop-up. A prompt will appear. Click Yes, Delete to permanently remove the email group from the Citizens.

Configuring Vendor Settings
In the Settings pane on the right side of the vendor details panel, you can configure the vendor’s payment preferences with the following toggles:
- Do not show bills from this vendor: Toggle this on to exclude all bills for this vendor from the Payments page in the plugin.
- Combine Multiple Bills: Toggle this on to consolidate multiple bills for the same payment method into a single payment.
- Notify vendor for each payment: Toggle this on to enable remittance advice emails. Once enabled, select an Email Group from the dropdown menu below it.
Finally, select a Preferred Payment Method from the dropdown. This will populate as the default for every bill for this vendor on the Pay Bills page and can be updated at any time.