Enabling Legacy Bank Feeds (NetSuite)
Note: These set of instructions cover the setup of our legacy bank feeds solution that will no longer be supported as of bank plugin version 2024.2.0.
If you are an existing user of our legacy bank feeds solution, please refer to Migrating Bank Feeds (NetSuite) to switch to the new solution.
If you are new to bank feeds are are not currently using our legacy solution, please refer to Enabling Bank Feeds (NetSuite) to set up the new bank feeds solution.
NOTE: Upon setup, NetSuite will automatically import 60 days of past transactions into the Match Bank Data Module. The timing and 60 day date range of this import cannot be customized.
You can find more information about this module by clicking this link to the Oracle NetSuite Applications Suite help center entry: Bank Feeds SuiteApp FAQ.
The bank bundle adds support for Bank Feeds through a custom Connectivity Method, which allows transactions from your bank accounts to flow automatically into NetSuite's Match Bank Data module. To enable Bank Feeds in your NetSuite environment, please follow the steps outlined in this guide. This guide will walk you through two methods of enabling bank feeds, via:
- CSV
- BAI2
Which method to use is your choice, but most users prefer CSV for richer detail.
Please note that aside from the custom Connectivity Method that is named after your bank, everything else discussed in this guide is owned and managed by NetSuite. This includes, but is not limited to, the following:
- Match Bank Data module
- Bank Statement Parsers bundle
- Financial Institution configuration
- Format Profile configuration
- Banking Import History page
While owned and managed by NetSuite, the following cannot be customized:
- Timing of when the daily bank transaction import begins.
- NetSuite randomly assigns a time, usually between 4 AM - 7 AM PT.
- Timing of when the first automatic bank transaction import is.
- The first import occurs immediately after a new Format Profile, as per instructions in this guide, is set up and saved.
- Number of days of past transactions imported upon setup.
- NetSuite will import 60 days' worth of transactions after initial setup.
The Bank Feeds feature requires your bank bundle to be updated to version 2021.16.0 or newer. For users on newer versions, you may skip to Step 3: Install Bank Statement Parsers.
Updating the Bank Bundle
Step 1: Locate Bundle
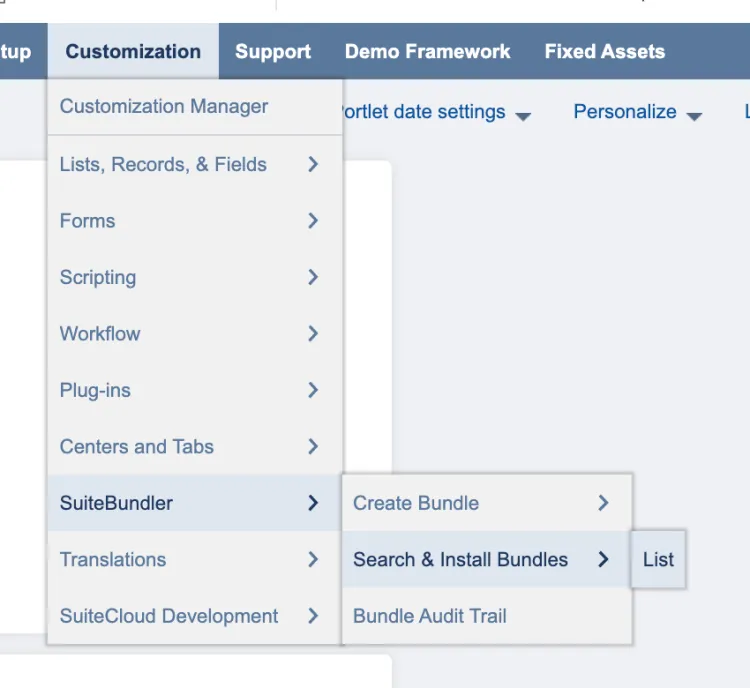
Go to Customization → SuiteBundler → Search & Install Bundles → List.
Step 2: Update Bundle
Find the Citizens bundle from the list. Then, hover over the green icon and select Update.
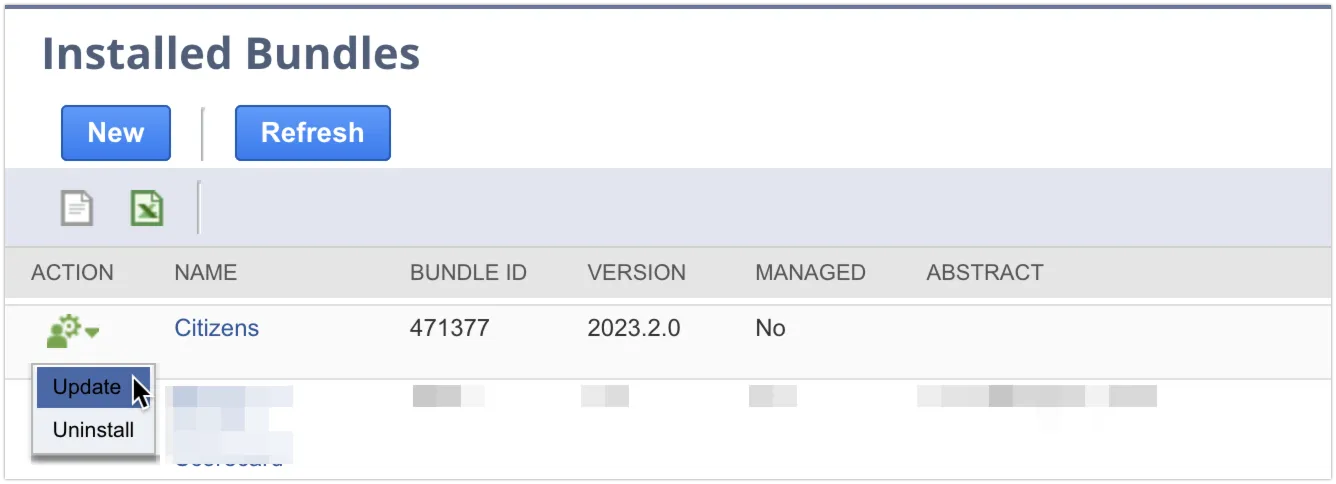
Select Update Bundle, and select OK on the confirmation pop-up.

Note: Non-administrator users who will be setting up and managing Bank Feeds must have the following permission:
- Setup → Financial Institution Records – Level: Full
They must also be added as an audience for the following Script Deployment (can be found under Customization → Scripting → Script Deployments):
- Citizens Trans Feed Config (ID: customdeploy_citiz_rpt_feed_s)
Step 3: Install Bank Statement Parsers Bundle
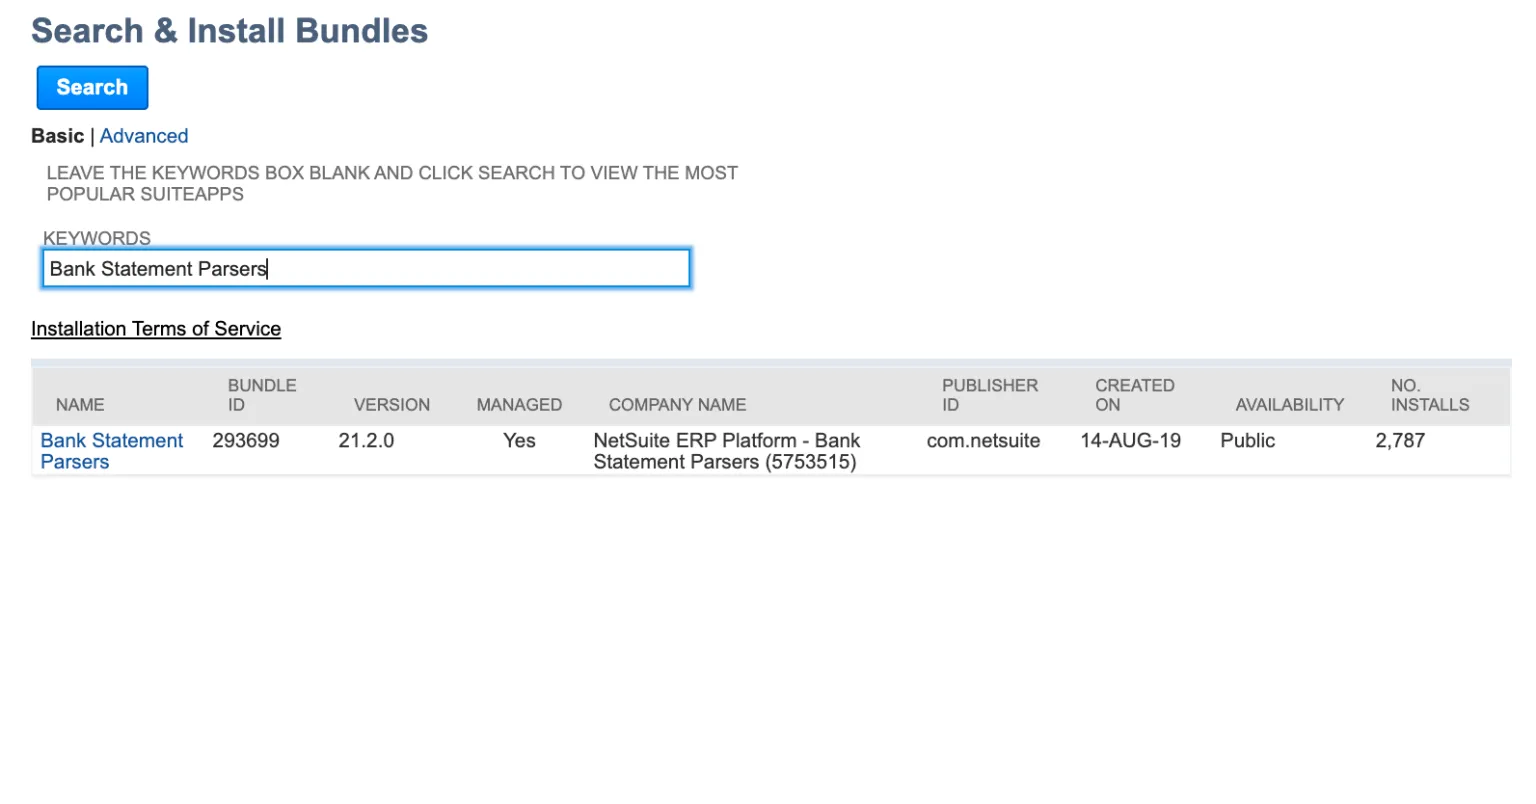
Navigate to Customization → SuiteBundler → Search & Install Bundles. Then, search for Bank Statement Parsers, select the appropriate bundle (293699), and select Install.
The bundle will take a few moments to install – it will appear as pending and then show the progress of the install. Once complete, the status column on the Installed Bundles page will show a check mark.
Step 4: Enable Bank Account Feature
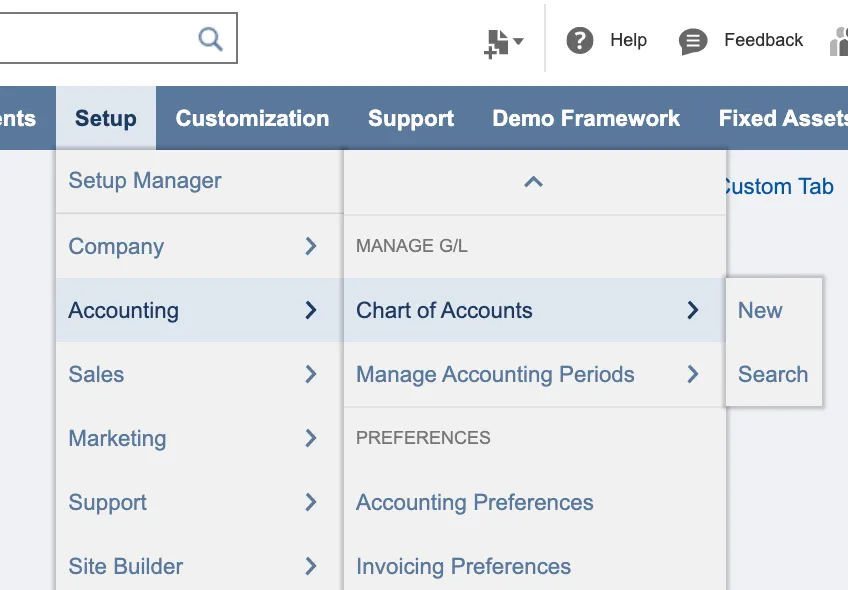
Go to Setup → Accounting → Chart of Accounts.
Select Edit on the bank account for which you would like to use the reconciliation feature.
Select the “Use Match Bank Data and Reconcile Account Statement Pages” box to enable this feature for the account.
Then, select Save.
Step 5: Create Financial Institution
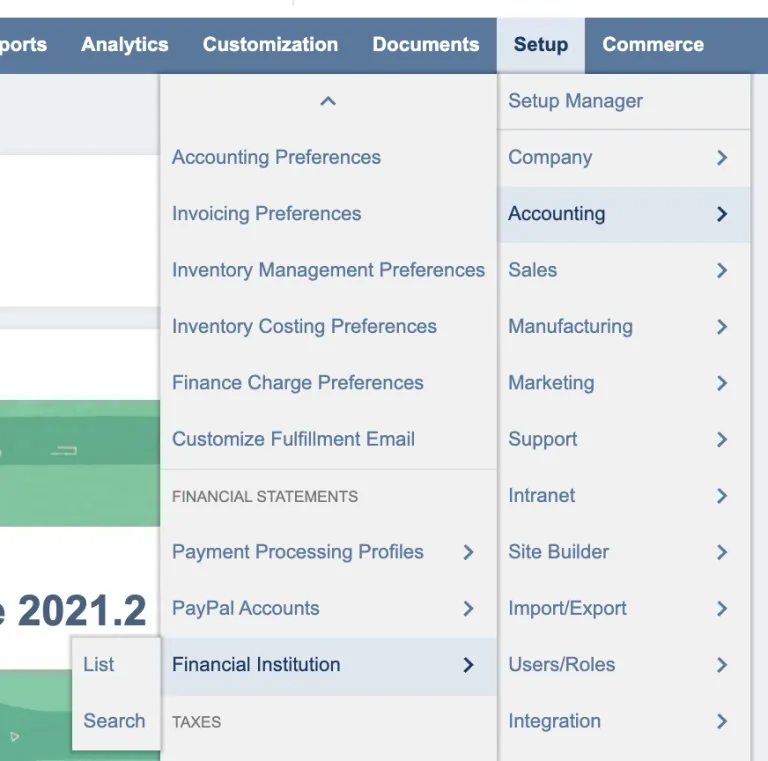
Go to Setup → Accounting → Financial Institution.
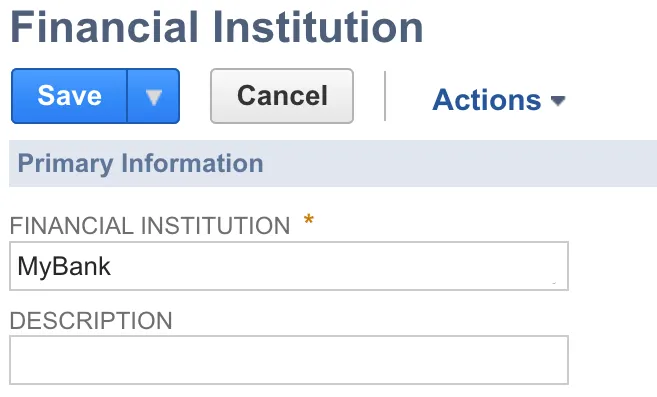
Enter a name for the Financial Institution. Then, select Save.
Enabling CSV Bank Feeds
Users have the option to enable either CSV Bank Feeds or BAI2 Bank Feeds. While some users may wish to have some bank accounts connected to CSV and others to BAI2, this is uncommon and does not provide any added benefit. We recommend users to pick either CSV or BAI2 for all bank accounts they wish to enable Bank Feeds for.
Refer to the steps below on how you can enable CSV Bank Feeds; otherwise, skip down to the Enabling BAI2 Bank Feeds section of this guide.
Create a Format Profile
Select the Format Profile: Configuration tab and select Add.
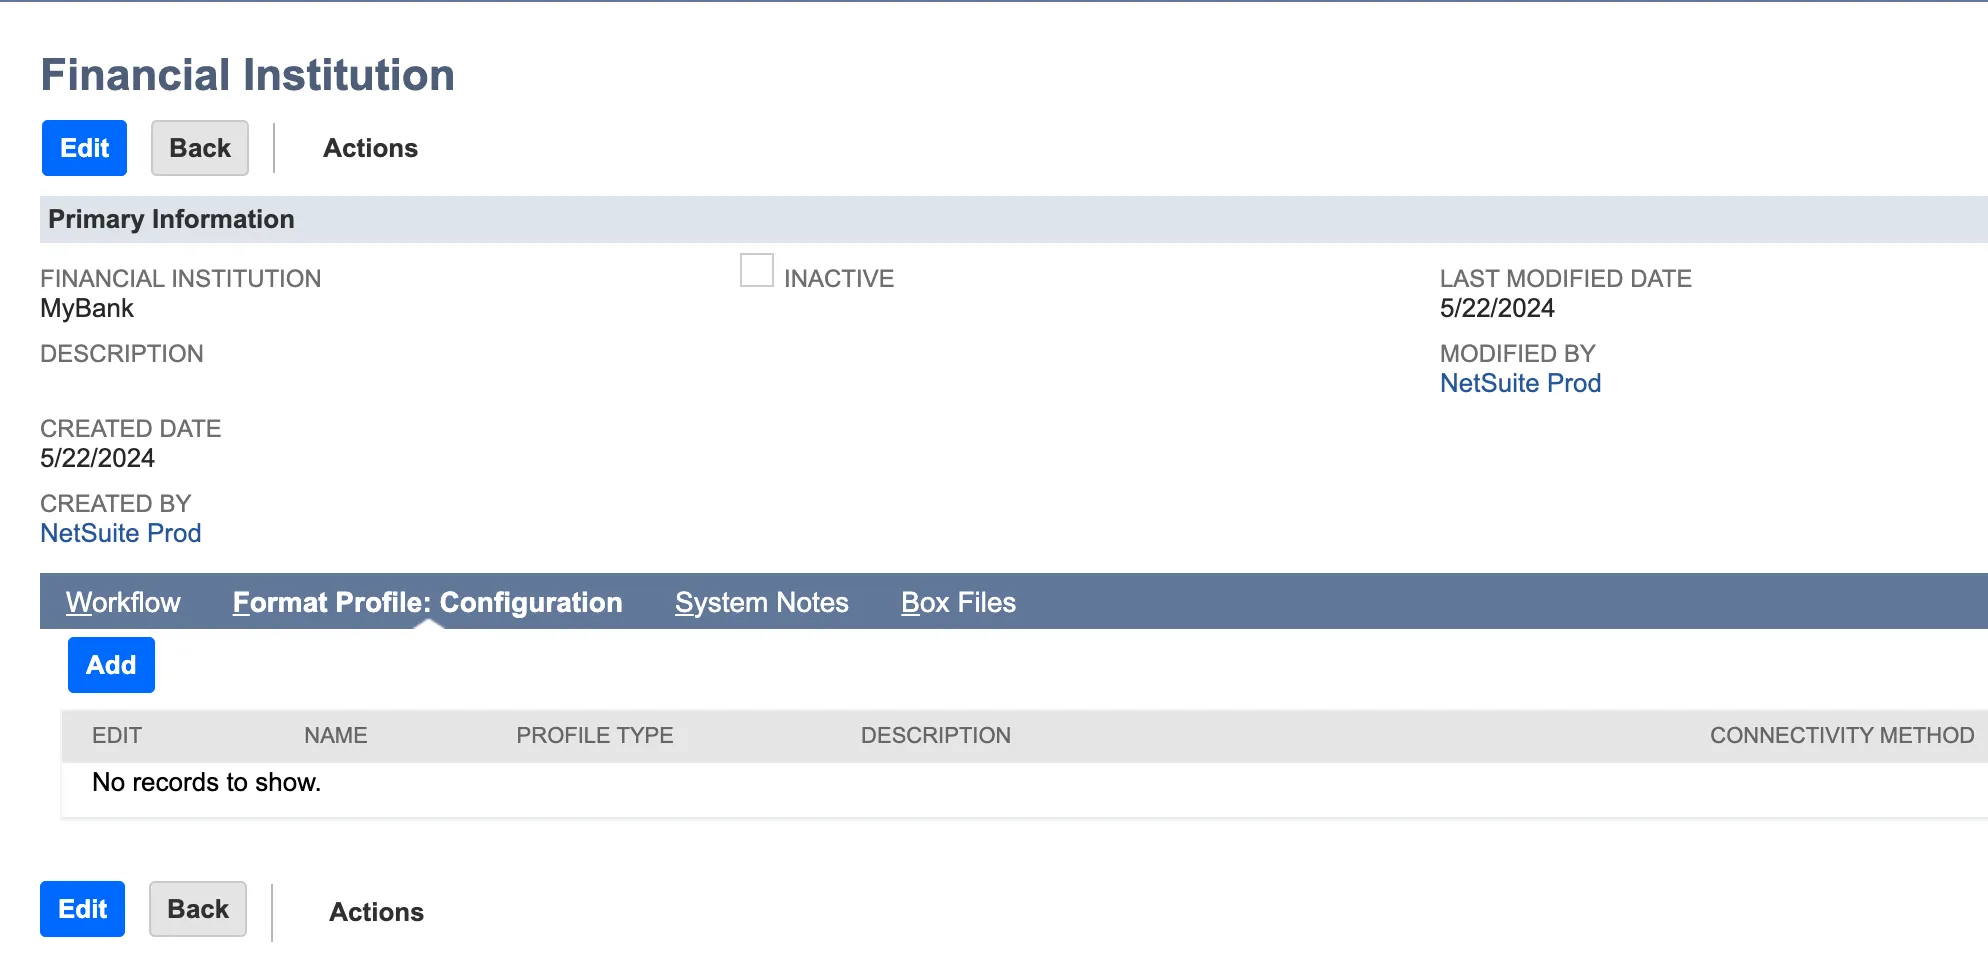
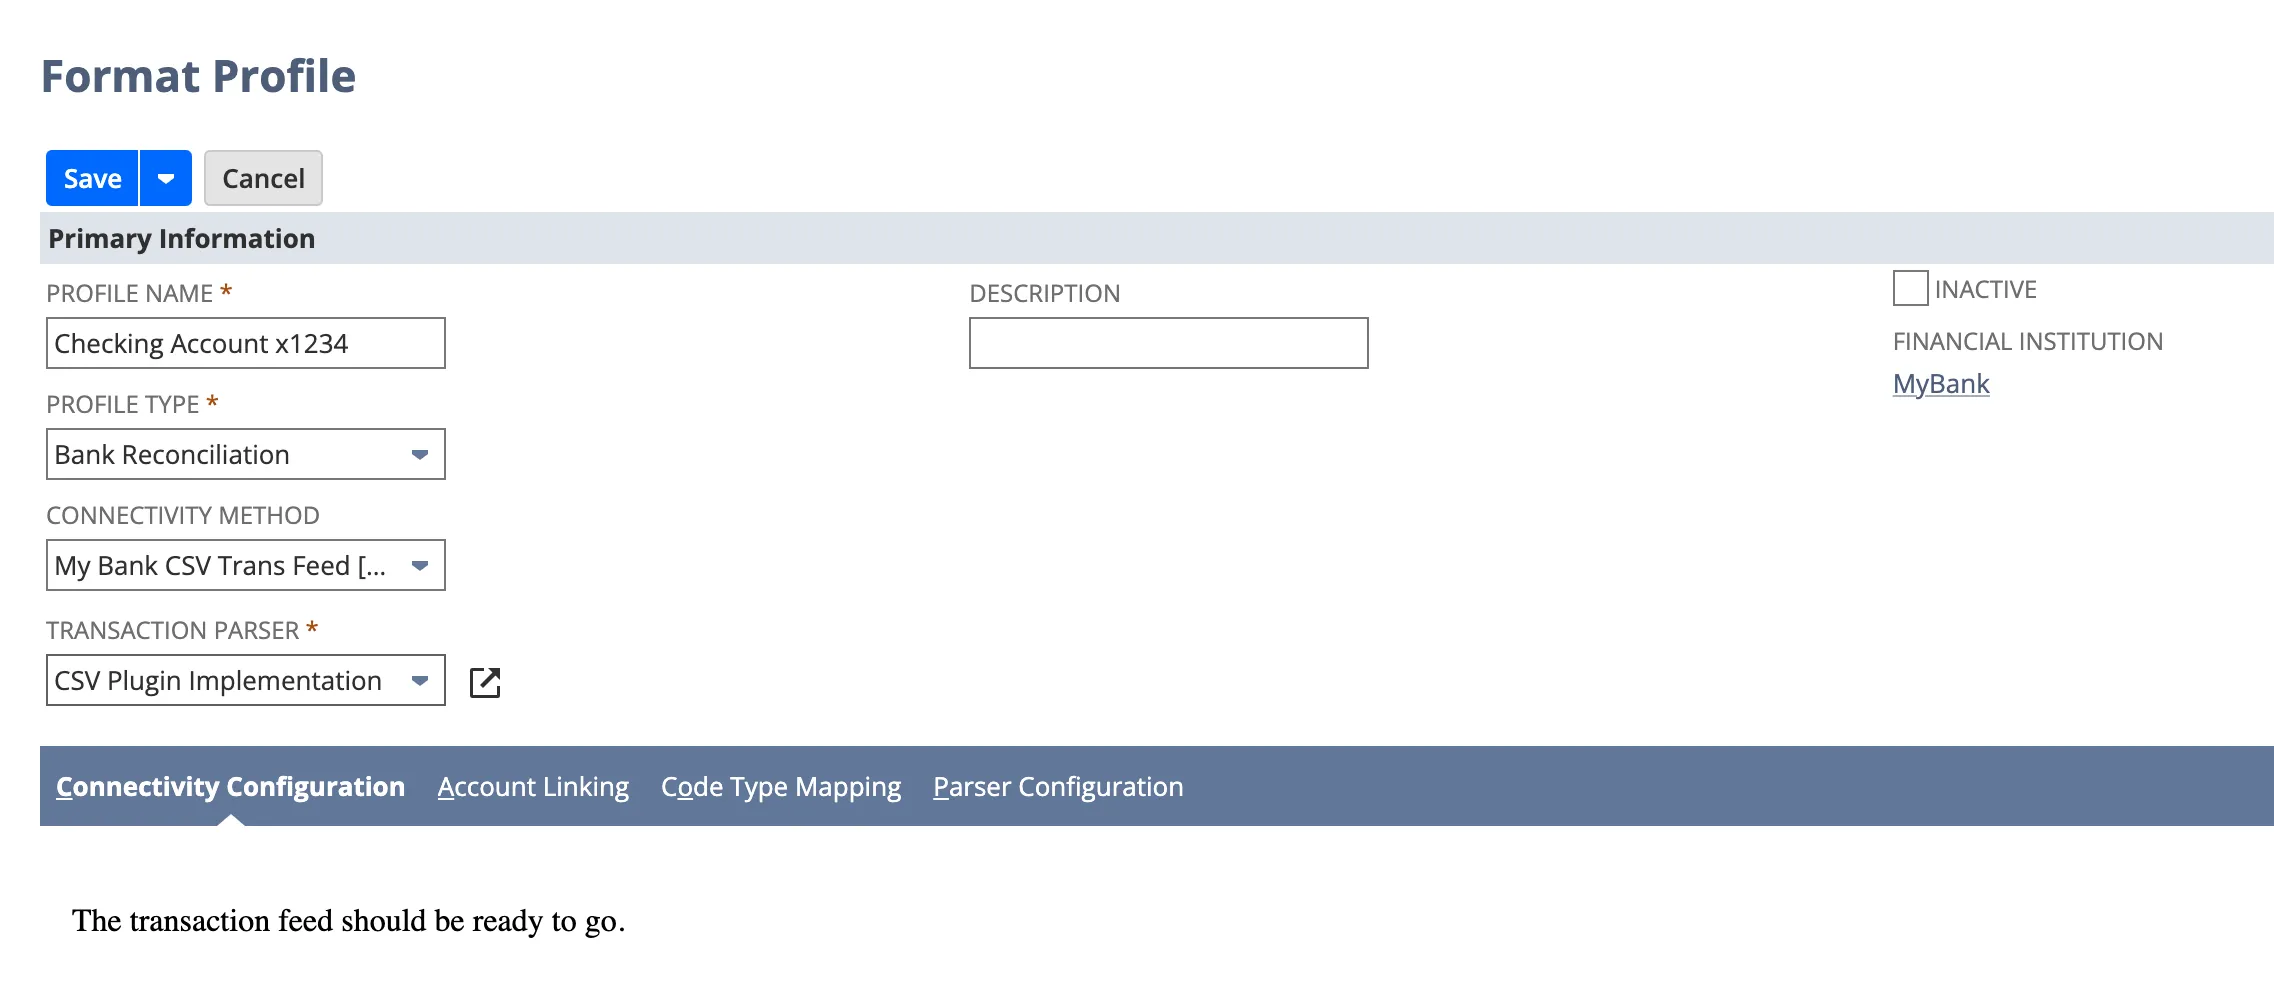
Fill in the following fields under Primary Information:
- Profile Name: Any name. We recommend you name this after the bank account you are linking.
- Profile Type: Bank Reconciliation
- Connectivity Method: My Bank CSV Transaction Feed
- Transaction Parser: CSV Plugin Implementation
Do not click Save yet.
IMPORTANT: Each Format Profile can only support one linked bank account. Only the top-most account with a “Linked GL Account” in the Format Profile will have data imported, and other imports will show as failed within the Banking Import History page.
To enable Bank Feeds for your other bank accounts, please create a separate format profile for each account by repeating the steps below.
To add a new format profile, navigate to Setup → Accounting → Financial Institution → List.
Select View for the Financial Institution you created previously, and then Add under the Format Profile: Configuration tab.
NOTE: The Connectivity Method we ask you to select above is custom and comes from your bank bundle. Everything outside of this Connectivity Method is considered native to NetSuite.
Define Parser Configuration Parameters
Select the Parser Configuration sub-tab.
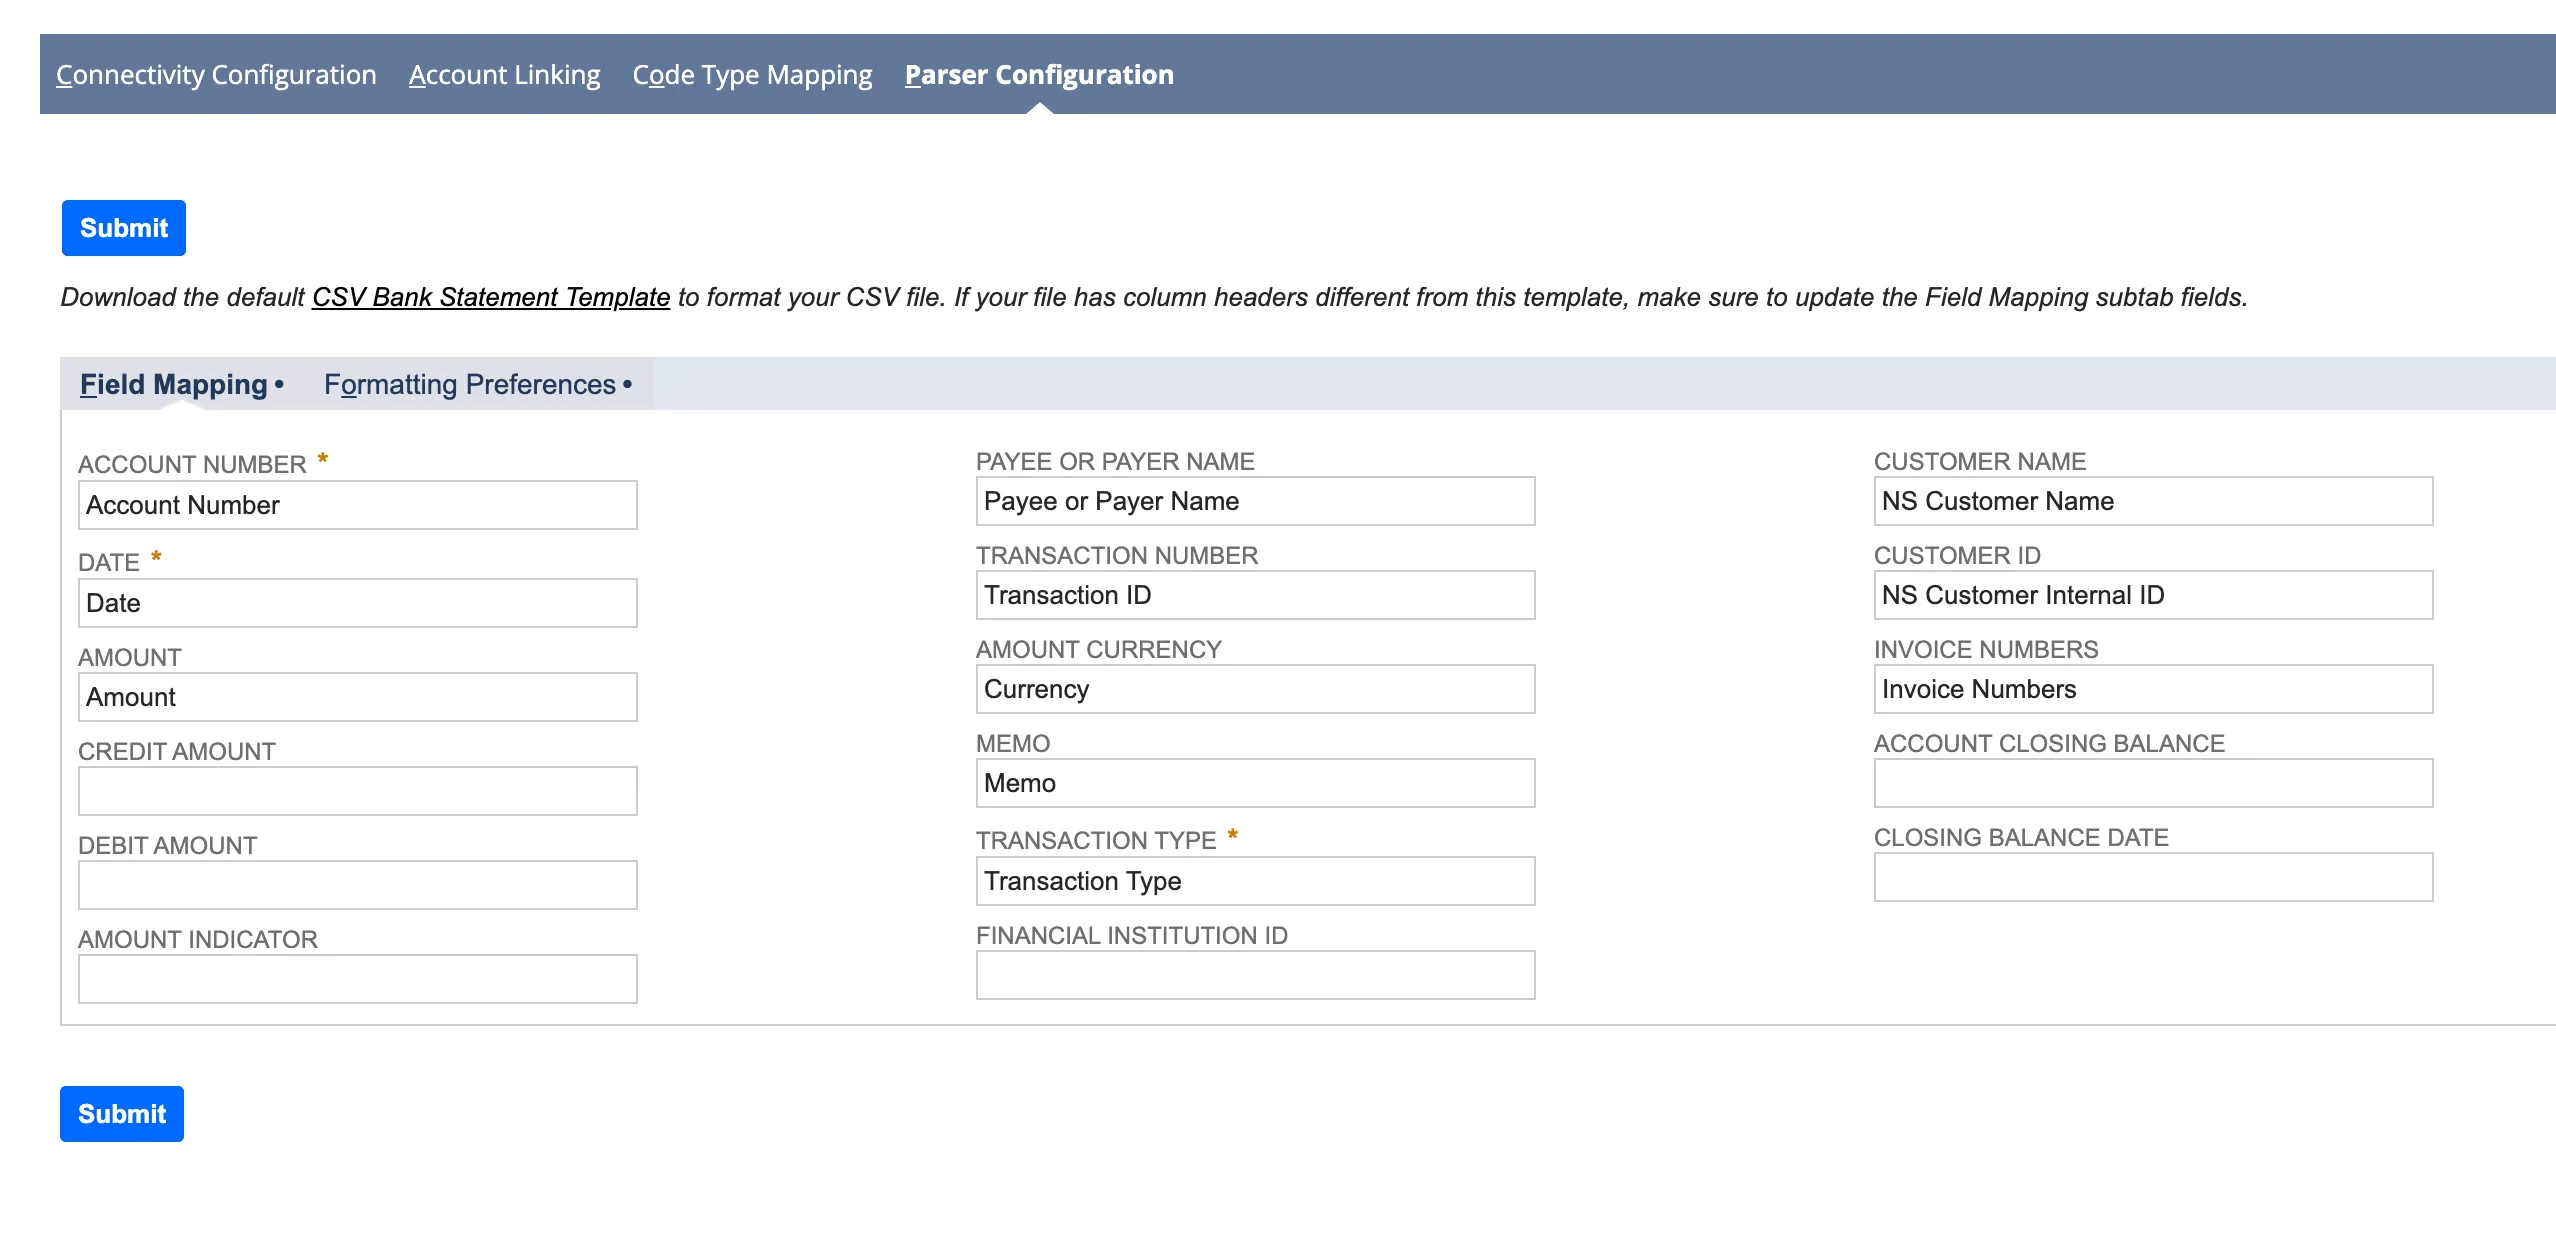
Ensure the following fields are shown under the Field Mapping sub tab:
- Account Number
- Date
- Amount
- Payee or Payer Name
- Transaction Number
- Memo
- Transaction Type
- Customer Name
- Customer ID
- Invoice Numbers
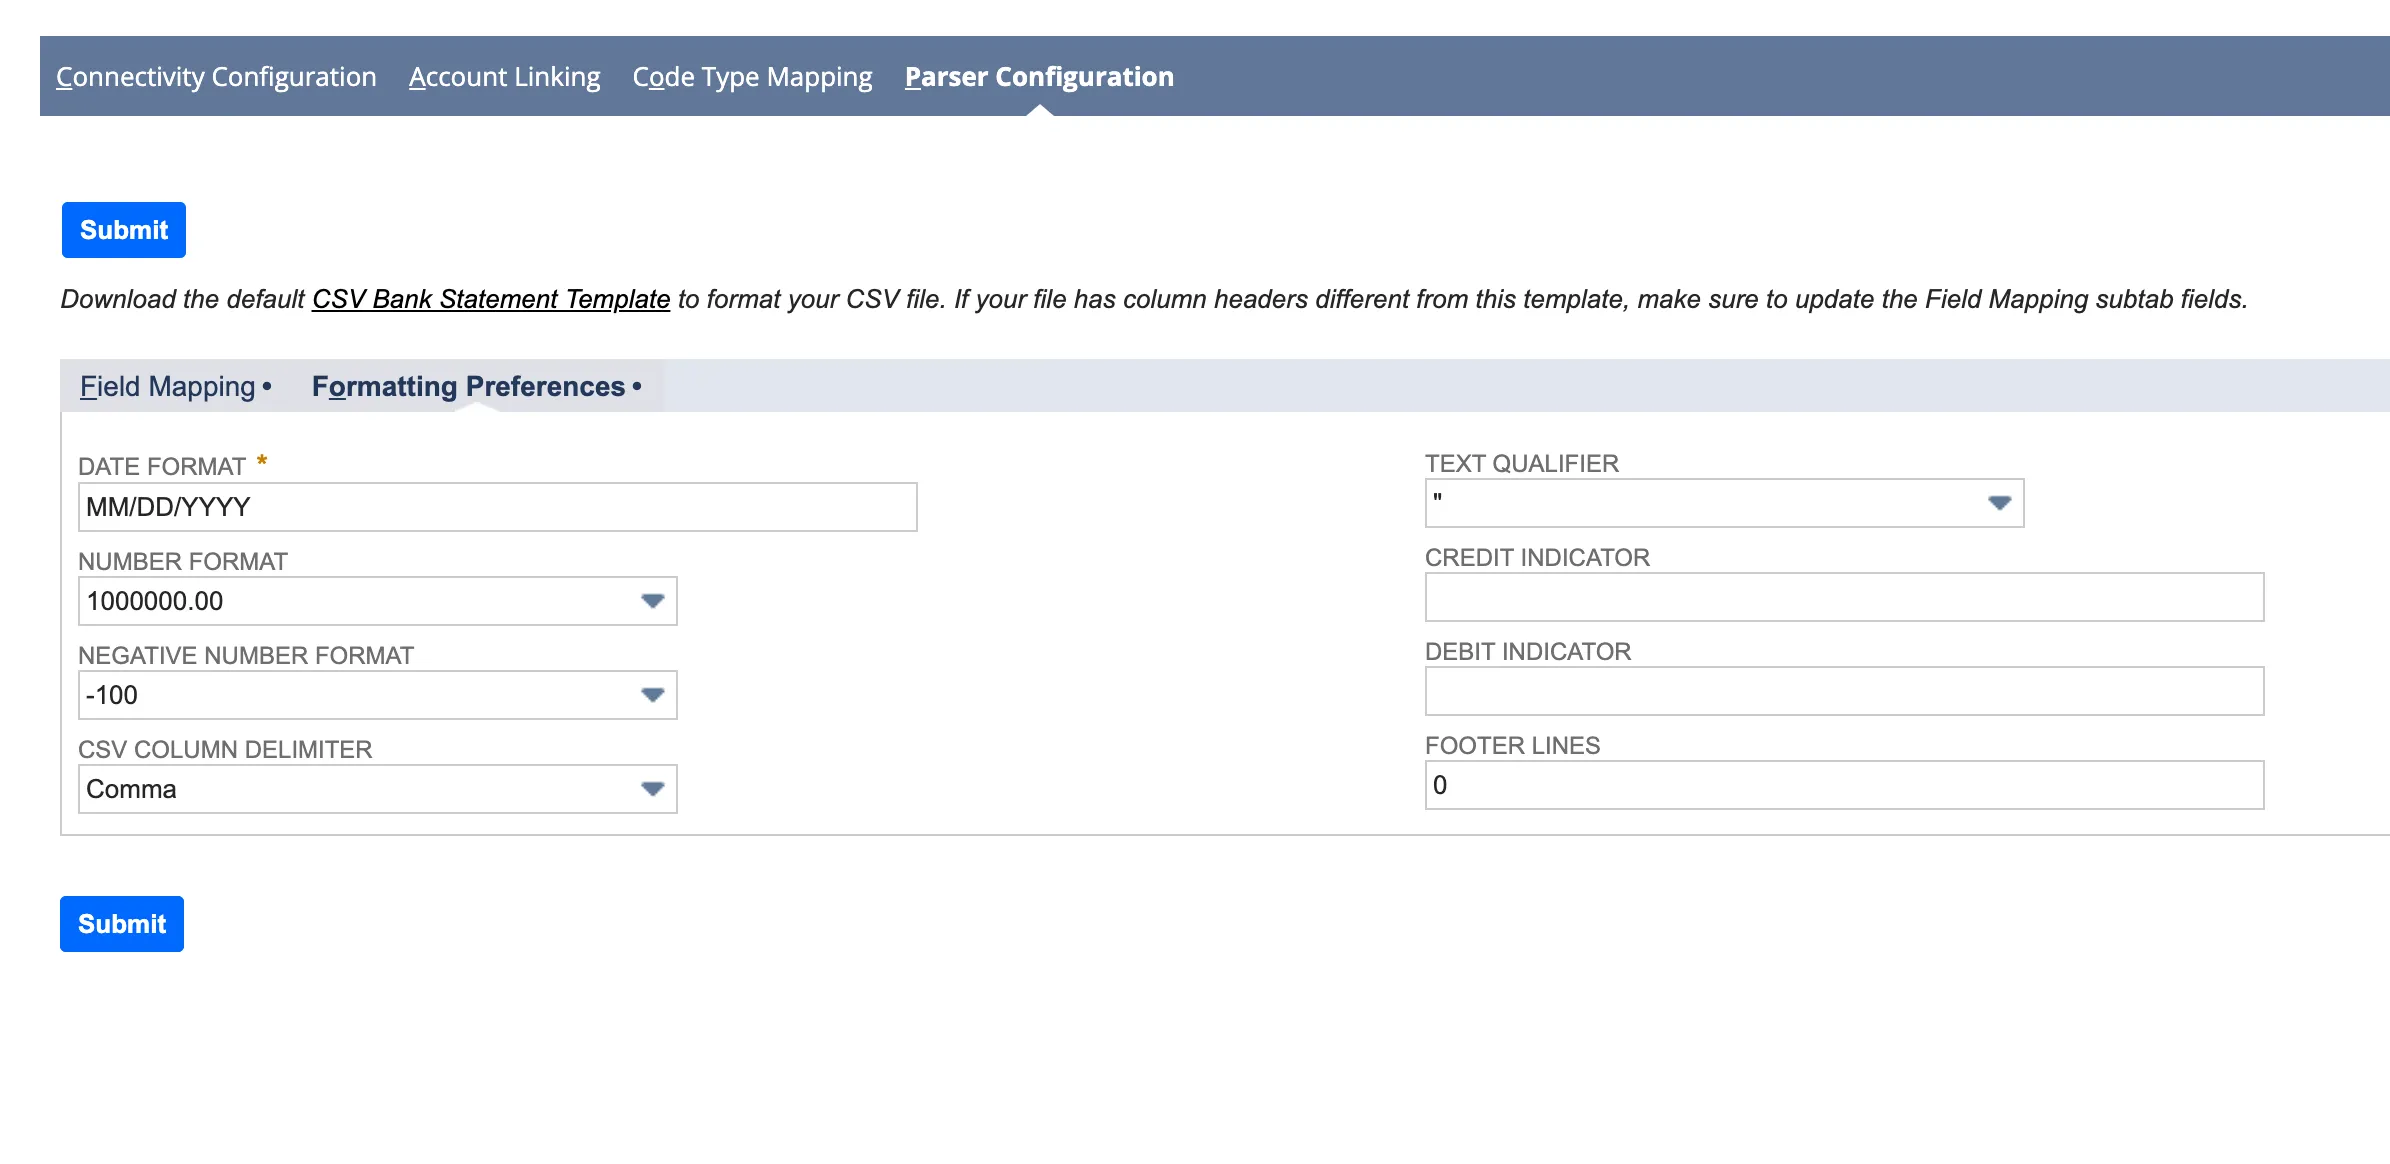
Then, select the Formatting Preferences tab within Parser Configuration. Ensure the Number Format is set to 1000000.00, and Negative Number Format is set to -100.
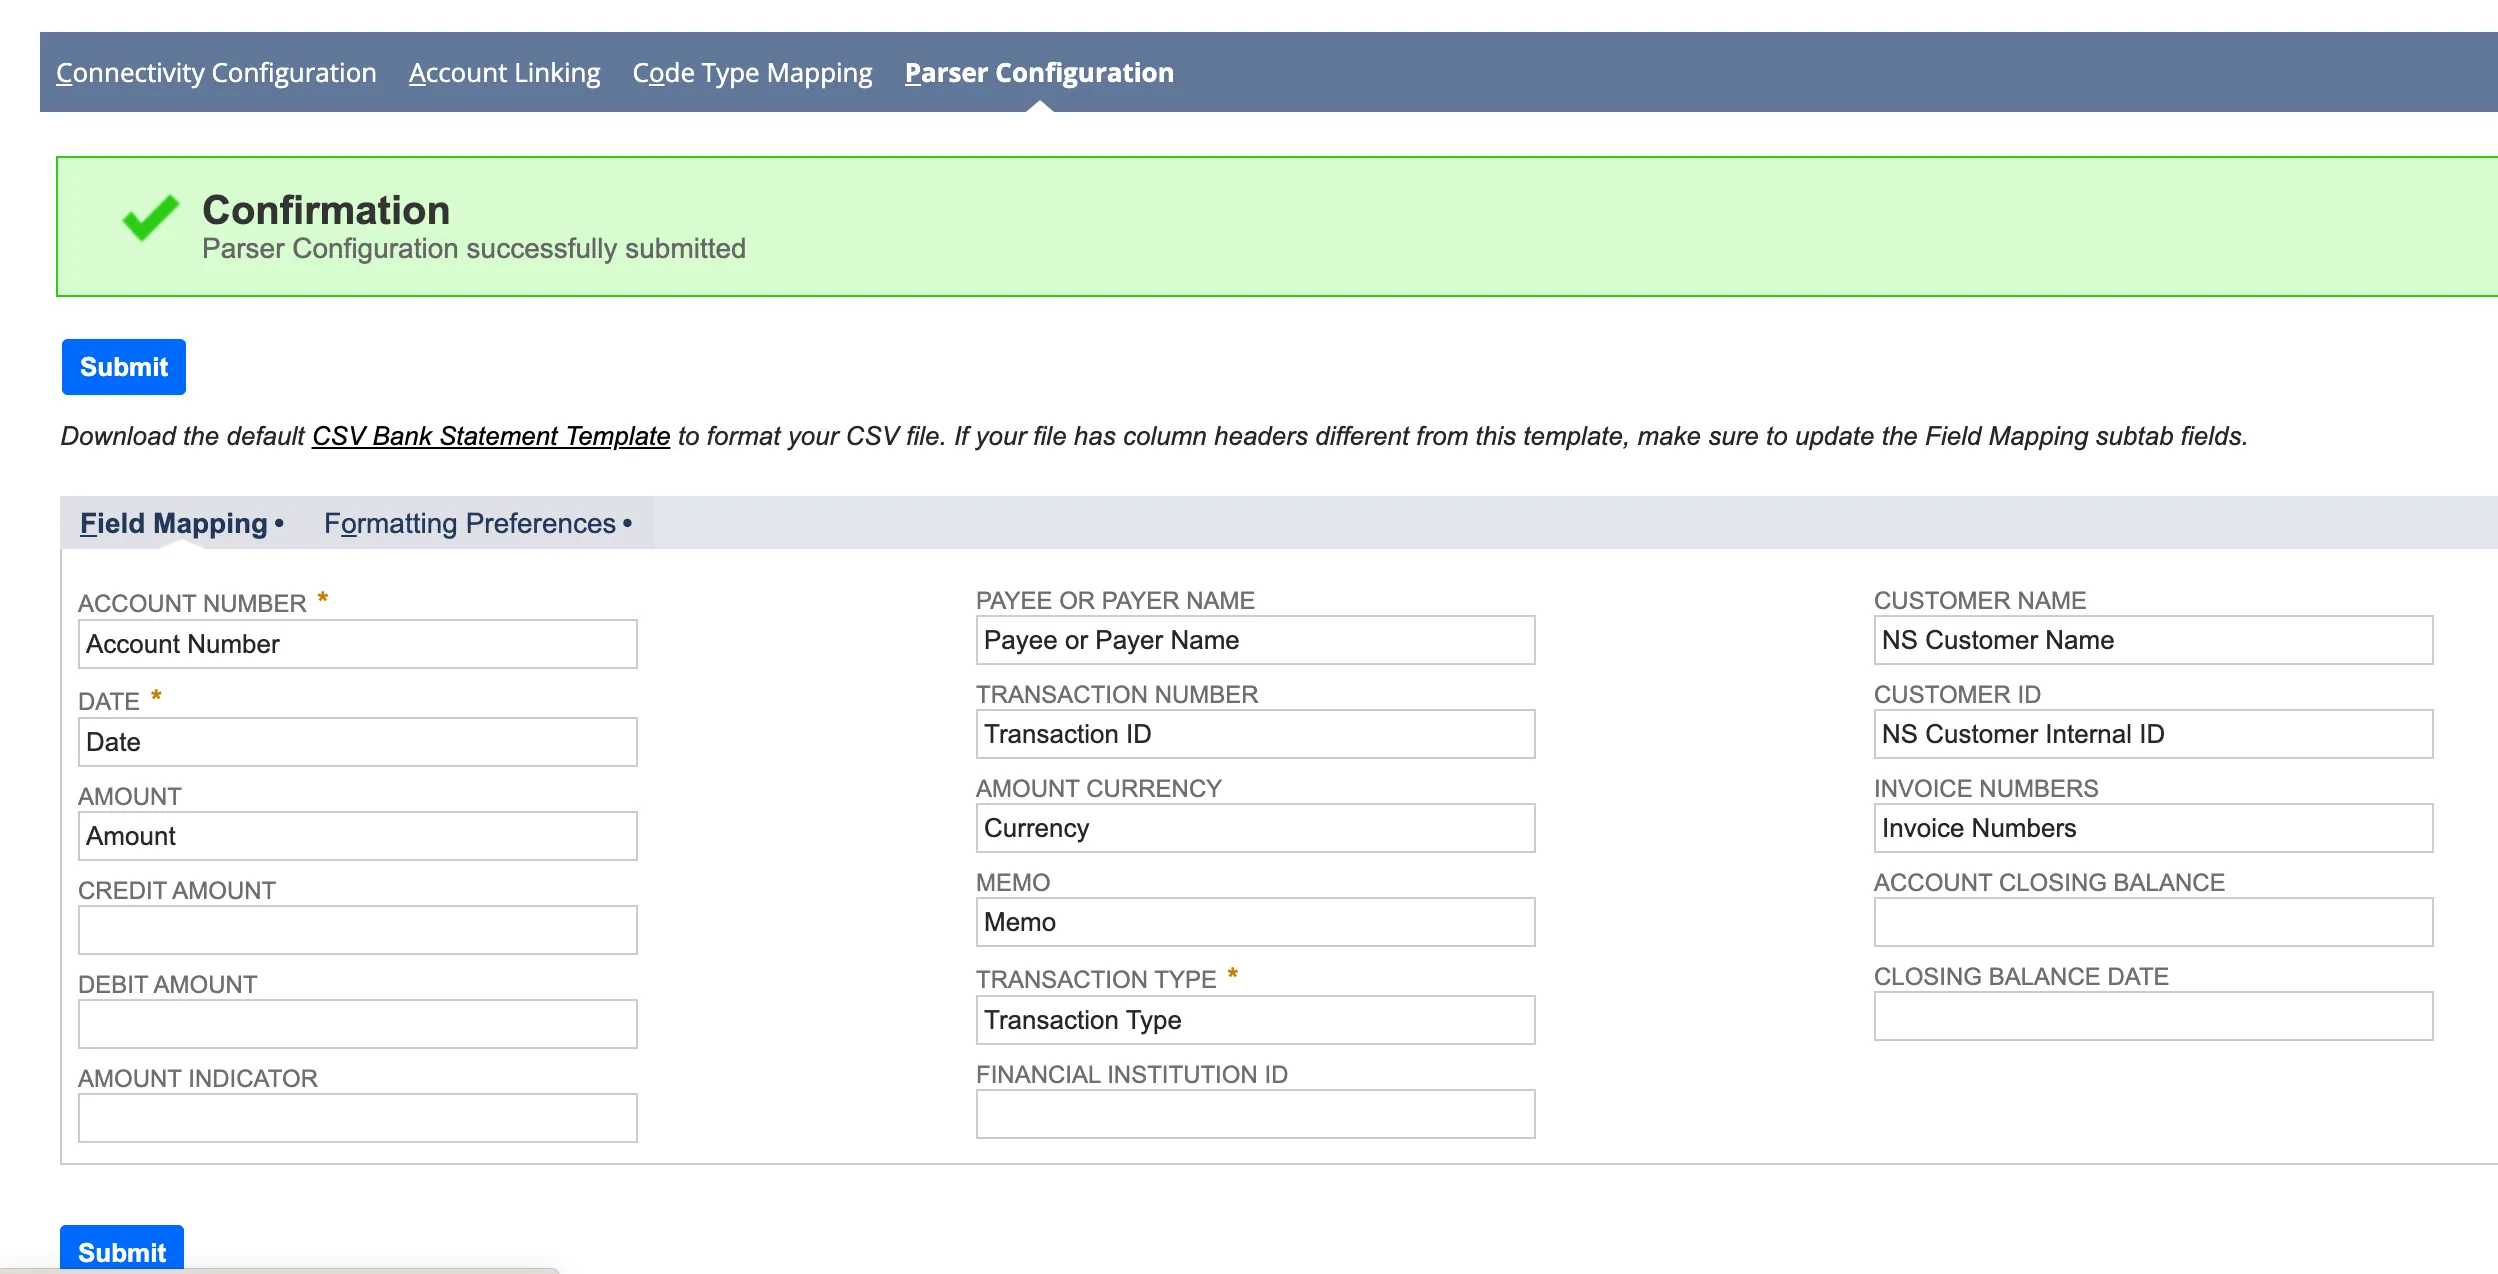
Then, select Submit to save the Parser Configurations. Do not click Save yet on the Format Profile.
Link GL Account to the Format Profile
Now, select the Account Linking tab.
Choose the appropriate Linked GL Account in the right-hand column for the Bank Account.
Now you may finally click Save for this Format Profile.
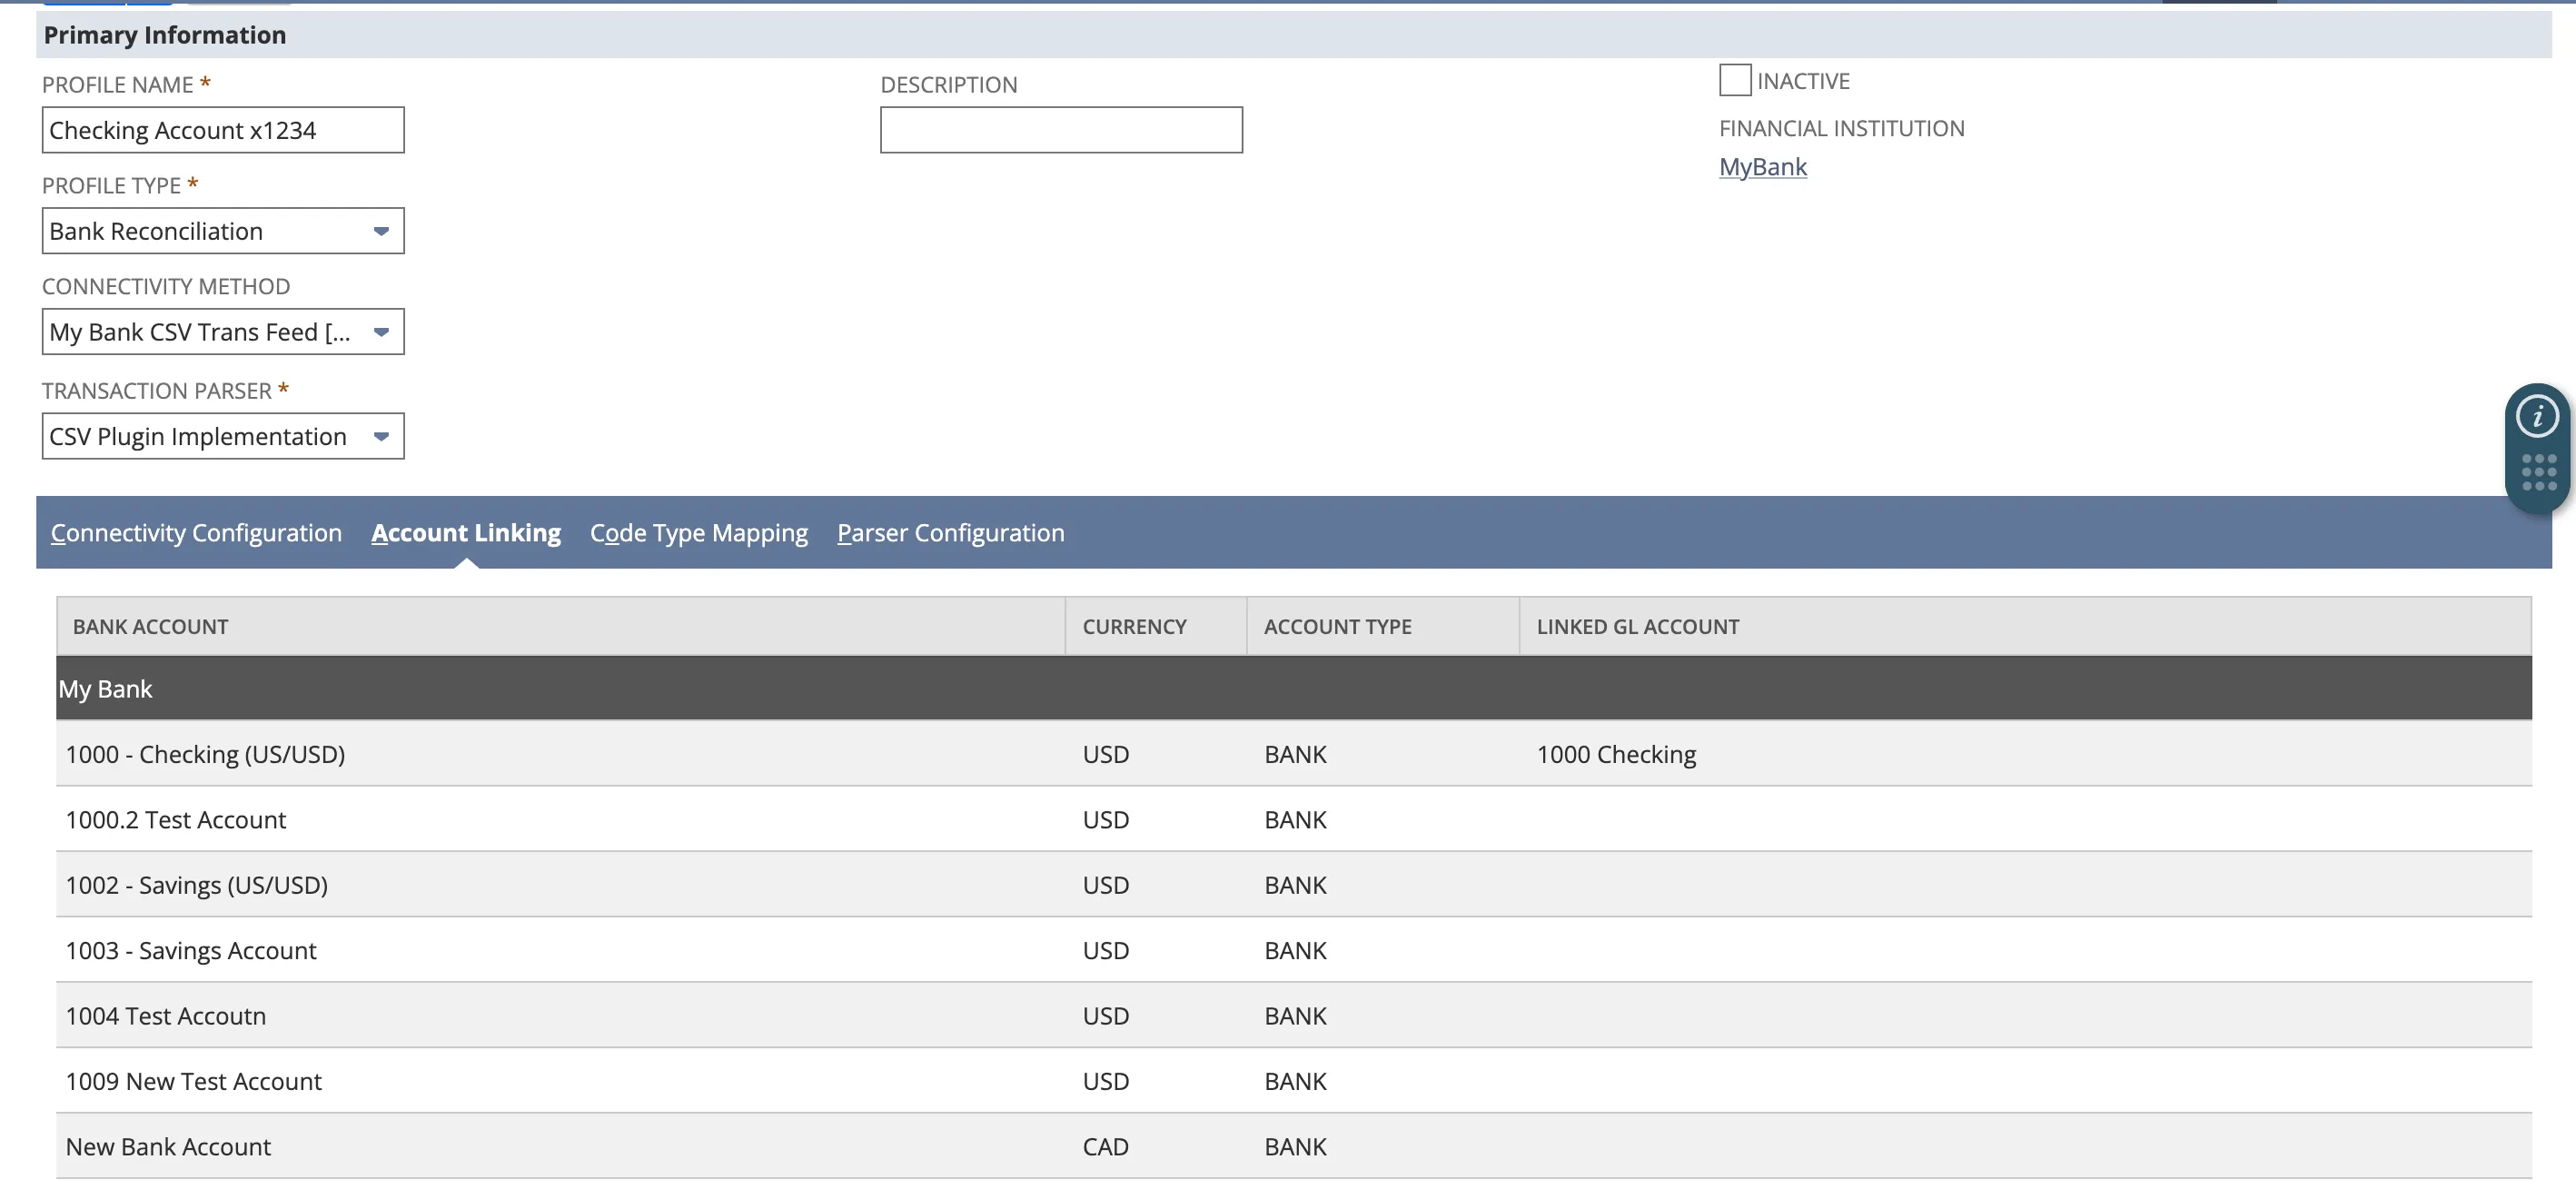
IMPORTANT: Each Format Profile can only support one linked bank account. Only the top-most account with a “Linked GL Account” in the Format Profile will have data imported, and other imports will show as failed within the Banking Import History page.
To enable Bank Feeds for your other bank accounts, please create a separate format profile for each account by repeating the steps you took above.
To add a new format profile, navigate to Setup → Accounting → Financial Institution → List.
Select View for the Financial Institution you created previously, and then Add under the Format Profile: Configuration tab.
Monitor Bank Import Process
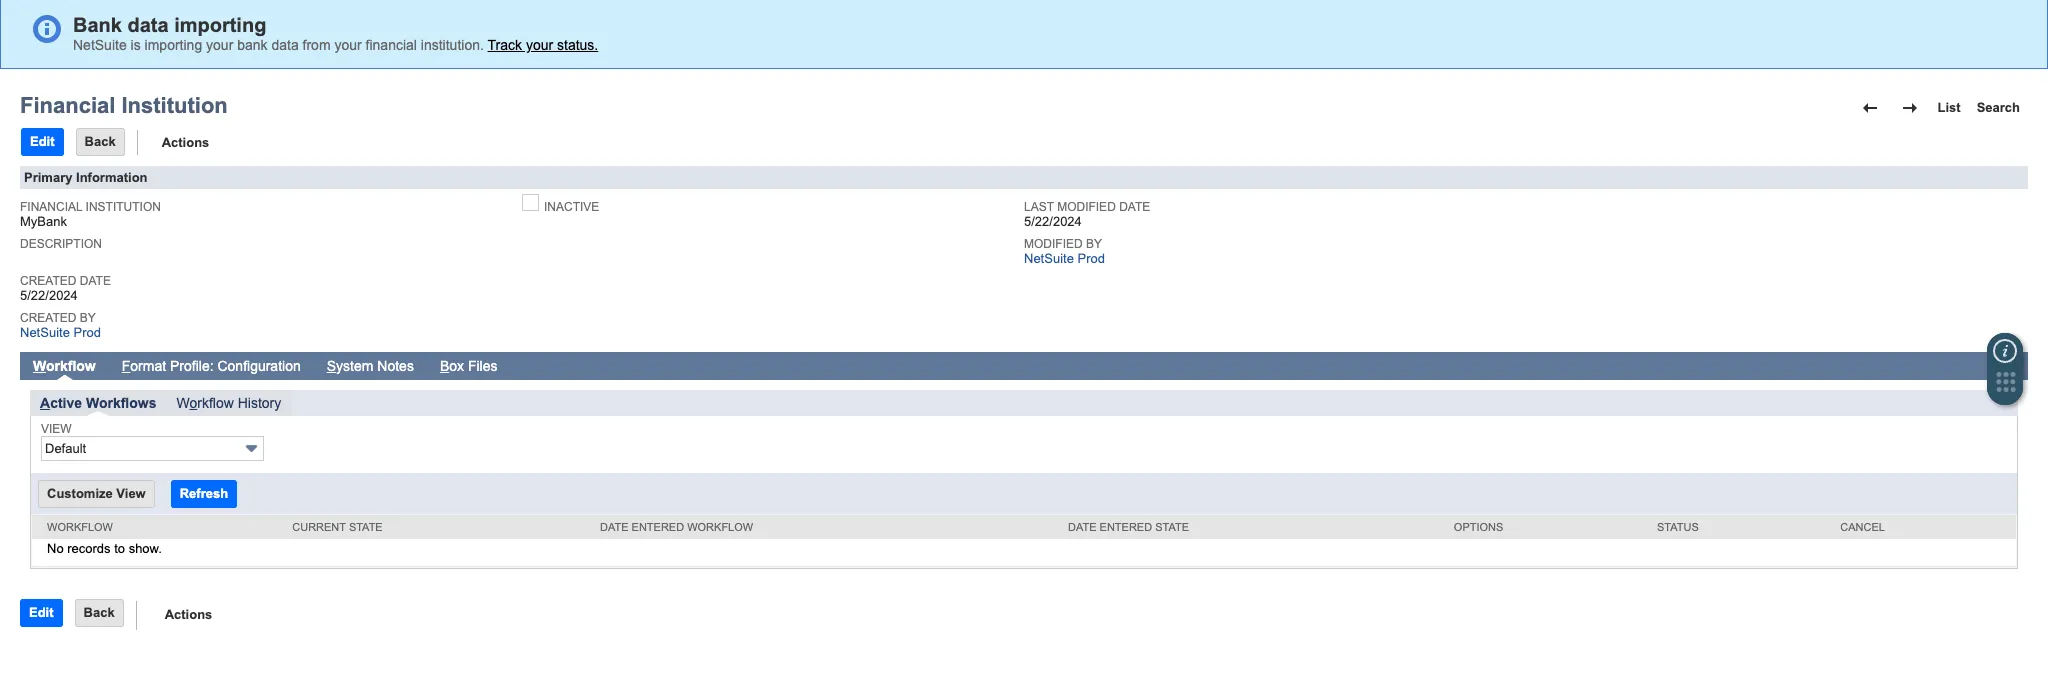
As soon as the Format Profile is saved, a blue banner will appear to notify you that NetSuite is beginning the bank import process.
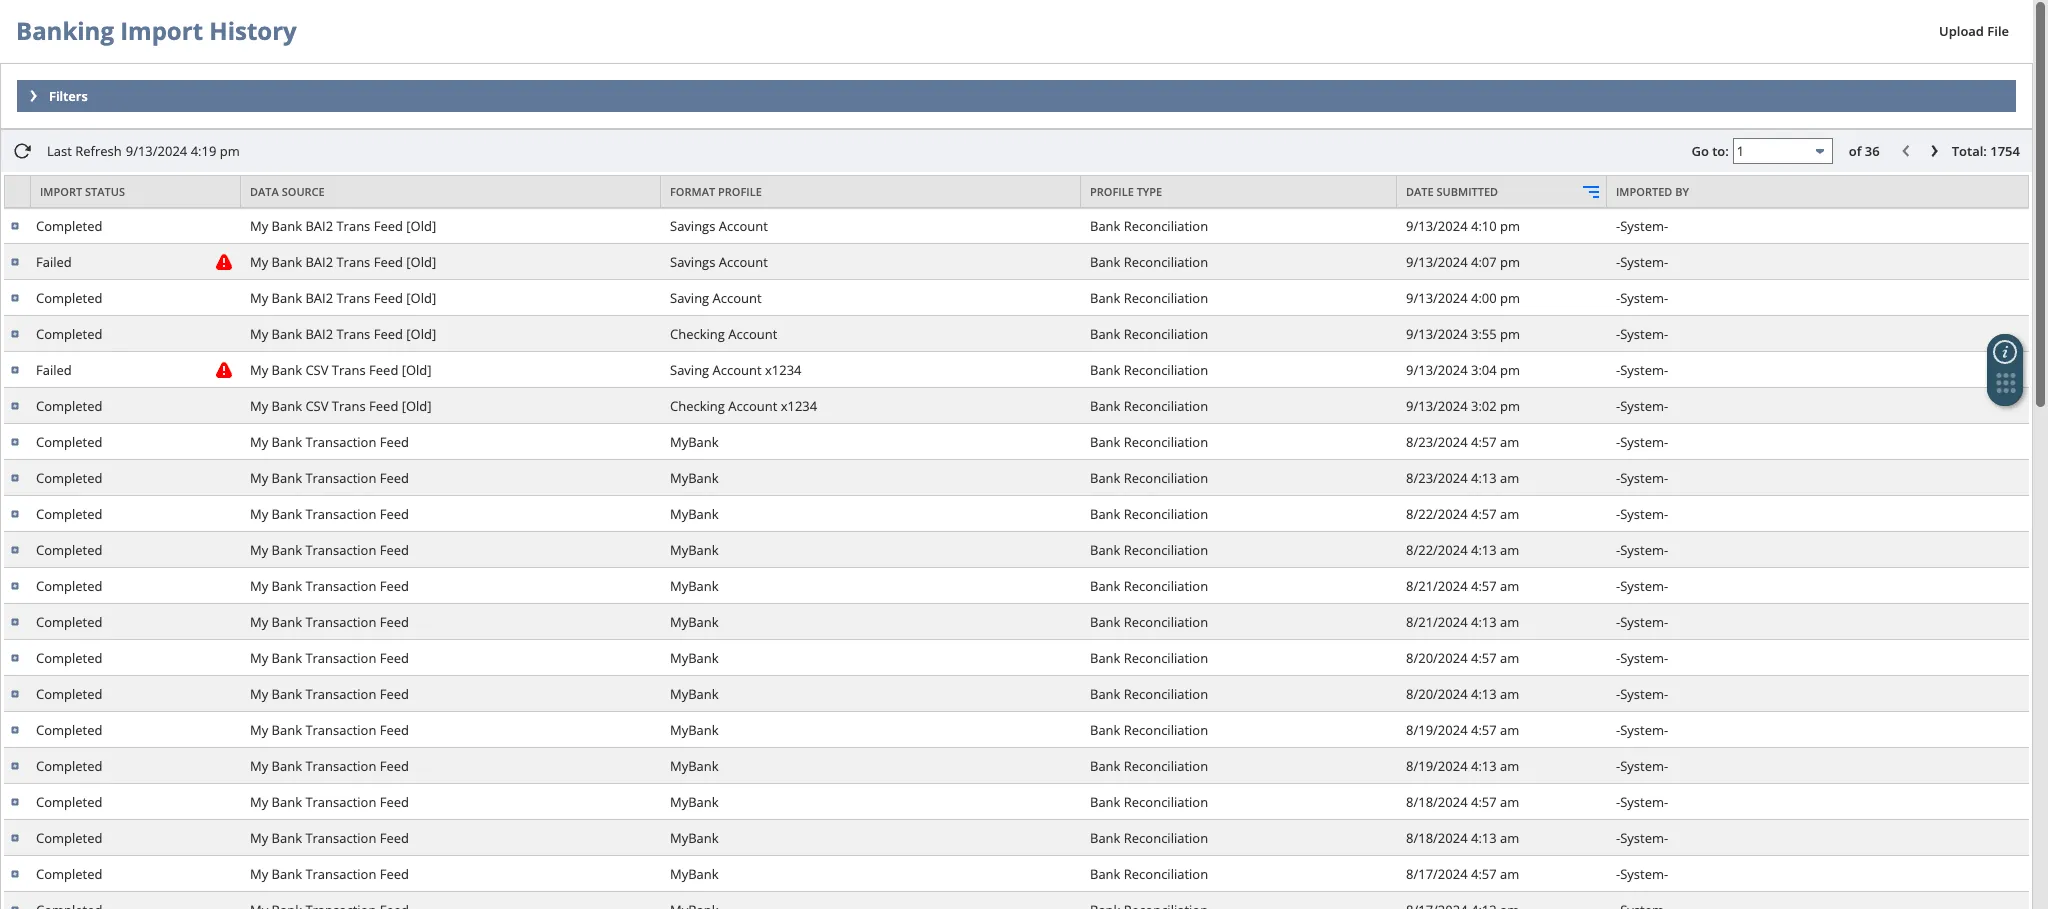
Select Track your status in the blue banner that appears, or go to Transactions → Citizens → Banking Import History.
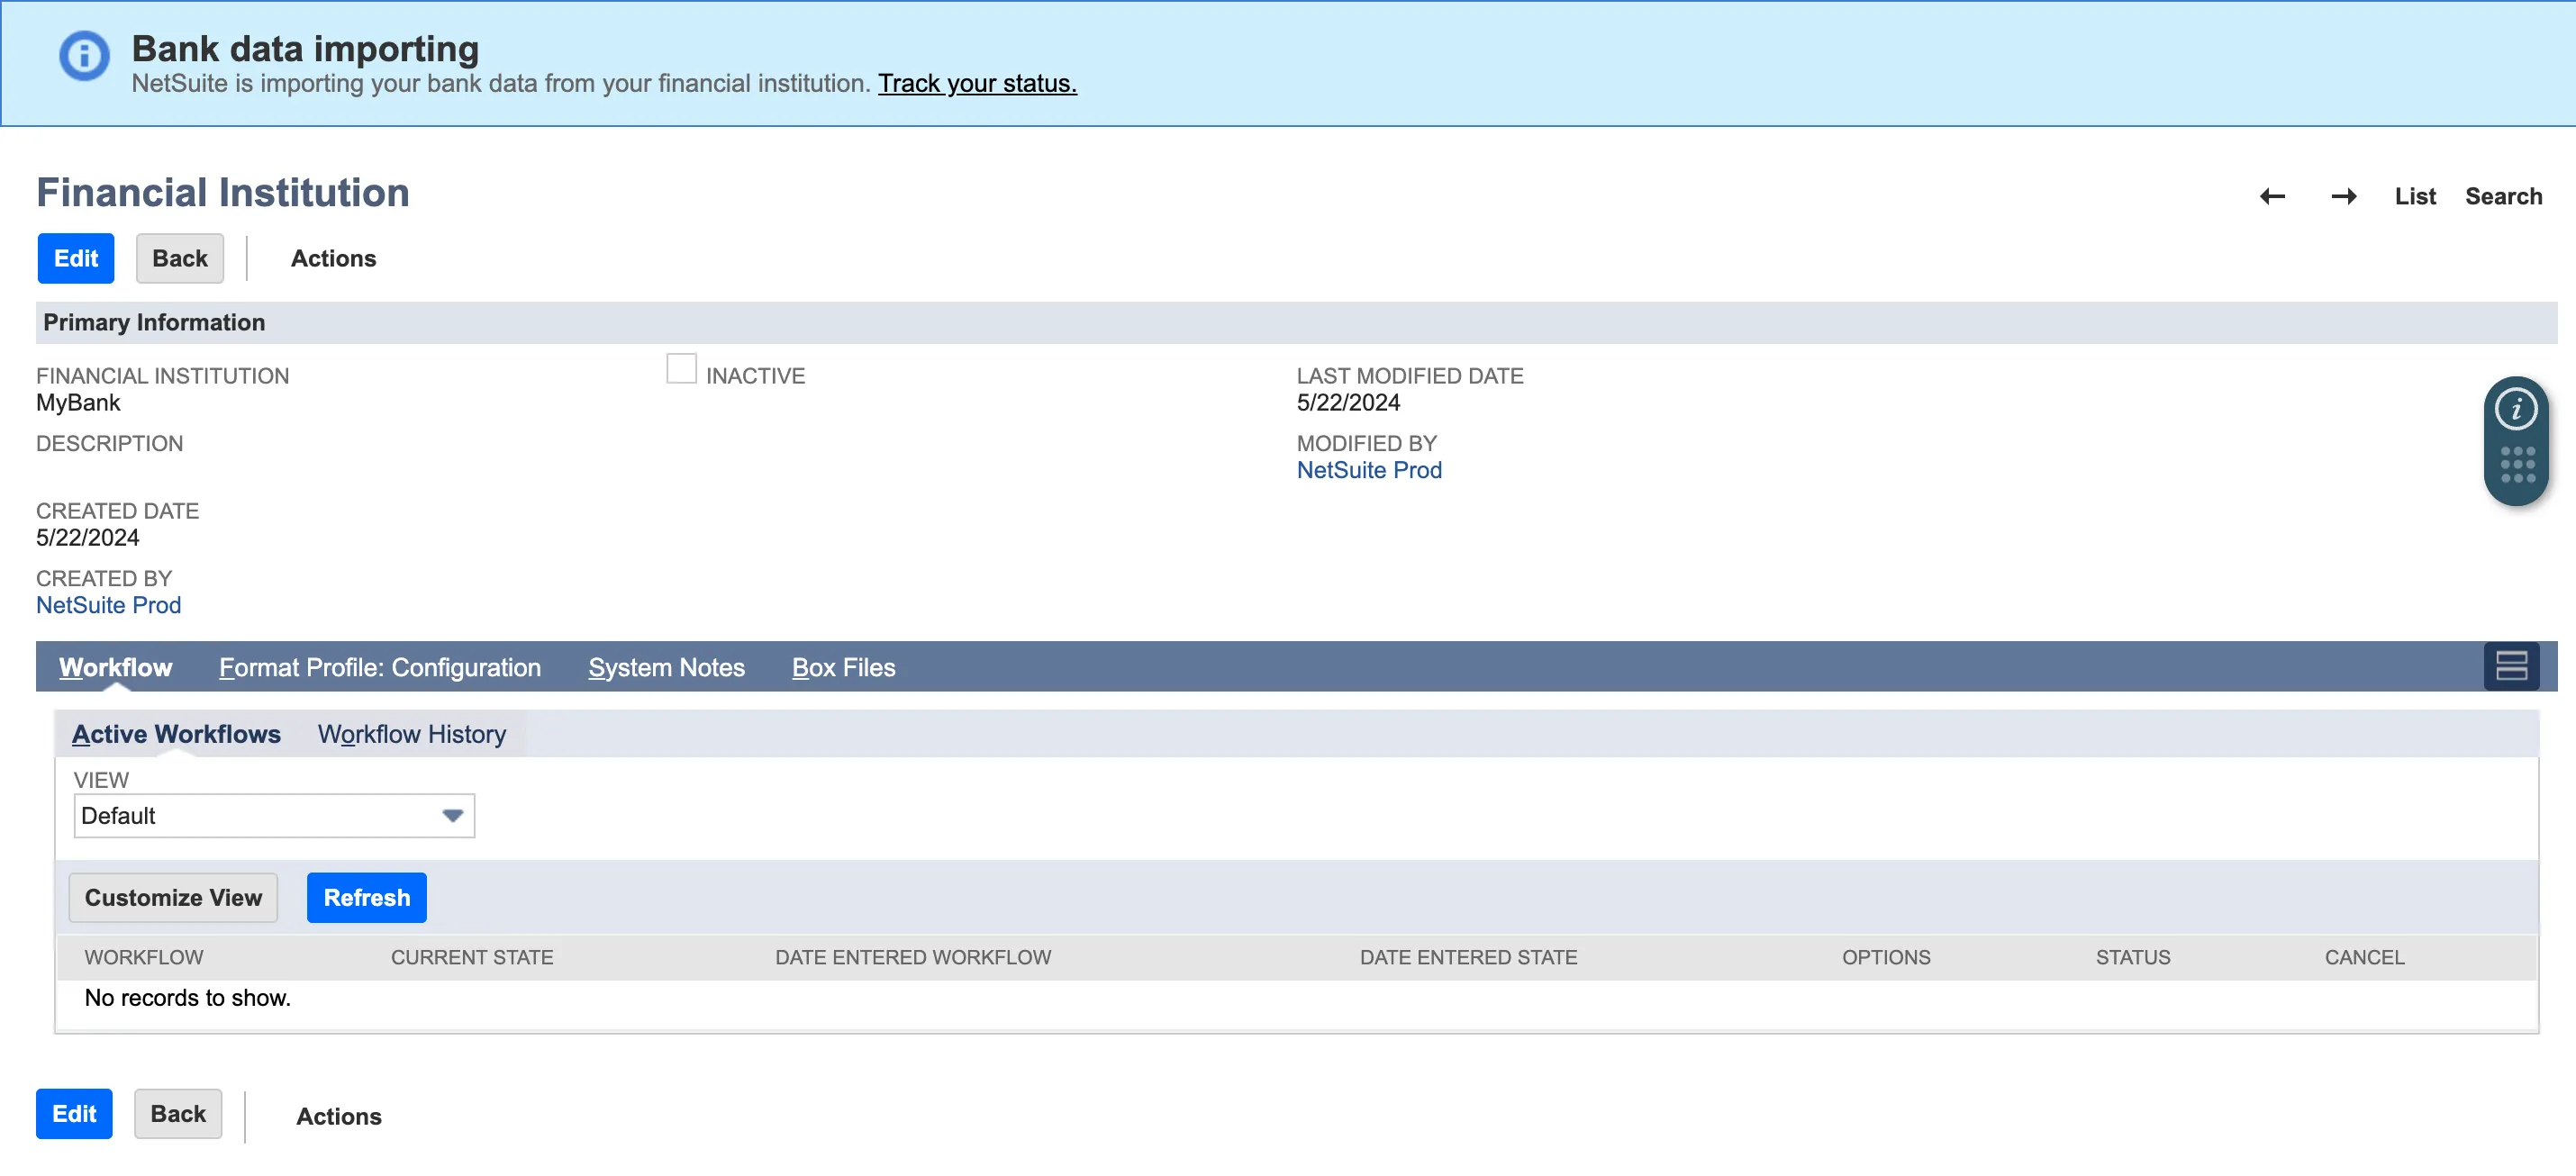
If the import was successful, you will see Completed under the Import Status column.
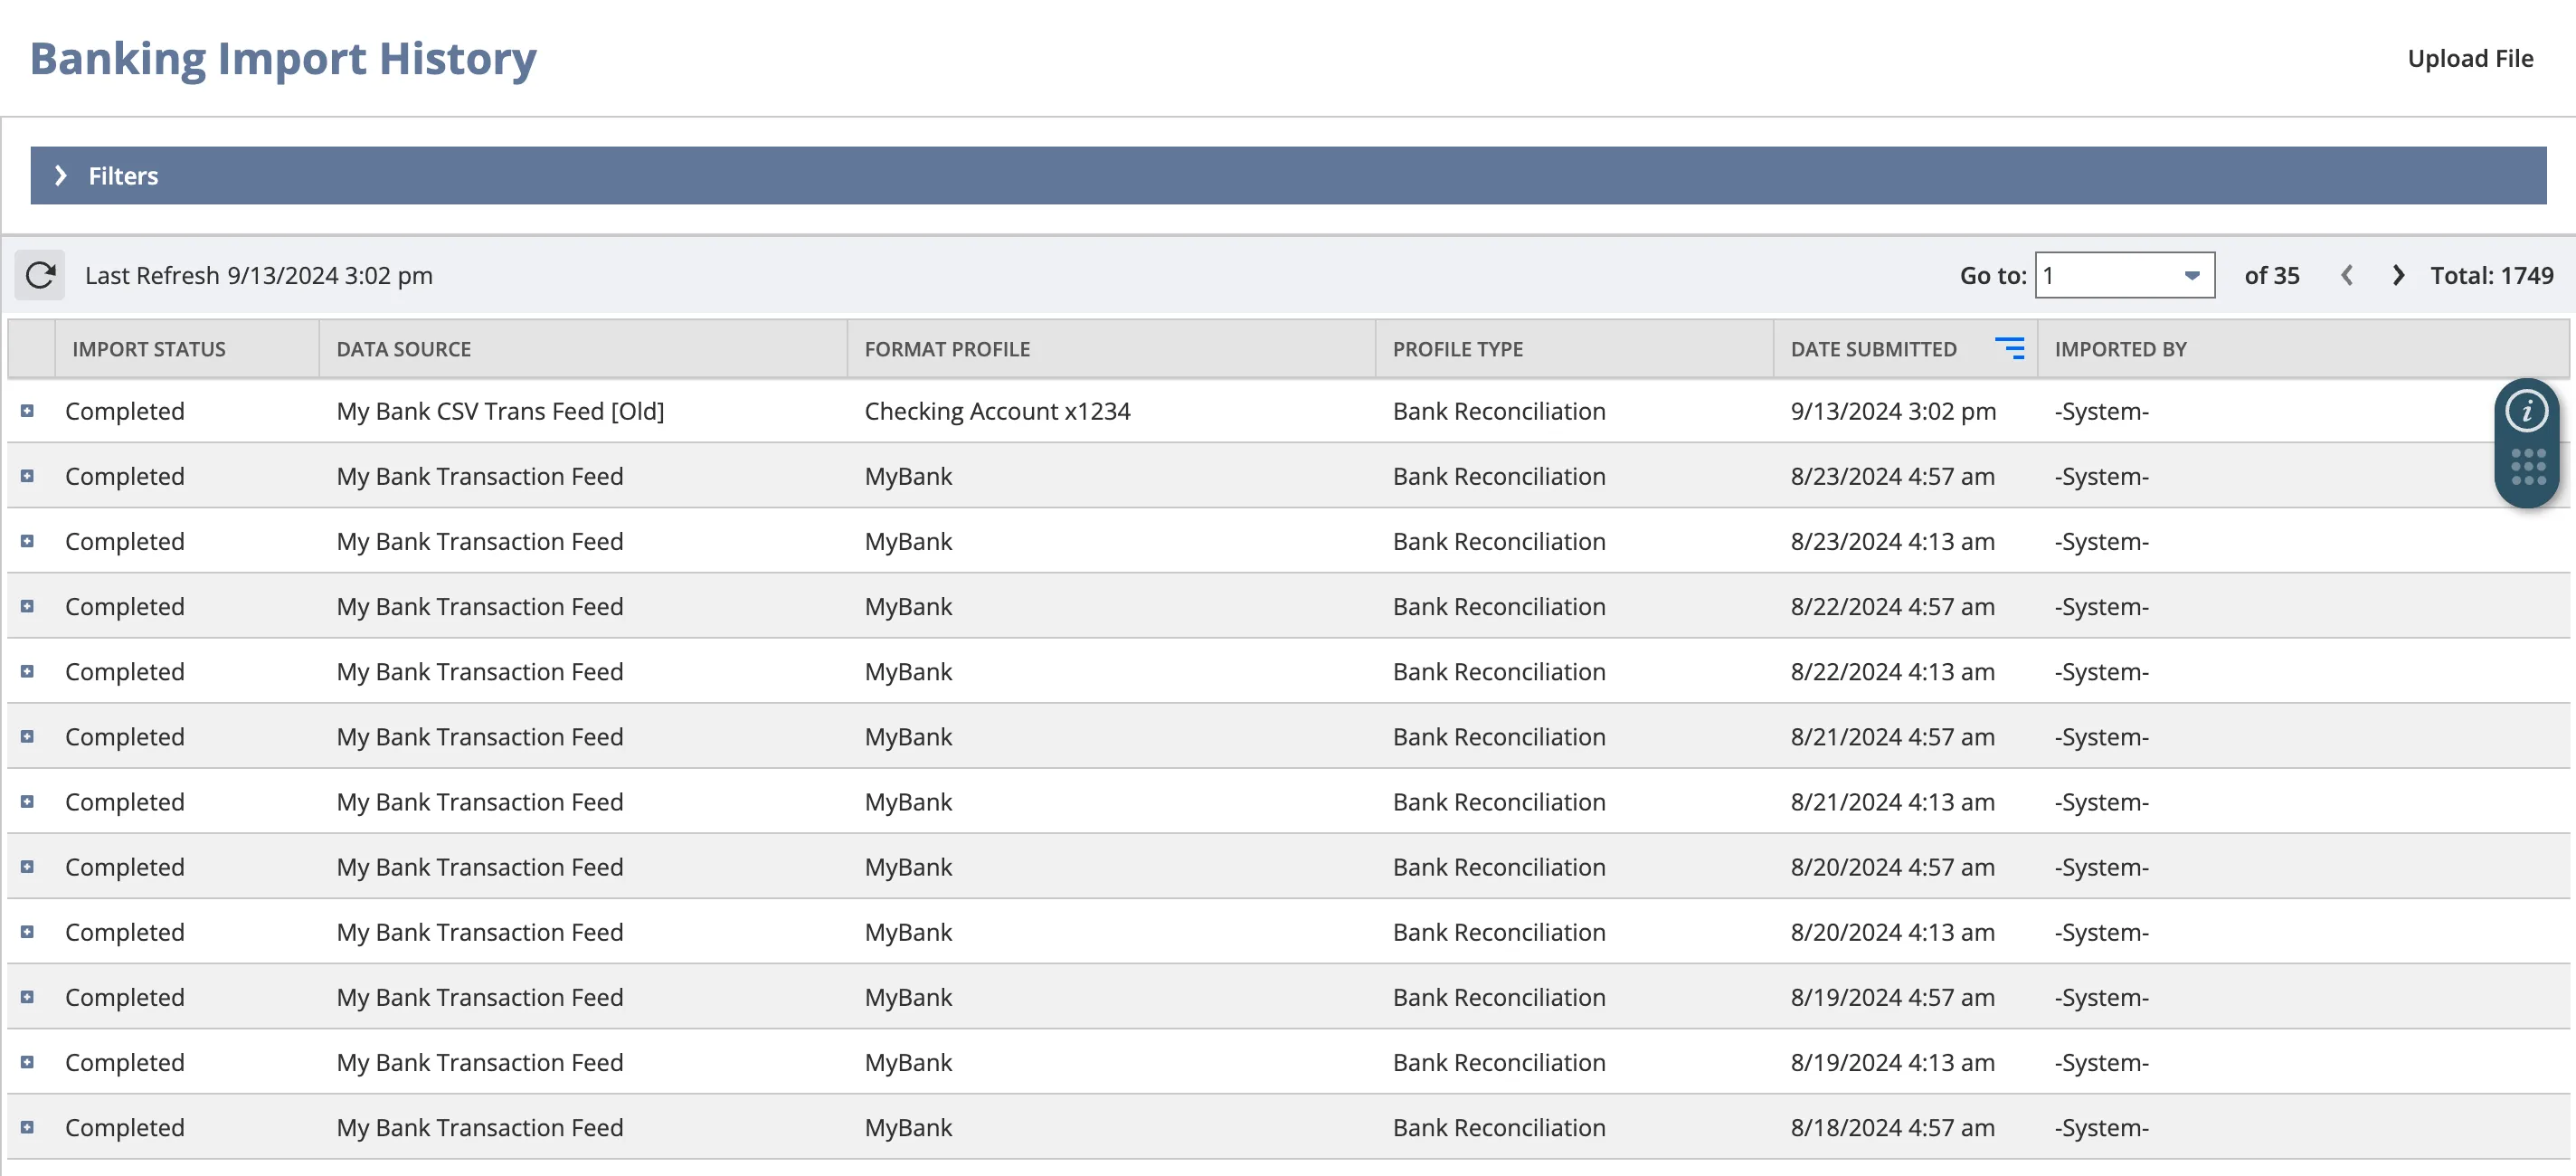
If the import fails, you will see Failed in the Import Status column. Select the plus (+) sign to expand the failure reason details.
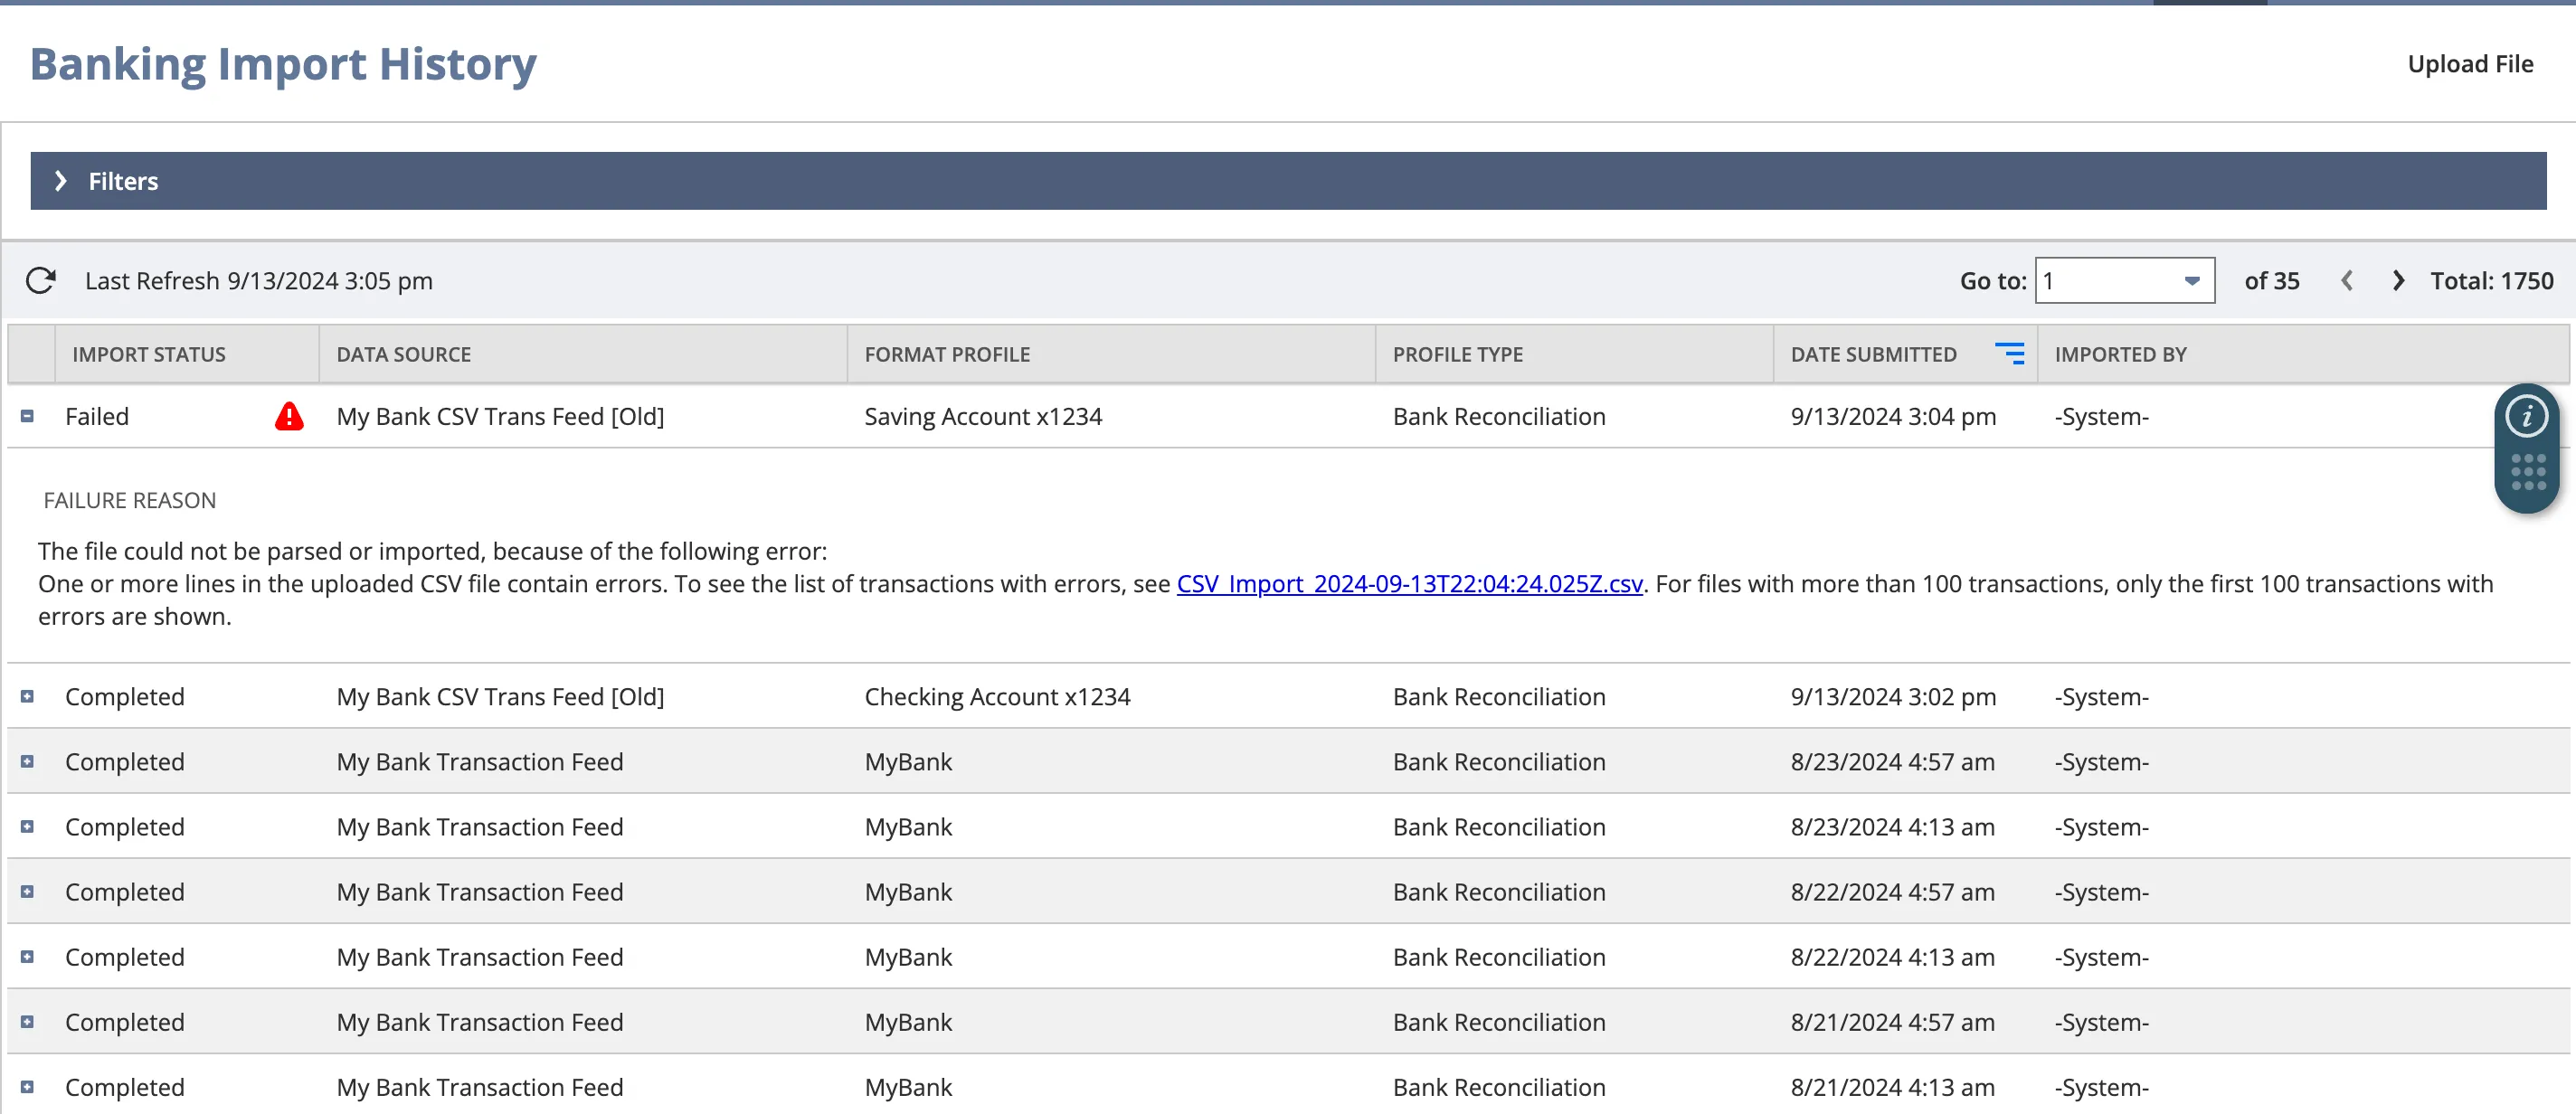
Please take a screenshot of the error message and download the CSV provided from the link in the error message. Then, email this information to support.
Enabling BAI2 Bank Feeds
Refer to the steps below on how you can enable BAI2 Bank Feeds.
Create a Format Profile
Each Format Profile can only support one linked bank account. Complete the following steps for each of your bank accounts.
Select the Format Profile: Configuration tab and select Add.
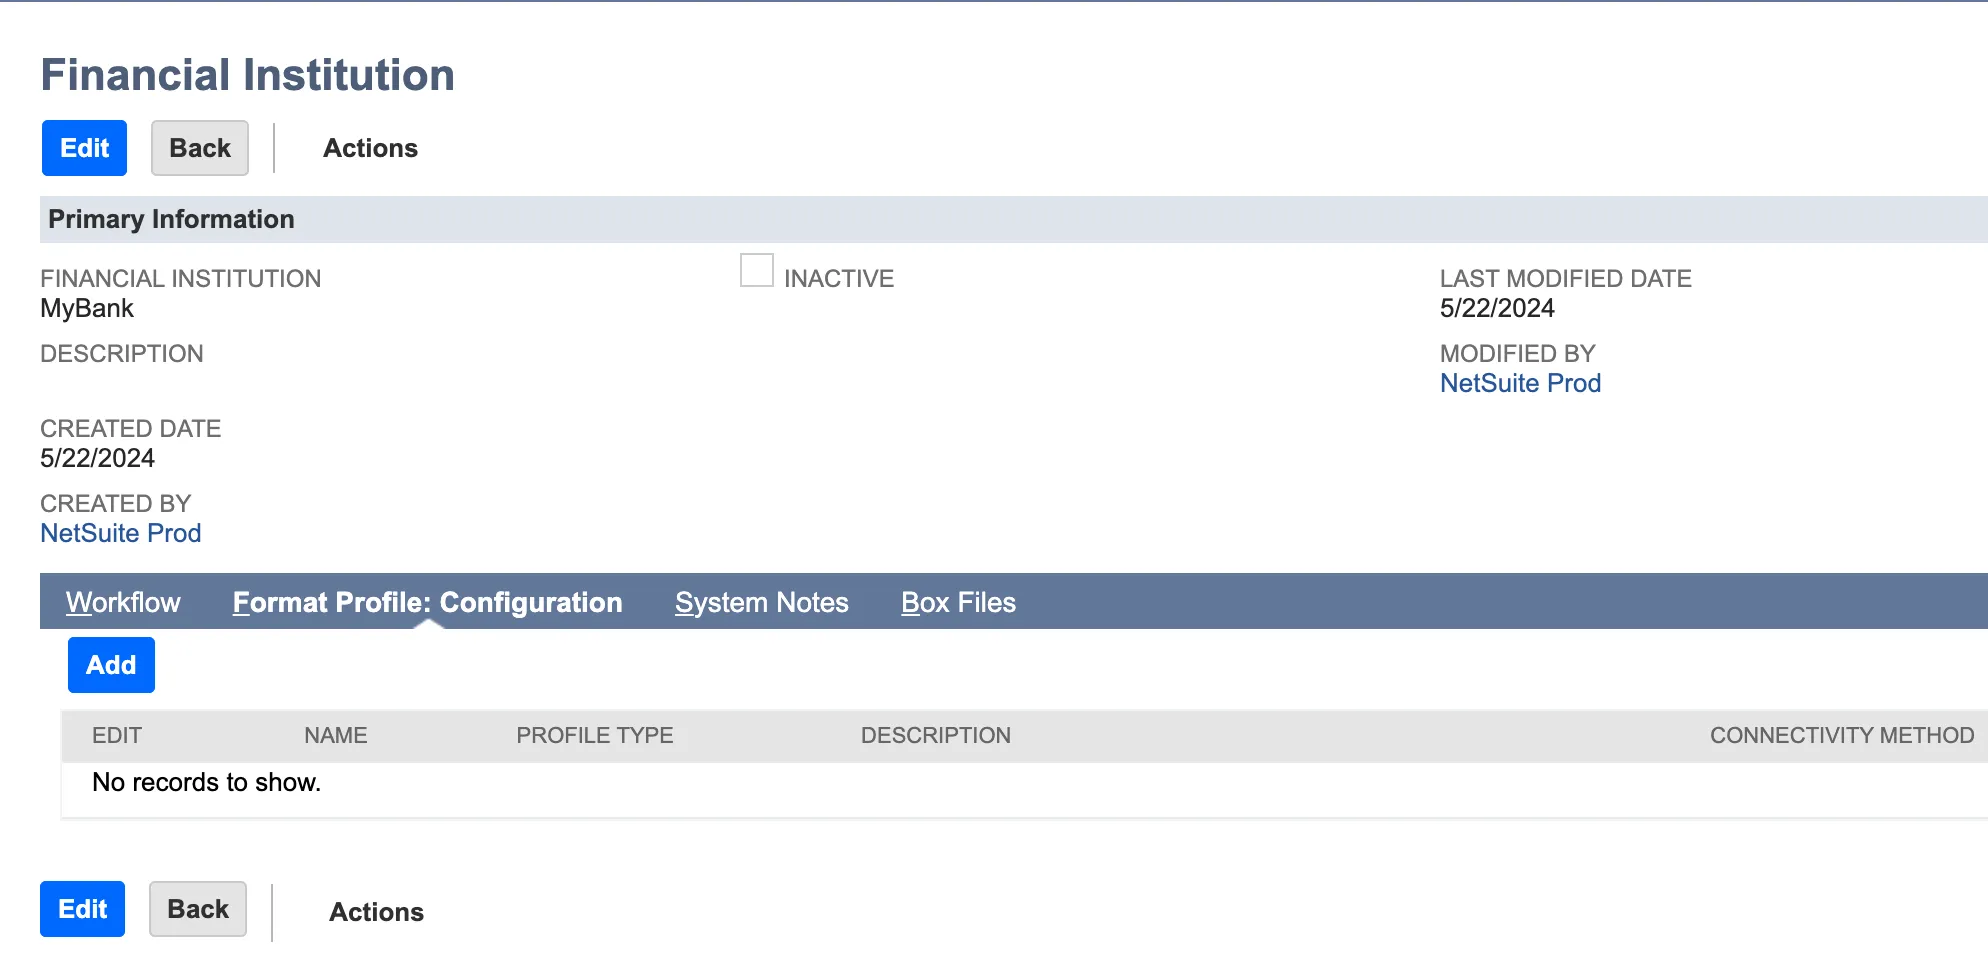
Fill in the following fields under Primary Information:
- Profile Name: Any name. We recommend you name this after the bank account you are linking.
- Profile Type: Bank Reconciliation
- Connectivity Method: My Bank BAI2 Transaction Feed
- Transaction Parser: BAI2 Plugin Implementation
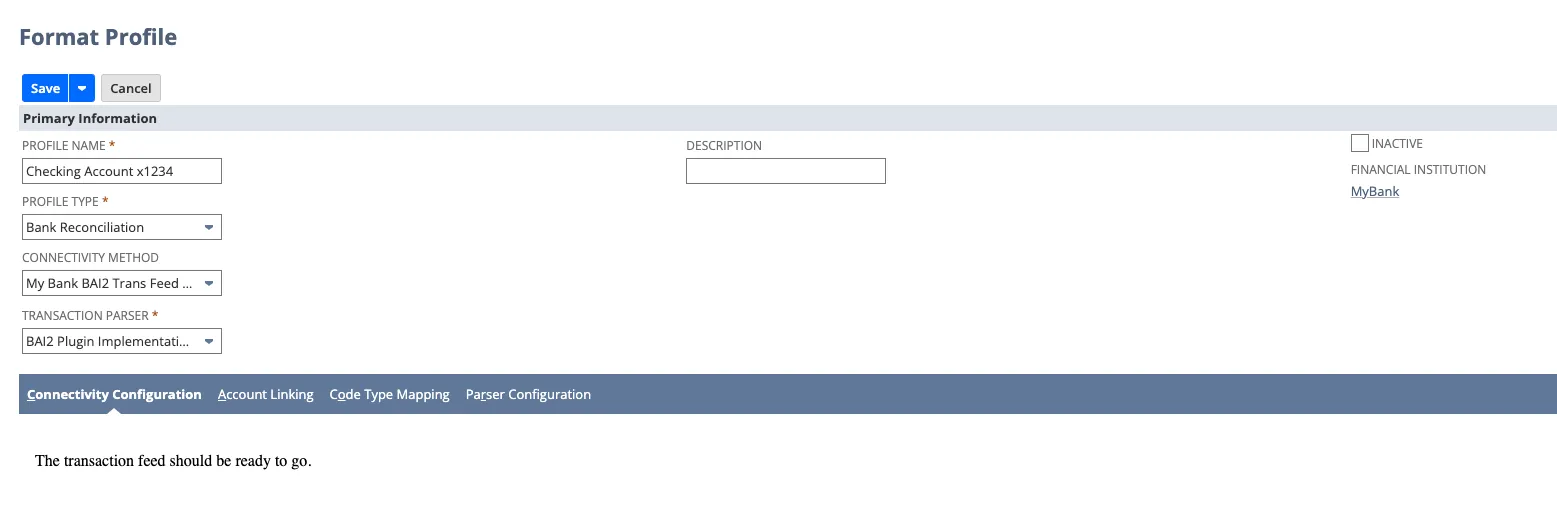
Do not click Save yet.
NOTE: The Connectivity Method we ask you to select above is custom and comes from your bank bundle. Everything outside of this Connectivity Method is considered native to NetSuite.
Link GL Account to the Format Profile
Now, select the Account Linking tab.
Choose the appropriate Linked GL Account in the right-hand column for the Bank Account.
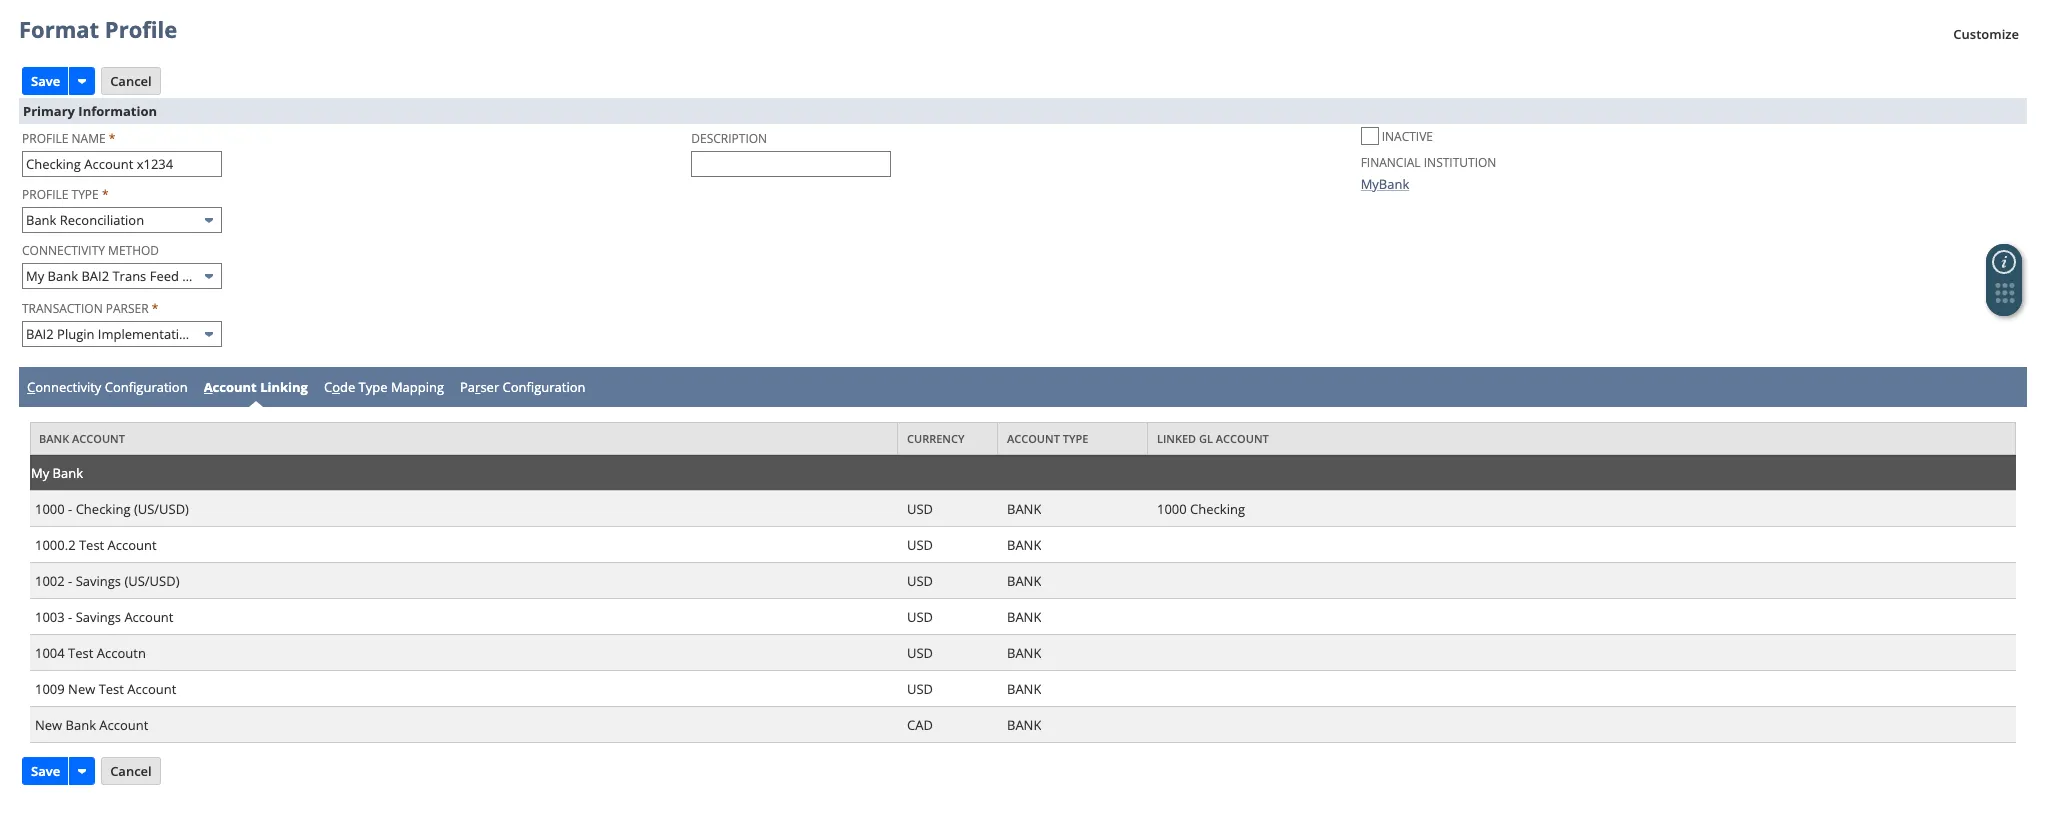
You can skip the Code Type Mapping tab for now and revisit it later if your bank has additional transaction codes. Also, skip the Parser Configuration tab, as it is required only for CSV Bank Feeds.
Click Save to save this Format Profile.
IMPORTANT: Each Format Profile supports only one linked bank account; data will be imported only for the top-most account with a Linked GL Account. To enable Bank Feeds for additional accounts, you must repeat these steps for each one.
Navigate to Setup → Accounting → Financial Institution → List.
Select View for the Financial Institution you previously created, then click Add under the Format Profile: Configuration tab.
Monitor Bank Import Process
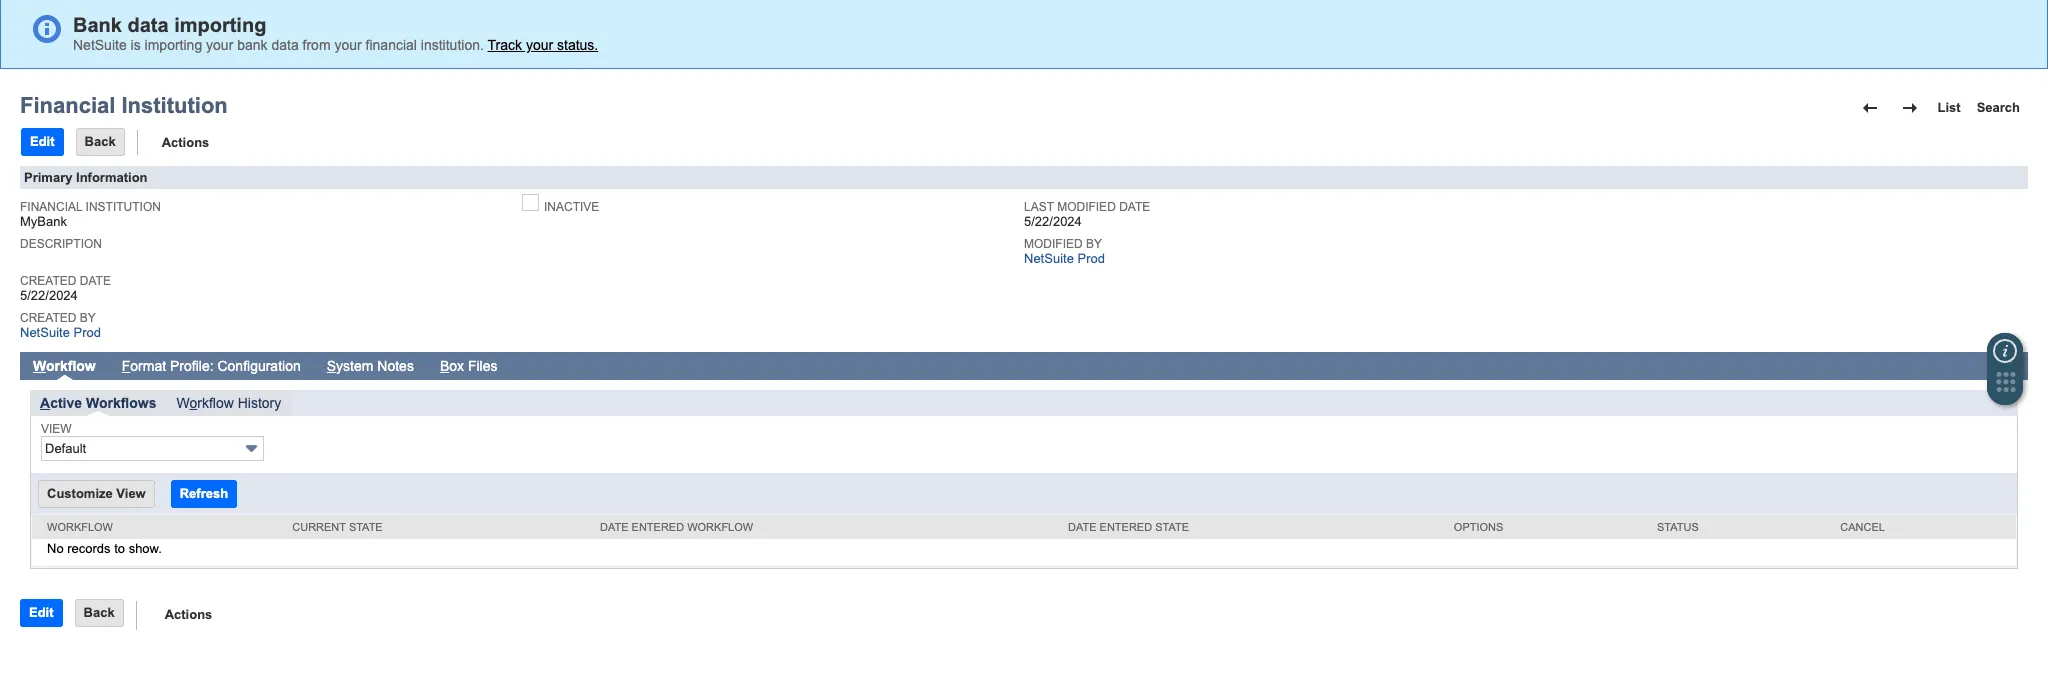
As soon as the Format Profile is saved, a blue banner will appear to notify you that NetSuite is beginning the bank import process.
Select Track your status in the blue banner that appears, or go to Transactions → Bank → Banking Import History.
If the import was successful, you will see Completed under the Import Status column.
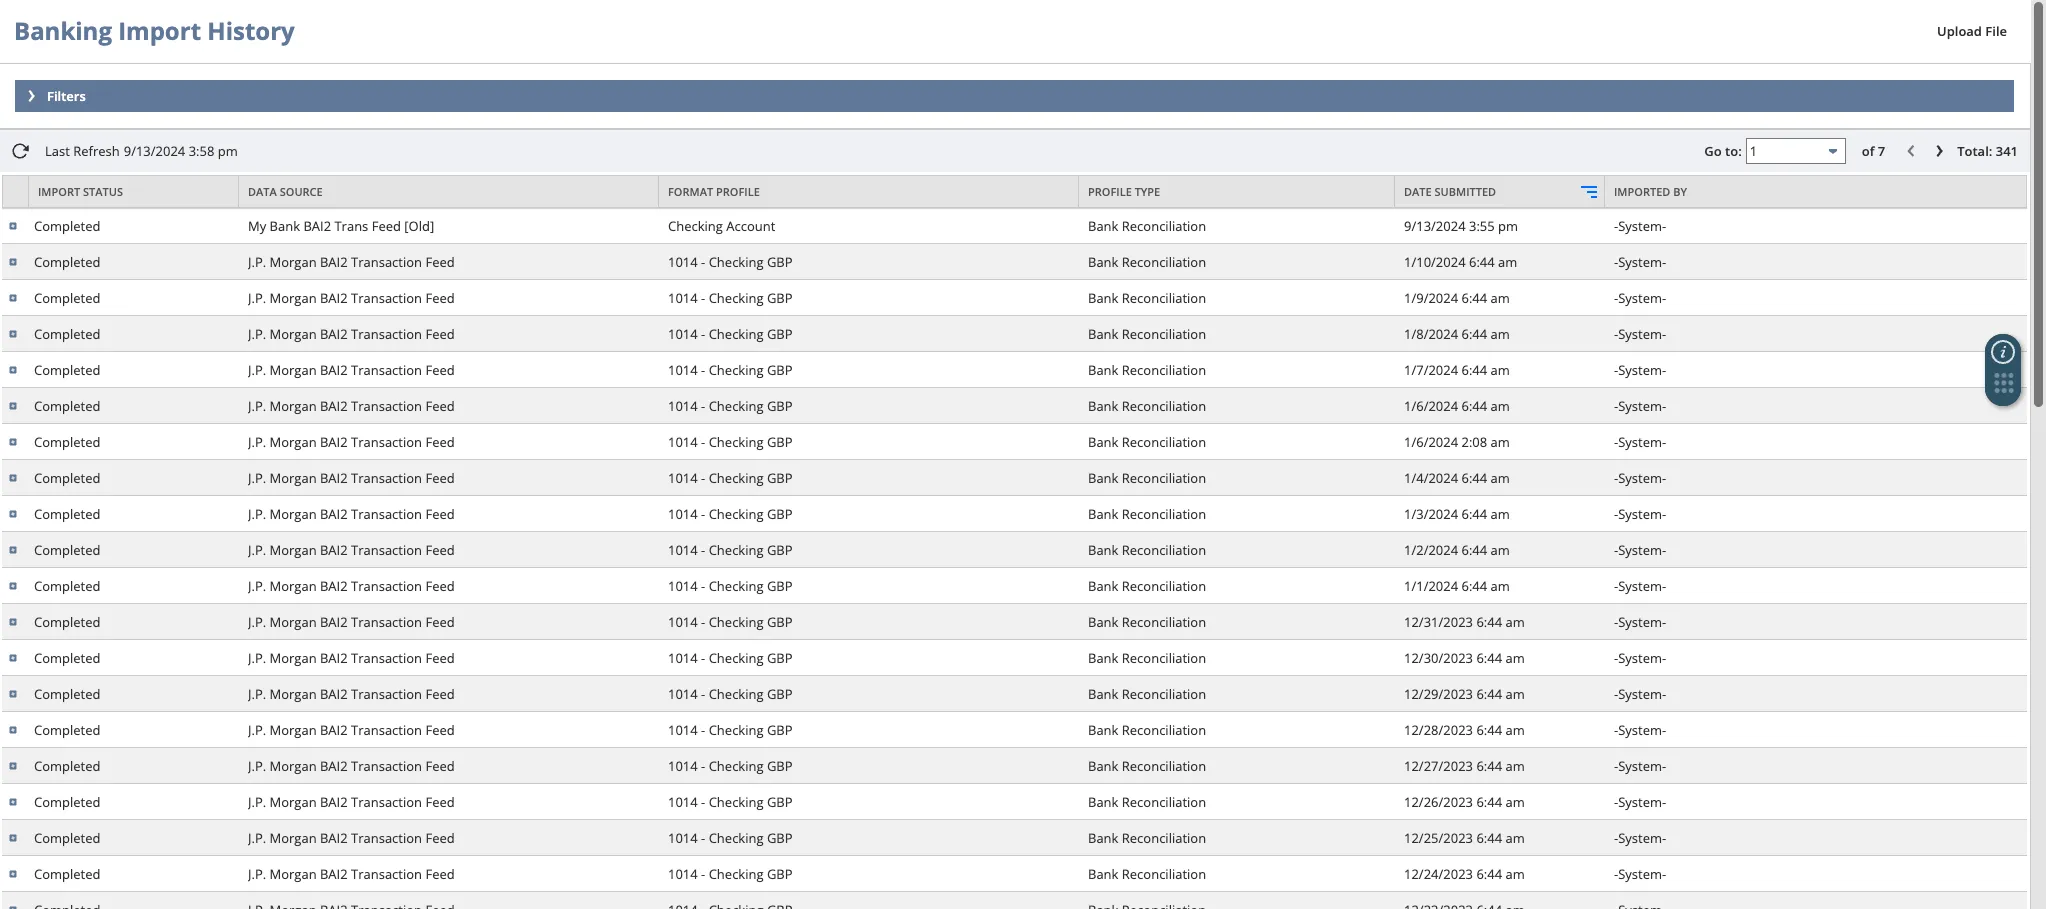
If the import fails, you will see Failed in the Import Status column. Select the plus (+) sign to expand the failure reason details.
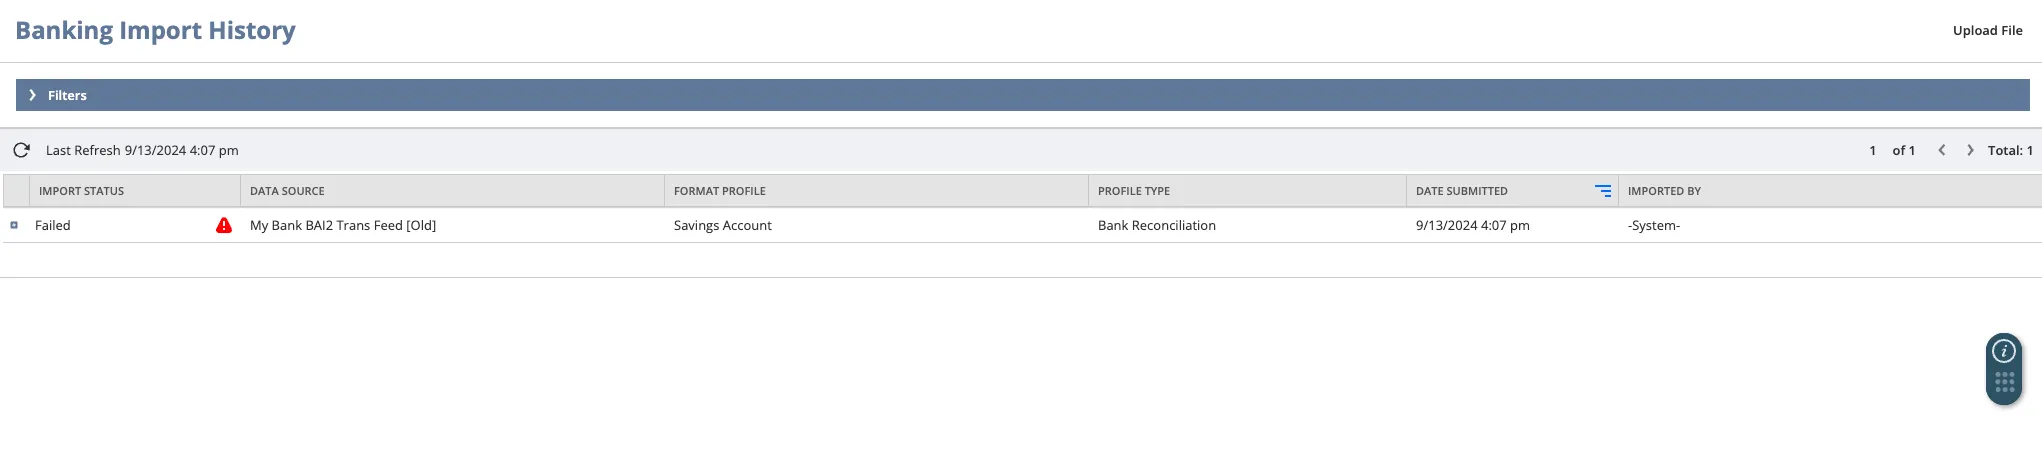
If your Failure Reason states that a three-digit number “is not one of your recognized bank transaction codes”, please proceed to the next step.
If your Failure Reason is anything other than an unrecognized bank transaction code, please take a screenshot of the error message and email it to the FISPAN Support team.
[BAI2] Step 4: Code Type Mapping
Return to Setup → Accounting → Financial Institution.
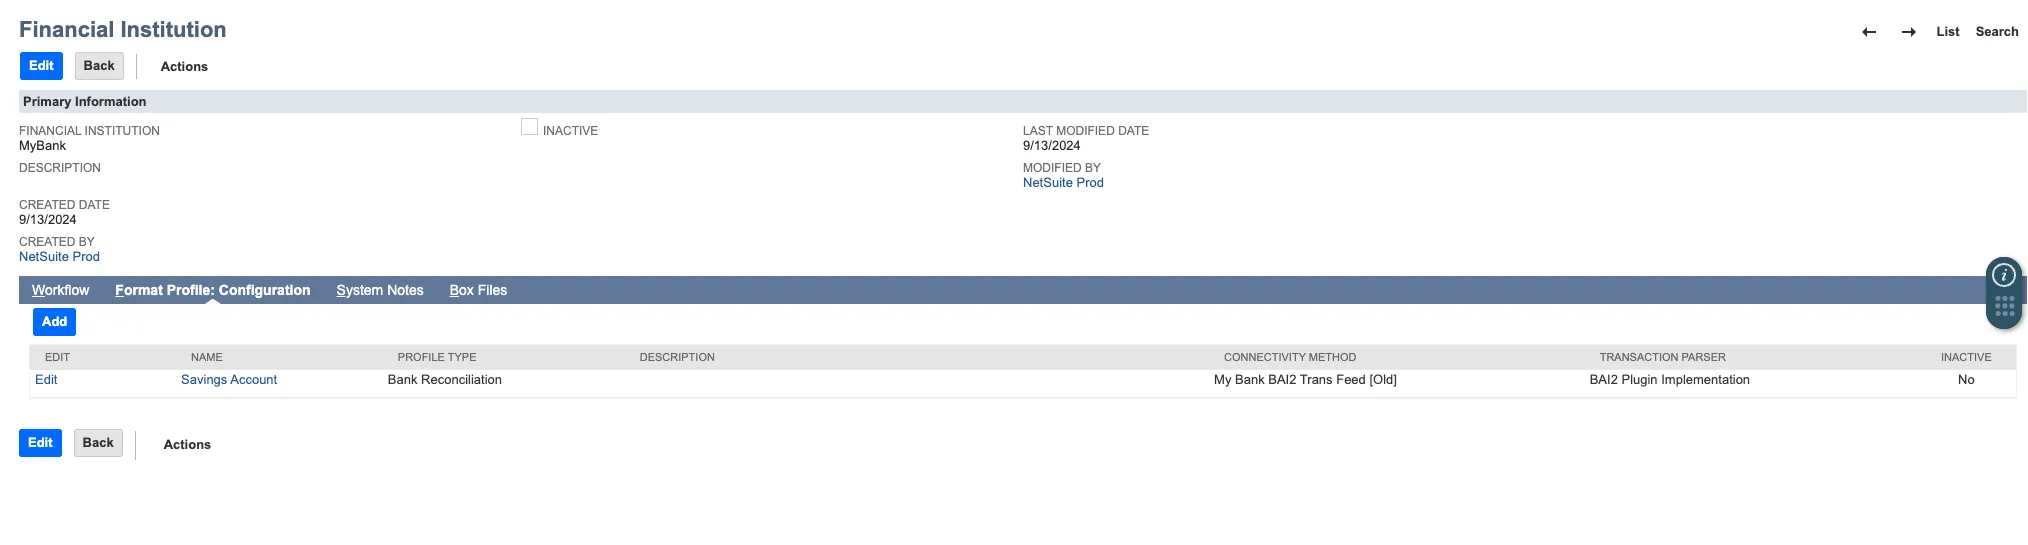
Click Edit on the Financial Institution that you have created previously.
Select the Format Profile: Configuration tab and select Edit on the Format Profile that had a failed import.
Click on the Code Type Mapping tab.
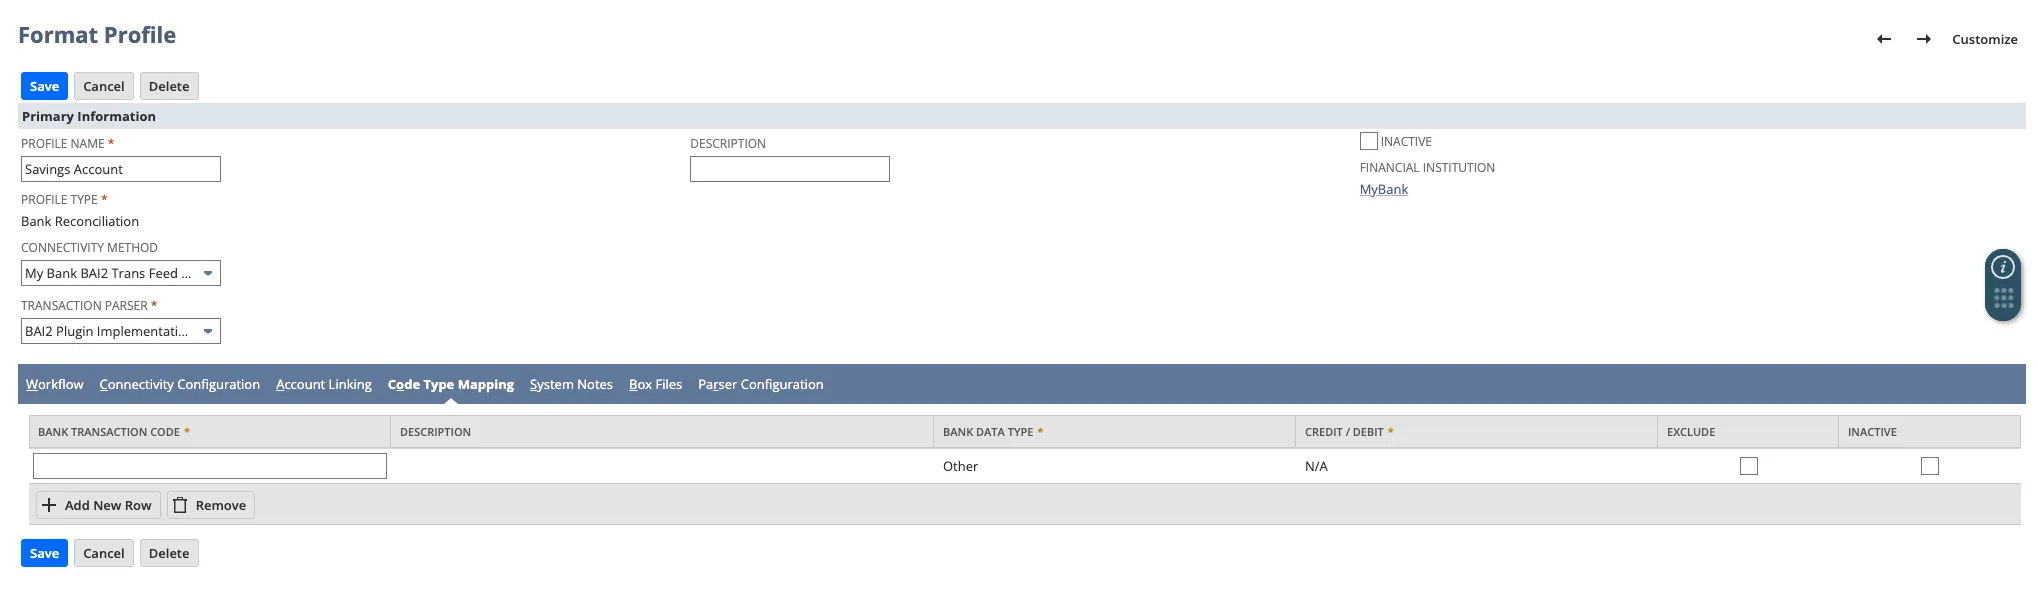
NOTE: If the Code Type Mapping could not be completed during the initial setup of this Format Profile, it is because the system has not read any bank transactions yet and does not know if there are additional codes that require mapping.
Fill in the following fields for the bank transaction code that was unrecognized:
- Bank Transaction Code
- Description
- Bank Data Type
- Credit / Debit
The Bank Transaction Code will be the three-digit code from the error message seen on the Banking Import History page.
Fill in Description with something that will help you identify the bank transaction code.
Bank Data Type and Credit / Debit values will be the same. They both must be either Credit, Debit, or N/A.
To determine whether your Bank Transaction Code is a Credit or Debit, refer to the table below:
Type Codes | Description |
|---|---|
001-099 | Account status type codes |
100 | Total Credits summary type codes |
101-399 | Credit summary and detail type codes |
400 | Total Debits summary type codes |
401-699 | Debits summary and detail type codes |
700-799 | Loan Summary and detail type codes |
900-999 | Customized Type Codes |
Customized type codes should fall within the following ranges:
Type Codes | Description |
|---|---|
900-919 | Account Status Codes |
920-959 | Credit Summary and Detail |
960-999 | Debit Summary and Detail |
For any codes between the 900-999 range that are continuing to fail, please reach out to FISPAN Support.
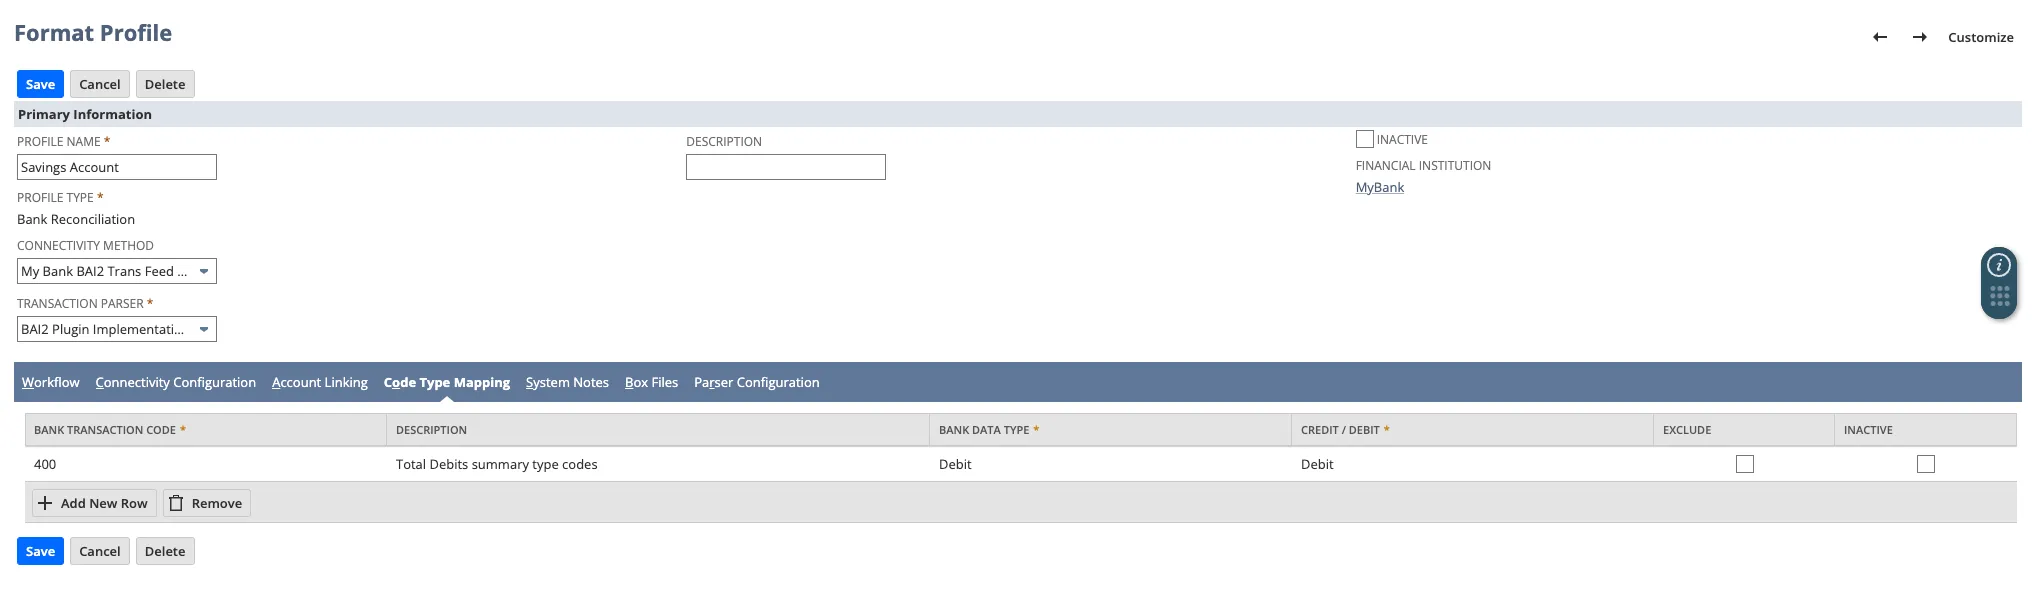
After filling in the above fields, click Save. This will trigger another import.
Return to the Banking Import History page by either clicking Track your status in the blue banner that appears, or by navigating to Transactions → Bank → Banking Import History.
If you receive a Failure Reason once more for an unrecognized bank transaction code, please repeat the above steps until the Banking Import status returns as Completed.
For any issues with enabling Bank Feeds or Code Type Mapping, please reach out to FISPAN Support at the below email address: