Enable Accounts Receivable (NetSuite)
The Accounts Receivable solution is currently in pilot. Interested in joining? Reach out to your Sales Officer for details.
Using the Accounts Receivable solution and Cash Application product requires additional setup, outlined on this page. We recommend starting by updating your bundle to the latest version; version 2026.5.3 or newer is required.
Technical Requirements
REST Web Services must be enabled for the Accounts Receivable solution to function. This allows us to deliver a faster, more responsive user experience compared to other pages within the NetSuite connector.
Once the product has been enabled by your bank, you must accept additional permissions to grant the plugin the appropriate access. For more information on managing user access for the plugin page, please refer to Step 11 of the NetSuite Plugin Setup.
Enable REST Web Services
The Receivables feature requires REST Web Services be enabled in NetSuite. Please follow these steps to enable REST Web Services:
Go to Enable Features
Start by logging in to NetSuite using an account with Administrator permissions.
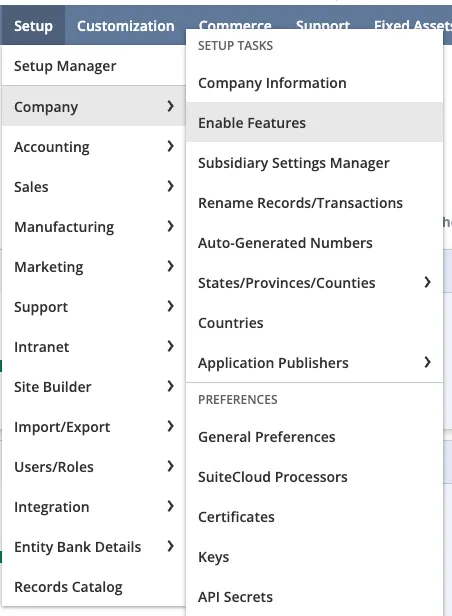
Go to Setup -> Company -> Enable Features
Enable REST Web Services
Open the SuiteCloud tab.

Under the SuiteTalk (Web Services) section, check the box for REST Web Services.

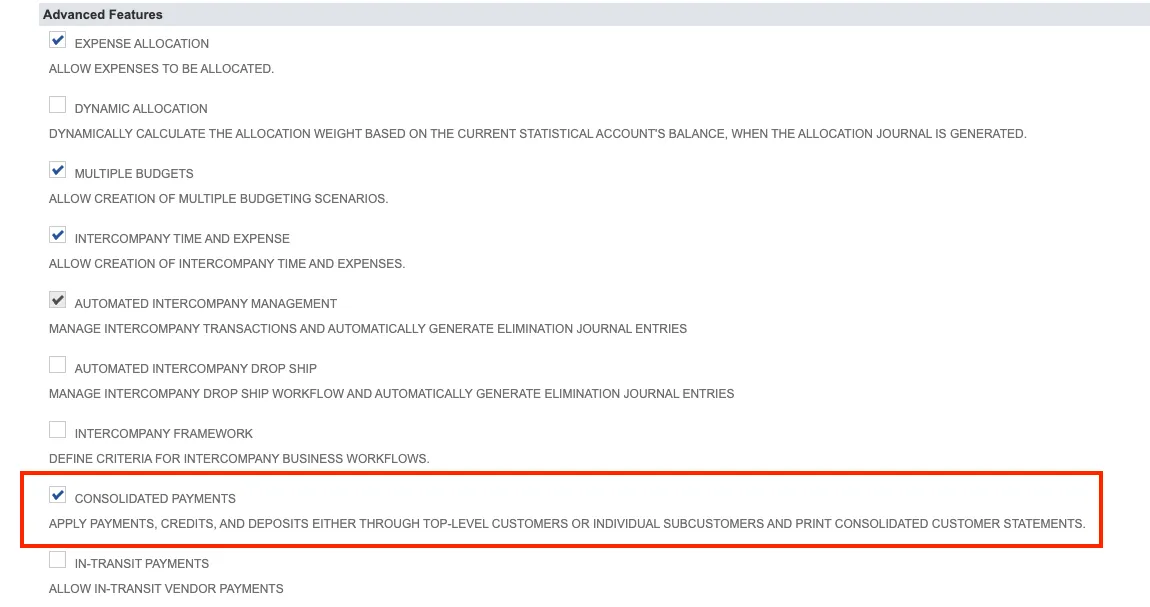
Enable Consolidated Payments
Open the Accounting tab.

Under the Advanced Features section, check the box for Consolidated Payments.
Accept Updated Permissions
The Accounts Receivable solution requires Read access to invoice data, and Read/Write access to customer payment data in NetSuite.
Upon receiving confirmation from your Sales Officer that Accounts Receivable has been activated for your profile, follow these steps to grant access to the requested data:
Log In to FISPAN Portal
Log in with your email address and password.
Grant Access
Upon login, a page will appear requesting new permissions to be granted for NetSuite data (Invoices and Customer Data).
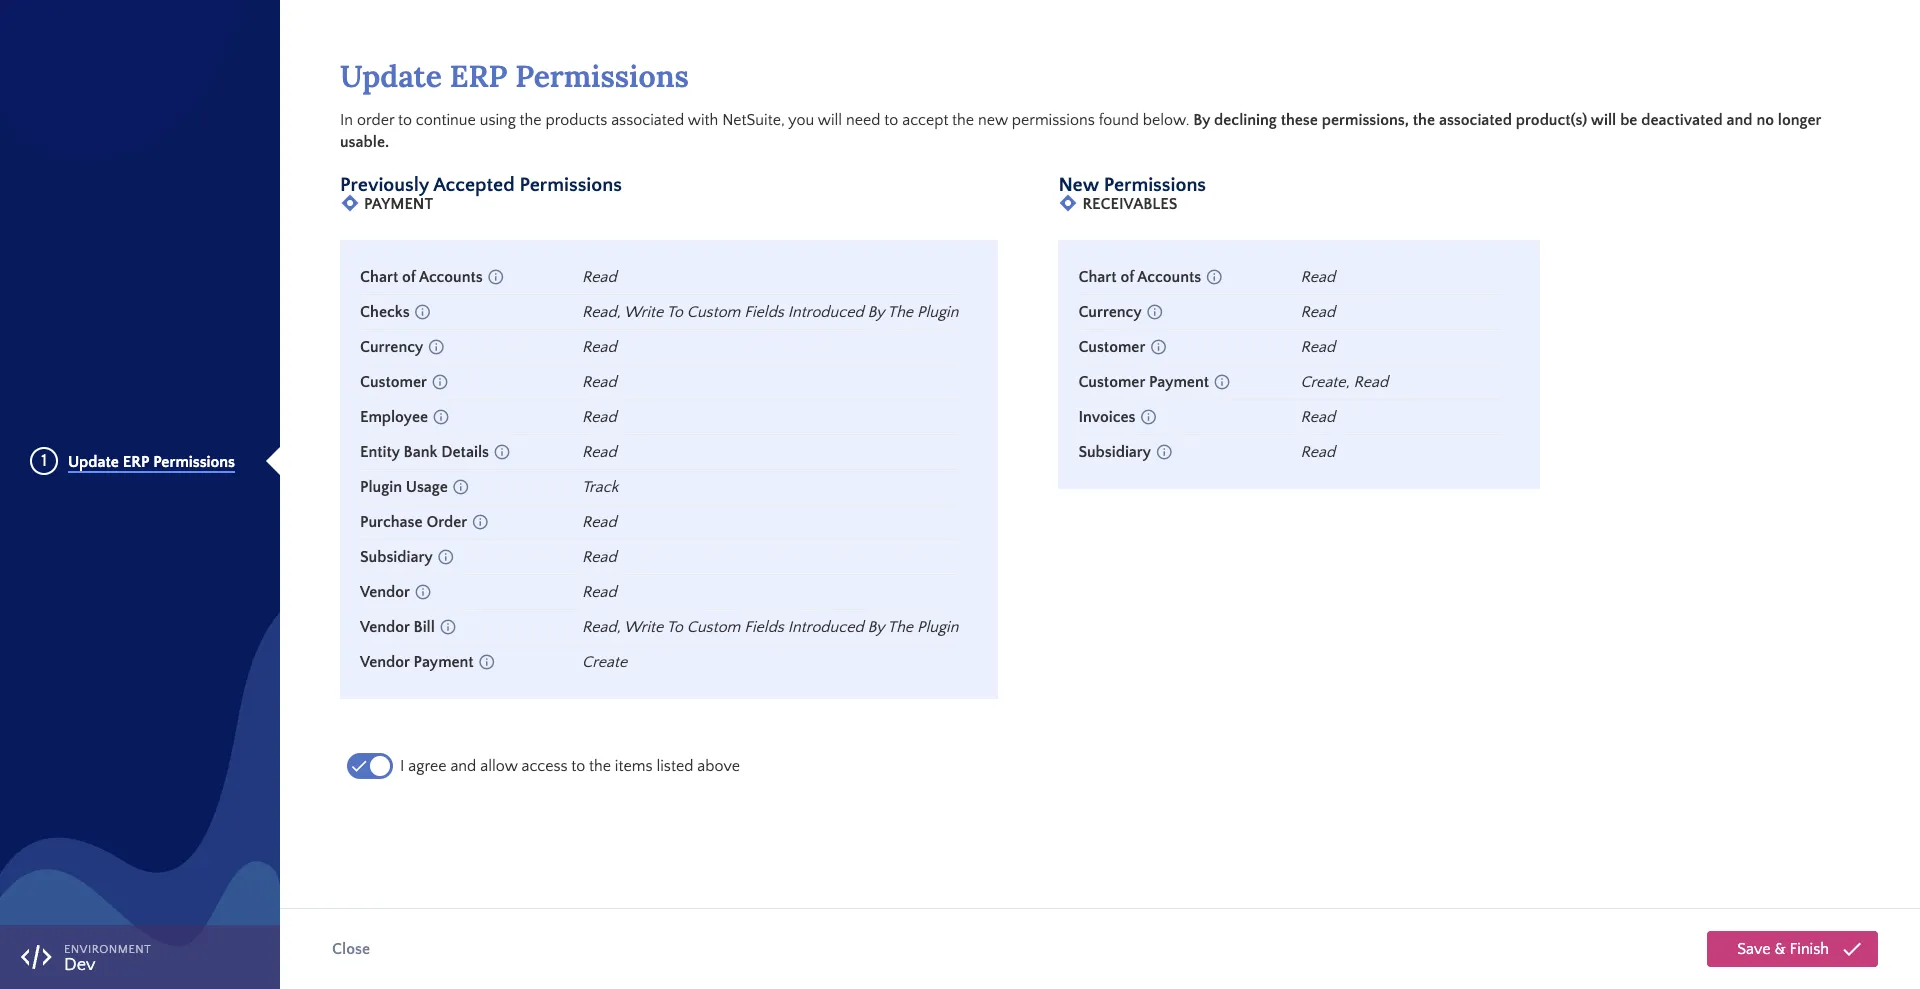
Review the permissions, check I agree and allow access to the items listed above, and click Save & Finish.