Customizable Columns and Filters - New (NetSuite)
Customizable Columns and Filters help you personalize the Pay Bills table to focus on the information most relevant to your workflow. Customize which bill fields display in your table and apply filters to narrow the list to specific bills. Your customizations save to your user profile and persist across sessions.
NOTE: If you can access Pay Bills, you can customize columns and filters. No additional permissions are required.
Customizing Columns
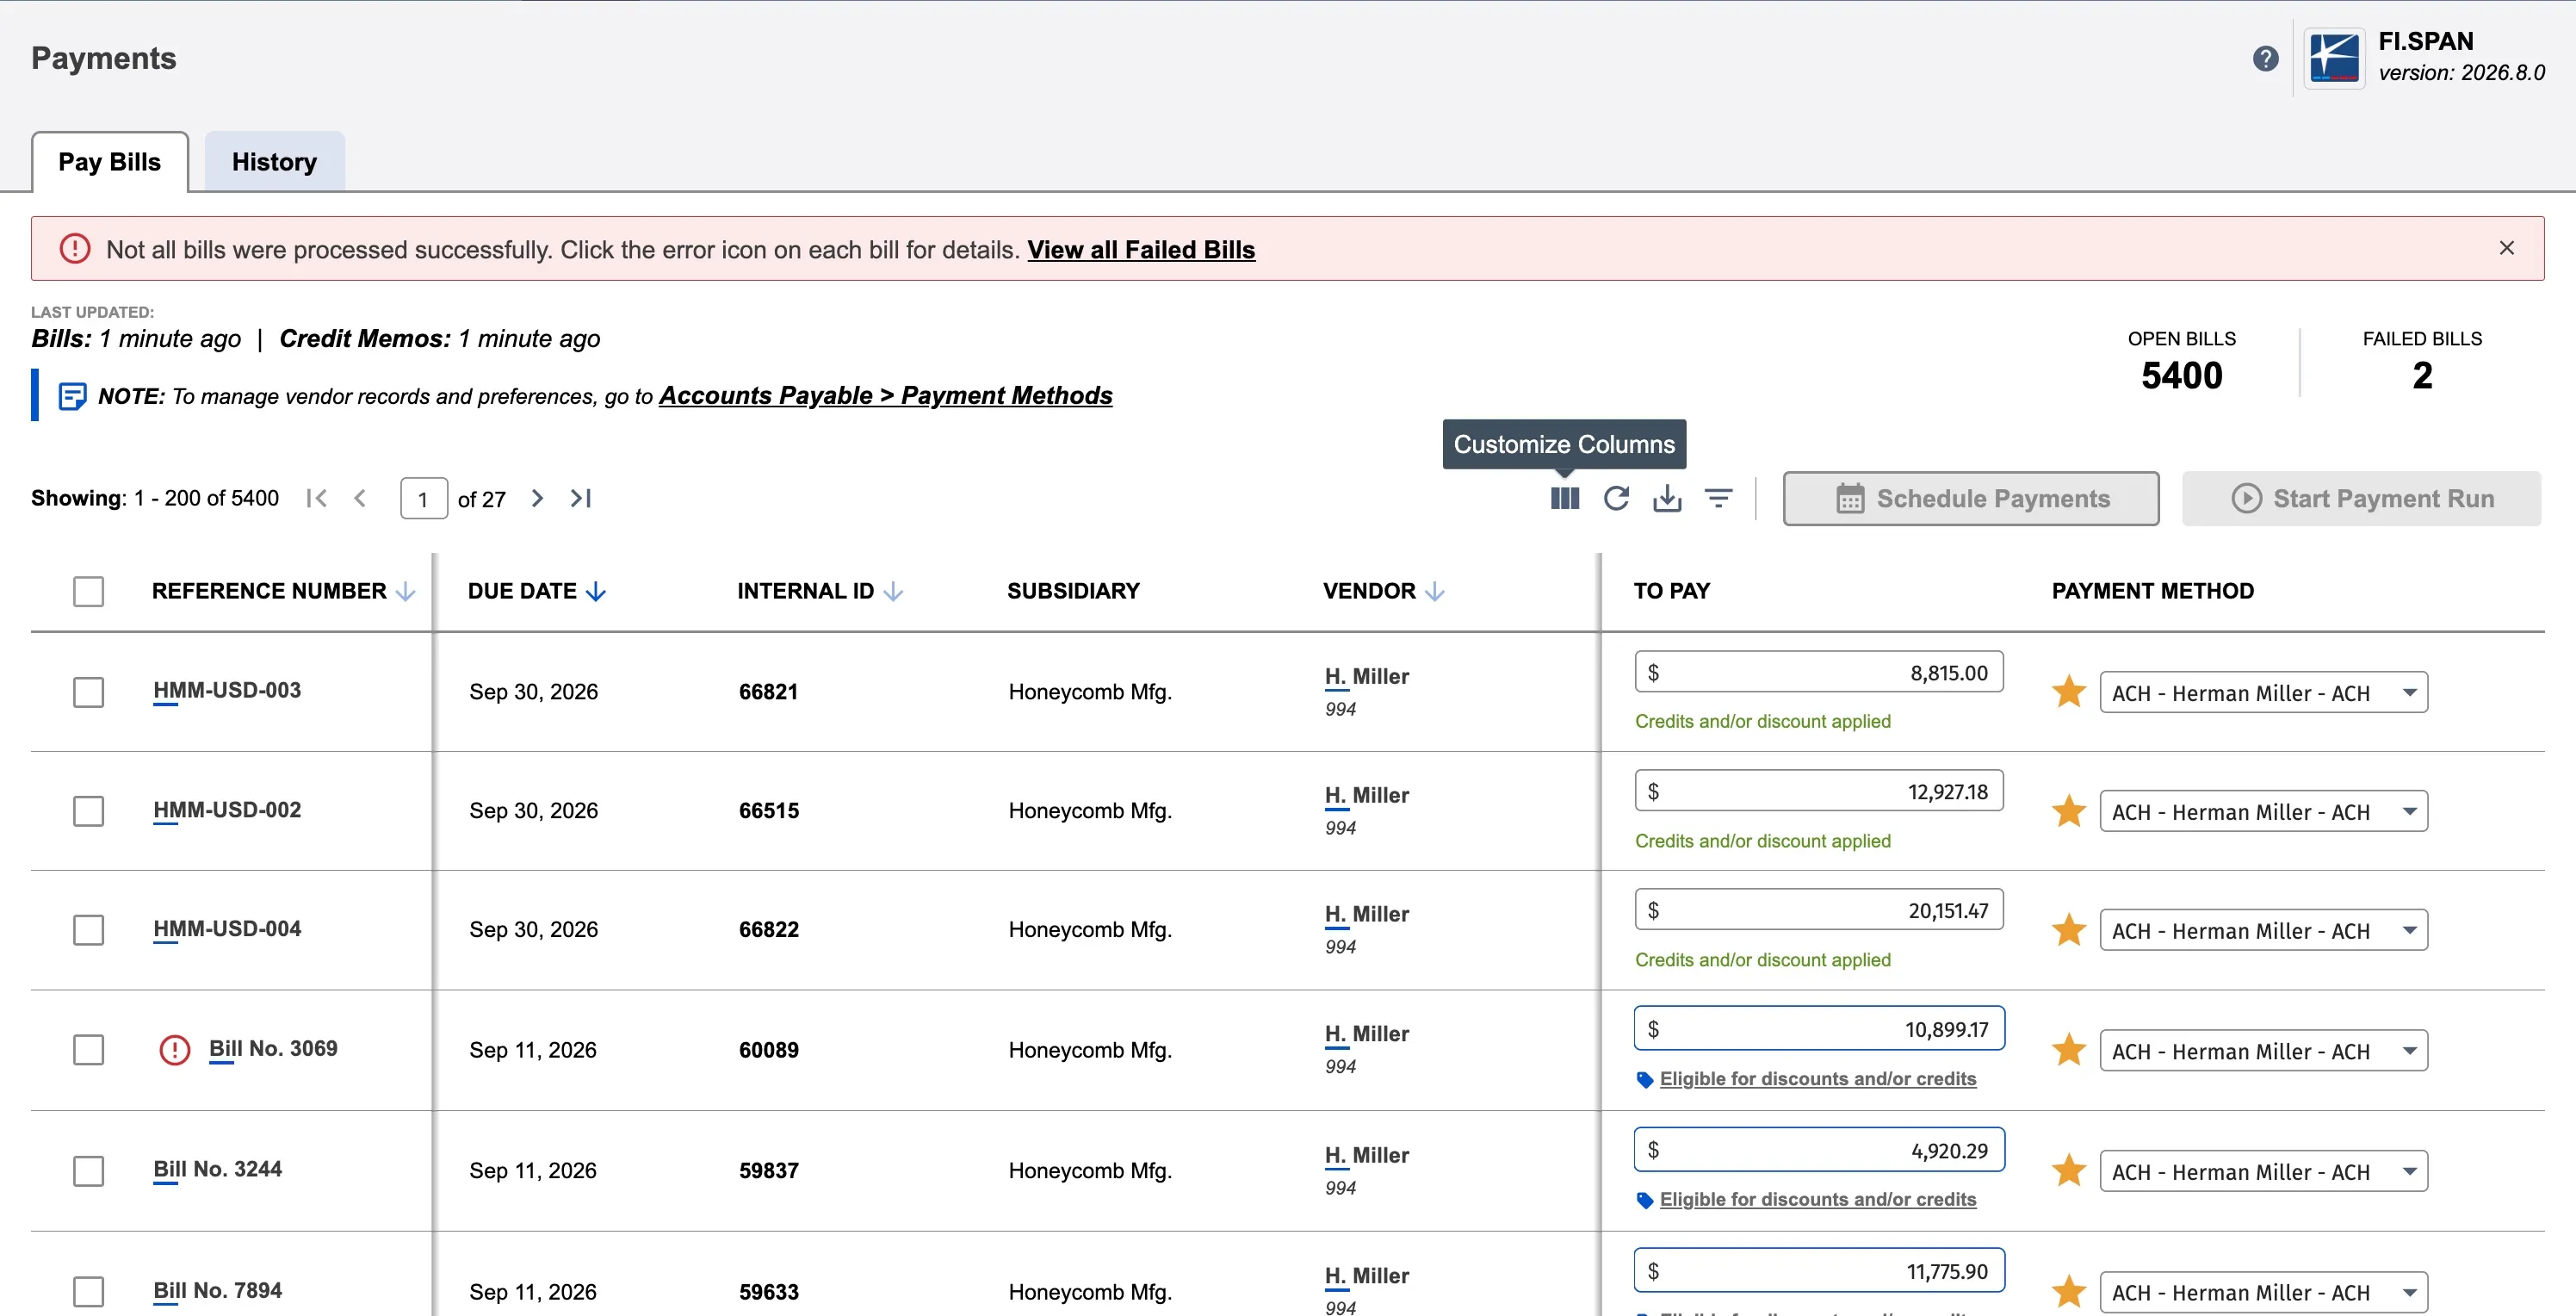
Use the column customization panel to control which bill fields display in your table and their order.
Opening the Column Panel
Navigate to Payments → Pay Bills
Click Customize Columns in the table toolbar
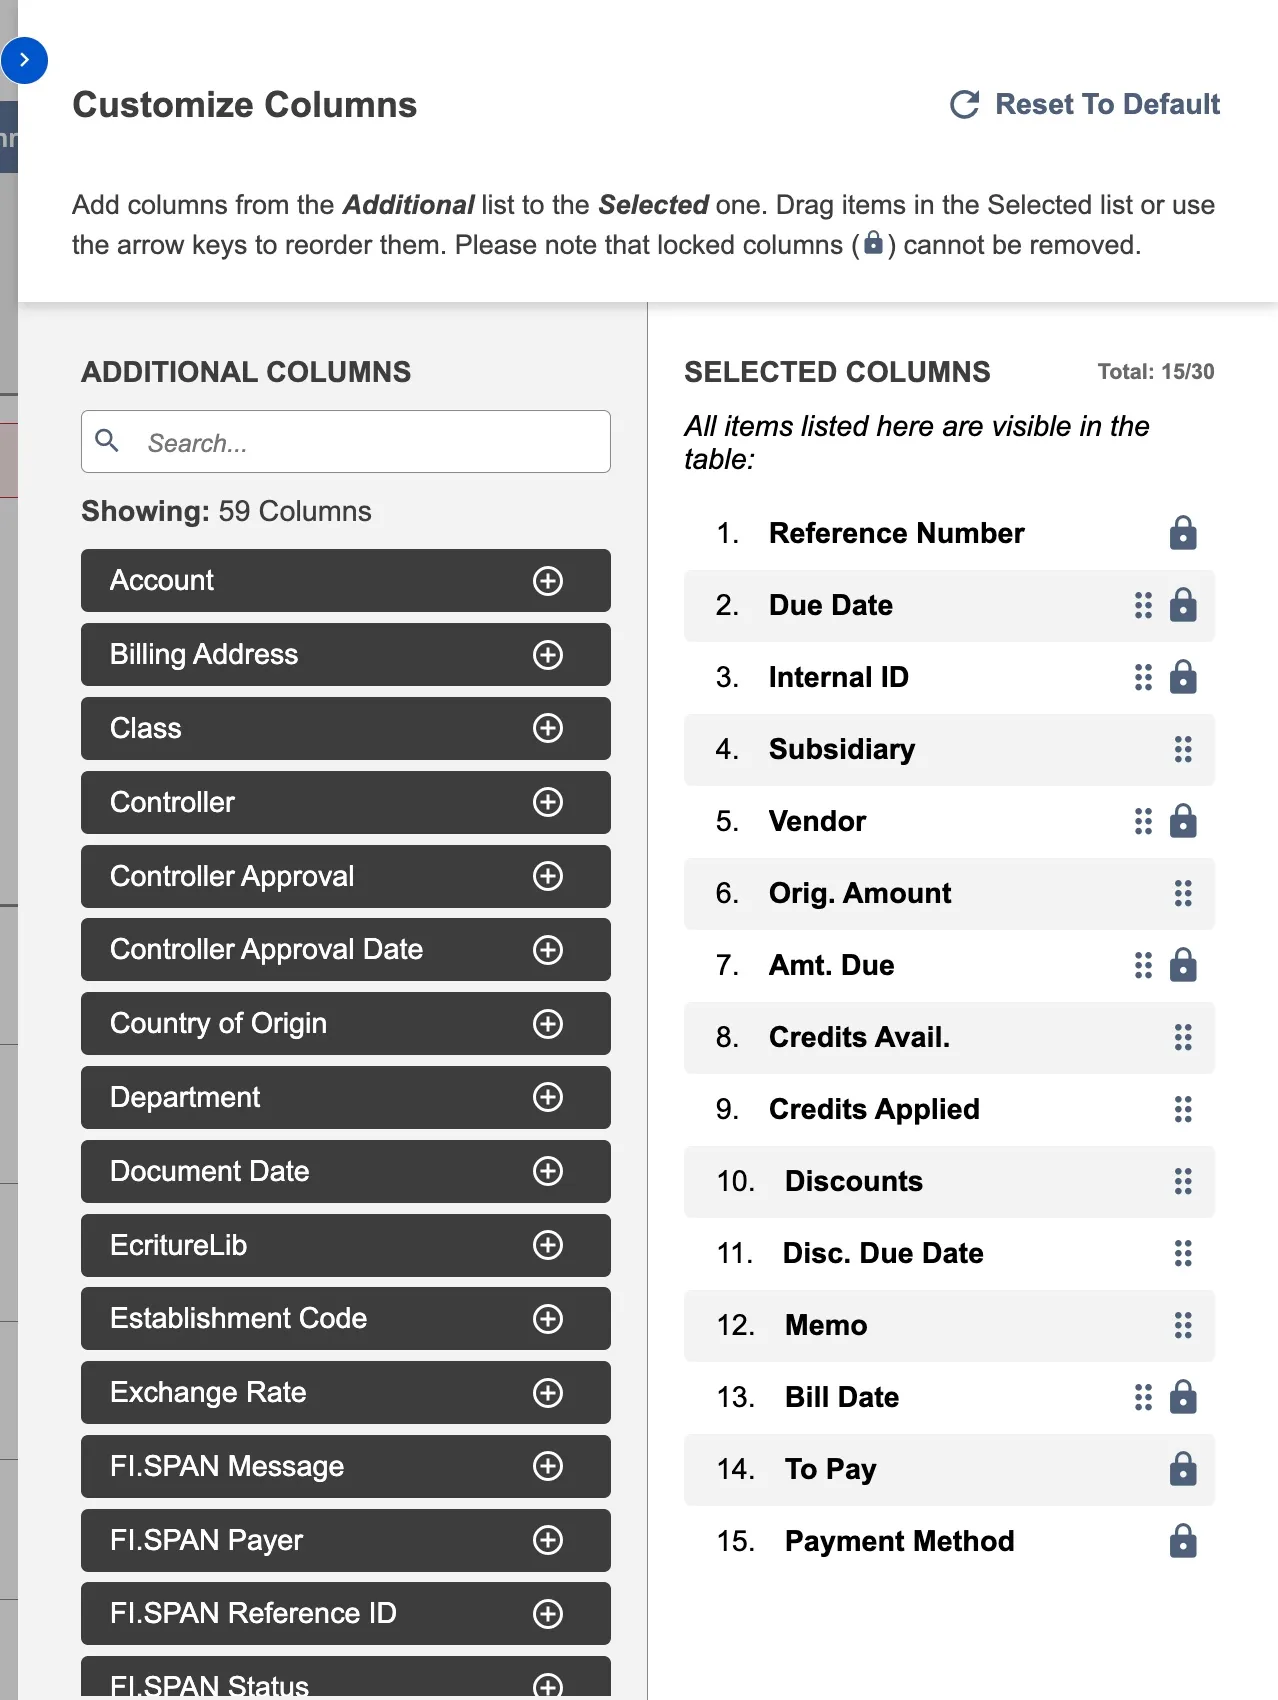
Panel sections:
- Additional Columns (left): Fields available to add to your table
- Selected Columns (right): Currently displayed fields in display order
- Total counter: Shows selected columns out of 30 maximum
Columns marked with a lock icon (🔒) are required and cannot be removed or moved.
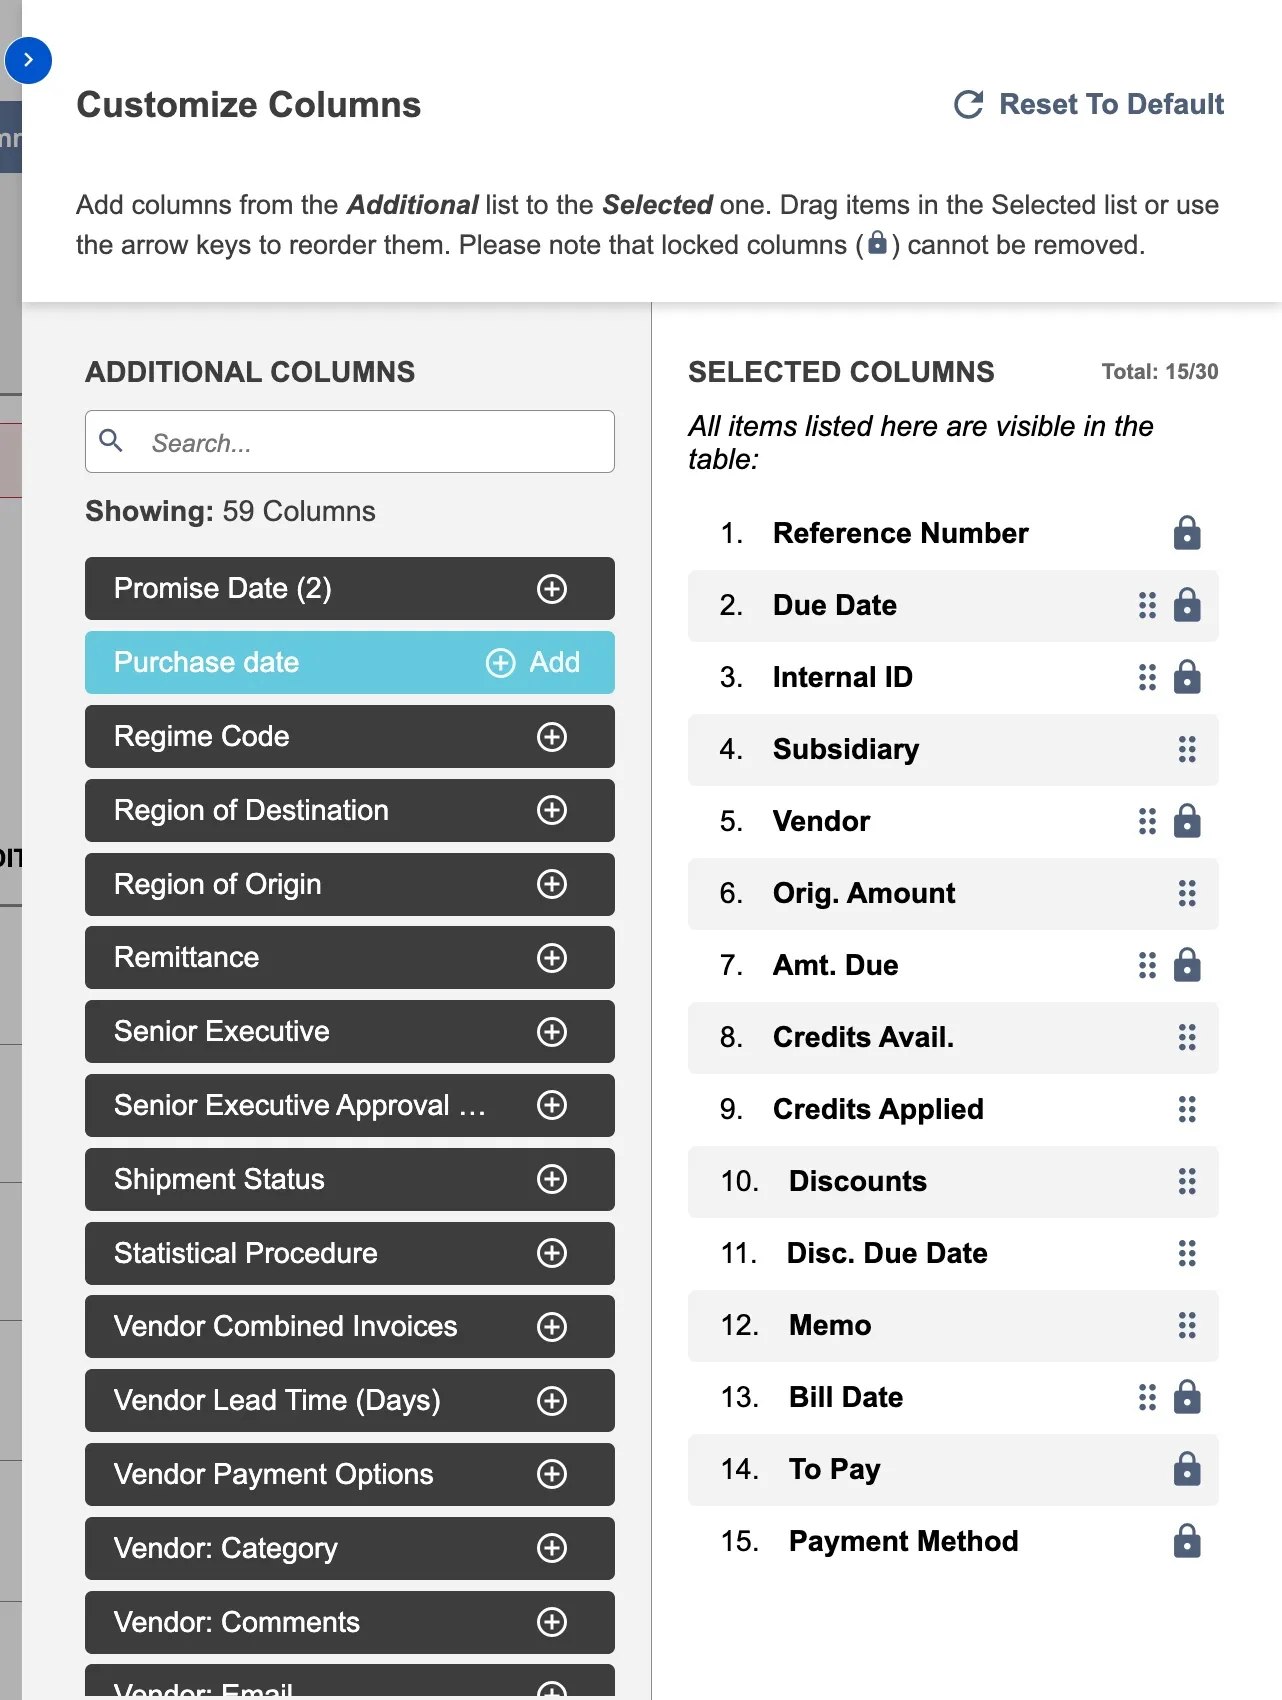
Adding Columns
- Locate the field in Additional Columns
- Use the search box to filter by name
- Browse the complete list
- Click the + icon next to the column name or Drag and Drop the column to your preferred order in the Selected list
- Repeat to add multiple columns
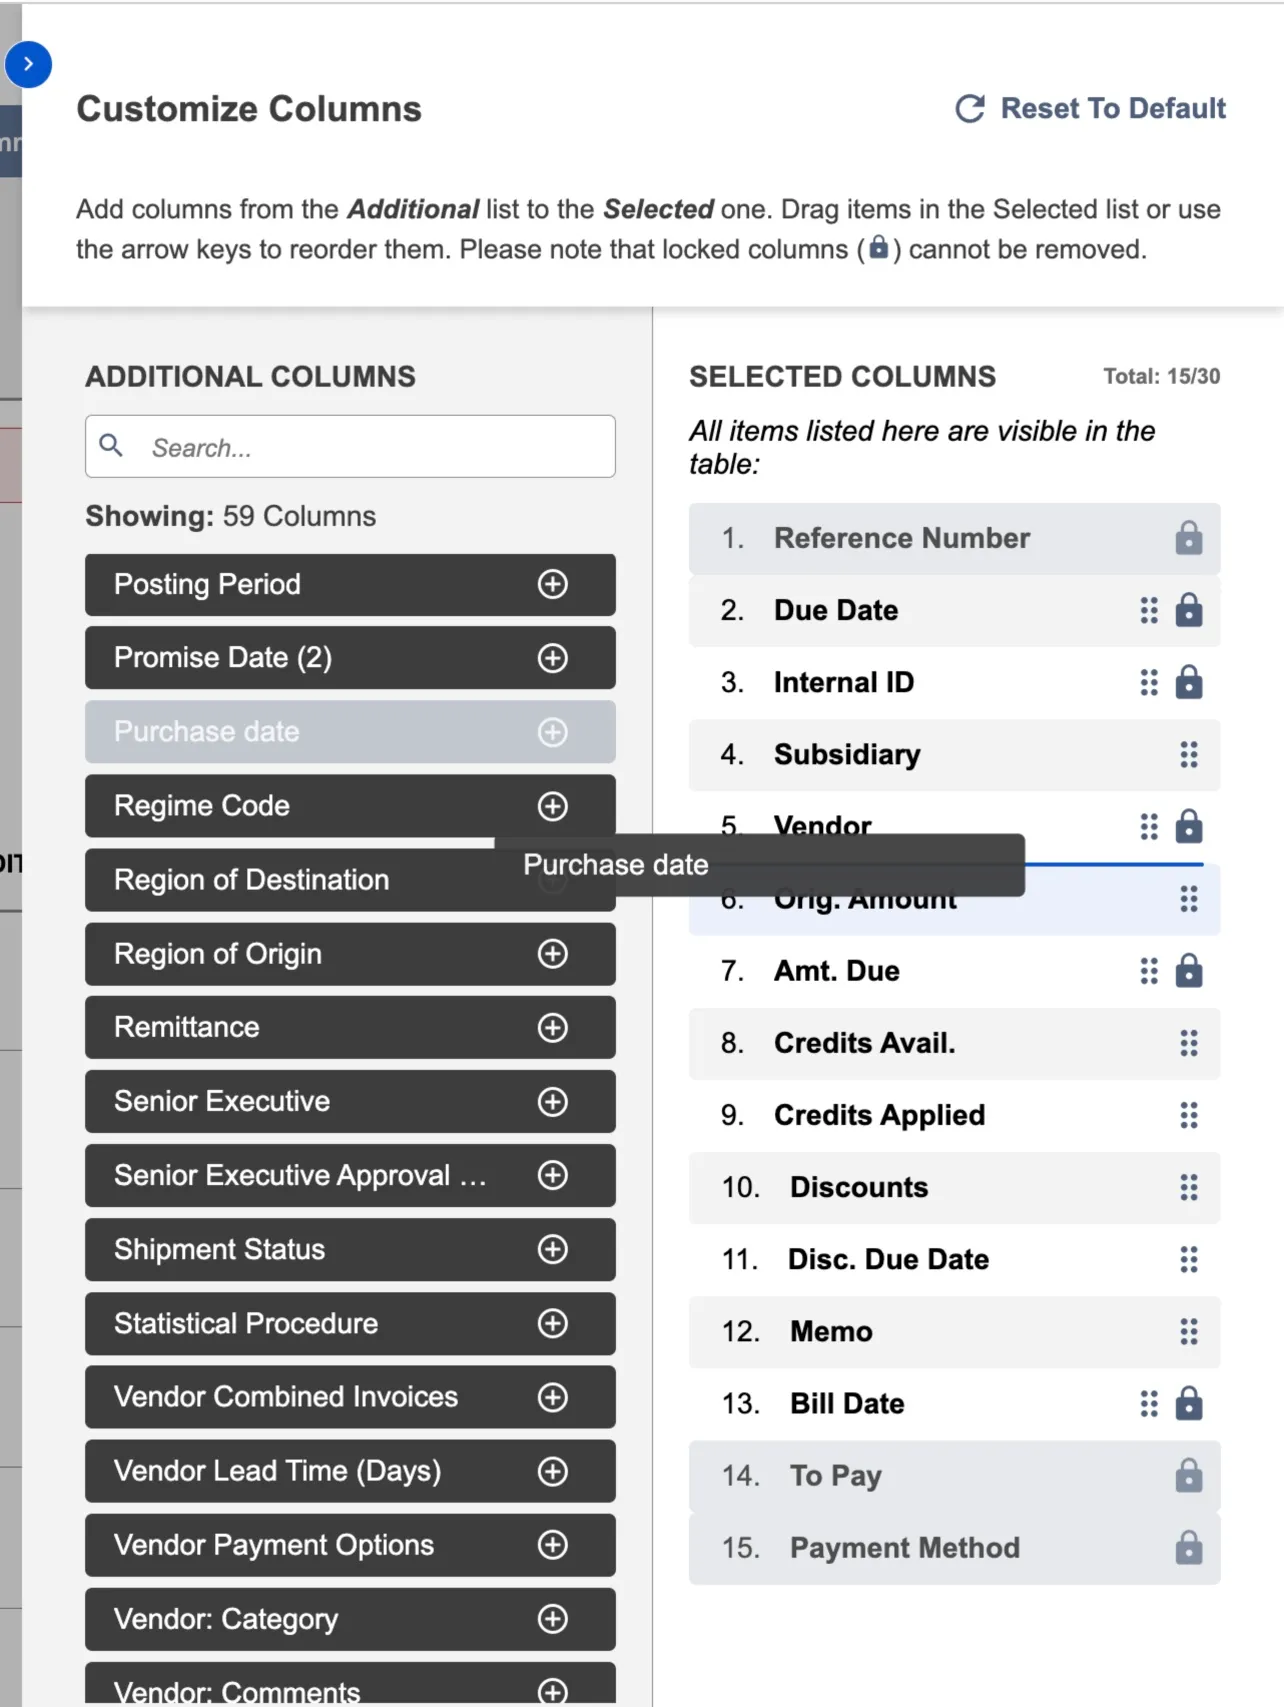
- Click Save Changes to apply
NOTE: The Citizens plugin supports standard bill fields and custom transaction body fields (custbody_*). Custom fields must meet specific requirements—see Custom Field Support below.
Removing Columns
- Locate the column in Selected Columns
- Hover over the column name
- Click the (-) icon that appears
- Click Save Changes to apply
The field moves back to Additional Columns.
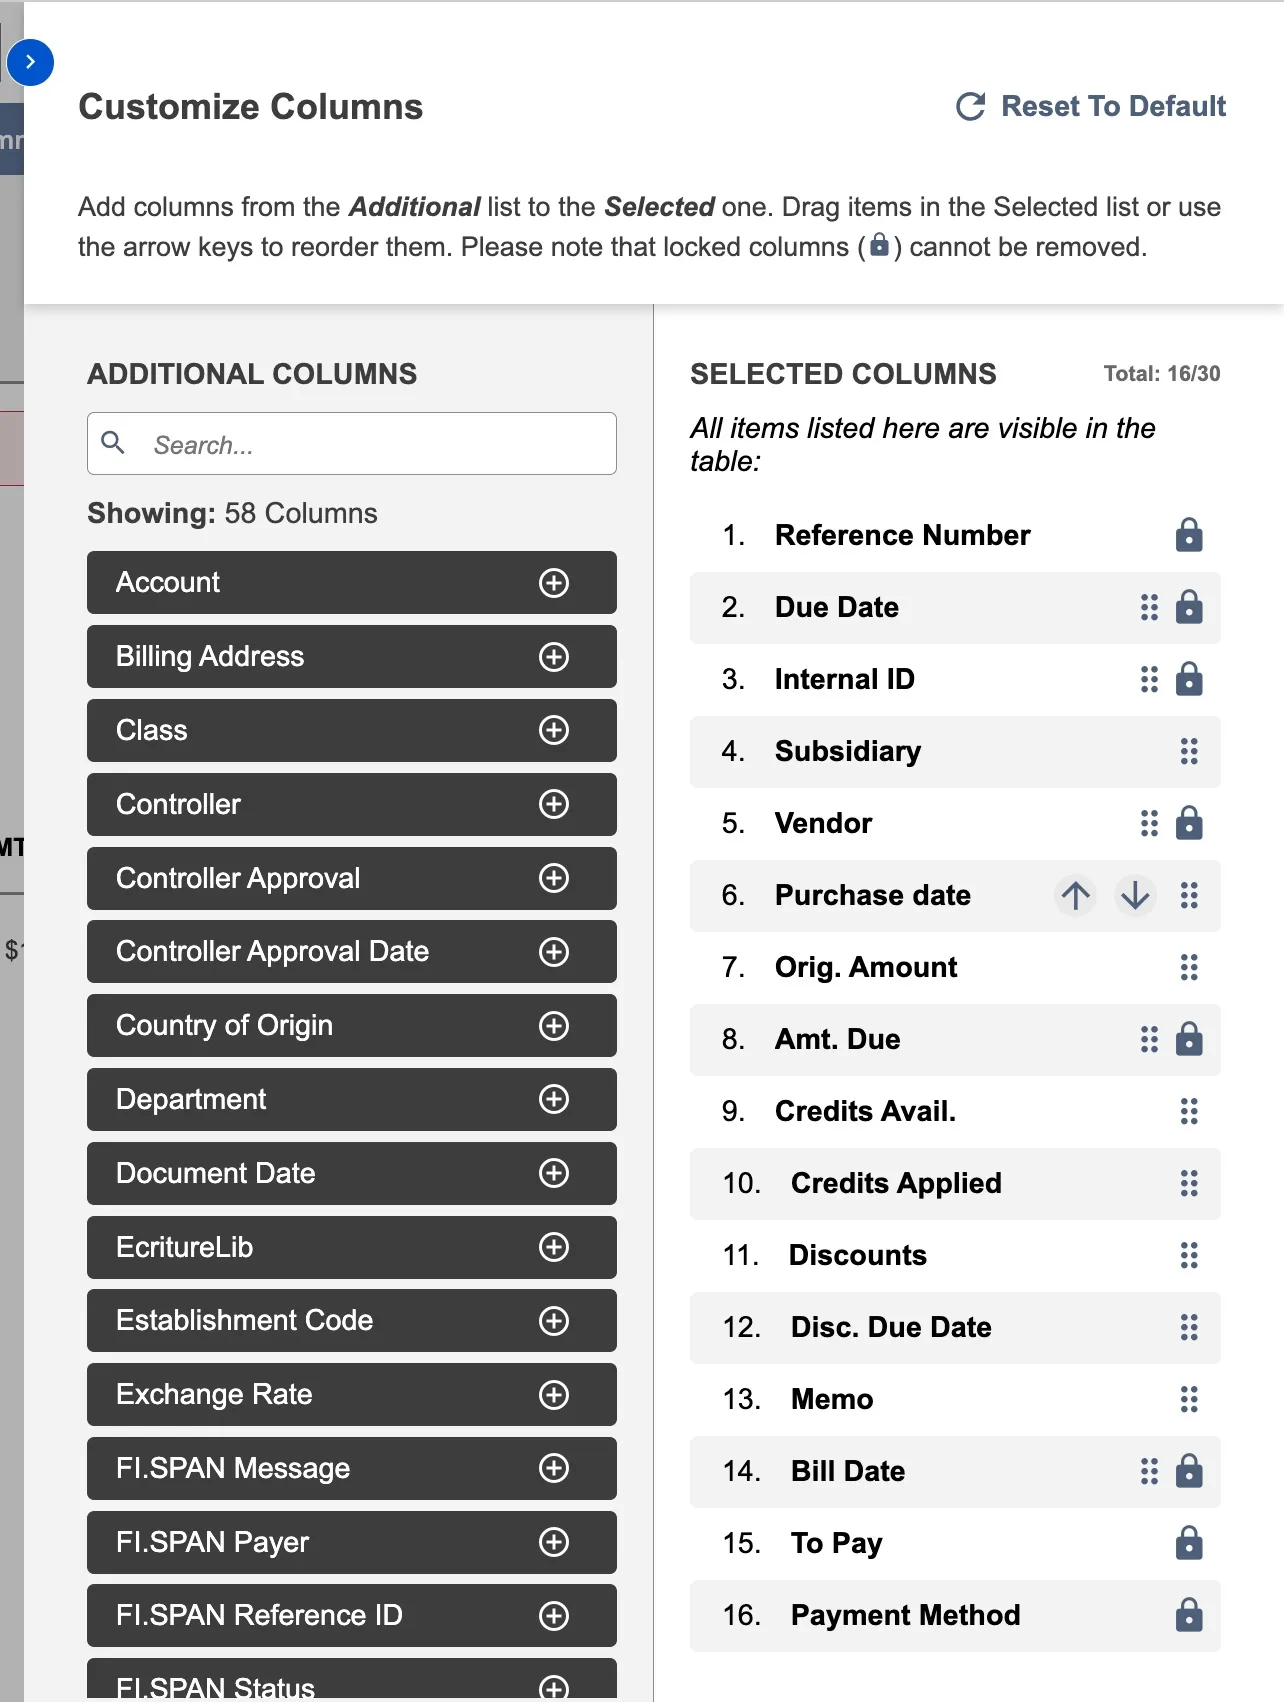
NOTE: Locked columns (marked with 🔒) cannot be removed. Required columns include Bill Number, To Pay, and Payment Method.
Reordering Columns
Change the display order of columns using either method:
Drag and Drop:
- Hover over the field in Selected Columns
- Click and hold the drag handle (⋮⋮)
- Drag up or down to the desired position
- Release when positioned correctly
- Click Save Changes
Arrow Controls:
- Hover over the field in Selected Columns
- Click ↑ to move left in the table
- Click ↓ to move right in the table
- Click Save Changes
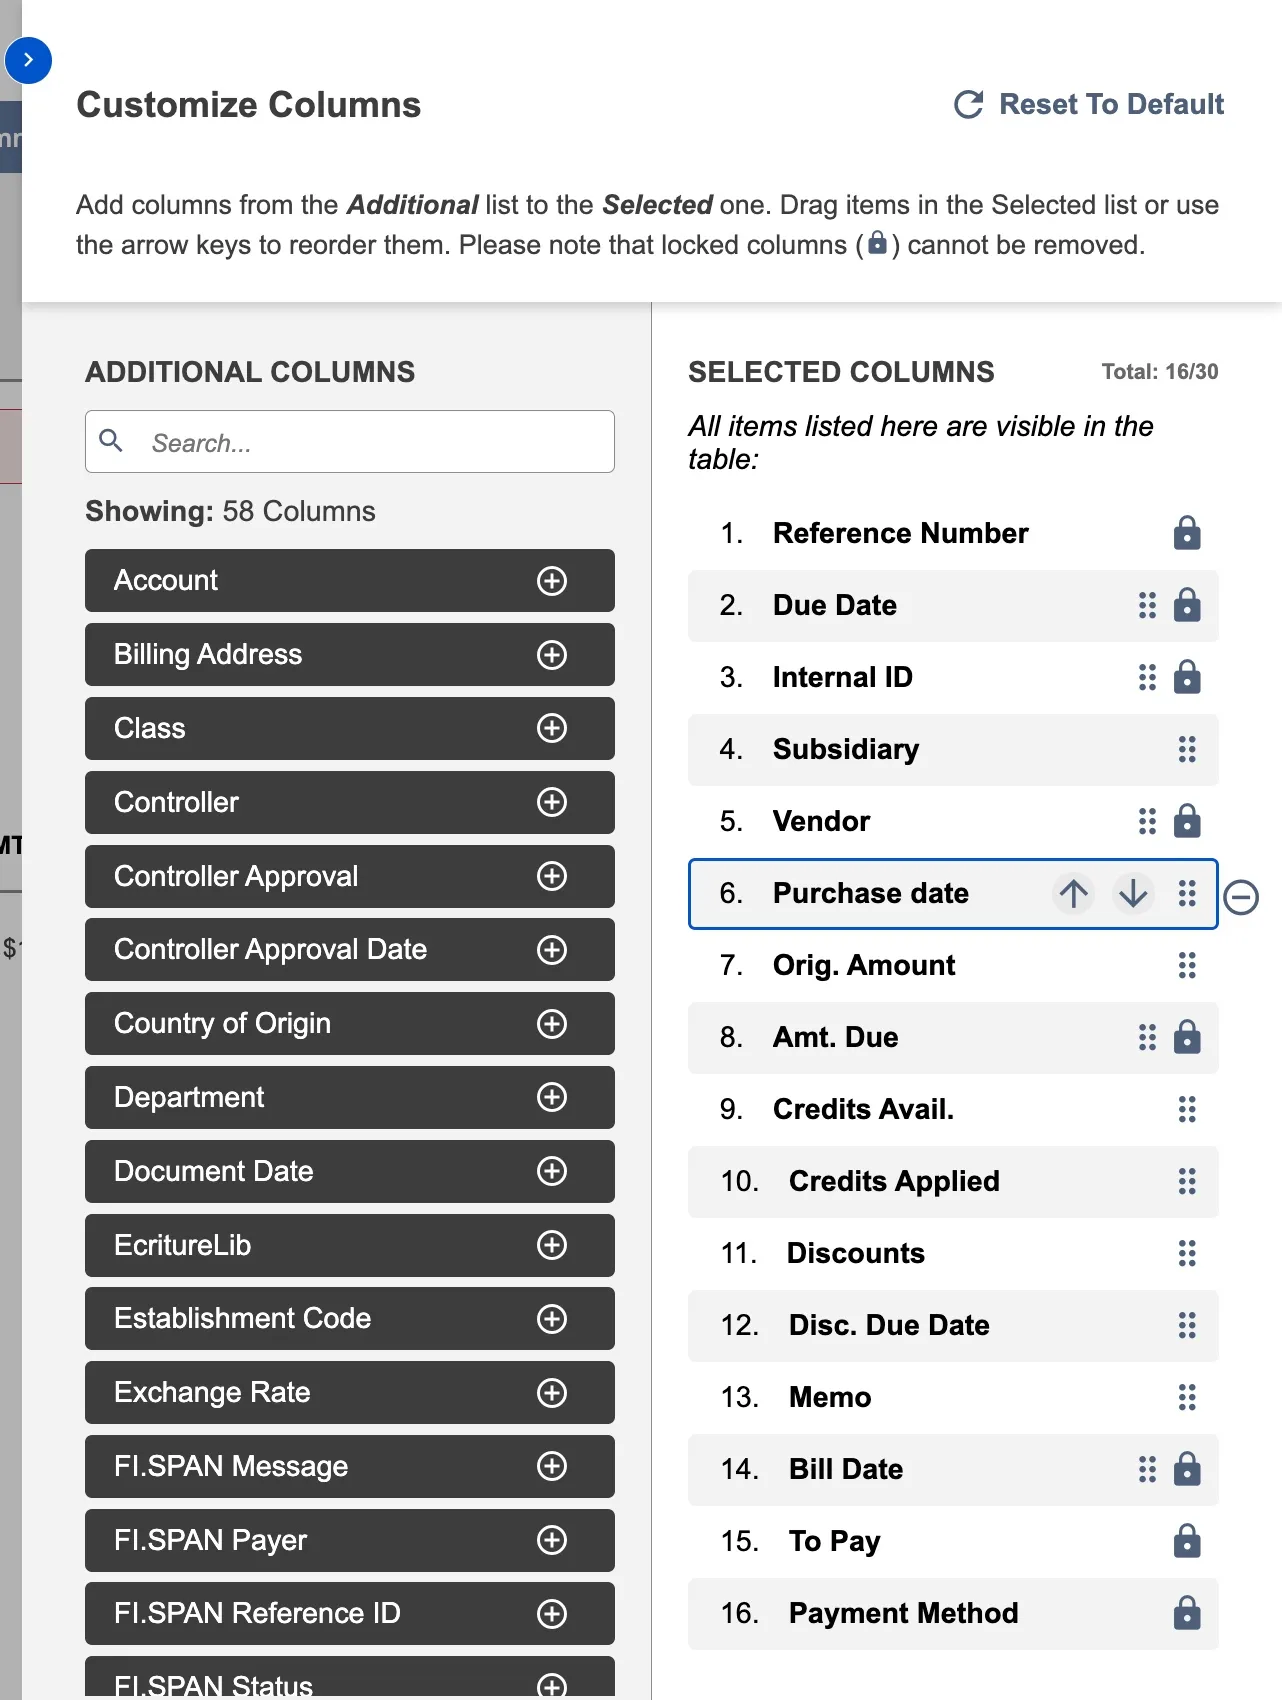
NOTE: Locked columns cannot be reordered.
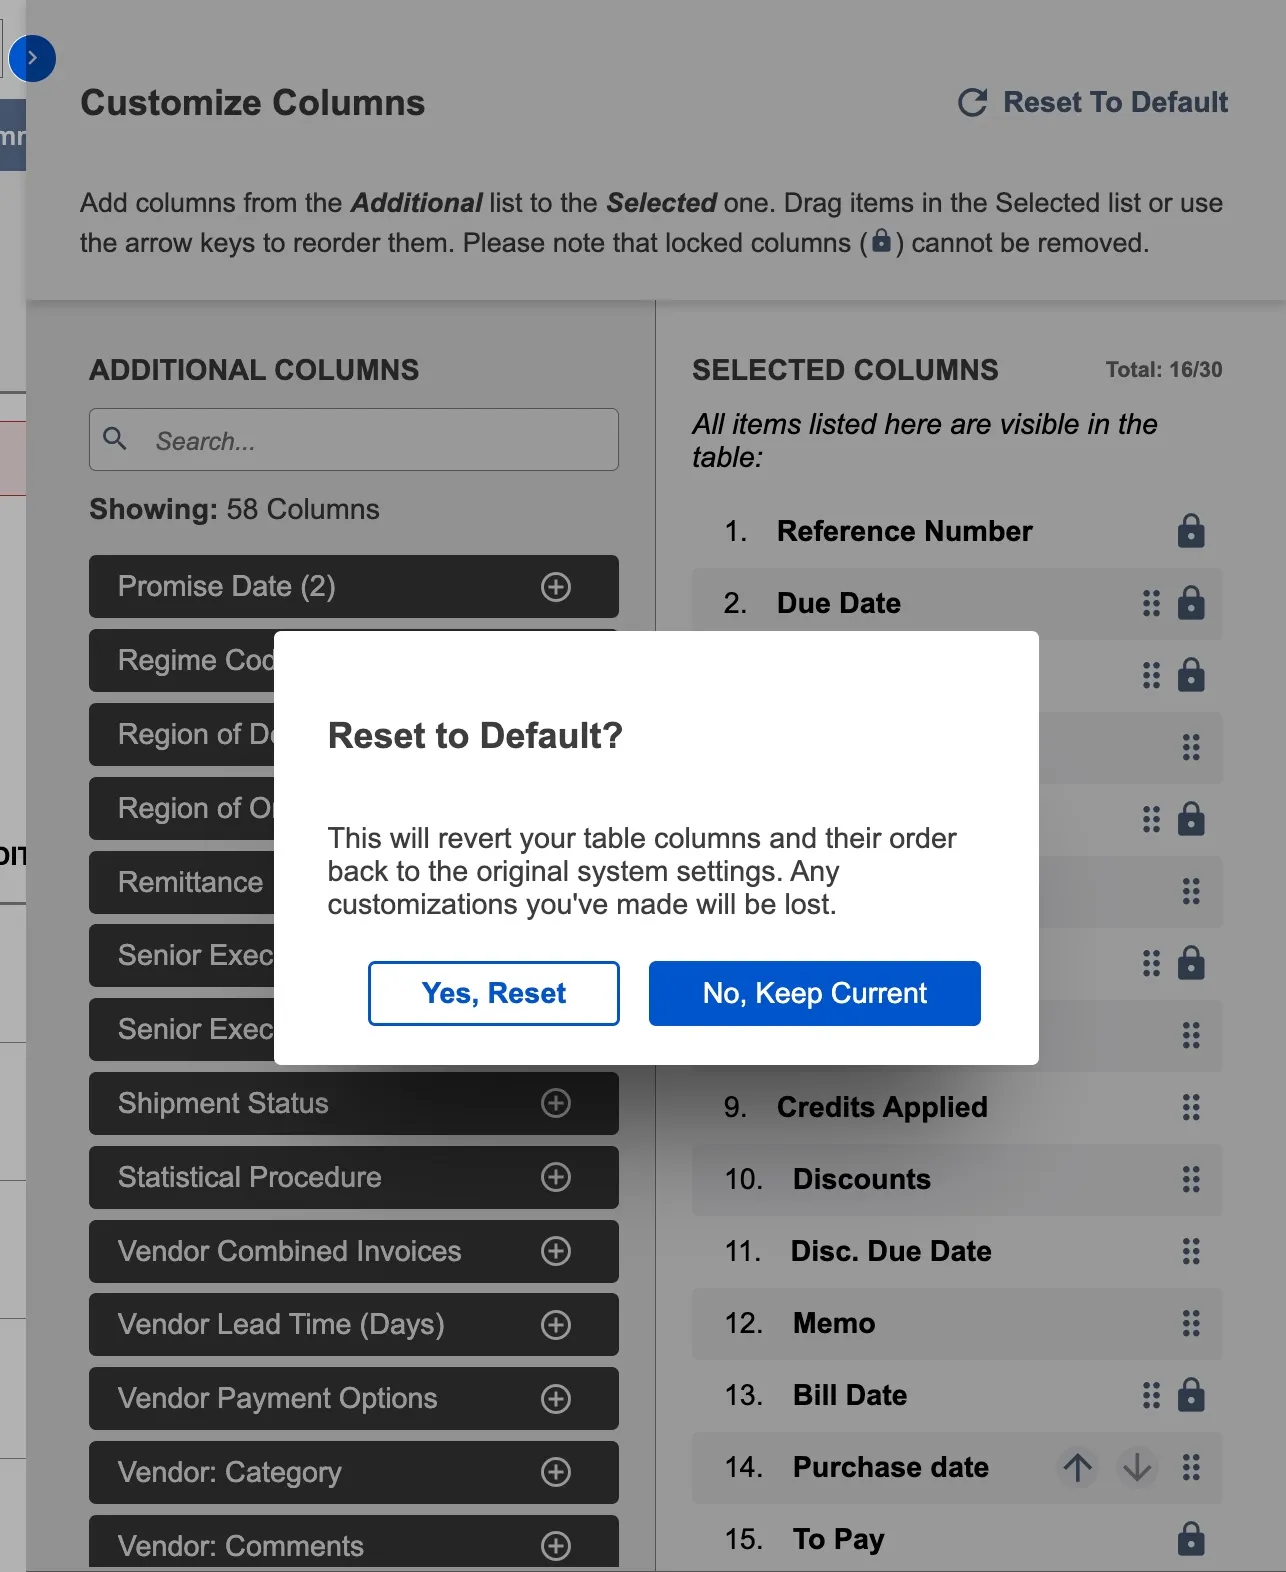
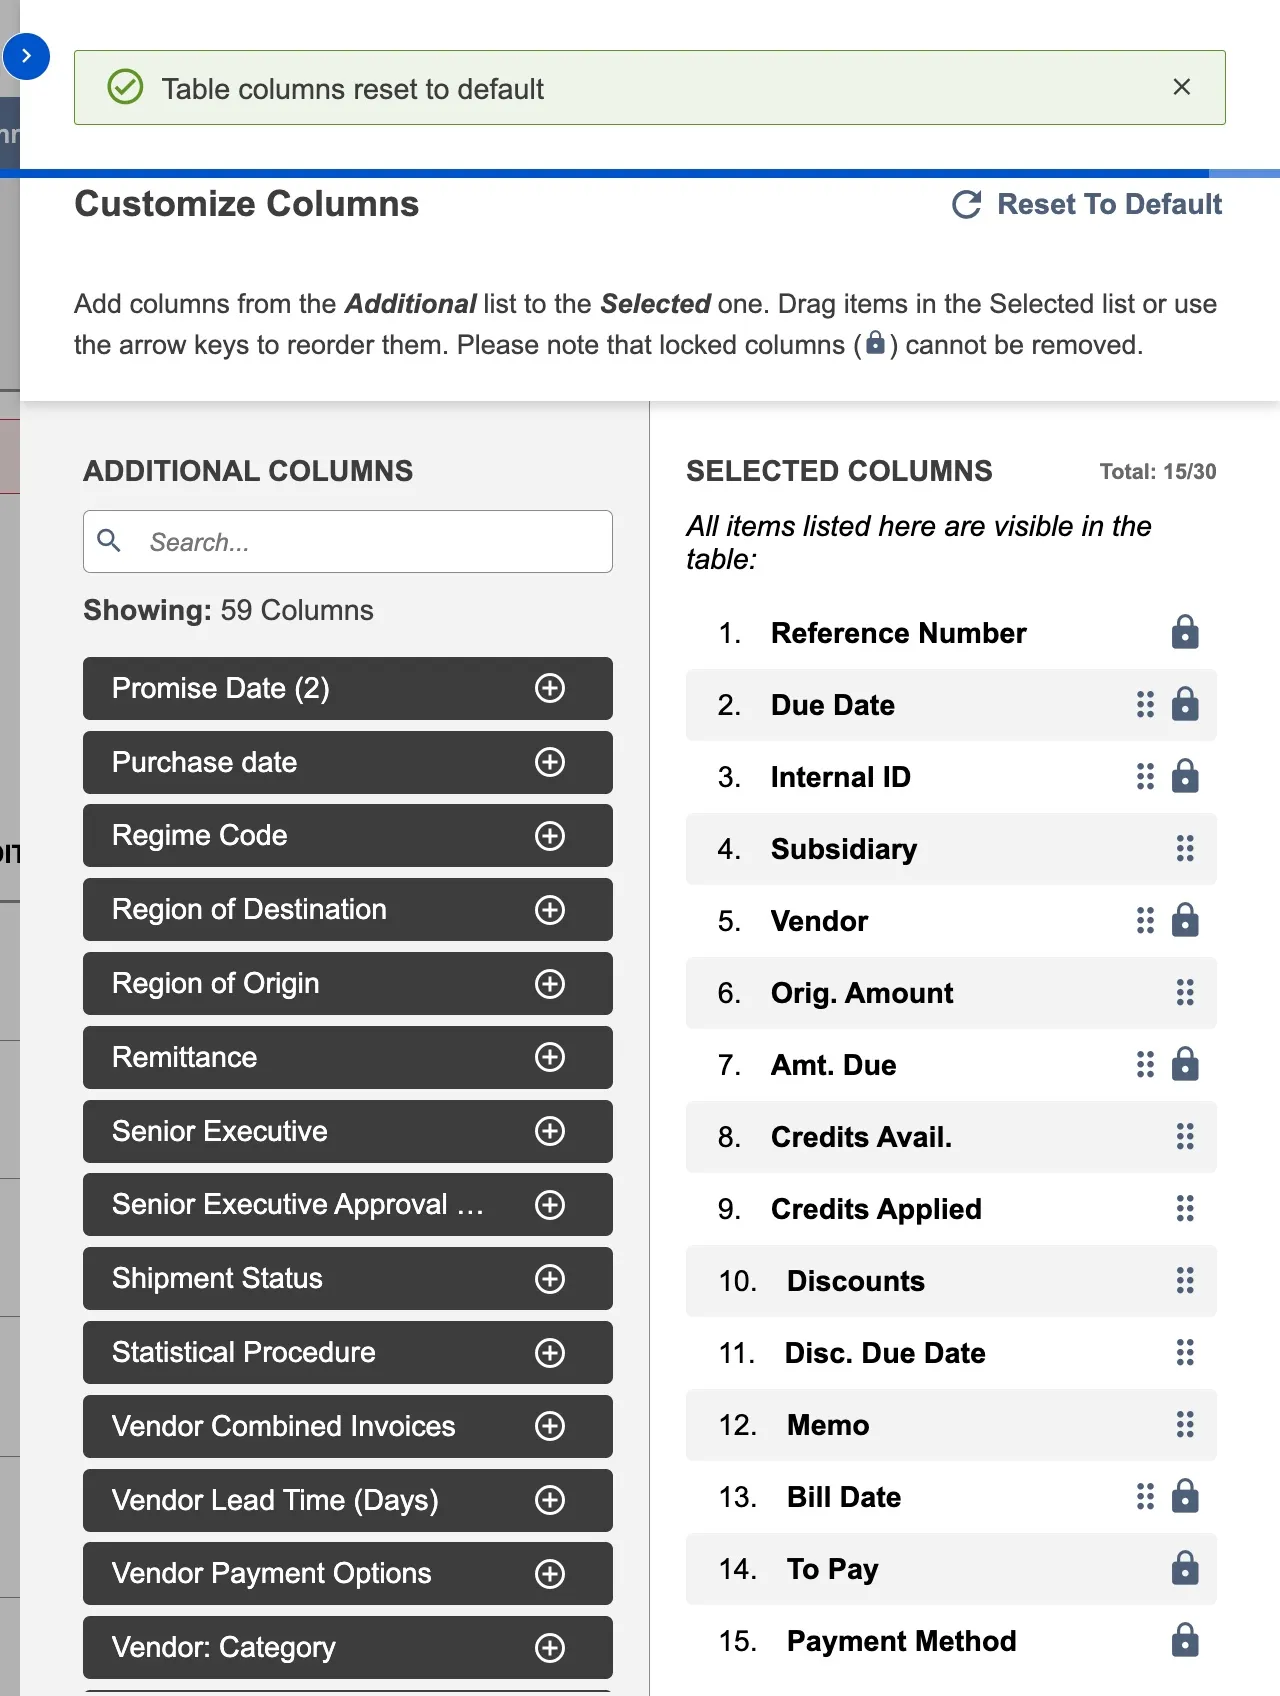
Resetting to Default
- Click Reset to Default in the panel header
- Confirm the reset
Your columns return to the standard Intacct layout and save automatically.
Column Limitations
- Maximum 30 columns can be selected
- Required columns (🔒) cannot be removed or moved
- Column width is automatically determined and cannot be adjusted
- User-specific settings do not transfer to other users
- Custom fields cannot be sorted
- Custom field support: NetSuite supports custom transaction body fields (custbody_*). See below for requirements.
Custom Field Support
The Citizens plugin supports custom transaction body fields (custbody_*) as both columns and filters. Custom fields must meet specific requirements to appear in the column and filter lists.
Requirements
1. "Store Value" must be checked in NetSuite:
- Go to NetSuite → Customization → Transaction Body Fields
- Find your custom field
- Verify "Store Value" checkbox is checked
- Fields with "Store Value" unchecked cannot be displayed or filtered
2. Field type must be supported:
Supported field types:
- Text: TEXT, TEXTAREA, EMAIL, PHONE
- Numbers: INTEGER, FLOAT, DECIMAL, CURRENCY, PERCENT
- Boolean: CHECKBOX
- Date: DATE (without time component)
- Dropdown: SELECT (single selection only)
Not supported:
- Date/Time (only DATE without time is supported)
- Multi-Select (only single-select dropdowns are supported)
- Rich Text
- Image
- File
- Password
NOTE: Custom fields cannot be sorted. Clicking a custom field column header does not sort the table due to performance constraints.
Customizing Filters
Use filters to show only bills matching specific criteria. Filters apply immediately without requiring a save action.
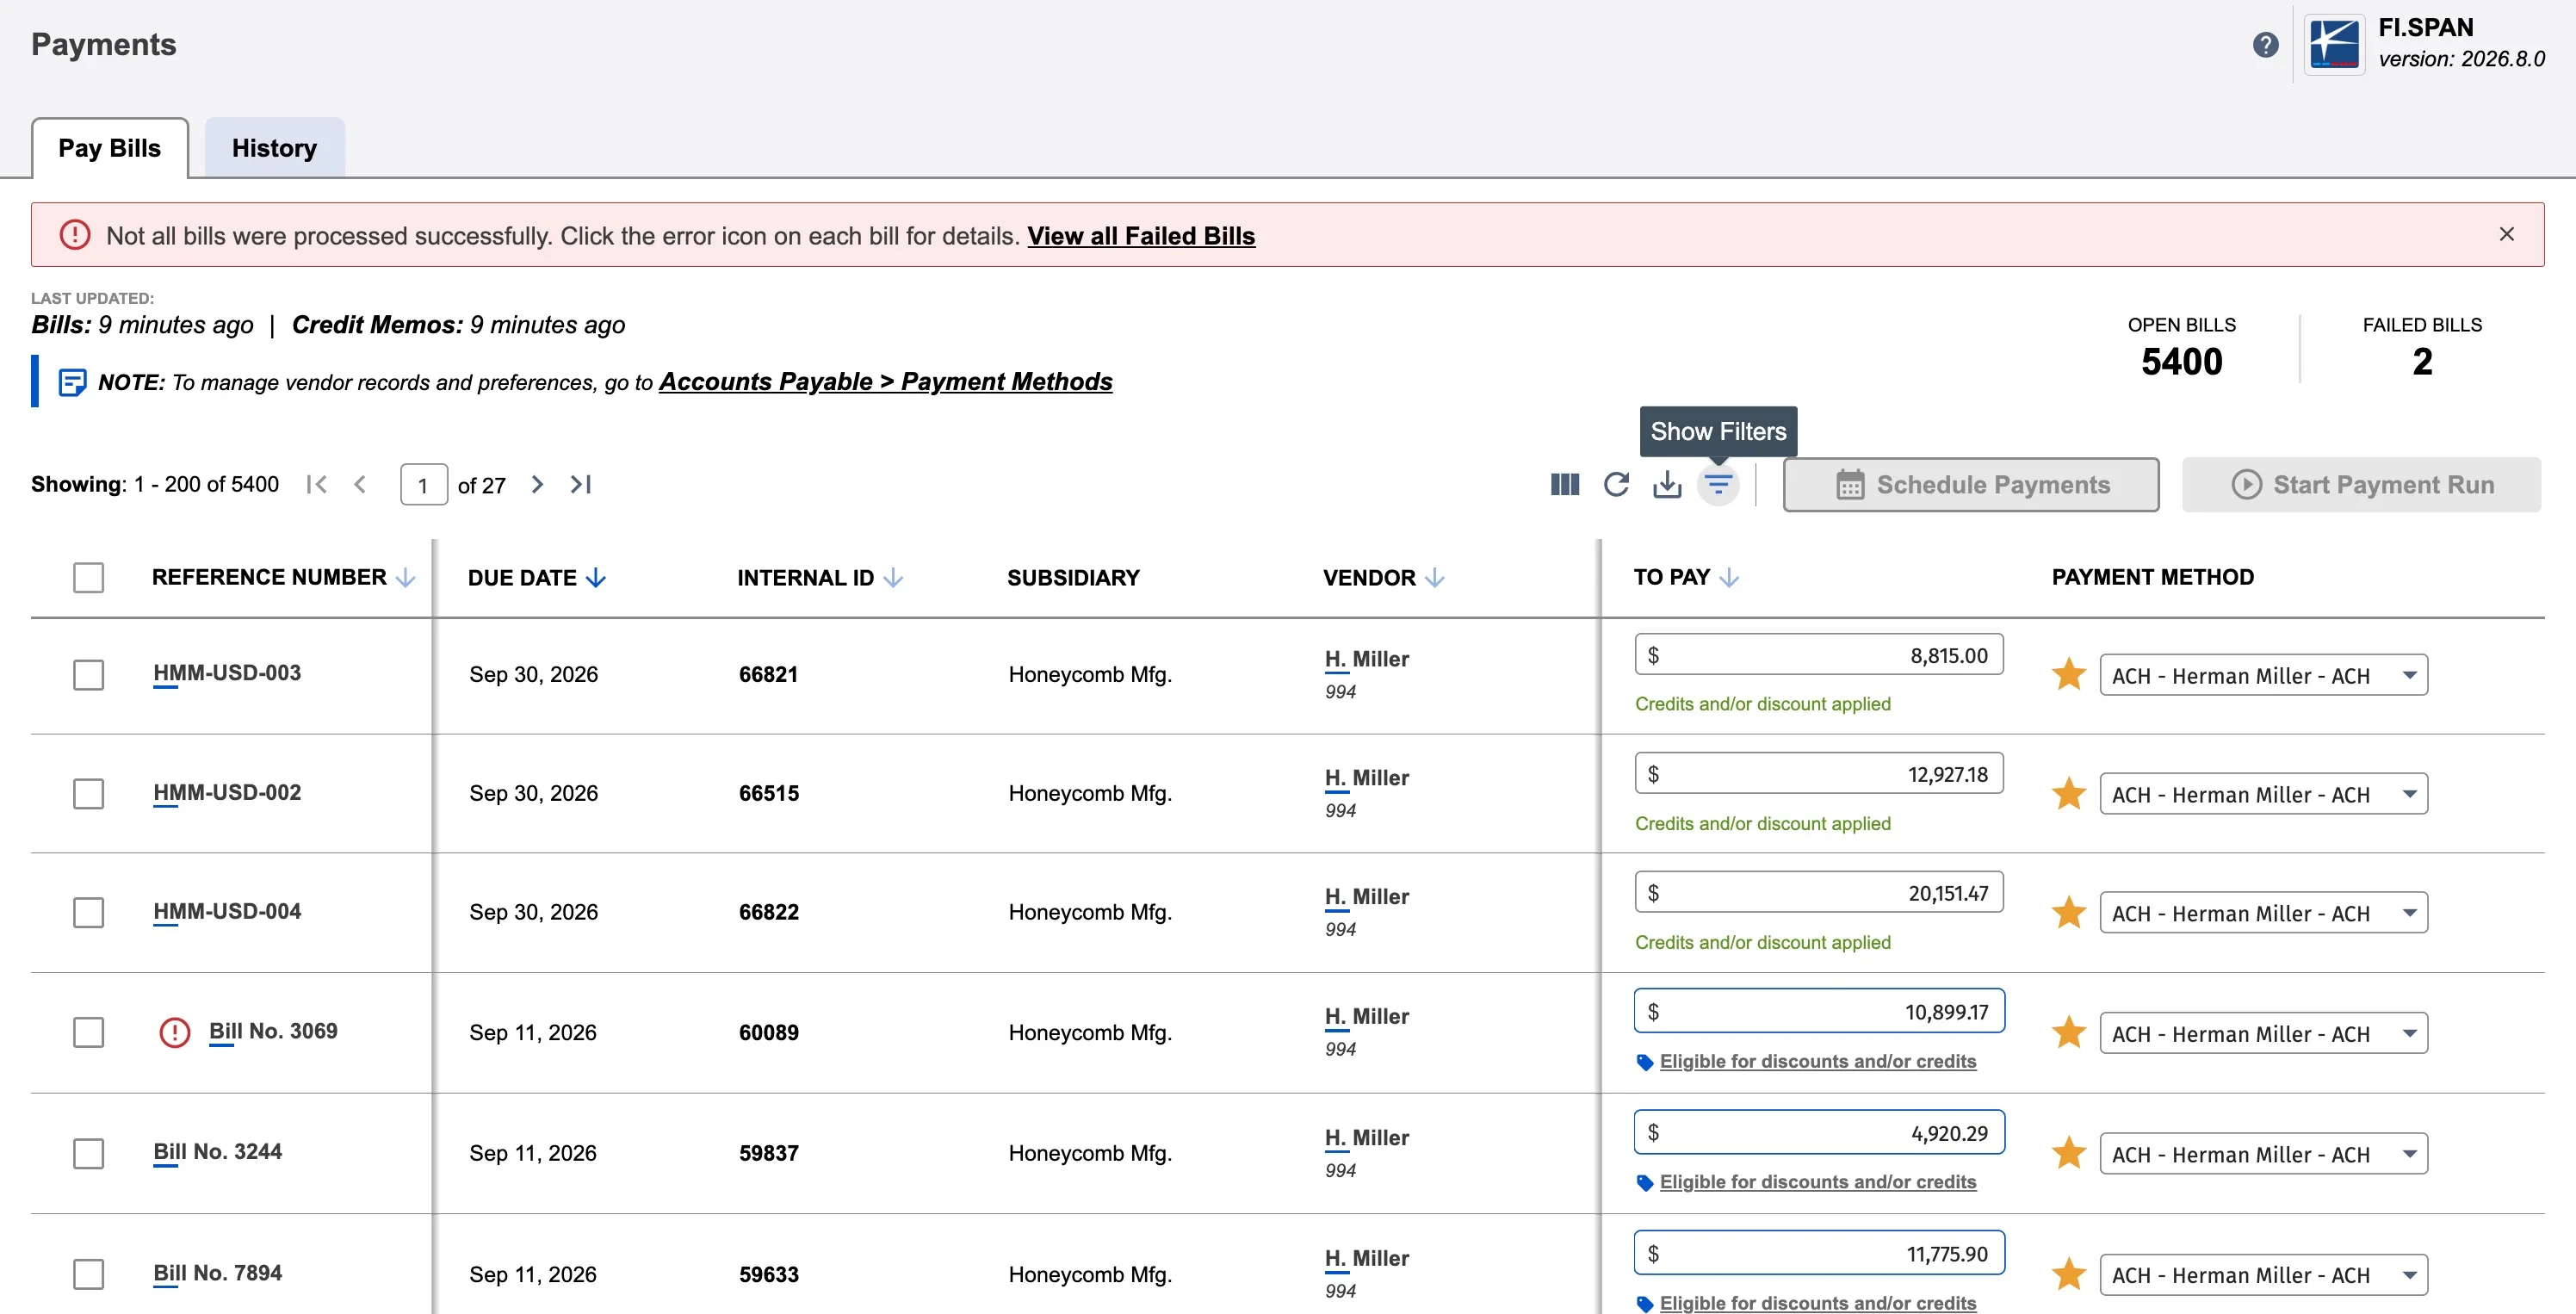
Opening the Filter Panel
Navigate to Payments → Pay Bills
Click Filters in the toolbar (top right)
The filter panel opens from the right side of the screen.
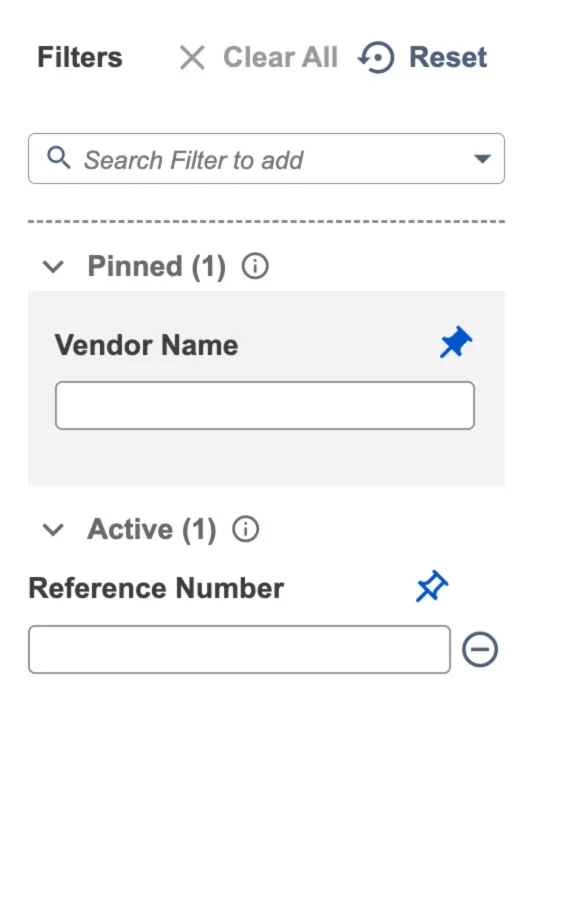
Panel sections:
- Search dropdown: Add new filters
- Pinned section: Saved filters that appear every session
- Active section: Temporary filters for current session
- Clear All / Reset buttons: Manage filter values
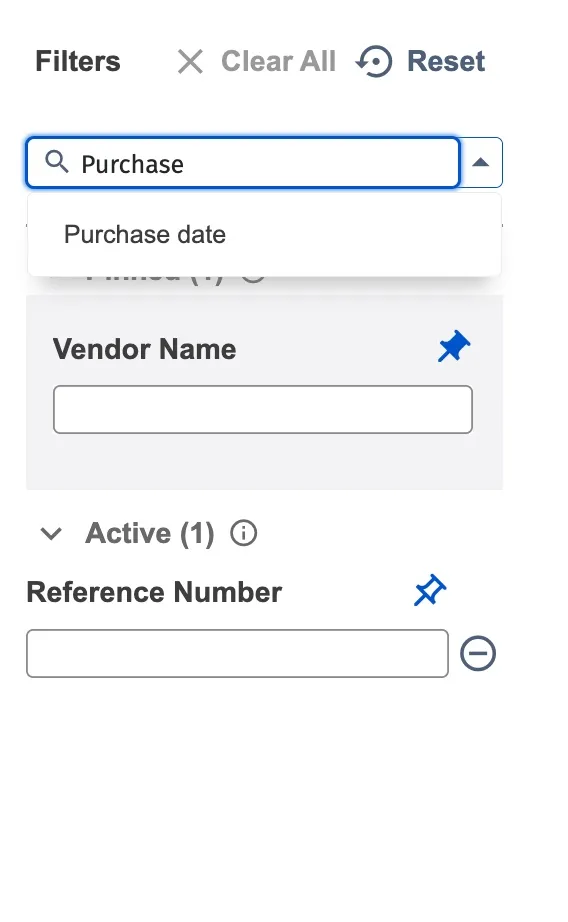
Adding Filters
- Click the search dropdown (Search Filter to add)
- Type to find a filter or scroll the list
- Click the filter name to add it
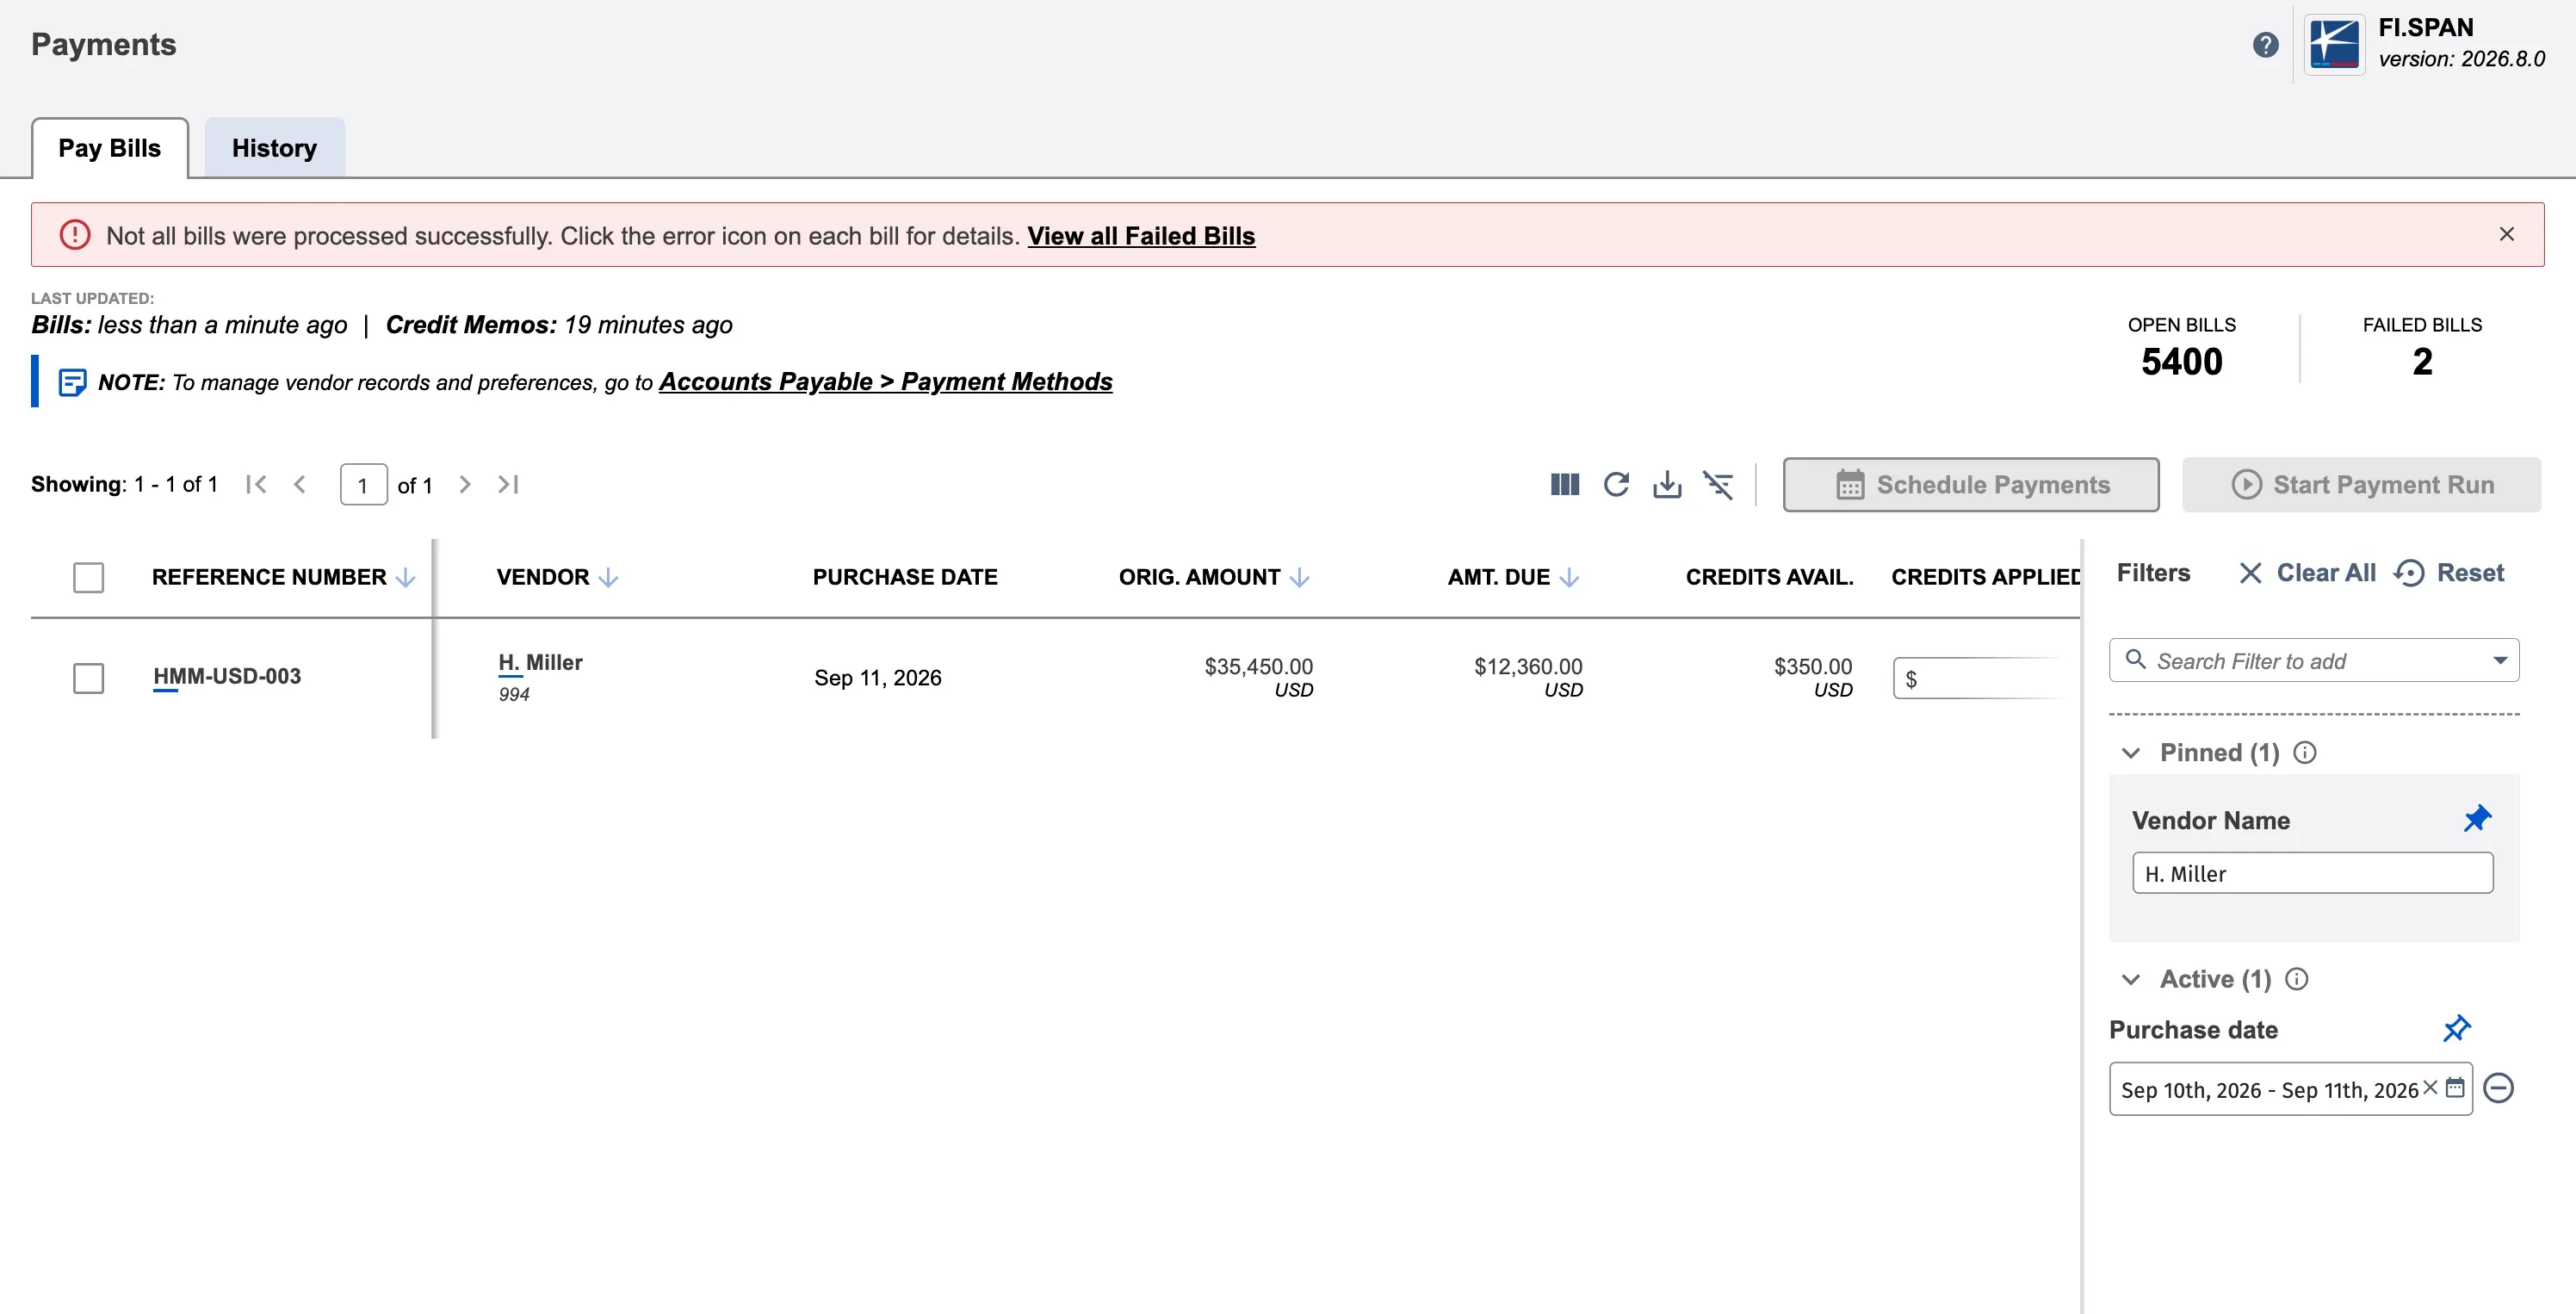
- The filter appears in Active section
- Enter your criteria in the filter control
The table updates immediately as you enter values.
NOTE: Custom transaction body fields (custbody_*) are available as filters if they meet the same requirements as columns. See Custom Field Support above.
Pinning Filters
Pin frequently-used filters to save their structure (not values) to your profile.
To pin a filter:
- Locate the filter in Active section
- Hover over the filter
- Click the pin icon (📌)
- Filter moves to Pinned section
IMPORTANT: Pinned filters save filter field only. Values are cleared when you close the panel and must be re-entered each session.
Maximum 15 pinned filters.
To unpin a filter:
- Locate the filter in Pinned section
- Hover over the filter
- Click the pin icon (📌)
- Filter moves to Active section and values clear
Clear All vs Reset
Clear All:
- Removes all filter values
- Keeps filters visible
- Use to apply different criteria with same filters
Reset:
- Removes all active filters
- Clears pinned filter values (structure remains)
- Use to return to baseline