Applying Bill Credits During Payment (NetSuite)
To apply Bill Credits during payment, please ensure your bank plugin is updated to version 2025.1.1+
You can easily apply bill credits directly on the Pay Vendor Bills page in NetSuite. This guide will help you understand the steps required.
Before starting, please ensure that the Expense Reports checkbox is selected in the Setup → Company → Enable Features → Employee Expenses tab. This step is required for the Apply Bill Credits functionality.
Applying Bill Credits
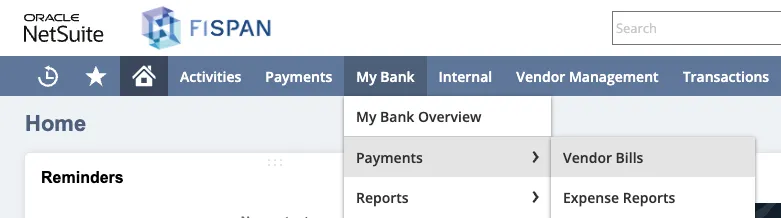
Go to Vendor Bills Page
To apply bill credits, navigate to Citizens → Payments → Vendor Bills.
Select Bills to Apply Bill Credits
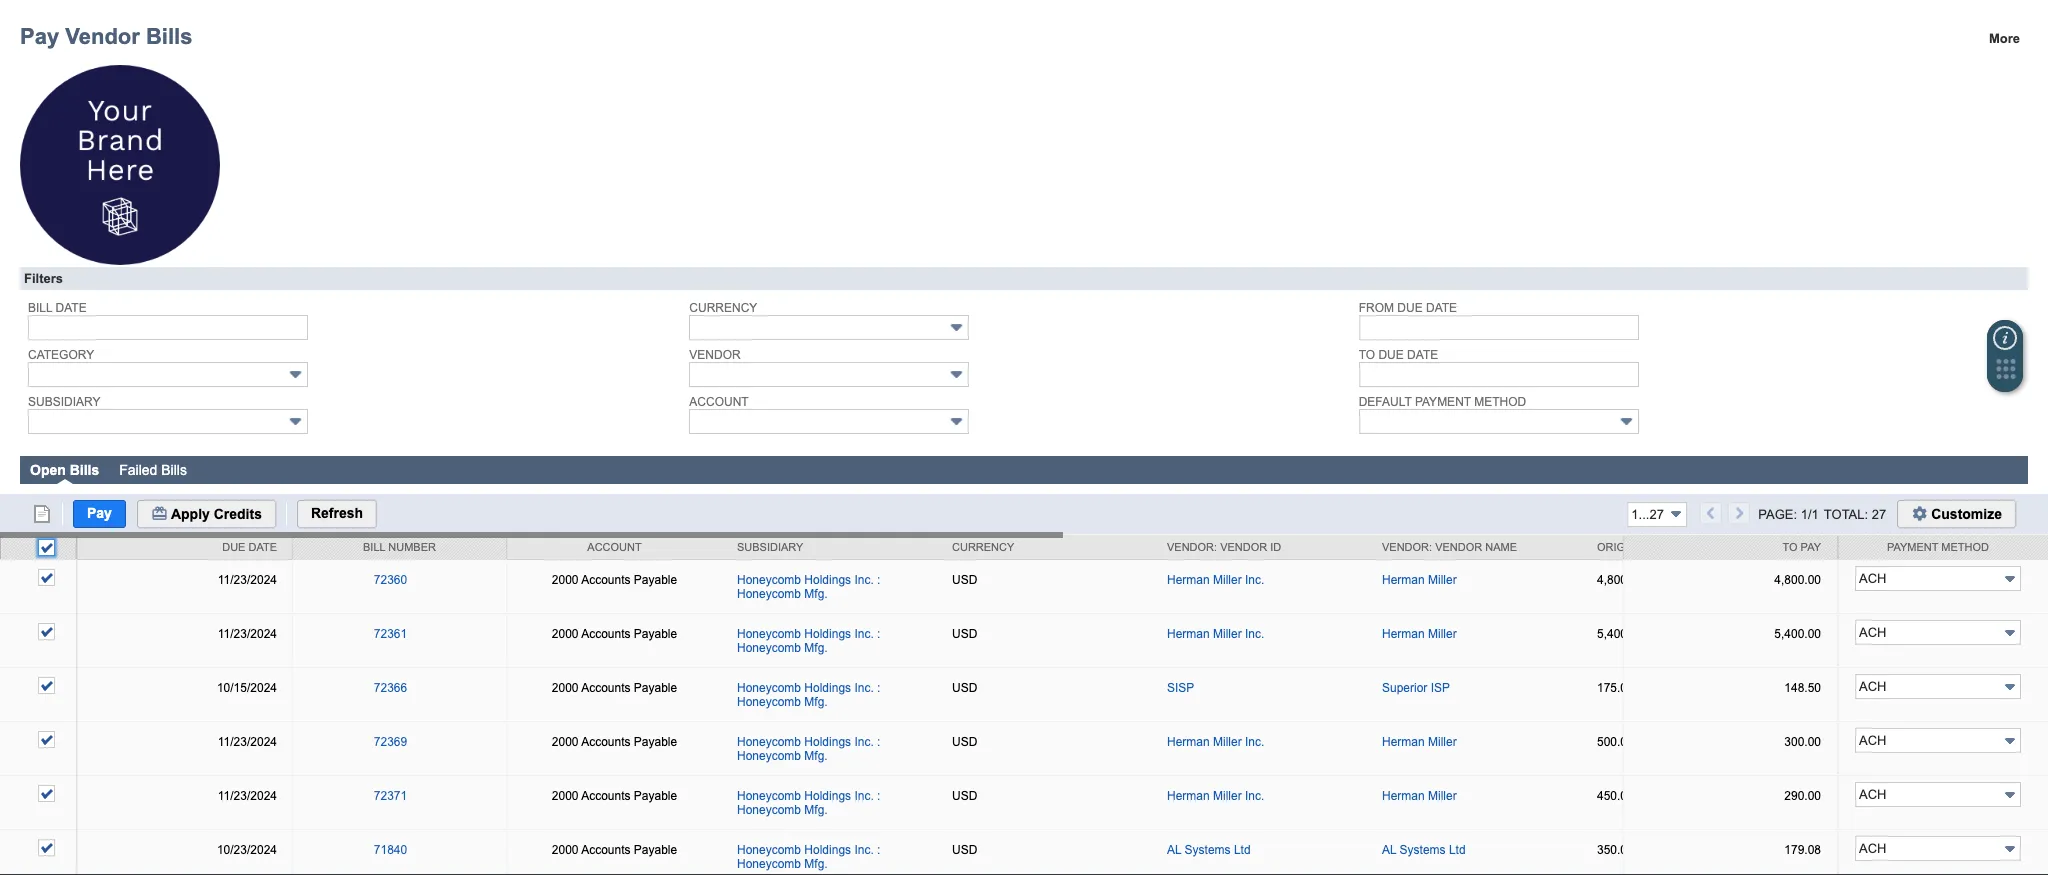
Identify the bill you would like to apply bill credits to and make a payment. If a default payment method has not been set up for a vendor, please select an appropriate option from the Payment Method dropdown list.
Select the checkboxes next to the bills you want to apply credits to, and click Apply Credits.
Select Vendor
Bills and bill credits are grouped by vendor and currency. Use the A/P Account drop-down to filter bills and bill credits by different accounts.
Find the vendor you want to apply the bill credits to and click View Bills Credits.
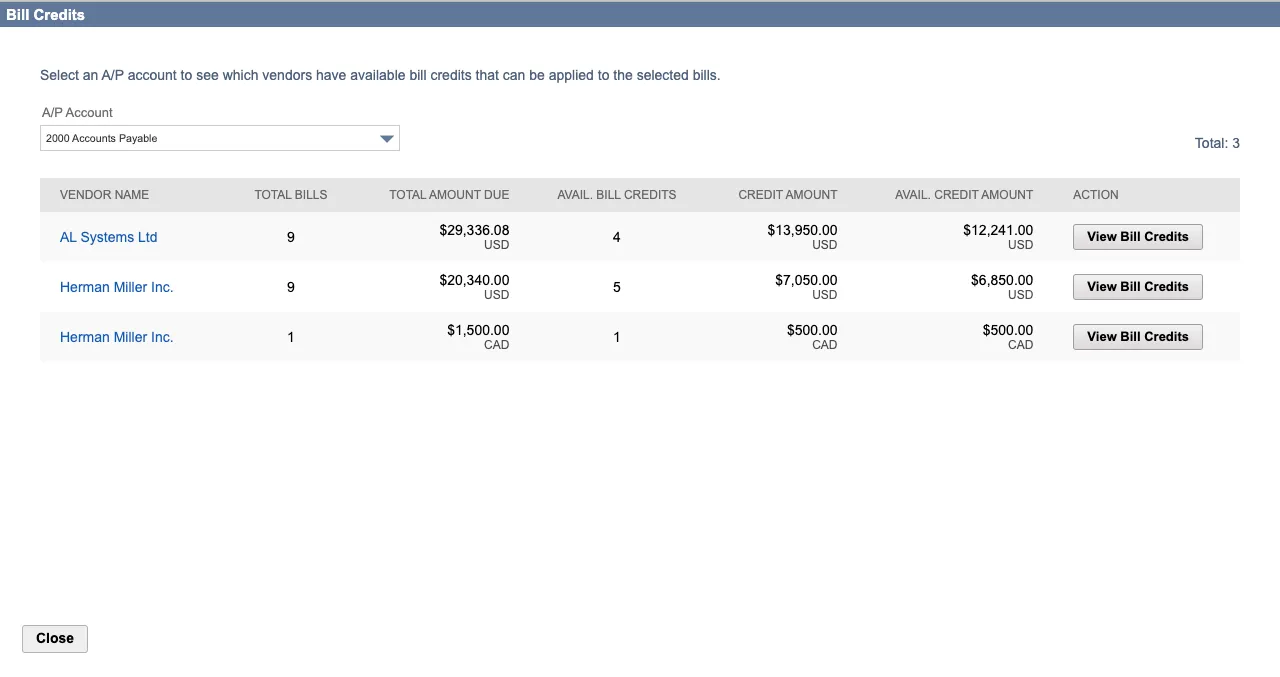
NOTE: The dialog will only show vendors who have bill credits available.
There are two methods for applying bill credits:
- Auto-Apply
- Manual Apply
Auto-Apply Bill Credits
The Auto-Apply function simplifies the process by automatically applying the available bill credits to the bills. With the Auto-Apply function, bill credits are applied to bills in order from the oldest to the newest due dates.
Select Bill Credits to Apply
The left panel contains a list of all available bill credits, including their original amounts and available balances. This panel also displays the total number of bills and bill credits, and how many are currently applied. Select the checkboxes for the bill credits you wish to apply.
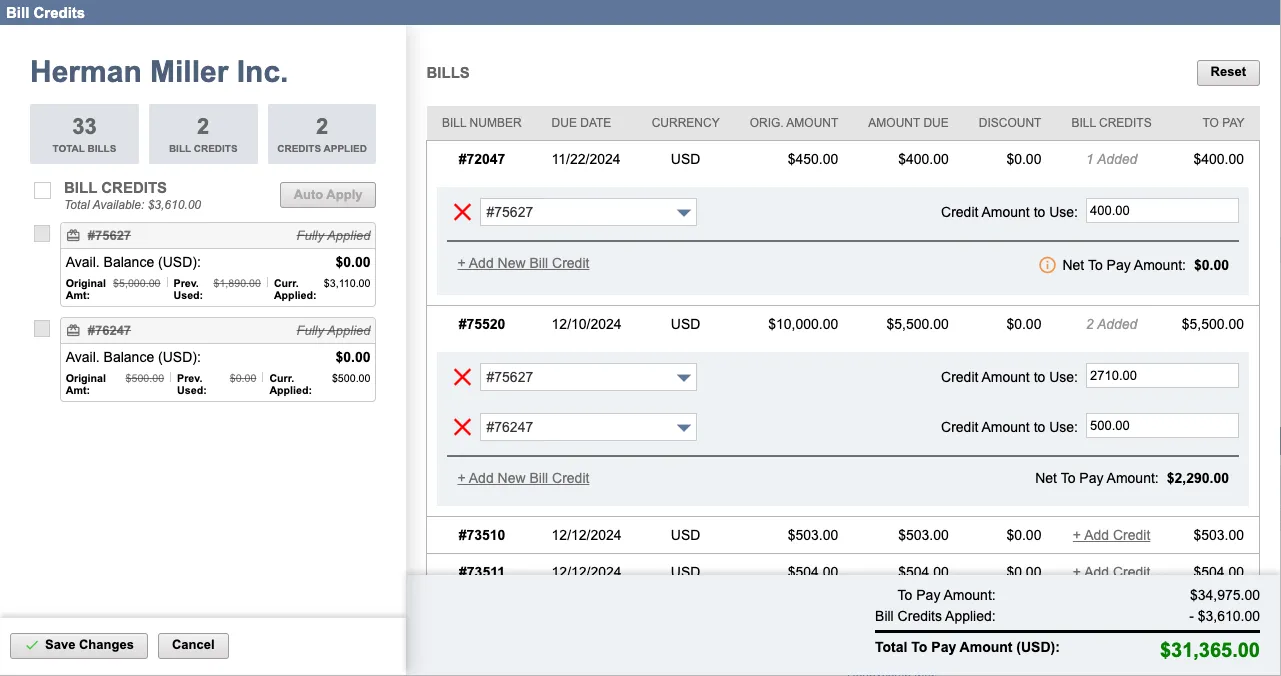
Once selected, click the Auto-Apply button. Upon clicking Auto-Apply, you’ll notice that bill credits are applied to bills starting from the oldest to the newest due dates. The Total Amount Due will update to reflect the applied bill credits.
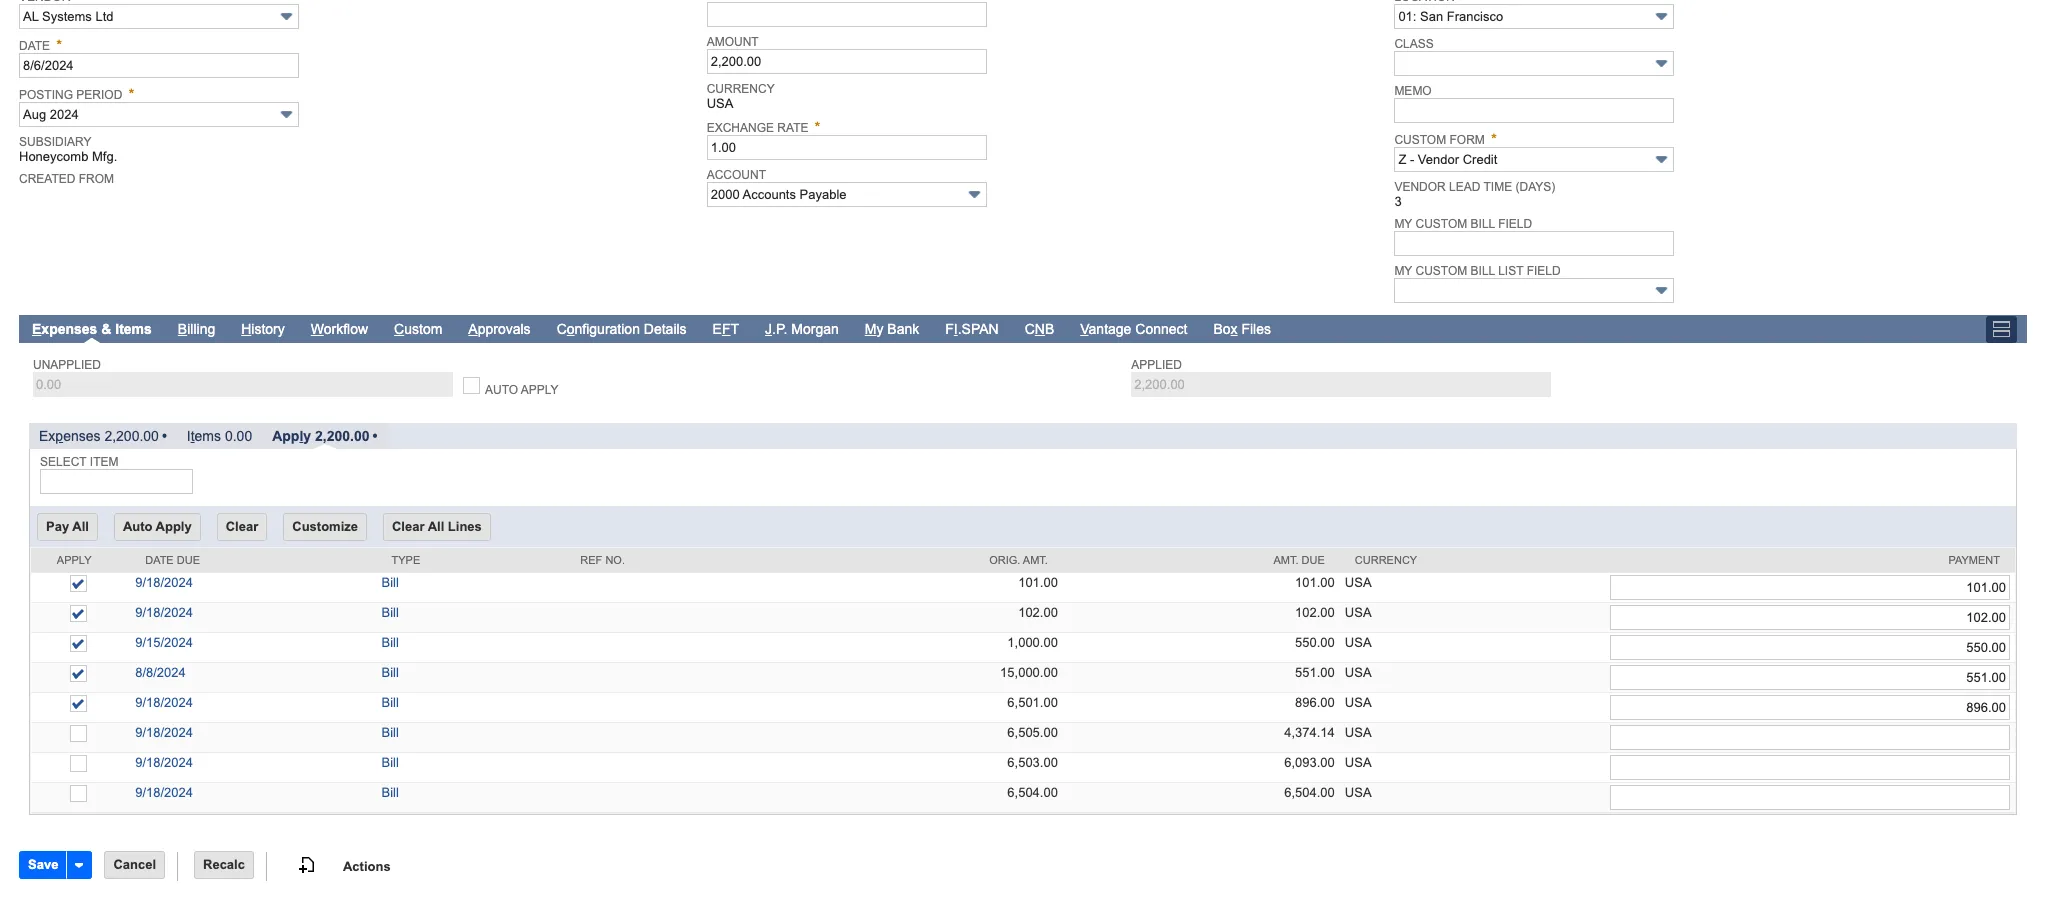
You can manually adjust the amount of the bill credit if needed or remove bill credits from respective bills by clicking a red cross icon.
After confirming the bill credits application, click Save Changes.
Manual Apply Bill Credits
The Manual Apply function allows you to select specific bill credits and determine the amount to apply to particular bills, giving you precise control over the allocation of bill credits.
Click +Add New Bill Credit and select the desired bill credit from the drop-down menu. You can customize the amount of each bill credit to apply to a particular bill.
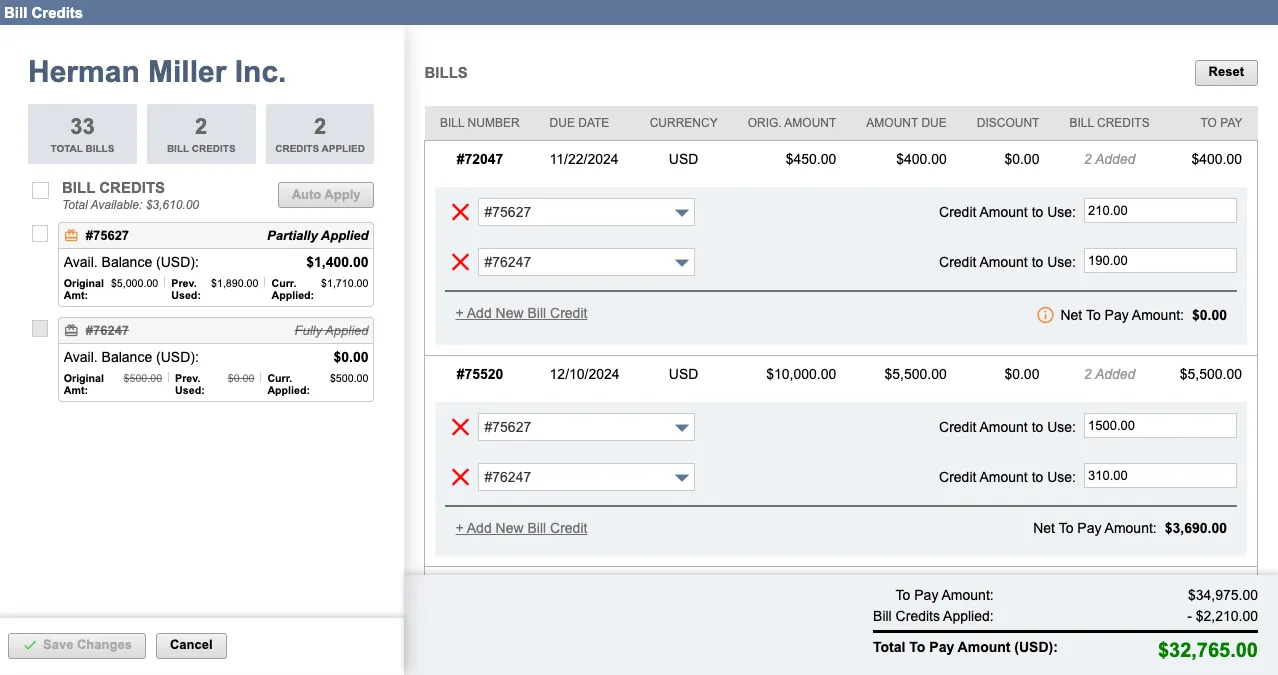
If you wish to remove the applied credits, click the Reset button. This will clear all bill credits currently applied.
After confirming the bill credits application, click Save Changes.
NOTE: Once you manually apply bill credits, the Auto-Apply function will be disabled. To restore the Auto-Apply function, click the Reset button.
Processing Bill Credits
The plugin will begin applying bill credits to the selected bills.
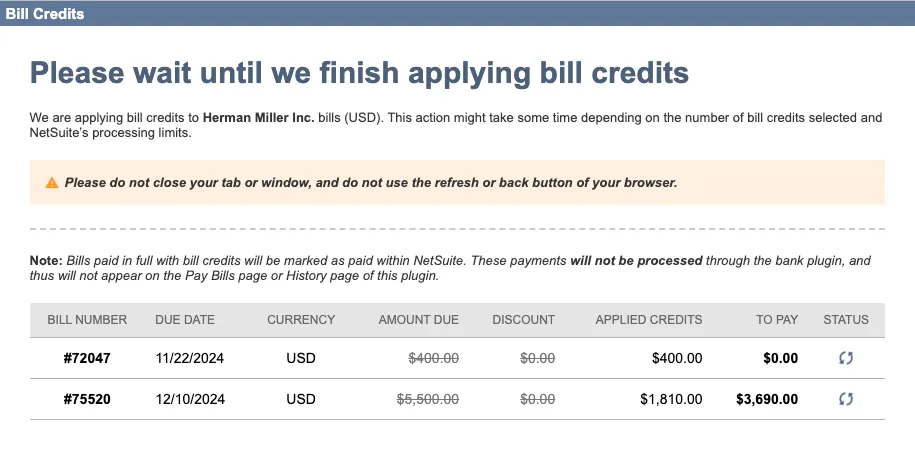
The status column will indicate whether each bill credit has been successfully applied. A green checkmark signifies a successful application, while a red caution icon shows that the bill credit could not be applied.
Hover over the icon to see a detailed message explaining why the credit application failed.
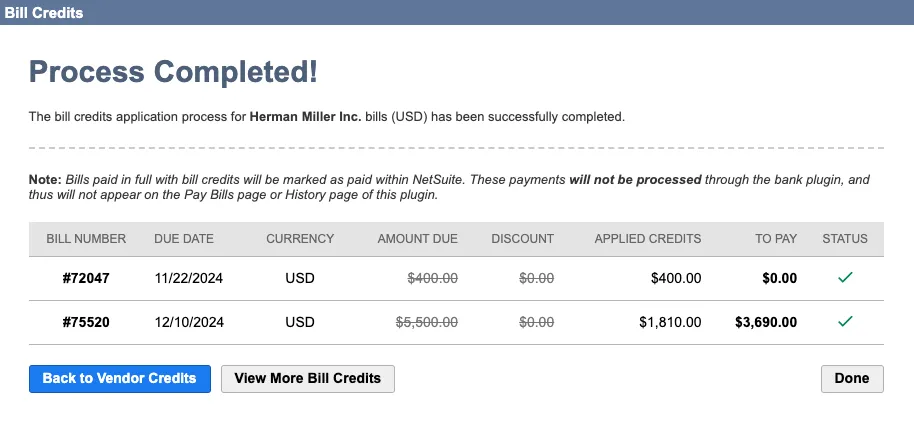
To reapply the failed bill credits, click Back to Vendor Credits. If you need to apply bill credits to another vendor, click View More Bill Credits.
Once you have finished applying bill credits, click Done.
NOTE: Bills with a net amount due of zero after applying bill credits will not appear on the plugin's Pay Bills or Payment History pages. These bills will be paid directly within NetSuite.
TIP: Bill Credits works best if your NetSuite environment has no customizations surrounding bill, bill payment, and/or bill credits creation, deletion, or modification.
Make Payment
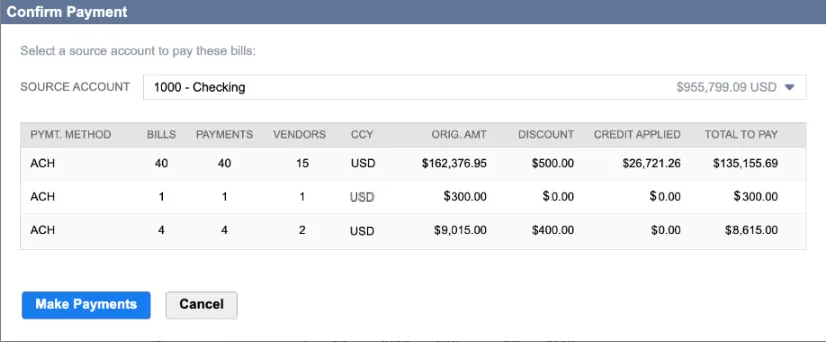
Select the bills to pay and click Pay on the Pay Vendors Bill page to proceed with payment.
The source account will only appear in the Confirm Payment pop-up if the associated bank account has a number input in the Number field.