Paying Bills (NetSuite)
Step 1: Go to Vendor Bills Page
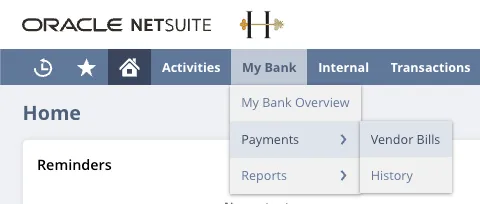
Go to Your Bank → Payments → Vendor Bills.
Step 2: Select Bills to Pay
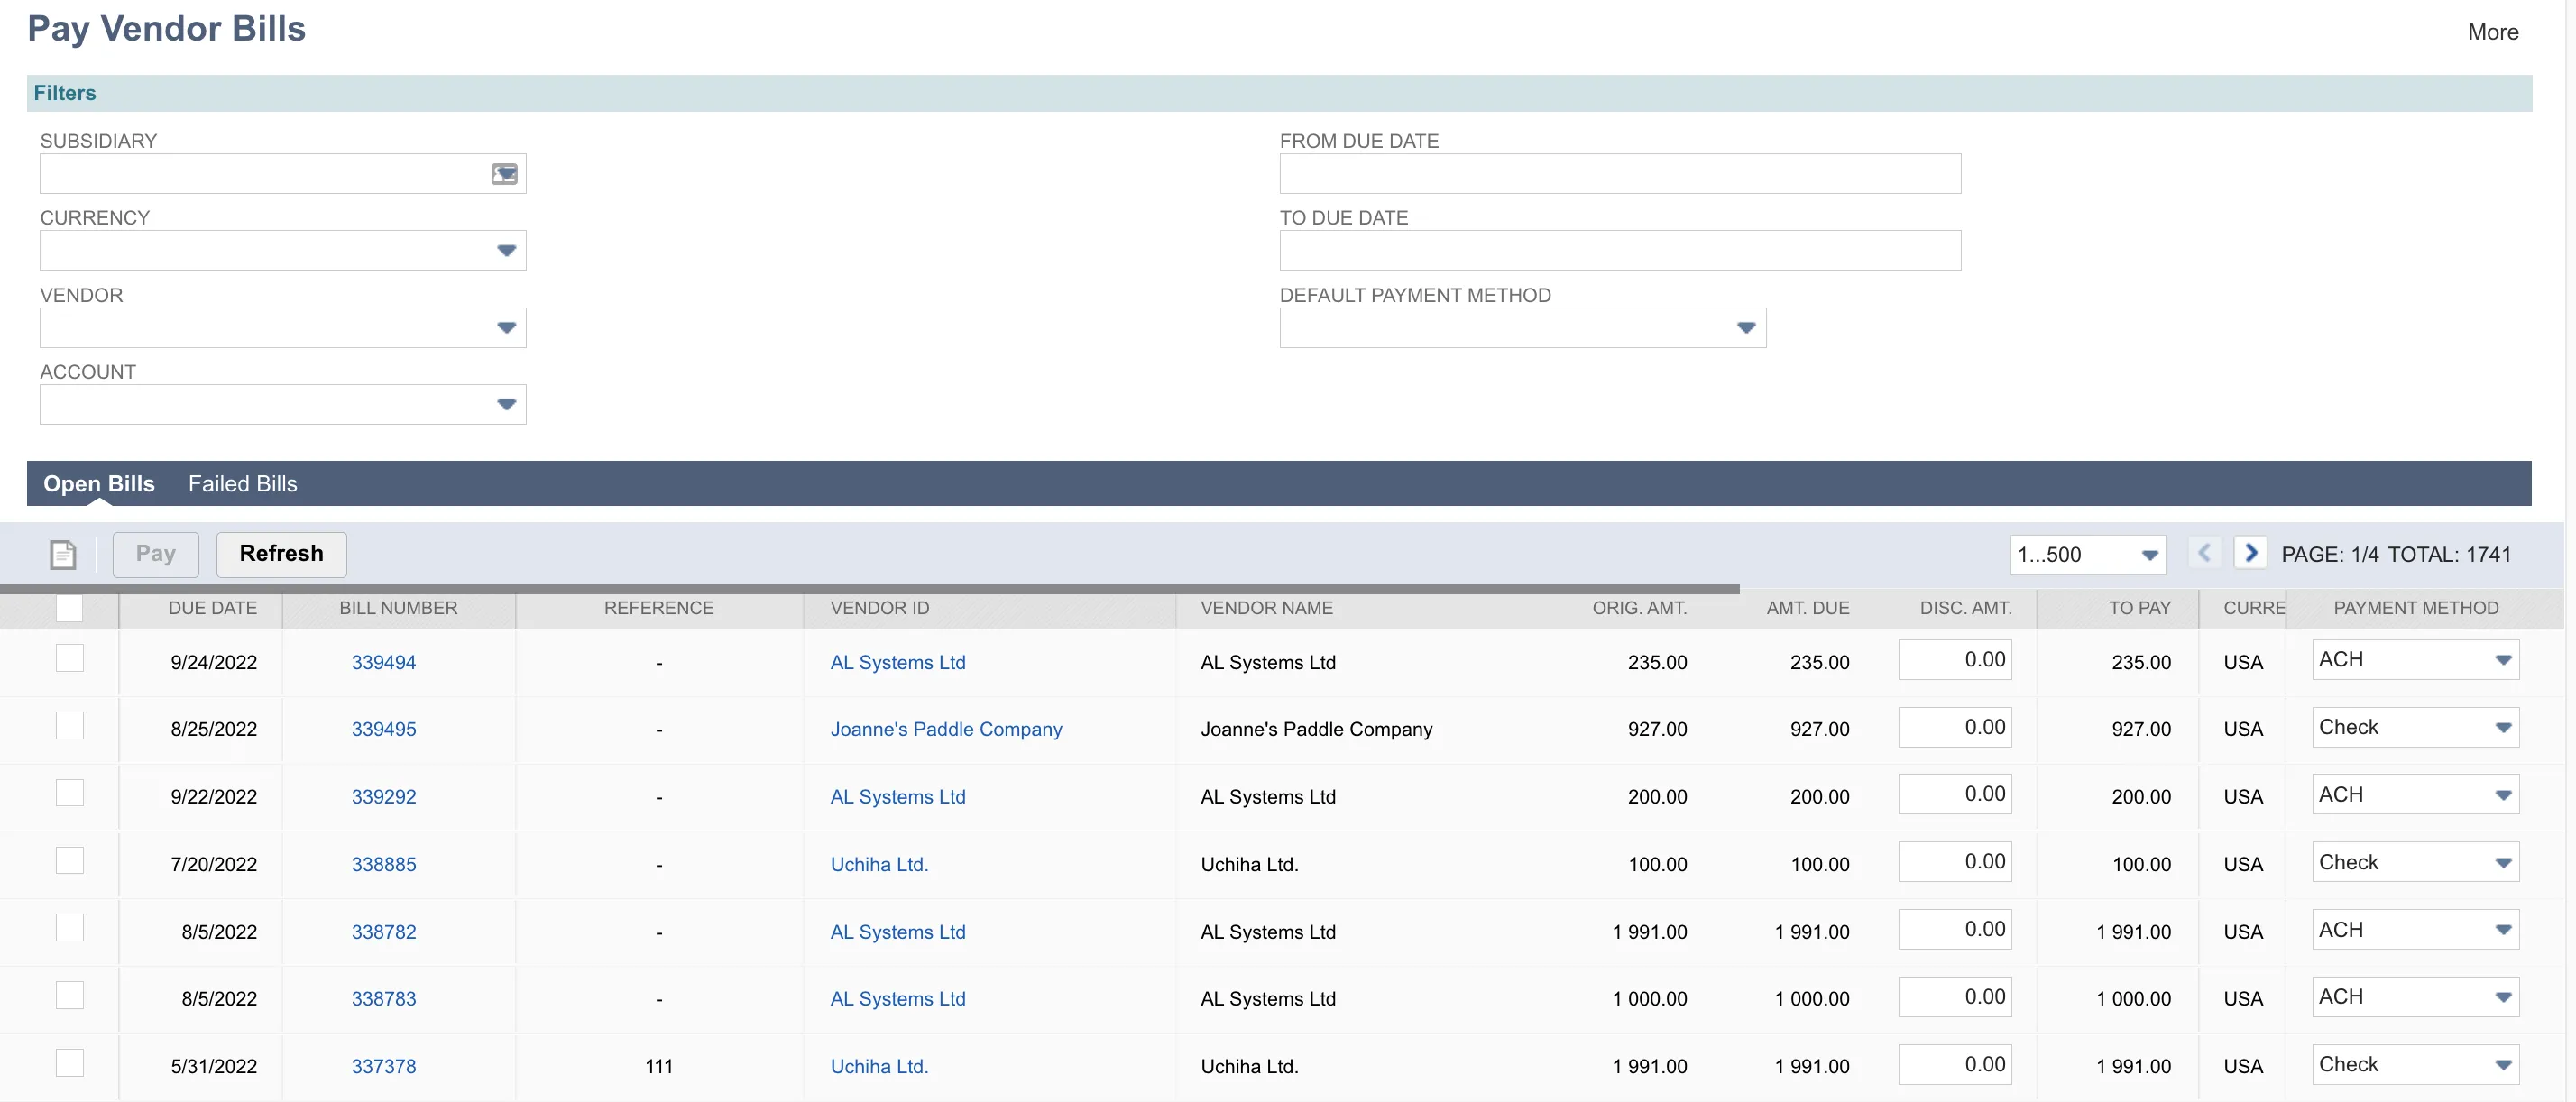
Only bills that are Open / Approved and do not have a Payment Hold on them will appear on the Pay Vendor Bills page.
This includes Open / Approved bills that are On Hold (with no Payment Hold on them).
Use the filters to find the bills you would like to pay. If a default payment method hasn't been set for this vendor, select a method from the respective column.
Select the checkboxes next to payments you want to make and select Pay.
Step 3: Confirm Payment
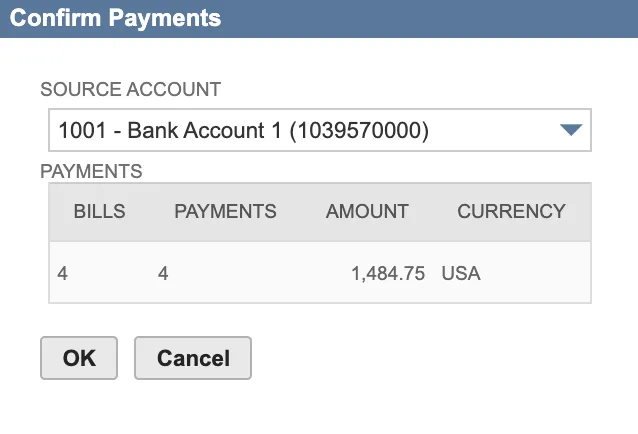
Select the account from the drop-down and confirm the number of bills, payments, and amounts are correct. Then, select OK.
Please Note: The source account will only appear in the Confirm Payment pop-up if the associated bank account has a number input in the Number field.
Step 4: Monitor Bill Processing

Once the payment request is successfully sent, the status bar will turn green.

Step 5: Check Status of Payment
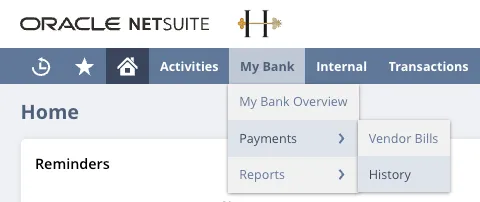
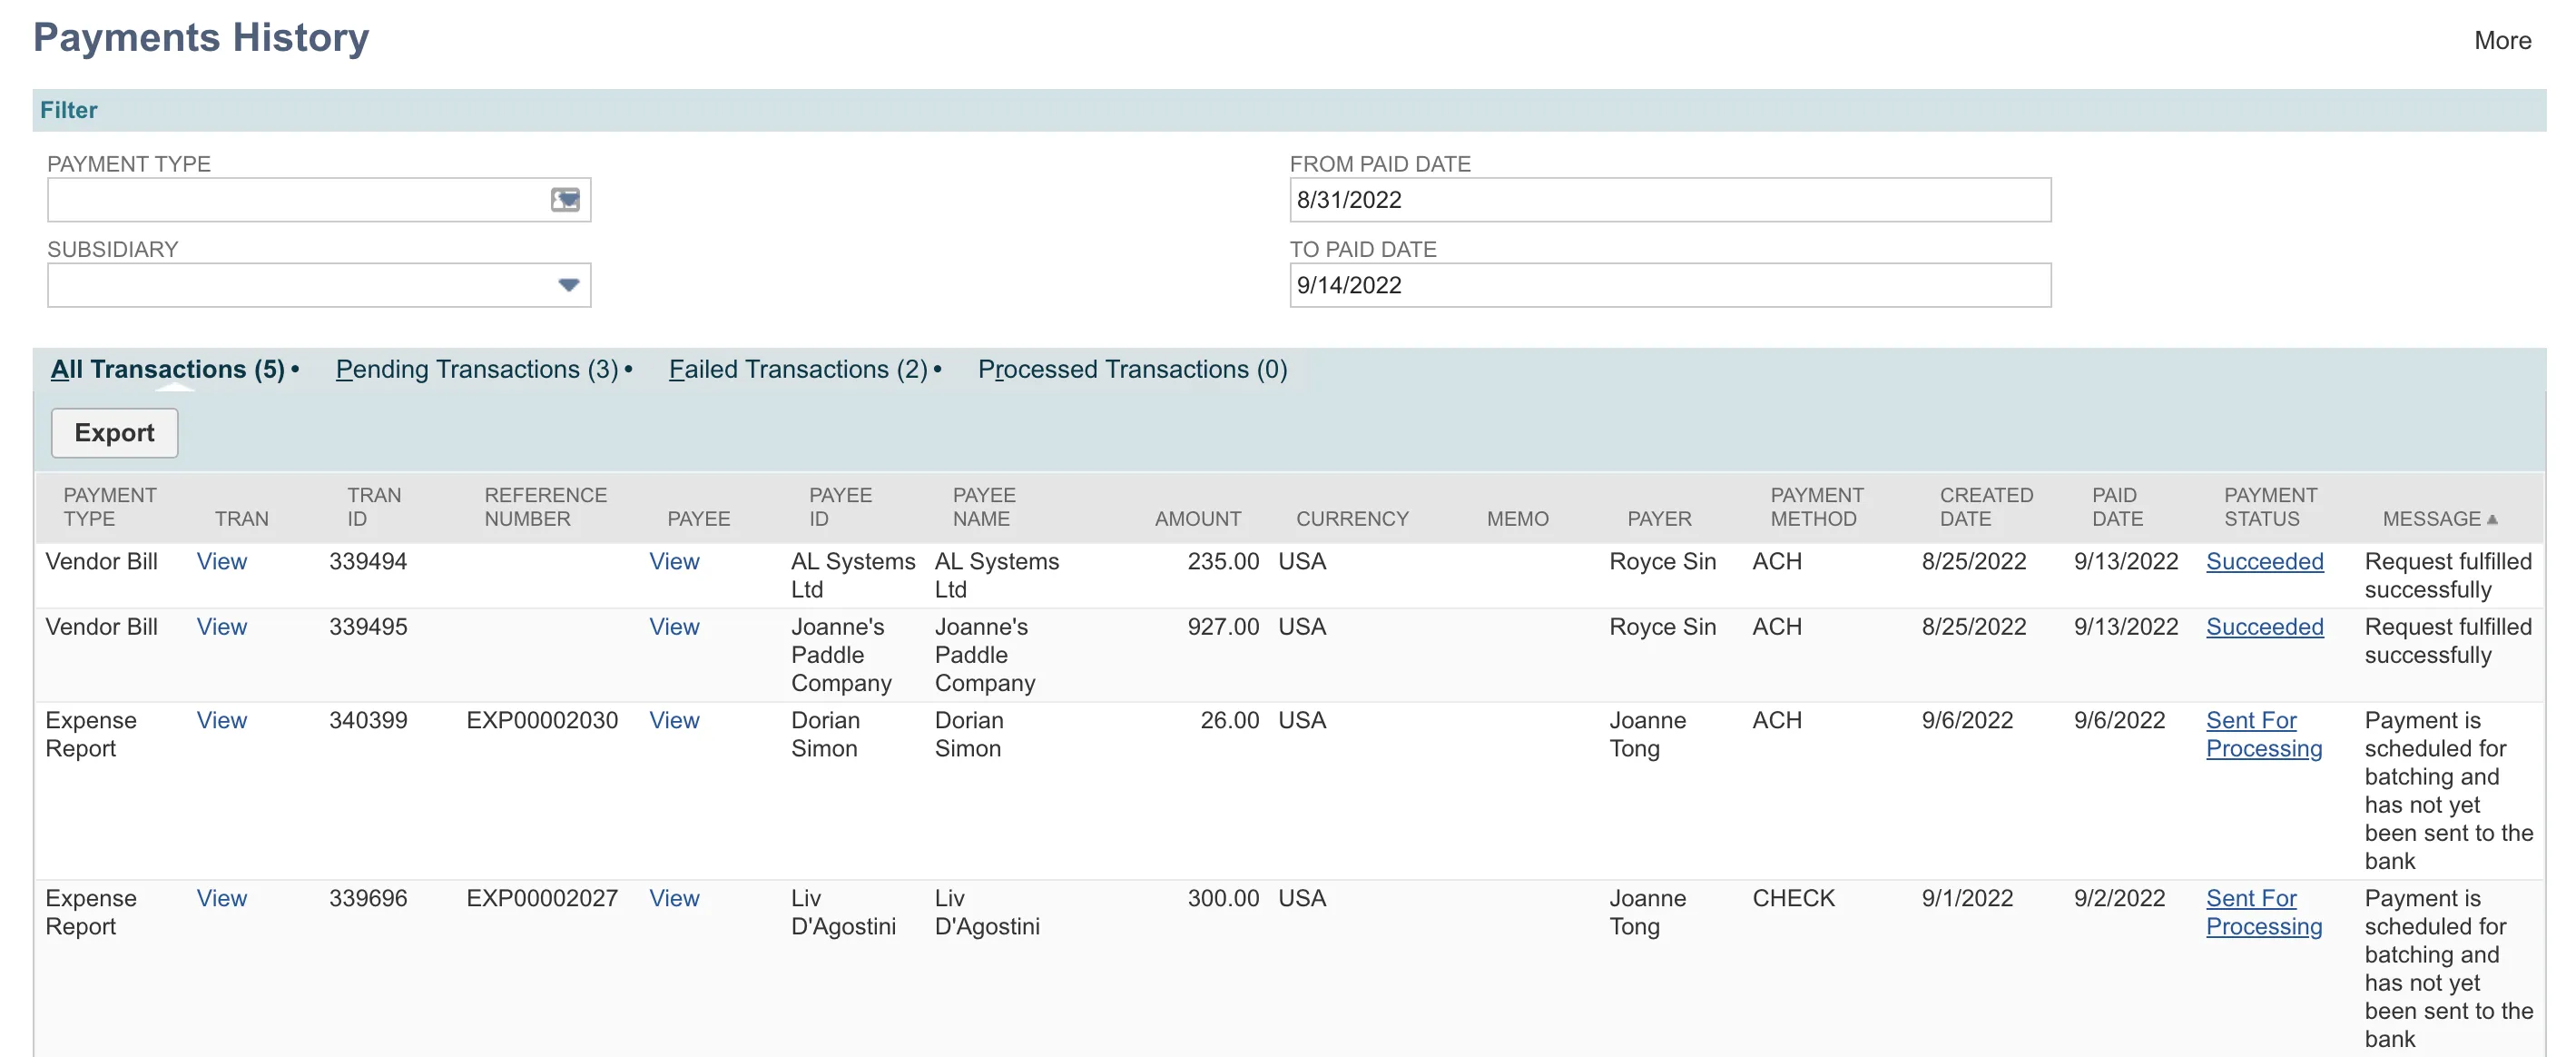
Go to Your Bank → Payments → History.
We recommend checking the Failed Bills tab after sending a payment to confirm the payment was successful.
Paying Grouped Bills
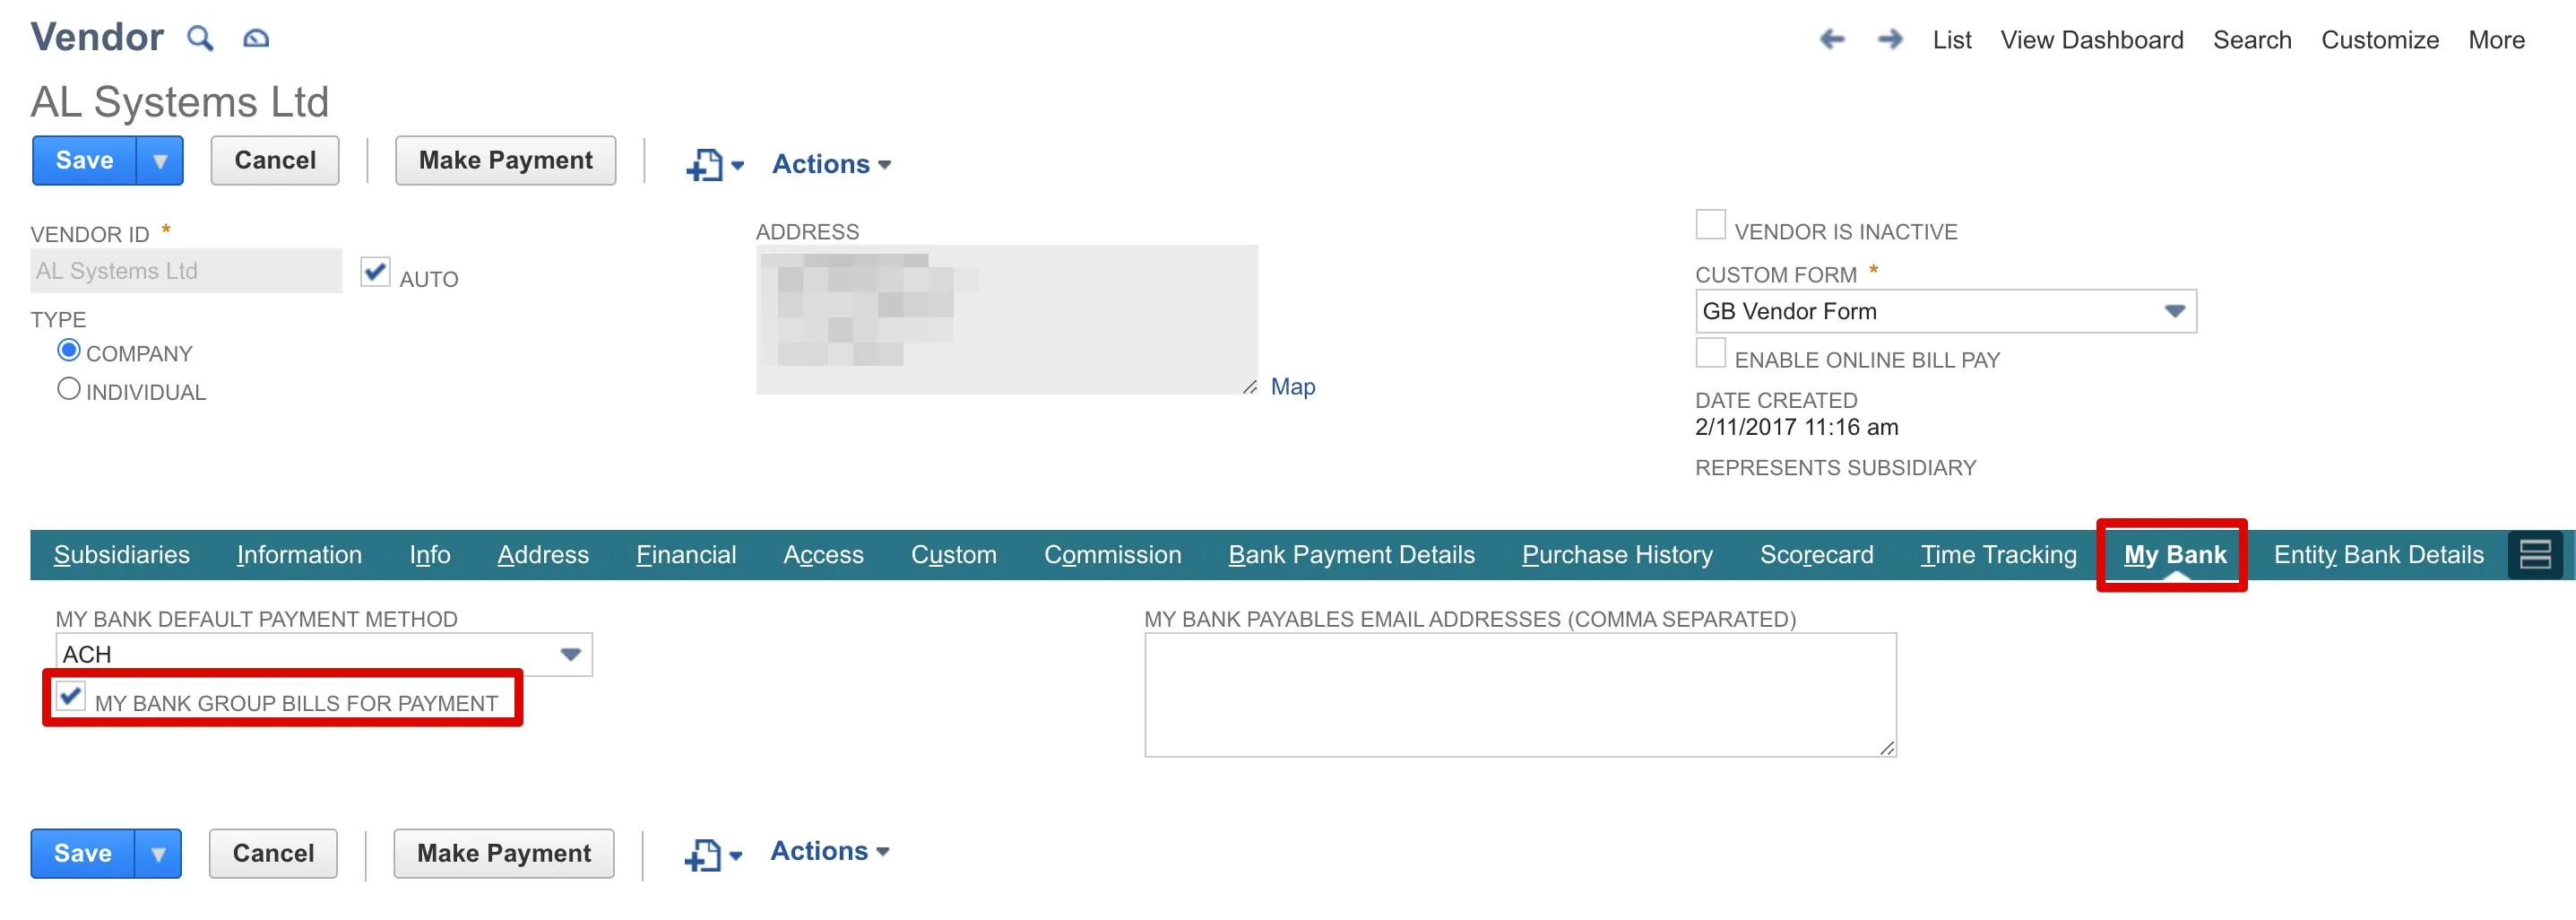
If you would like to make grouped bill payments, please ensure you have the GROUP BILLS FOR PAYMENT checkbox selected on the Vendor record. This can be done by navigating to the Vendor record, and selecting the sub-tab for your bank.
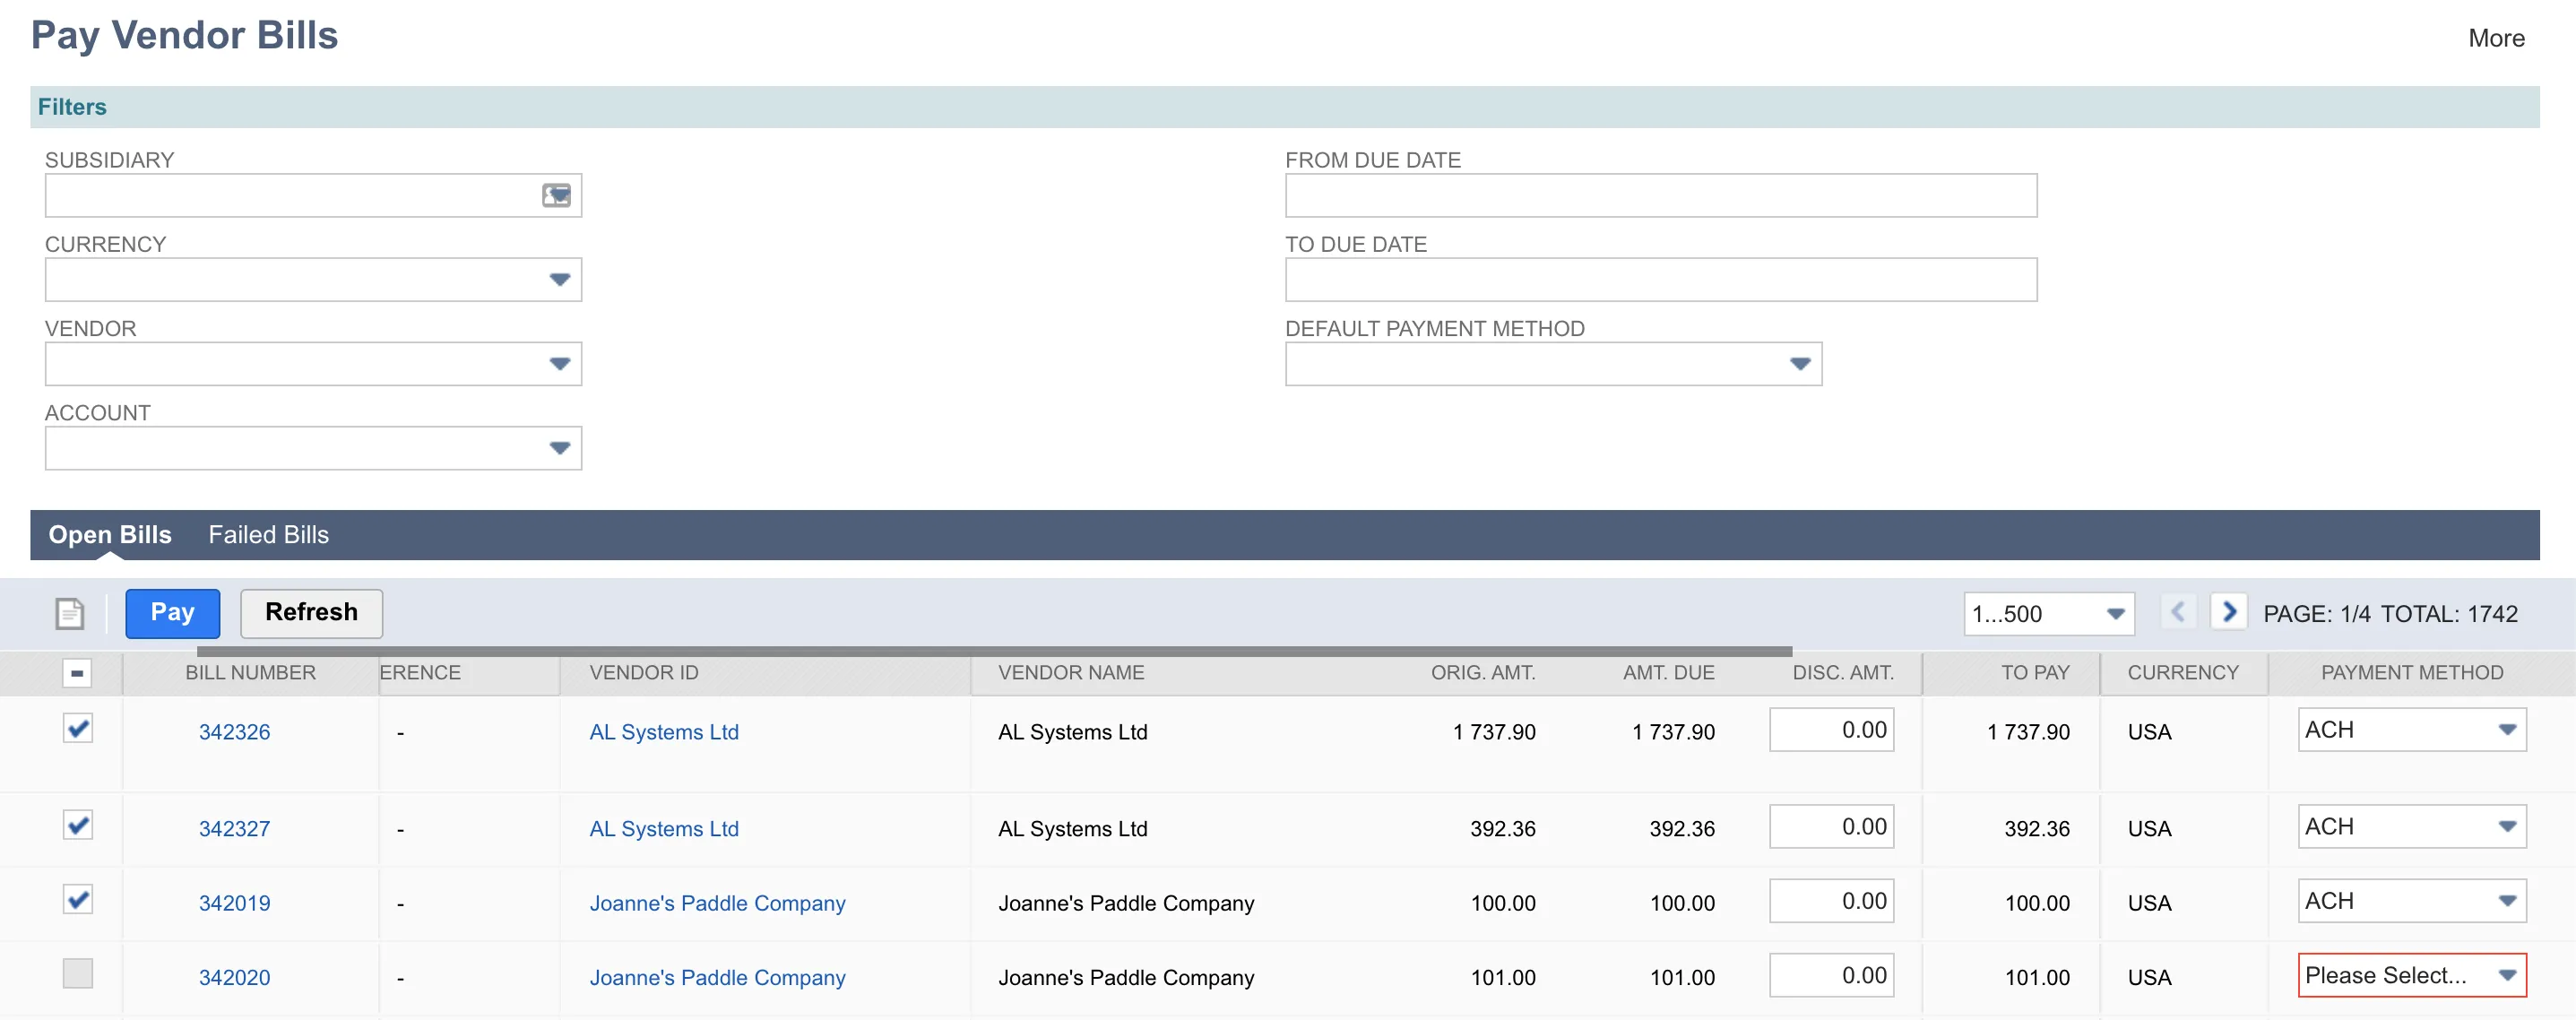
To make a grouped bill payment, navigate to Your Bank → Payments → Vendor Bills.
Select more than one bill for at least one Vendor with Grouped Bills enabled, and then select Pay.
The Confirm Payment window appears, and here you can select the Source Account and verify the number of bills vs. payments. With Grouped Payments enabled for a Vendor you are paying more than one bill to, the number of payments will always be less than the number of bills.
If everything looks good, select OK to transmit the payment.