Positive Pay (QBO)
The Positive Pay feature enables the secure transmission of payment details for in-house checks to your bank. It automatically extracts data from checks printed within QuickBooks Online, allowing you to submit a Positive Pay file for your entire check run in just a few steps. Follow this guide to get started.
Prerequisites
NOTE: To use this feature, the Positive Pay feature must be enabled for your account. Please speak with your sales officer to add this feature.
Getting Access to Positive Pay
To gain access to the Positive Pay feature, simply re-run the onboarding wizard so we can sync your check information. This only applies to active plugin users. If you are using the plugin for the first time, no further action is needed.
Print and Confirm a Check
The plugin only transmits checks that have been confirmed inside QuickBooks Online. To complete this essential native QuickBooks Online process, follow the steps below.
Open the Pay Bills Window
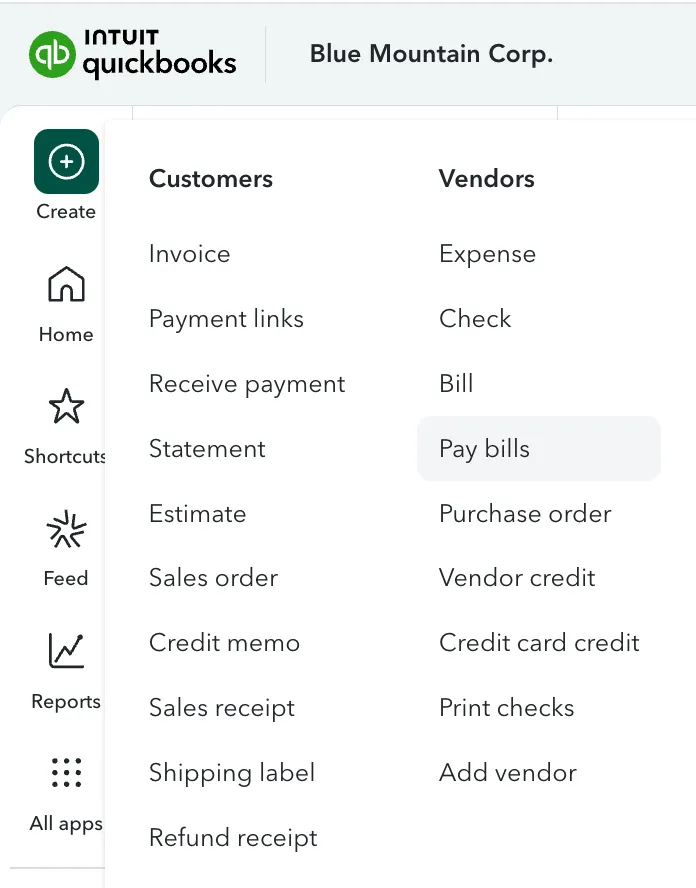
Click the + New button in the top left corner of your dashboard, then select Pay Bills under the Vendors column.
Select Your Bank Account and Date
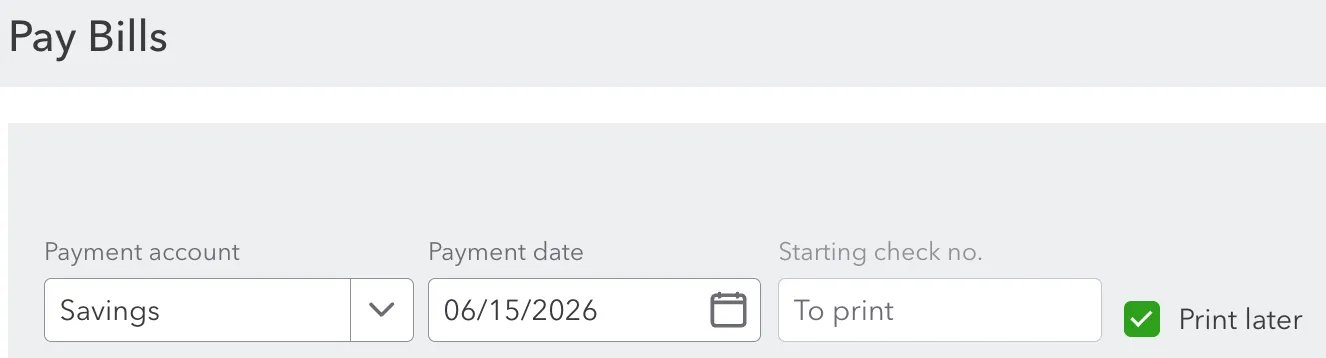
From the Payment account dropdown menu, select the bank account you are drawing funds from. Set the Payment date to the date you want on the check.
Configure Check Processing Method
- For batch computer printing: Select the Print later checkbox. The Starting check no. field will be suppressed.
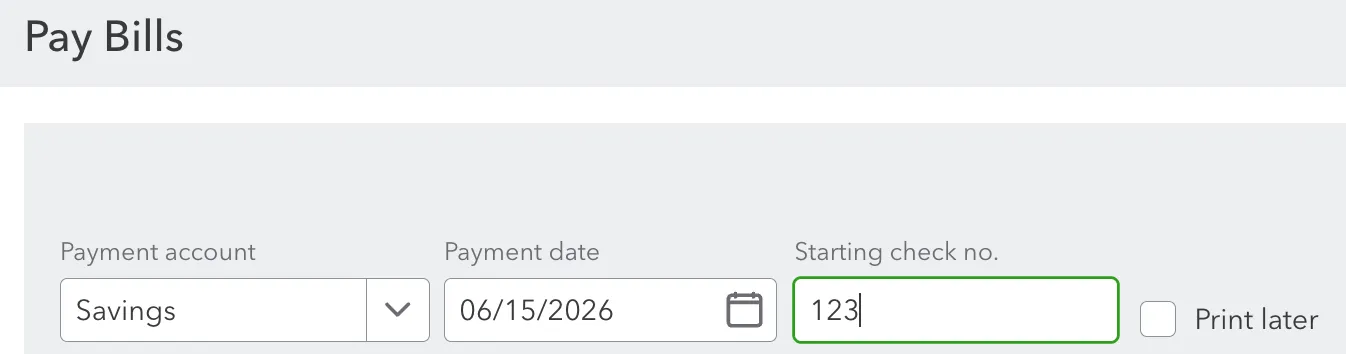
- For manual handwritten checks: Deselect the Print later checkbox, then enter the exact sequential check number from your checkbook into the Starting check no. field.
IMPORTANT: Only check numbers containing digits can be synced; letters and special characters are not supported.
Select the Bill(s) to Pay
In the list on the Pay Bills screen, check the box to the left of each bill you want to pay.
Confirm Payment Amount
Once you check a bill, QuickBooks automatically fills in the payment amount as the full open balance for that bill. You can leave it as-is, or edit it if you only want to make a partial payment.
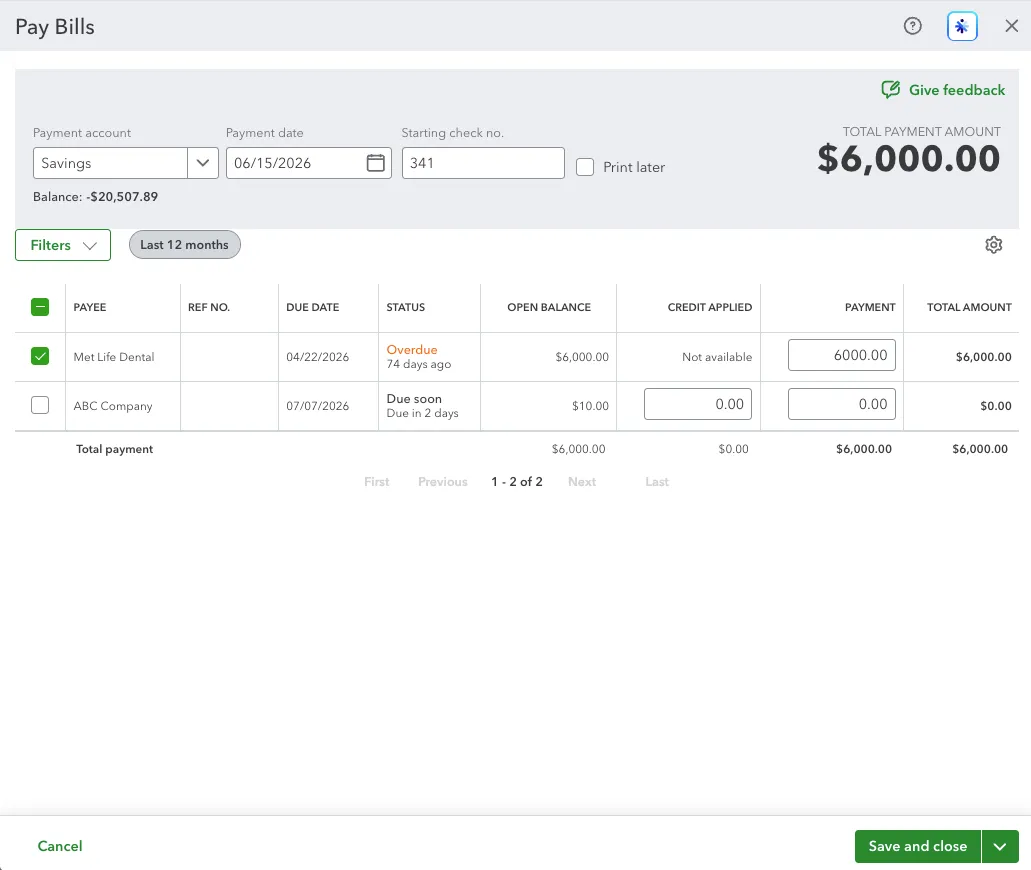
- Click Save and close if you're writing and sending the check manually and just want to record the payment.
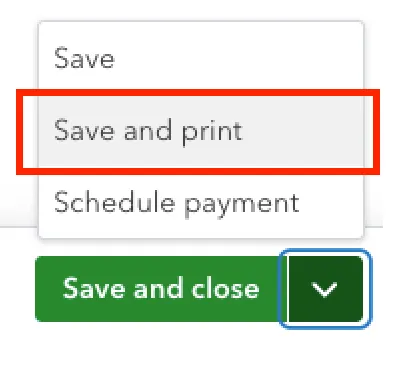
- Click Save and print if you want to print a physical check now.
If you clicked Save and print, QuickBooks takes you to the Print Checks screen. Check the box next to the check(s), confirm the starting check number, and click Preview and print.
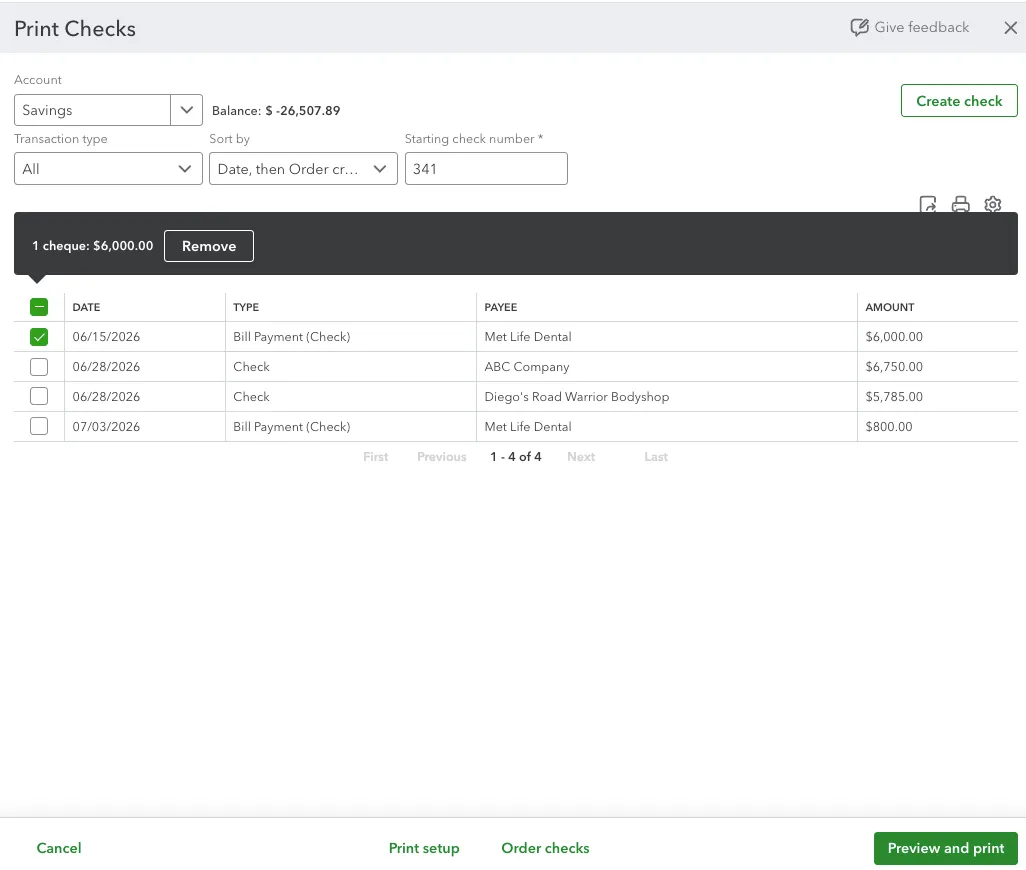
NOTE: If you need to add a memo to the check, click directly on the bill payment (check), scroll to the Memo field and enter your memo.
Save/close that check, then continue with Preview and print as normal.
PDF Preview
After clicking Preview and print:
- A PDF preview of the check(s) opens so you can review them.
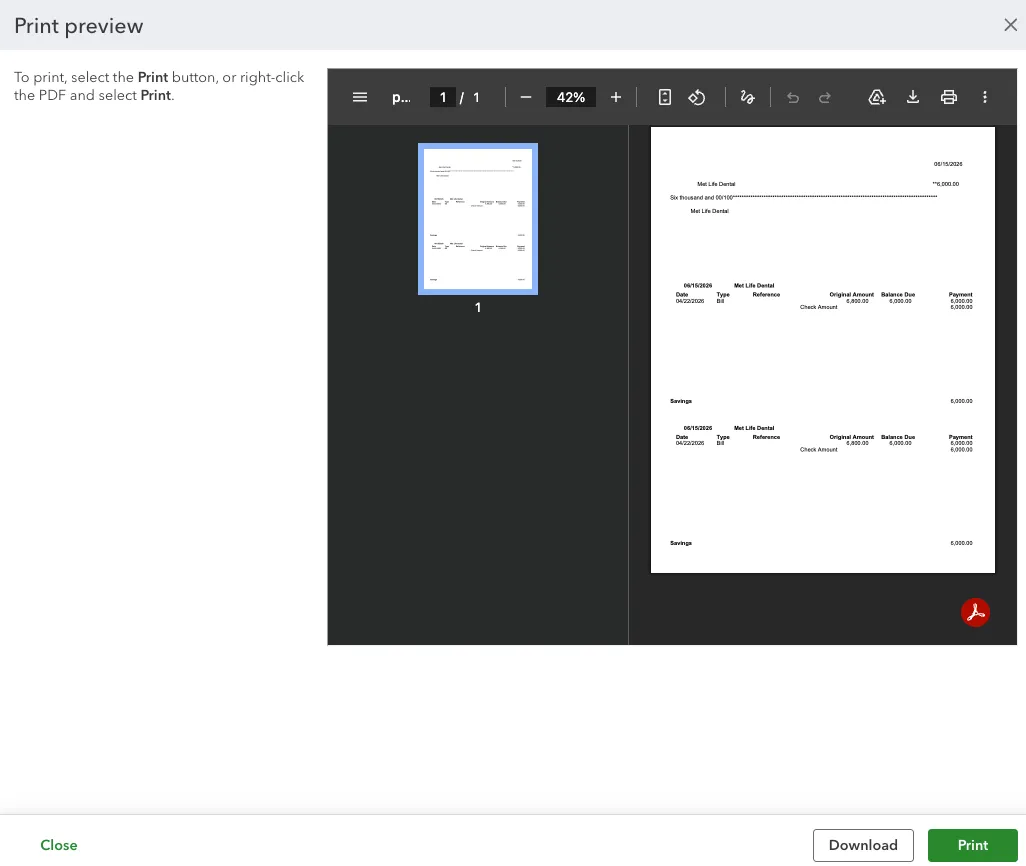
- Click Print to send them to your printer.
- A pop-up asks "Did your checks print OK?" — choose one:
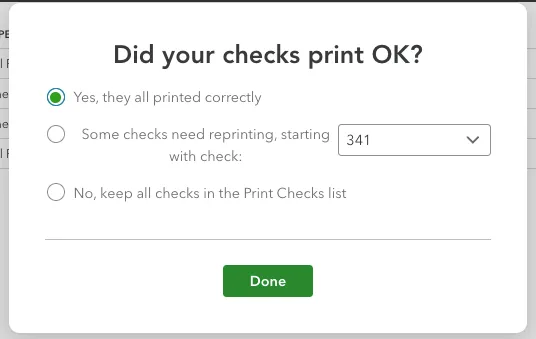
- Yes, they all printed correctly → those checks are removed from the print queue.
- Some checks need reprinting, starting with check [#] → enter where the errors began.
- No, keep all checks in the list → they stay in the queue to retry.
- Click Done to close the window.
Transmit Positive Pay
Once the check(s) have been printed and posted, they will be available for positive pay transmission in FISPAN Sync.
Reviewing the Checks Dashboard
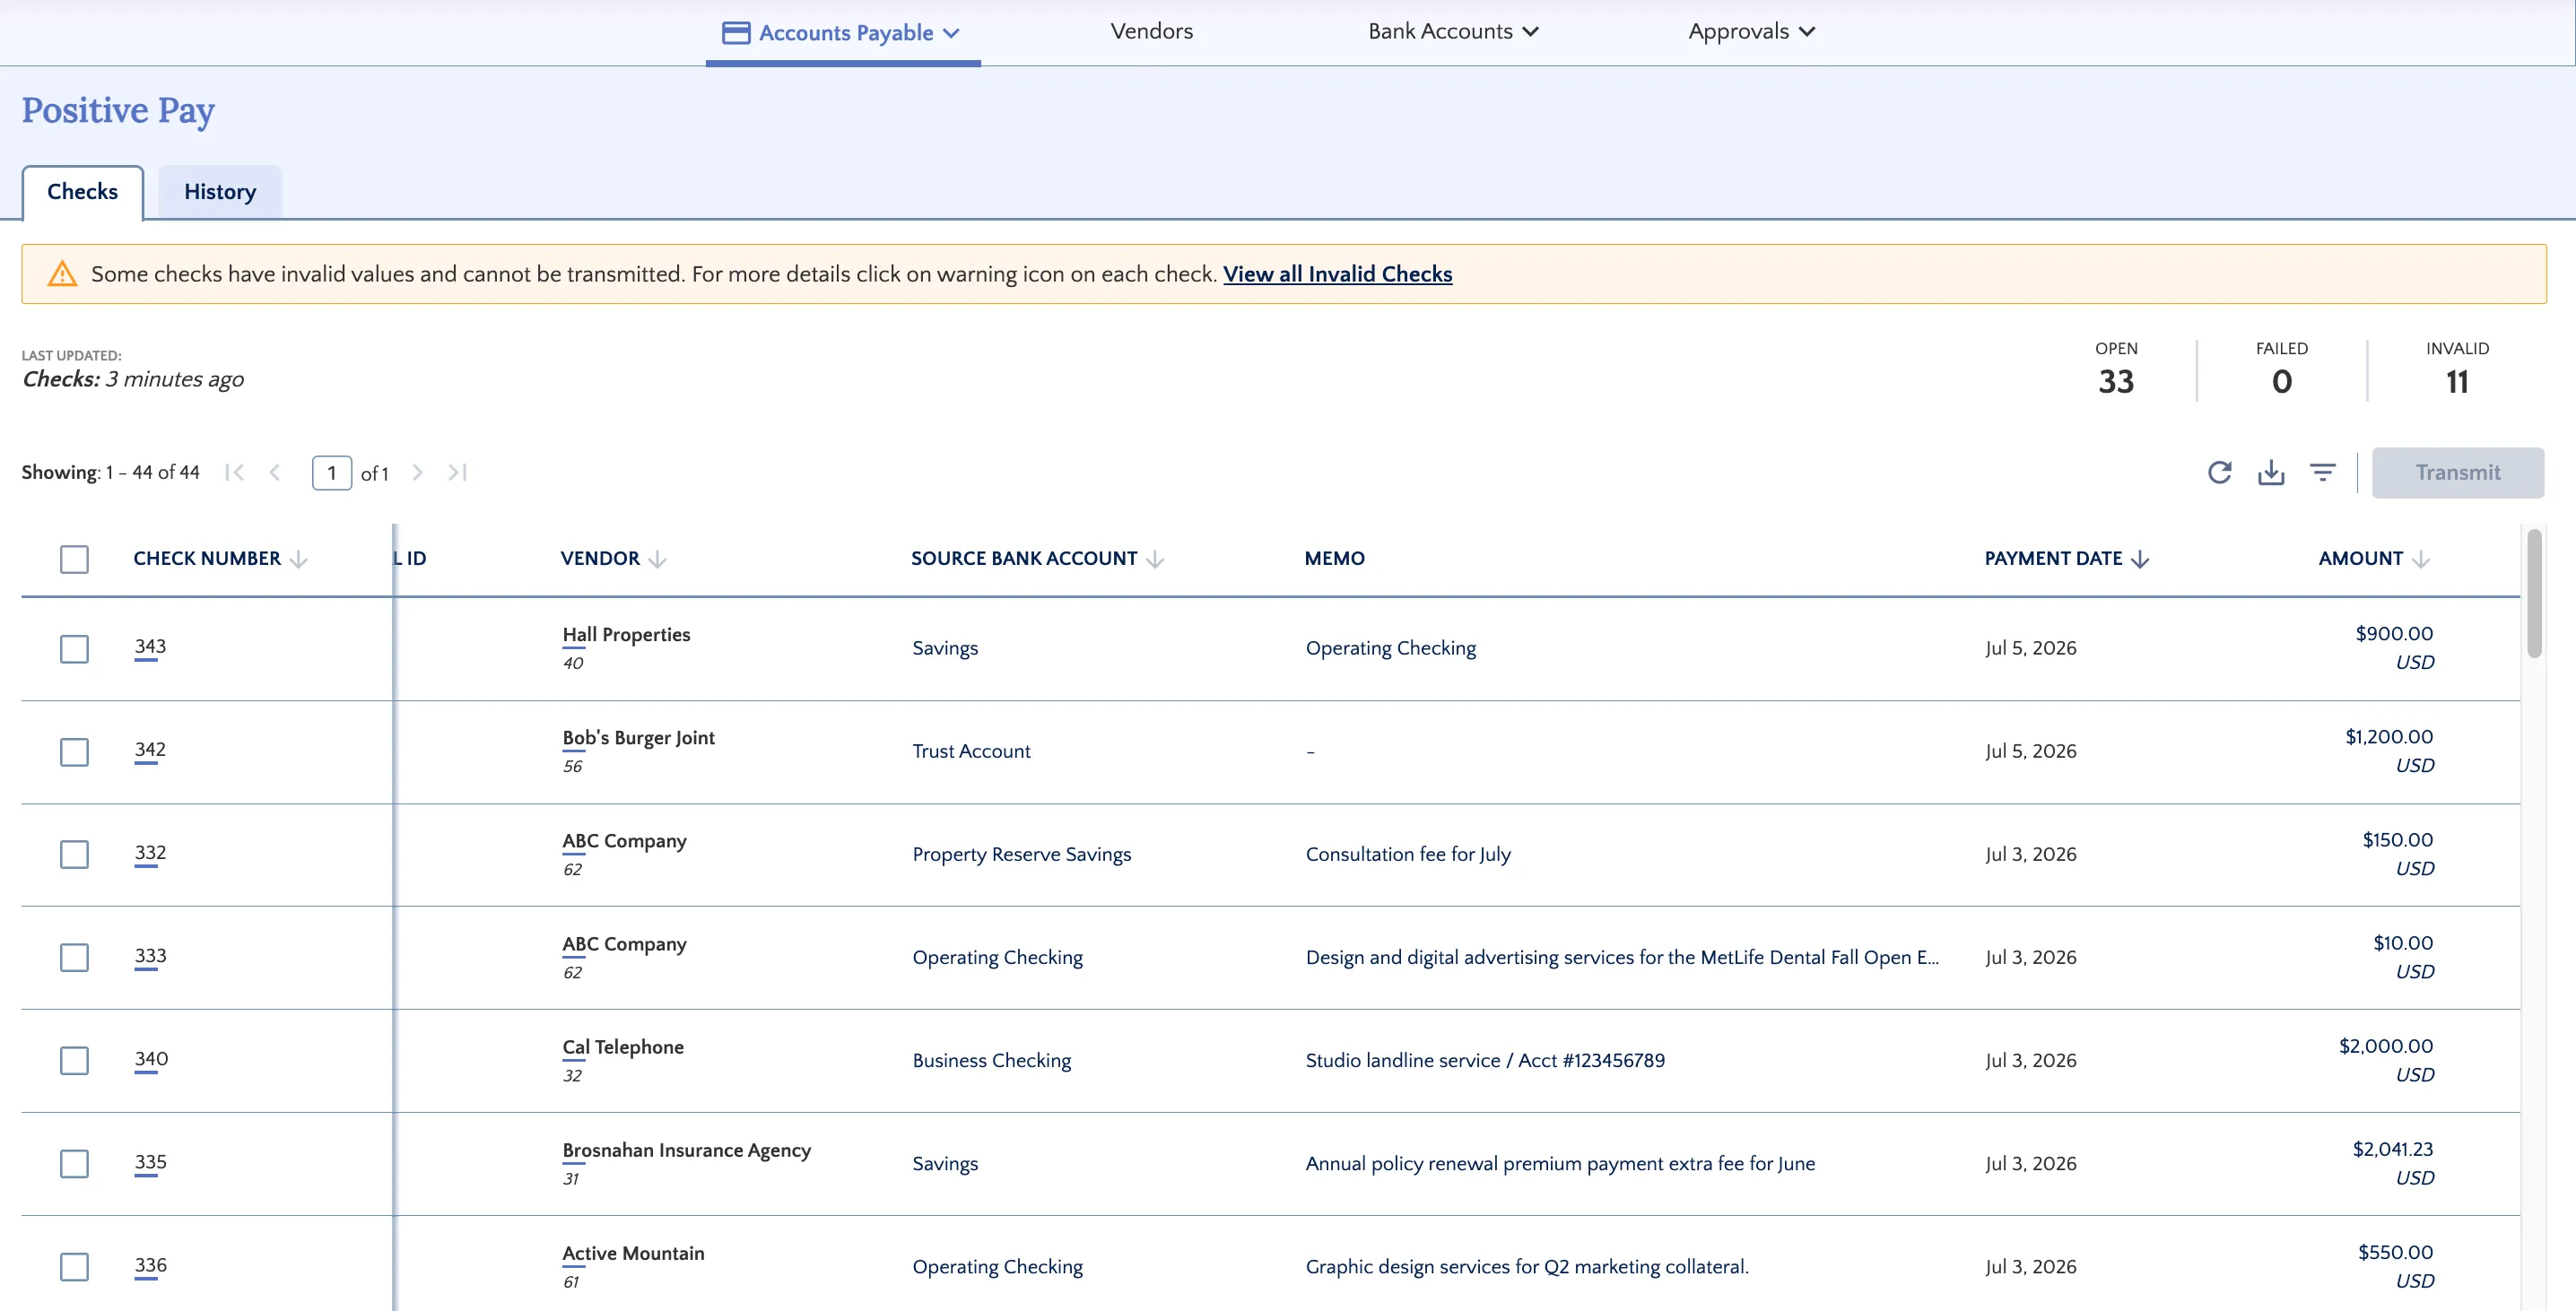
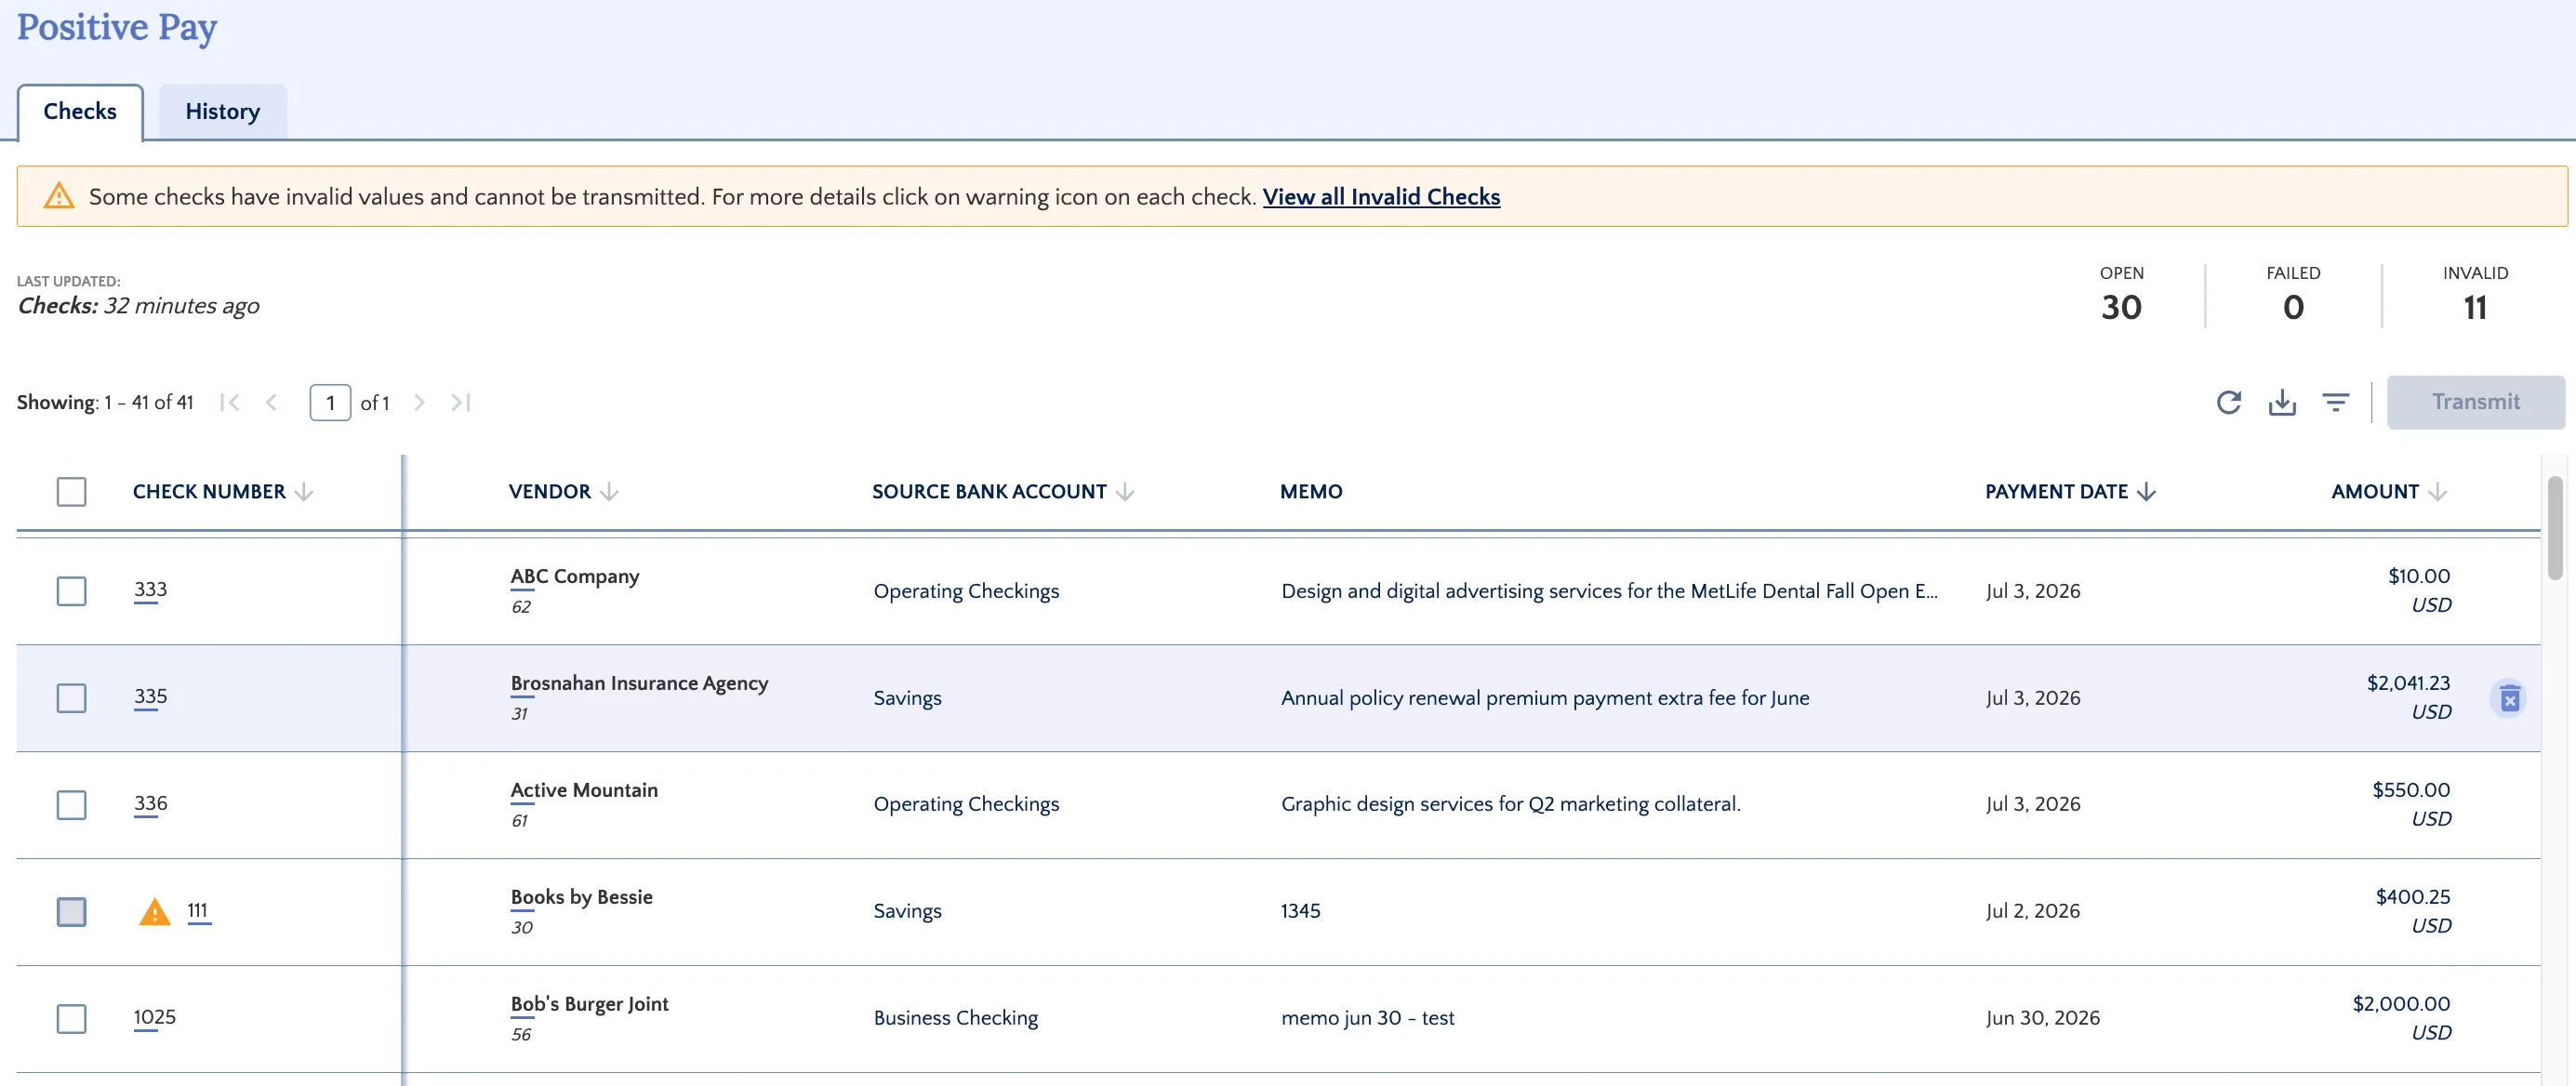
The Checks tab provides a real-time summary of your transmissible data:
- Dashboard Summary: View the total count of Open, Failed, and Invalid checks at a glance.
- Alert Banners: High-priority notifications will appear if checks fail to process or contain invalid checks. Click View all Failed Checks or View Invalid Checks to filter the list immediately.
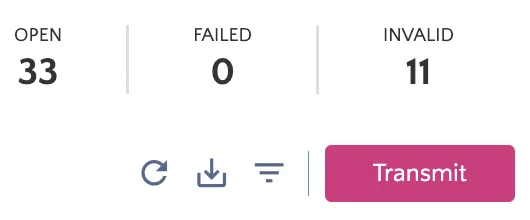
- Action Icons: Use the Refresh icon to update the list, the Download icon to export a CSV, or the Filter icon to narrow your view.
Follow these steps to transmit Positive Pay in the plugin.
Transmit Positive Pay
From the FISPAN Sync, go to the Positive Pay page.
Select Checks
In the Checks tab, use the individual checkboxes to select specific payments, or use the header checkbox to select all available Open and Failed checks.
As you select items, a blue status bar will appear showing the total number of Checks Selected and the Total Vendors involved.
Initiate Transmission
Click the Transmit button in the top right corner of the dashboard.
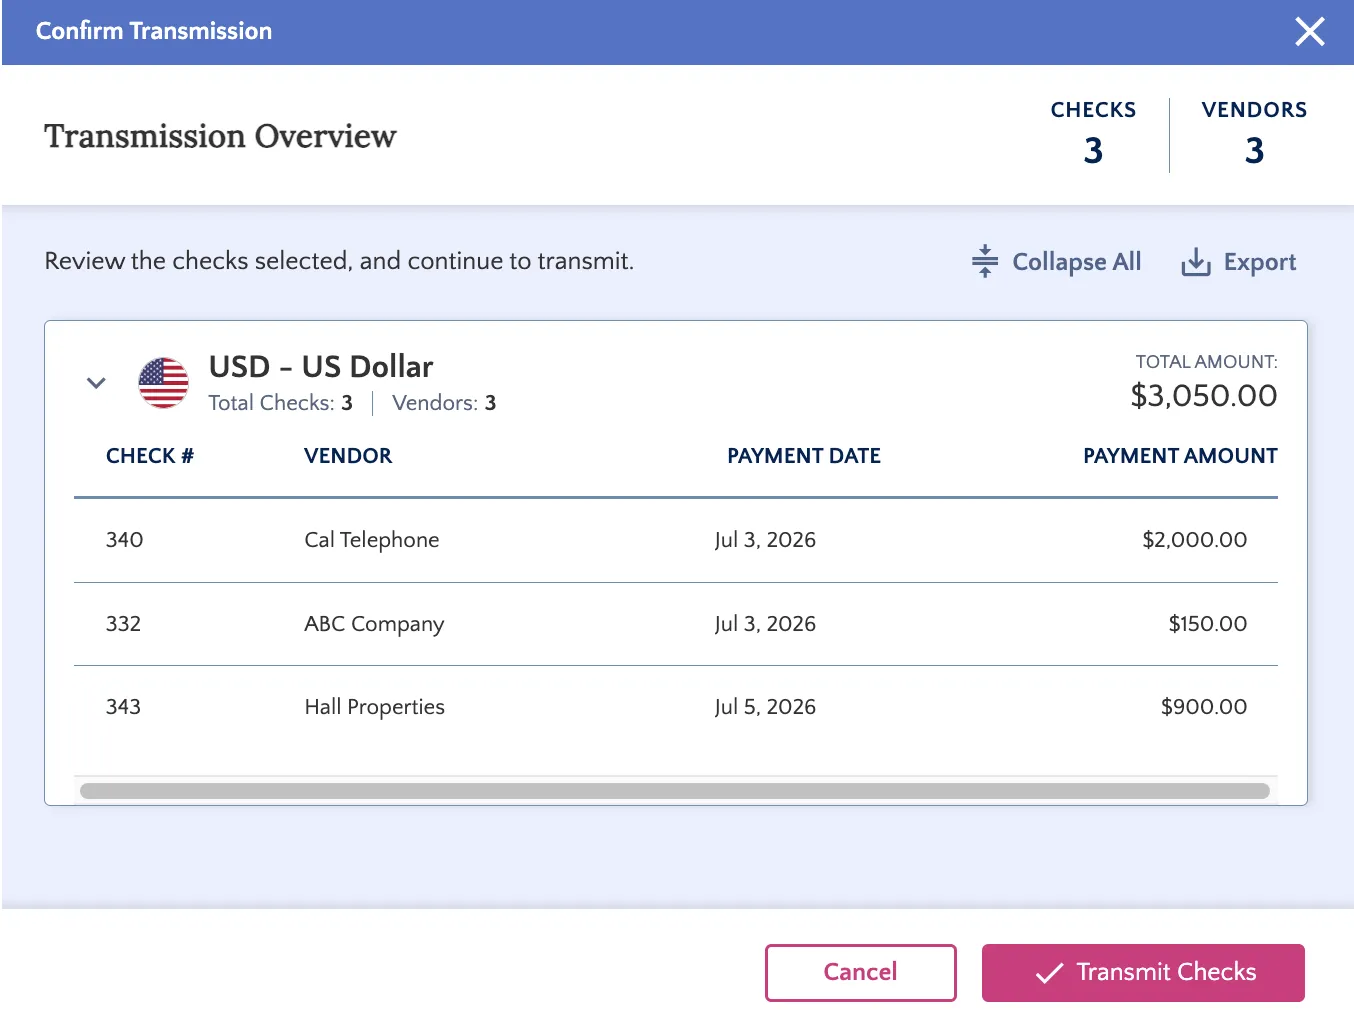
Review Transmission Overview
A summary window will appear, automatically grouping your checks by currency.
Review the Total Amount, Check Count, and Vendor Count for each currency group.
You can click on the Export button on the top-right of the dialog to export this view of the transmission.
Finalize and Confirm Transmit
Click Transmit Checks to securely transmit the Positive Pay file to the bank.
A "Checks Successfully Transmitted!" window will appear, confirming the final counts. You can click the Positive Pay History link in this window to track the real-time status of your request.
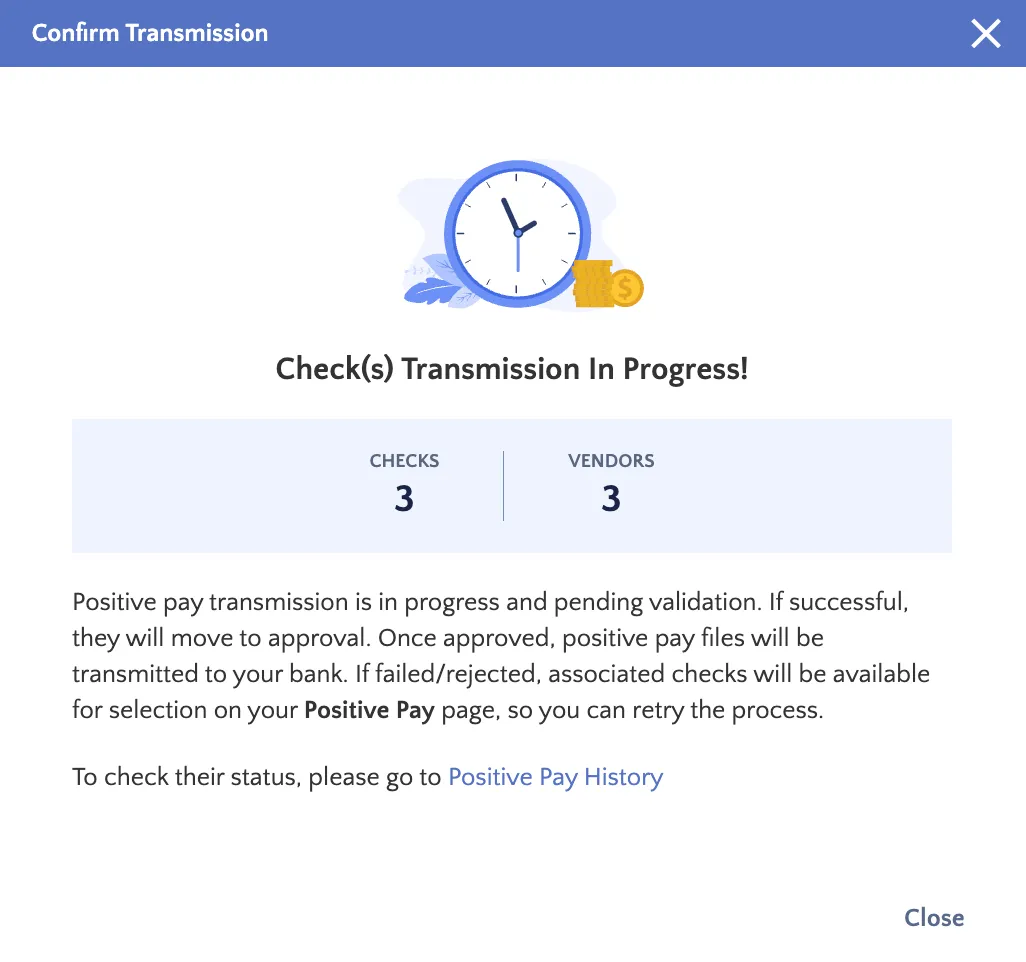
NOTE: If your organization has Payment Approvals enabled and a rule is configured for Positive Pay, the transaction will move to the Approvals module. It must be approved there before being sent to the bank. If rejected, the checks return to the Positive Pay page for re-transmission.
Review History
To audit past activity or check the status of a current transmission, navigate to the History tab within the Positive Pay page.
View the real-time status of each transmission: Completed, Failed, or In Progress.
Each entry provides a Status Message with specific feedback from the bank (e.g., "Completed", "Processing", "Waiting for Approval").
Track who initiated the transmission (Transmitted By) and the exact date and time it was processed. Search & Filter: Use the Show Filters icon to locate specific check numbers or vendors within your history.
Managing Exceptions
Invalid Checks
A check is flagged as Invalid (orange warning icon) if the respective bank account of the payment is not mapped within the Portal. These are payments associated with a bank account that has not yet been matched within the bank plugin in the Portal.
You must log in to the Portal and follow the Account Mapping steps to ensure the specific bank account used in Business Central is correctly matched to the corresponding account in the plugin.
Deleting Checks from the Checks Page
If a check appears that should not be transmitted, you can remove it from the plugin view.
Locate Check
Find the check in the table and click the Garbage icon on the right.
Confirm Deletion
Select Yes, Delete in the pop-up.

NOTE: This only removes the check from the Positive Pay page in the plugin; the record remains active in QuickBooks Online.