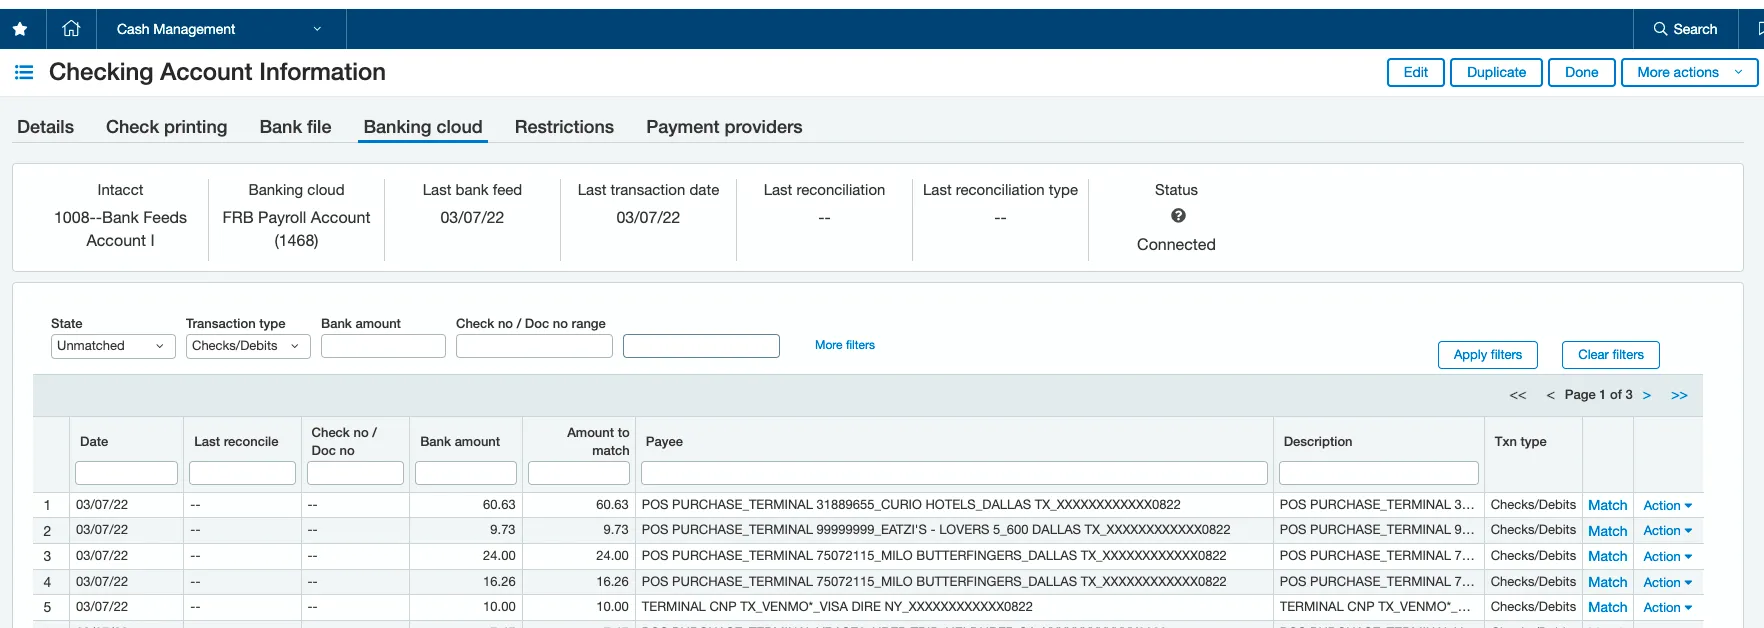
Step 18: Bank Feeds Setup
By enabling Bank Feeds for the plugin, your bank establishes a reliable and secure flow of transactions from your bank into Sage Intacct’s Reconciliation module.
Bank transactions that settled the previous day are imported each morning. For example, transactions that are settled on Tuesday will be pushed into Sage Intacct early on Wednesday morning. The exact timing can vary depending on when your bank sends the first transaction file (PDR).
Step 1: Locate the Account
Go to Cash Management → Checking.
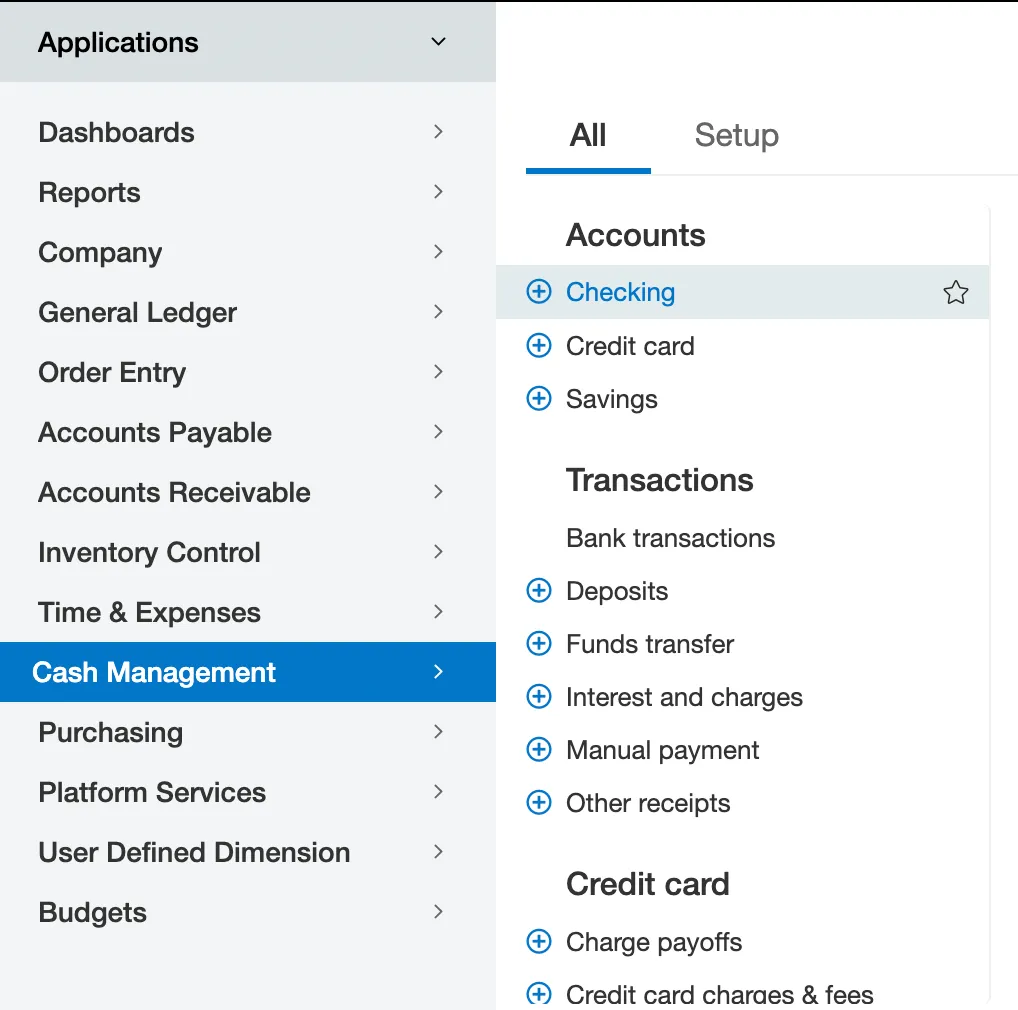
On the Checking page, select Edit on the account you wish to turn on Bank Feeds for.

Step 2: Activate Bank Feeds
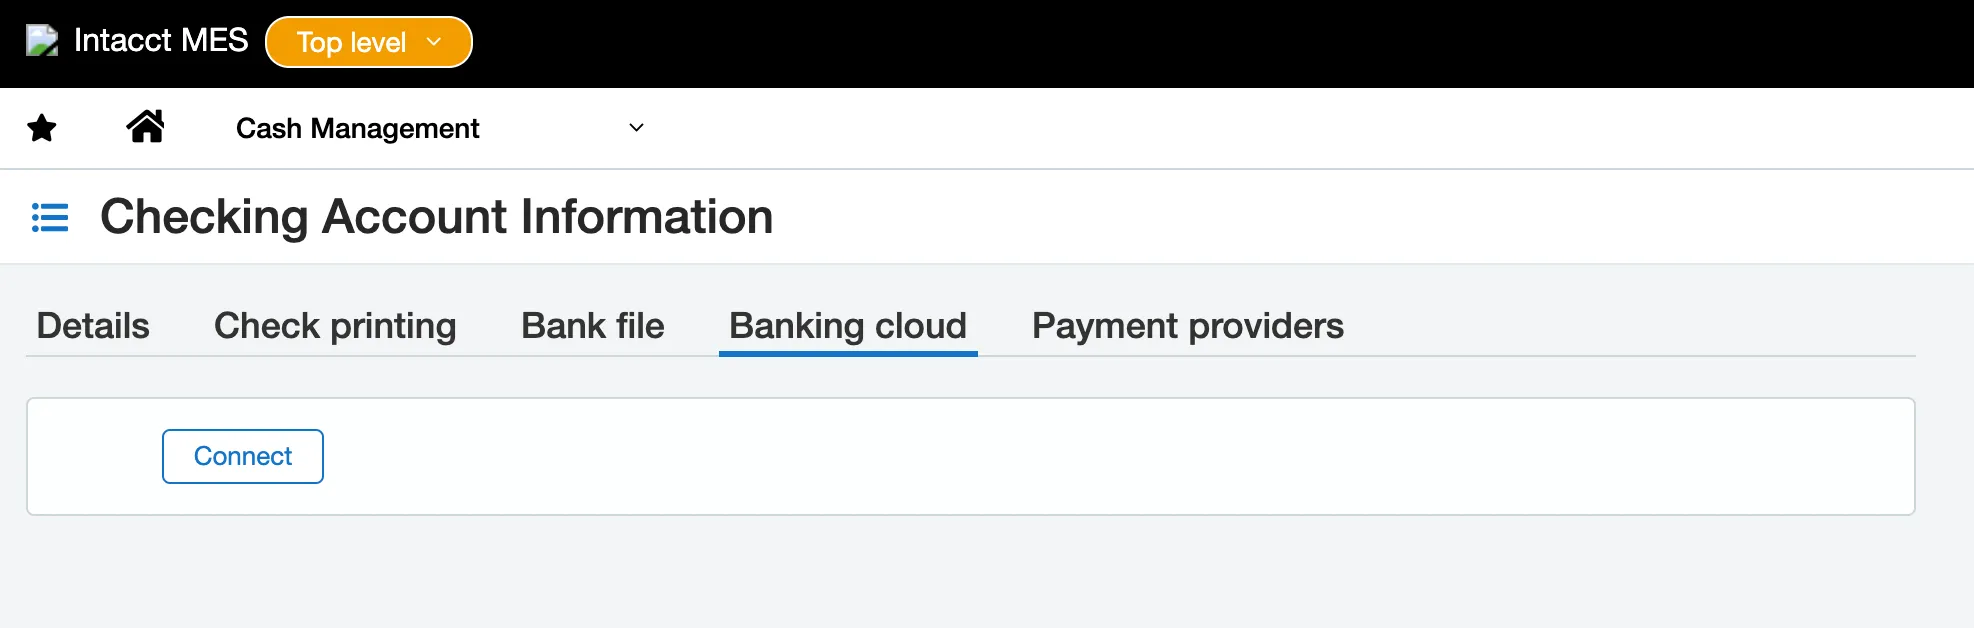
Under the Banking Cloud tab, click Connect.
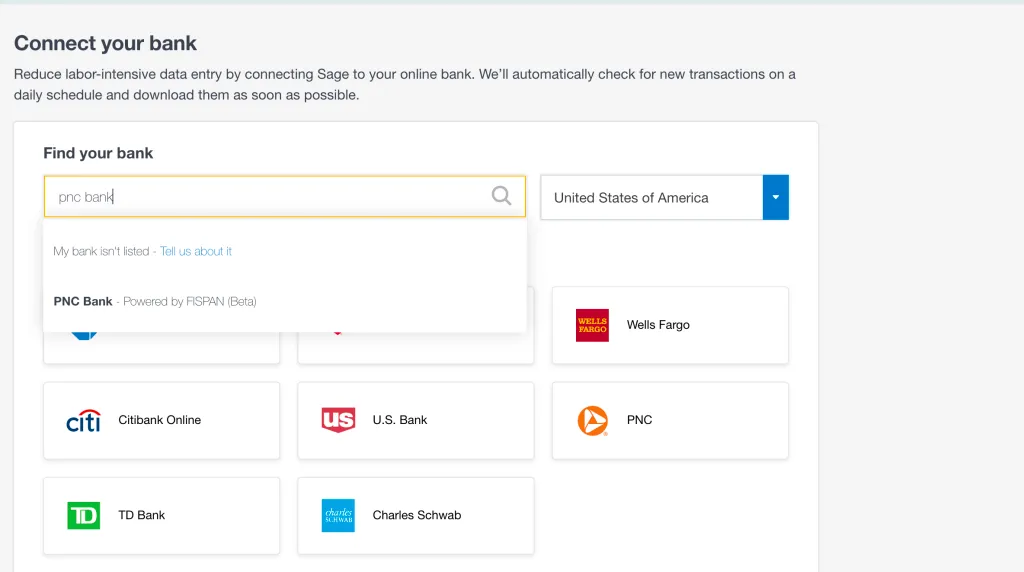
In the search bar search "PNC Bank"
Select PNC Bank - Powered by FISPAN.
Agree to the terms and conditions and select Continue.
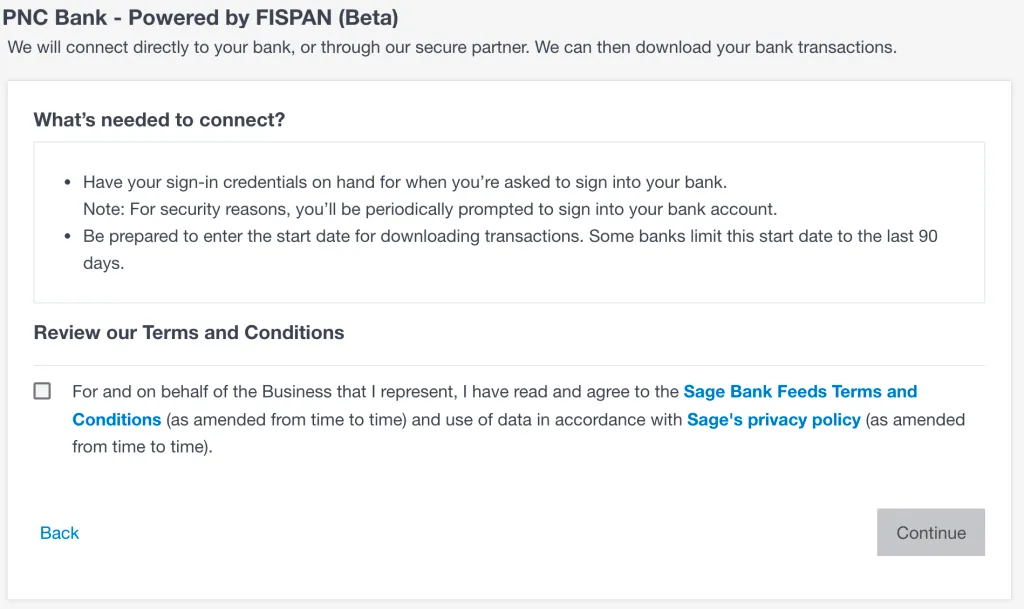
Select Continue.
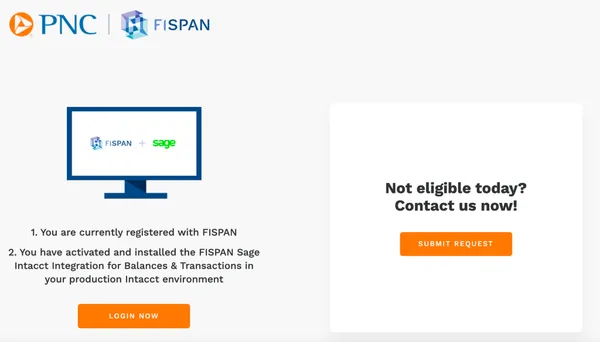
You will be redirected to a landing page that will require you to sign in to the FISPAN Wizard.
Select Login Now.
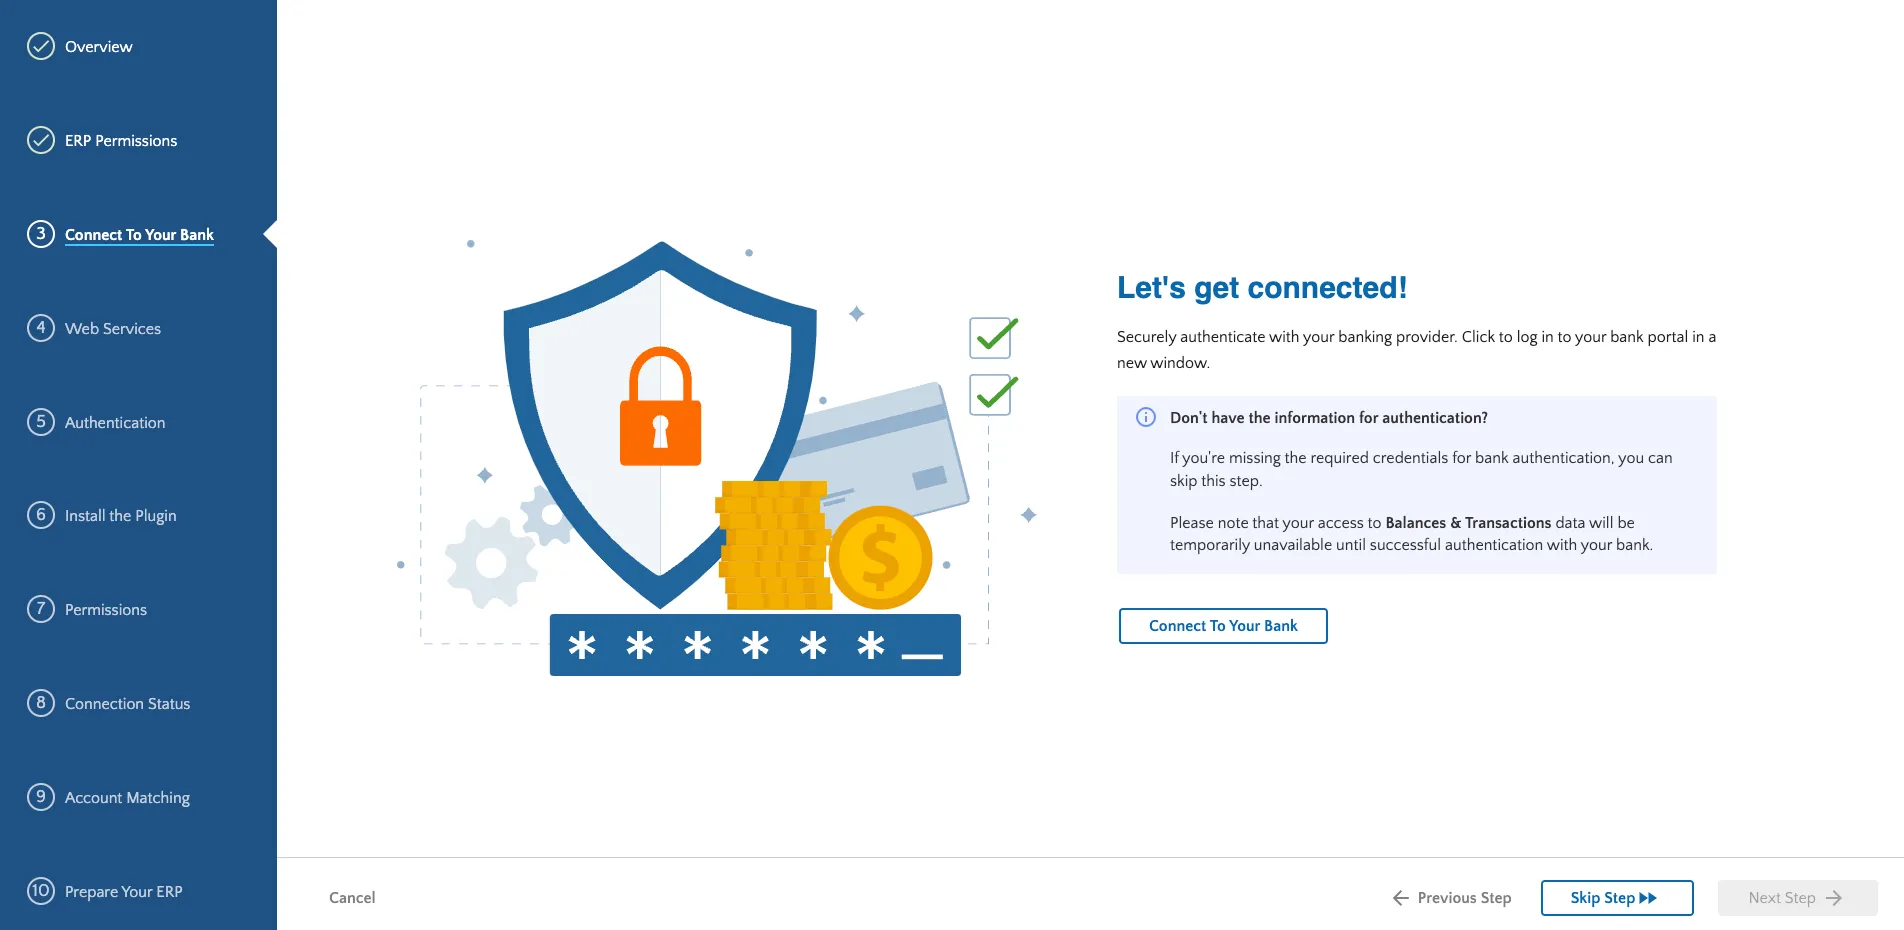
Click on Connect to Bank, it will open a new window for you to log into PNC.
Log into the PNC Portal with the credentials supplied by PNC.
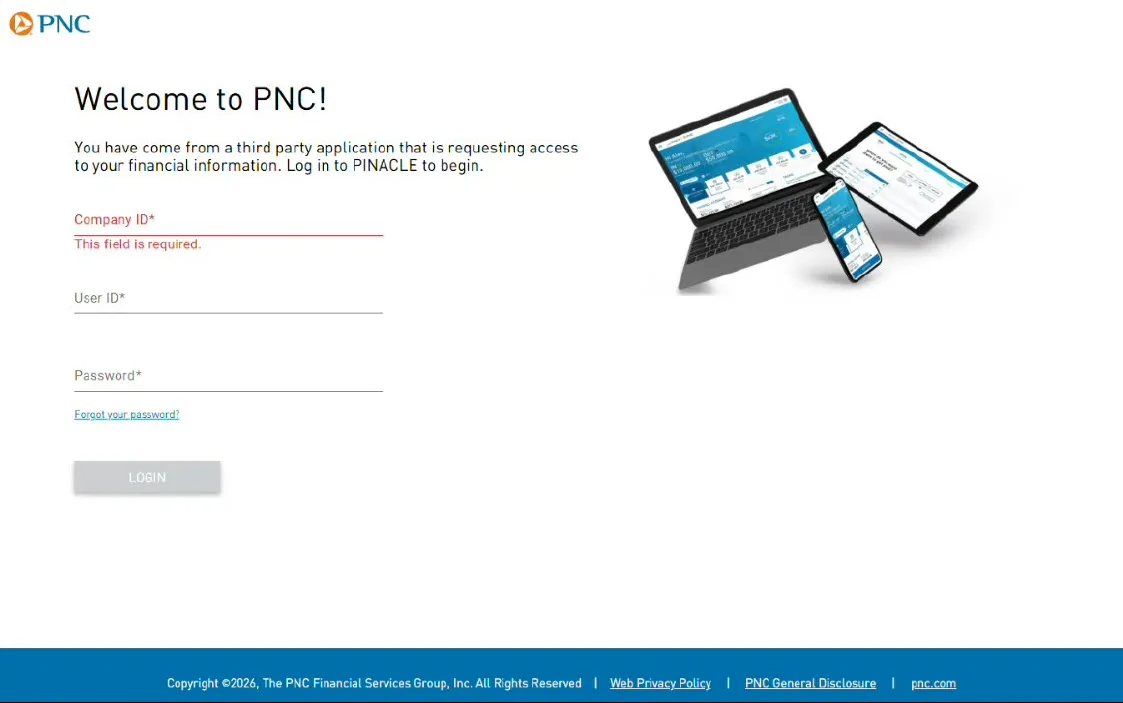
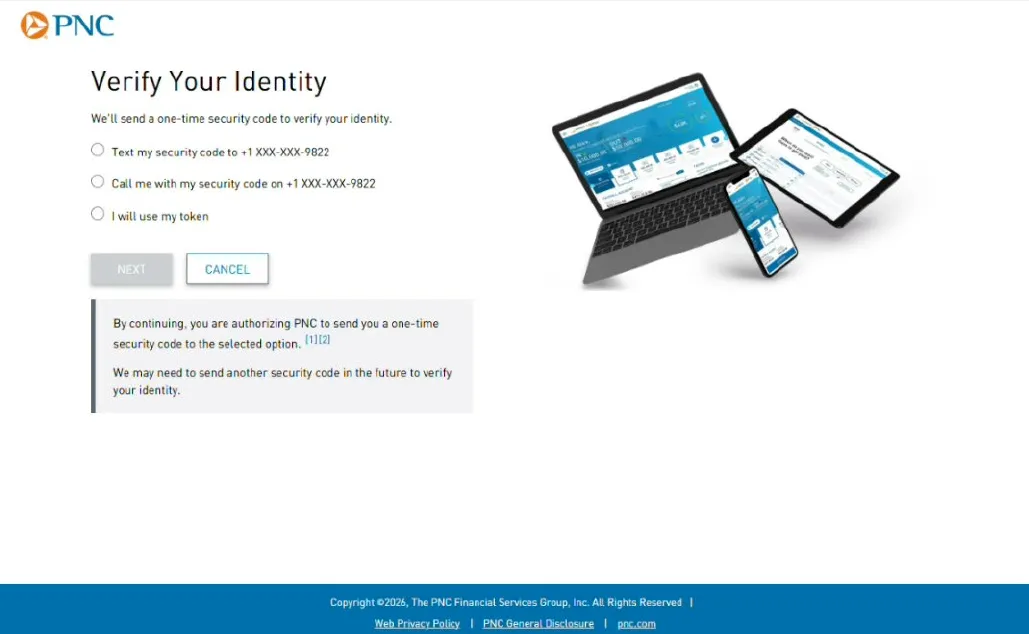
Once logged in, you must verify your identity. This can be done through any of three different methods:
- Text
- Phone call
- Token
Select a method, and then click Next.
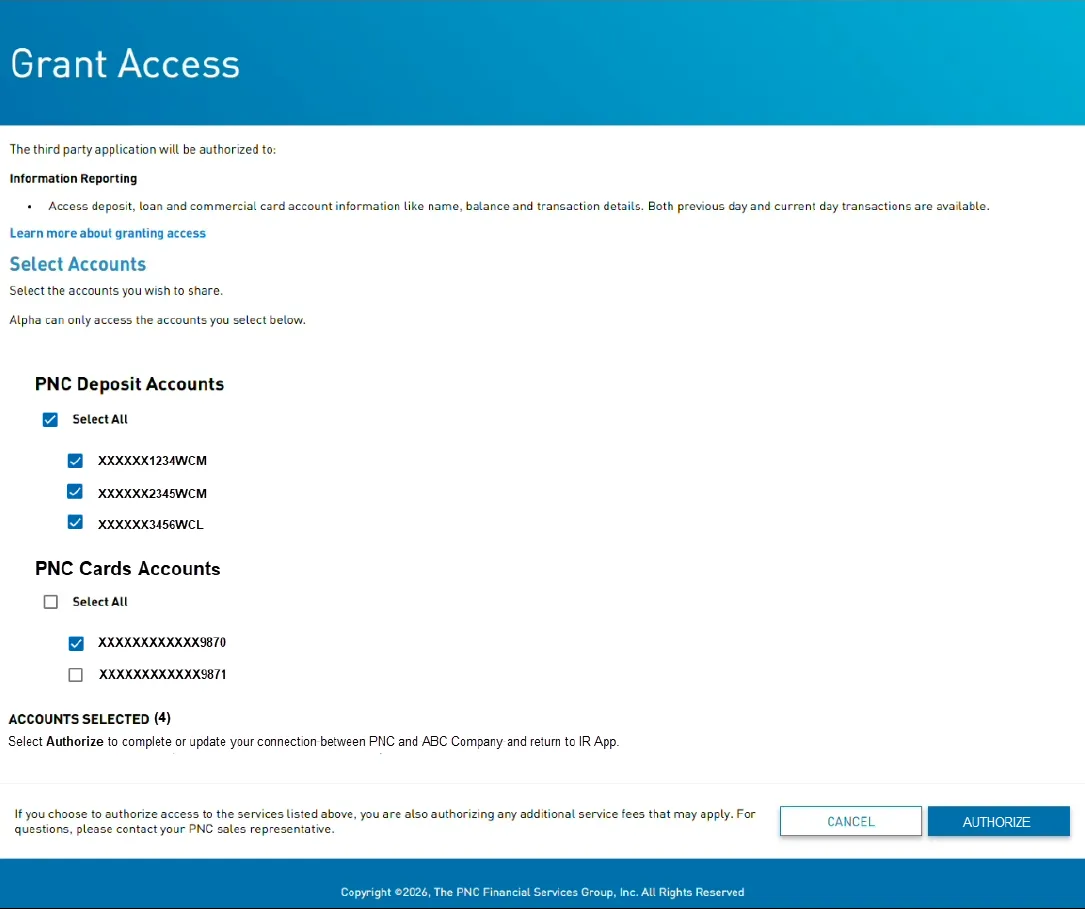
Once you are authenticated, a list of PNC accounts will appear. Check the box(es) next to the account numbers that were included on your enrollment form. You can also click the Select All checkbox to select all accounts available. Then click Authorize.
The window will close after a few moments, and you can then press the Next Step button in the installation wizard.
Step 3: Match Account for Bank Feeds
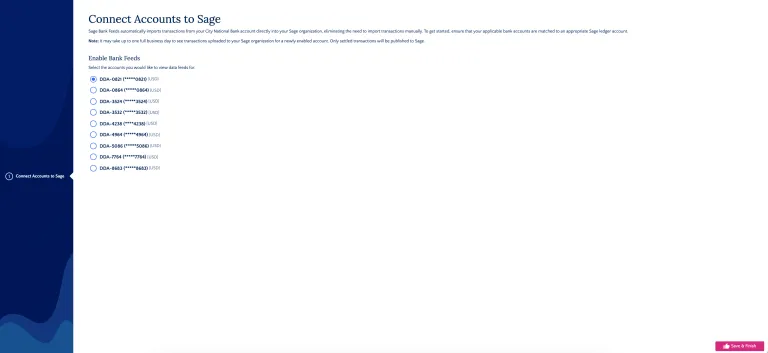
After logging in, select the account from Step 1, then select Save and Finish. You will automatically be redirected back to Sage.
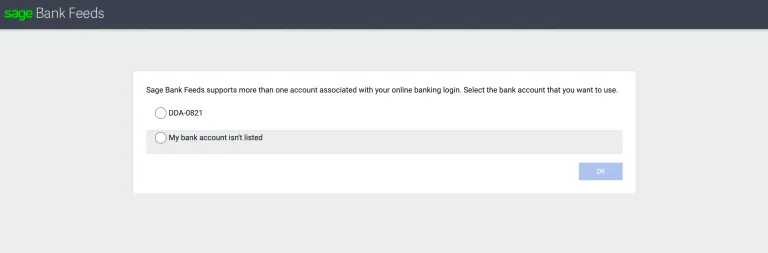
After being redirected back to Sage, select the same account and click OK.
Choose the date you want transactions to start from.
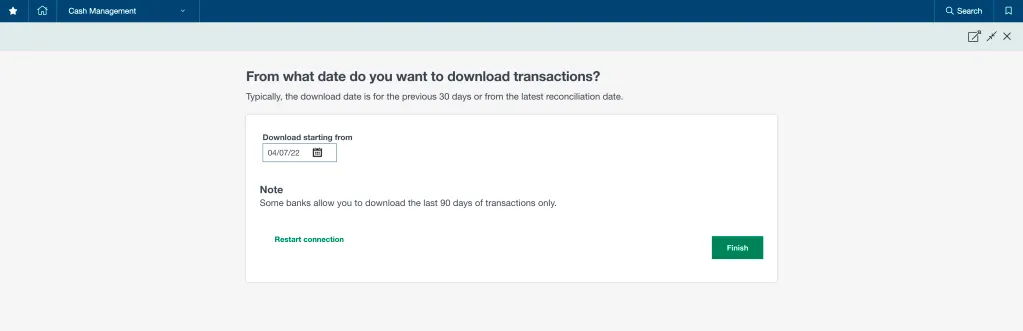
NOTE: You must complete account matching within 60 minutes; otherwise, the installation wizard will time out, the connection will fail, and the account will remain Pending with no transactions coming in.
To retry, disable the account(s) under the Accounts table and reinitiate the mapping process.
Step 4: Confirm Bank Feeds
Select Confirm to confirm the activation of Bank Feeds. Once the connection is successful, the status will change to Connected.
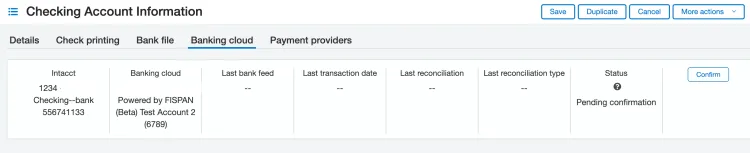
NOTE: If the account is in Pending status, it means that the transactions have not been pushed for this account. You will need to wait until the transactions are successfully pushed to this account before seeing it marked as Connected.
Once the account is Connected, go to Cash Management -> Reconciliation -> Bank and follow your native reconciliation process.
Set Up Multi-Account Bank Feeds
Bank Feeds allows you to connect multiple accounts to the plugin. Once one bank account has been connected to Bank Feeds by following the Enabling Bank Feeds page, other accounts can be connected simultaneously through a financial institution connection.
NOTE: Before you set up the Financial Institution, ensure that both Cash Management and Sage Cloud Services are enabled in the Subscriptions section. In the Sage Cloud Services configuration, confirm the Enable Bank Feeds checkbox is checked as per the Enabling Bank Feeds page. If this does not work, please contact Sage support and ask to get access to the Financial Institution.
Follow the steps below to set up multiple accounts for Bank Feeds.
Set up a Financial Institution
Go to Cash Management → Set up → Financial Institution and create a new Financial Institution.
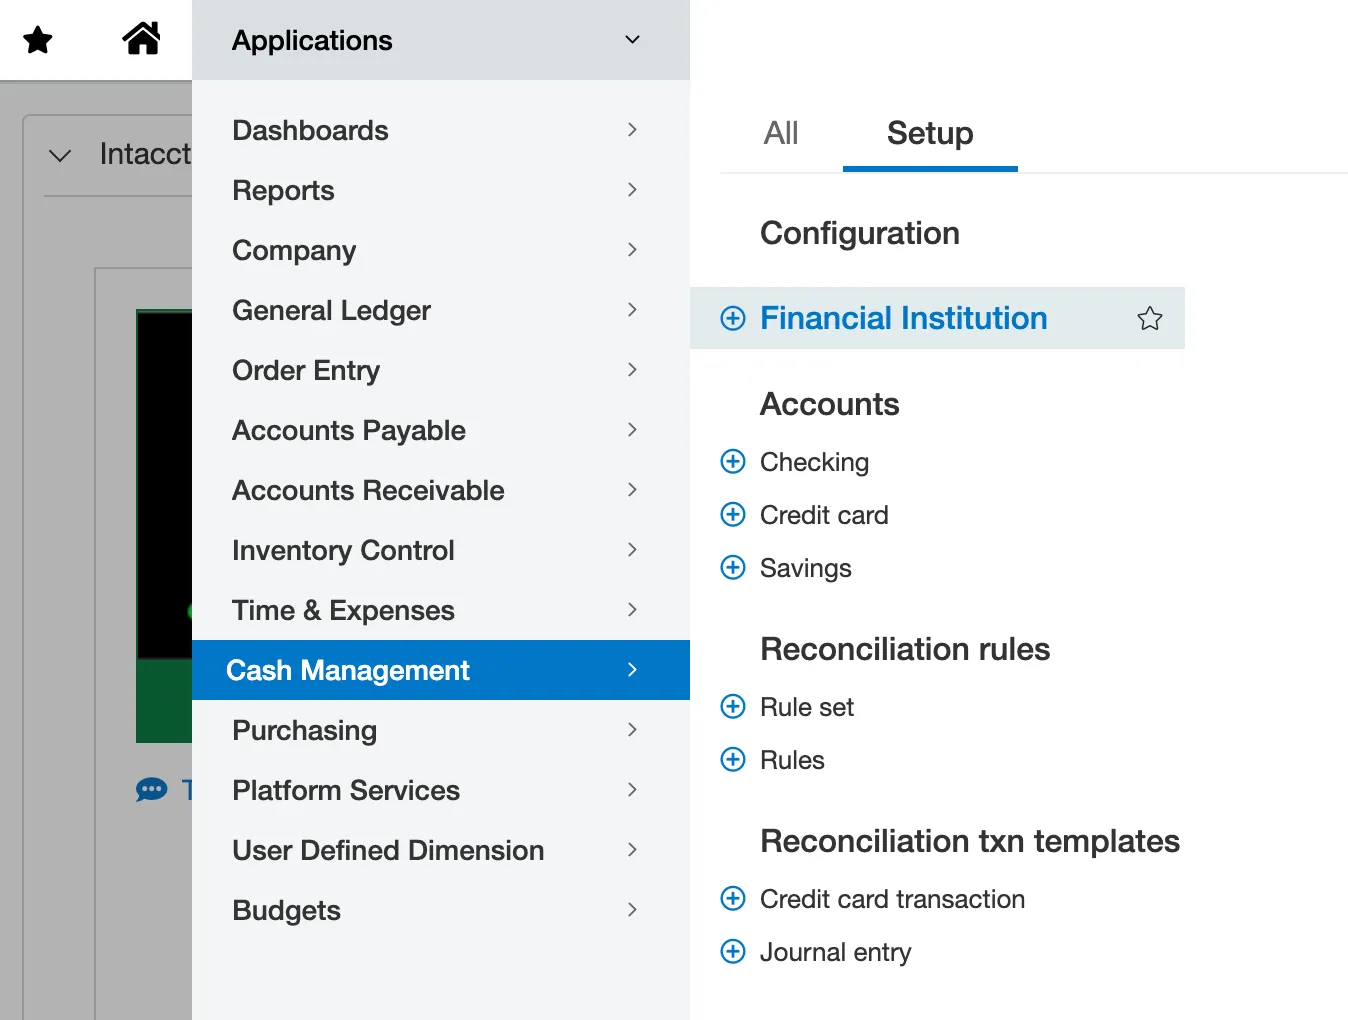
This allows you to create a connection to the bank. Create the ID and Name as desired.

Map Accounts for Bank Feeds
Select Map Accounts and choose which accounts you would like to enable on Bank Feeds.

NOTE: You must complete account matching within 60 minutes; otherwise, the installation wizard will time out, the connection will fail, and the account will remain Pending with no transactions coming in.
To retry, disable the account(s) under the Accounts table and reinitiate the mapping process.

After mapping the accounts, the Banking cloud statuses can be seen in the Accounts tab.

To view your account information, click Bank Transactions in the Cash Management module. You can also view this information through the Reconciliation module.