Applying Discounts (NetSuite)
Learn how to apply discounts to payments in NetSuite with the Bank helping you manage your payment discounts and processing.
Apply Discounts to Payments
Follow these steps to learn how to apply discounts to vendor payments.
Confirm Purchase Discount Account
Go to Setup → Accounting → Accounting Preferences → Items/Transactions → Purchase Discount Account.
Confirm the appropriate account is selected. The account selected here can be any account; choose one that works best with your business.
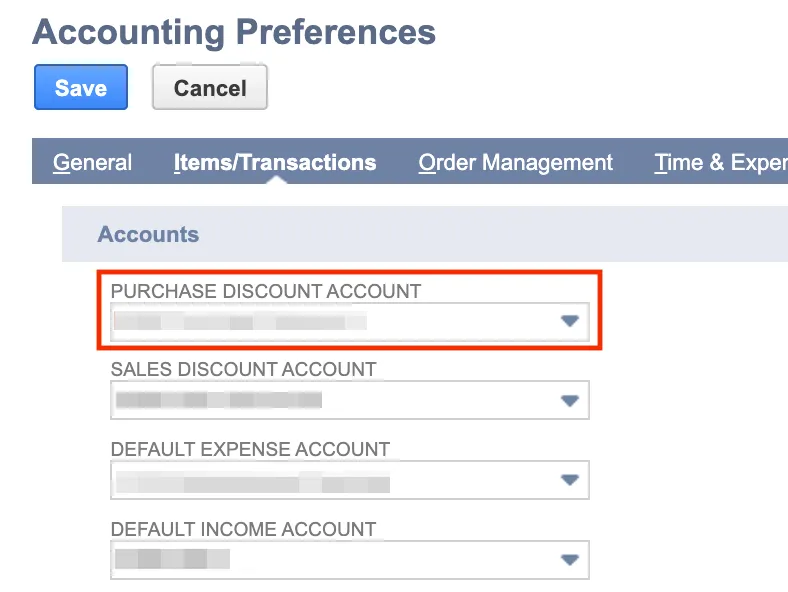
Click Save.
Creating Payment Terms
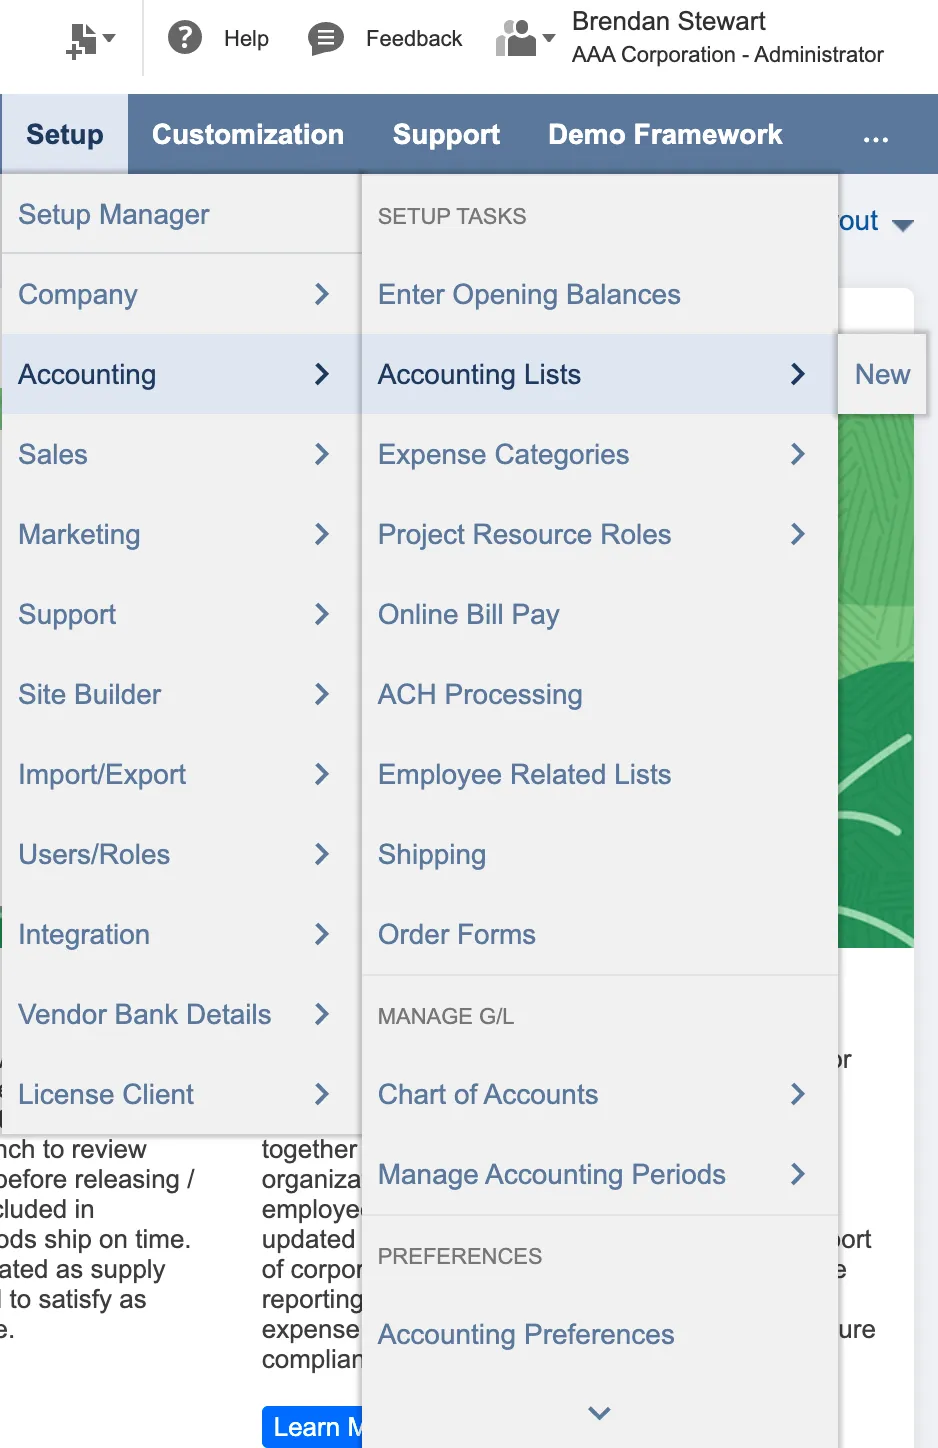
Terms can be created or modified in the Payment Terms page. Go to Setup → Accounting → Accounting Lists.
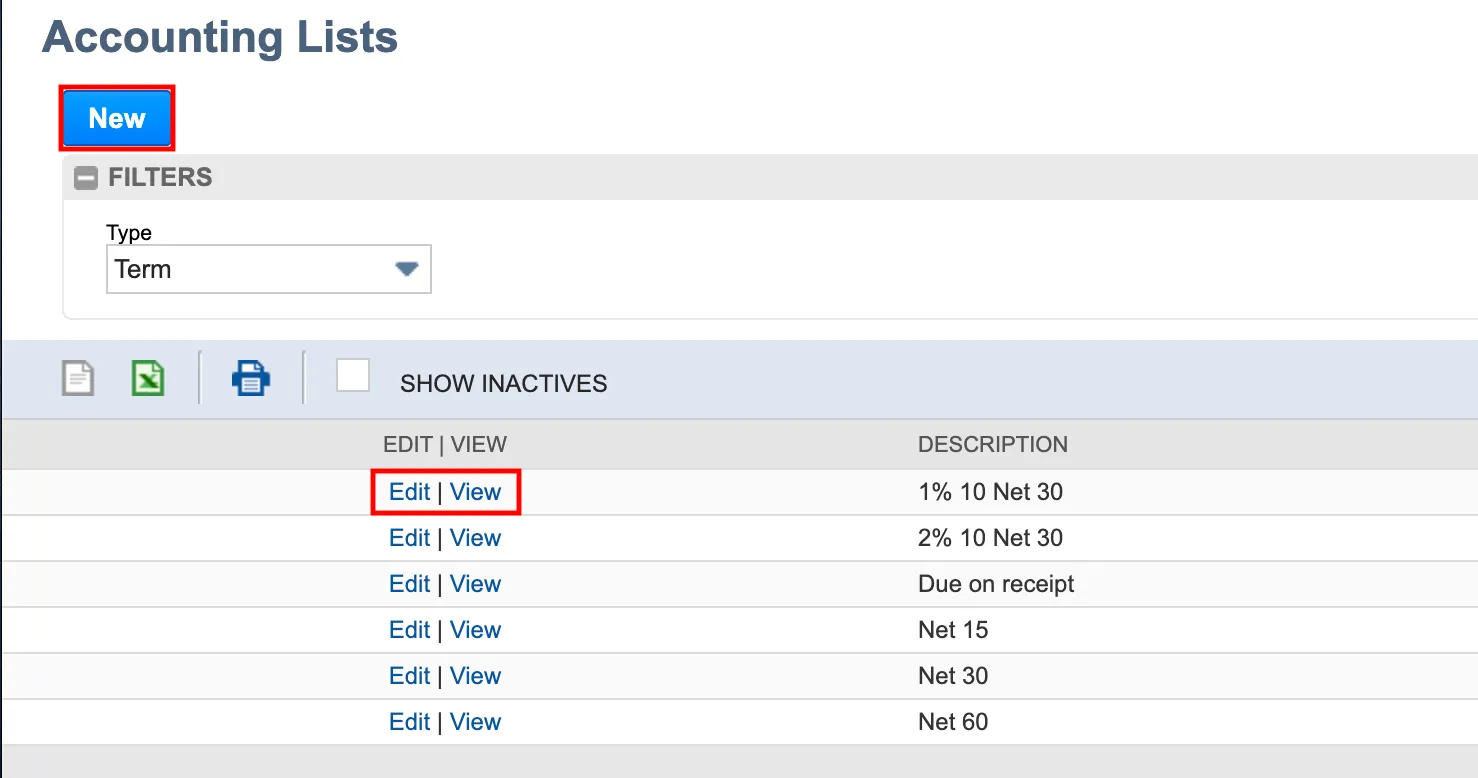
Select Filter → Type → Term.
From here, you can view and edit Terms that already exist, or you can select New and create a new Term.
Enter the details for your new Term. Once you are done, select Save.
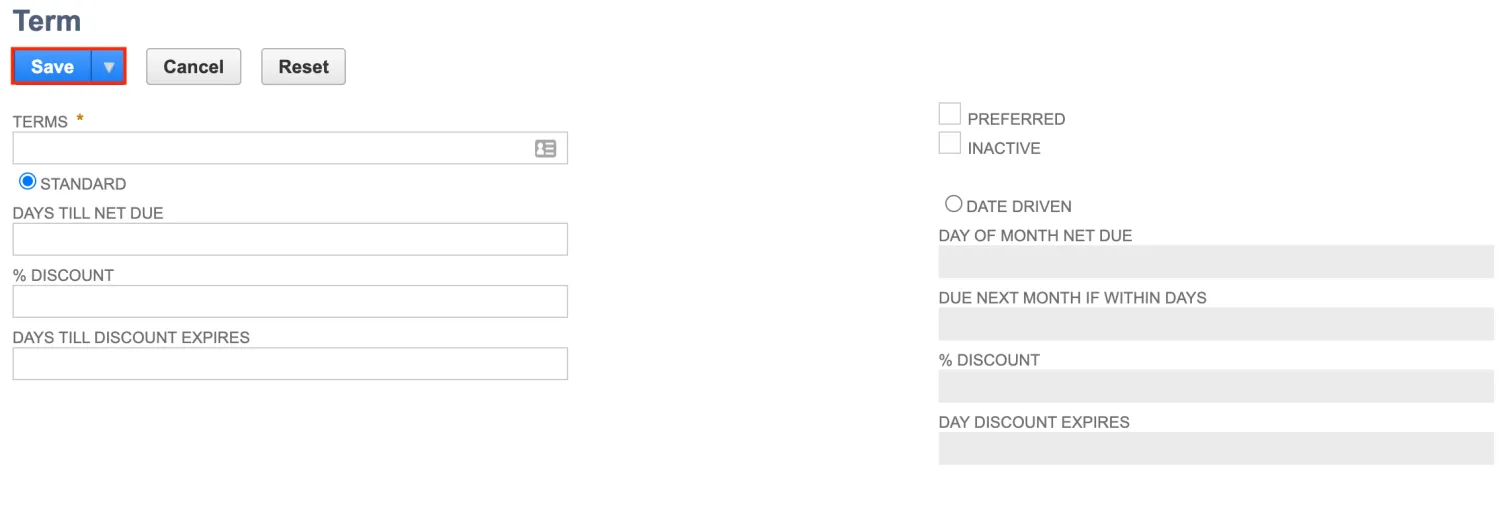
Setting Payment Terms
Terms can be set at the Vendor level or the Bill level.
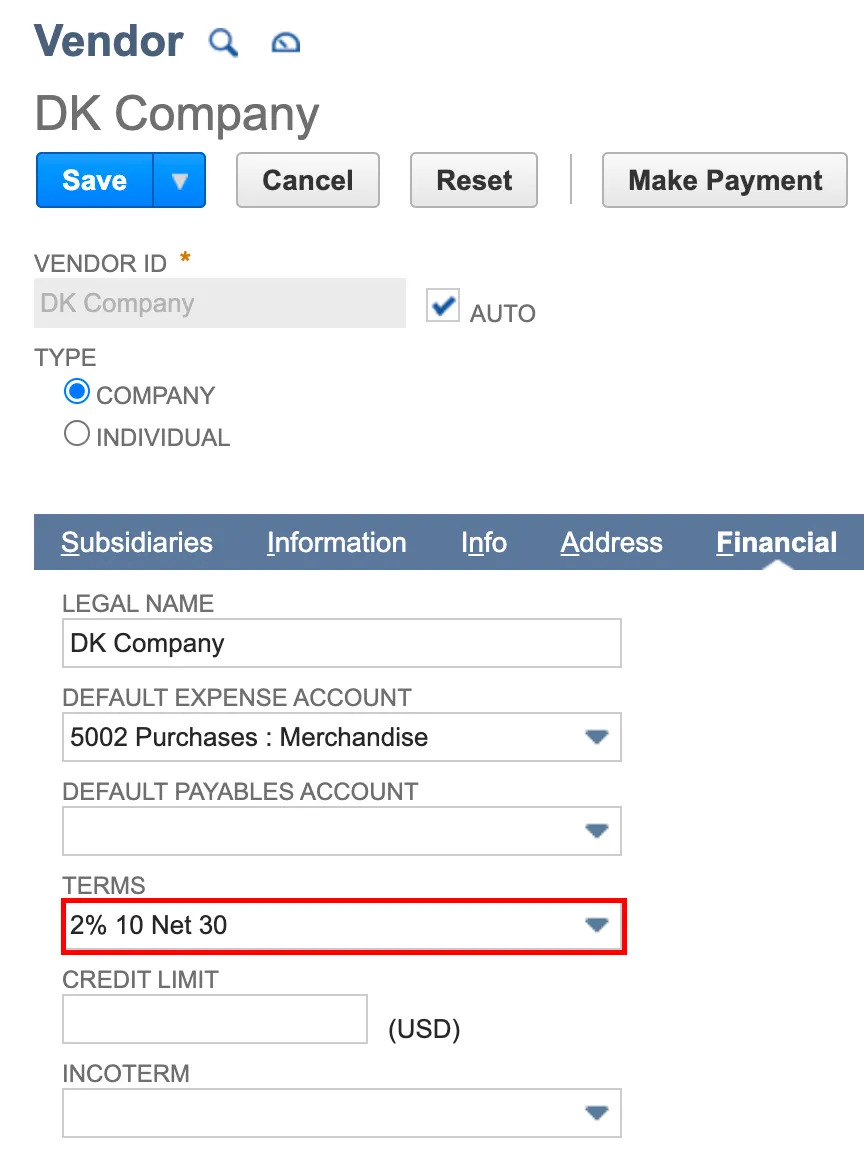
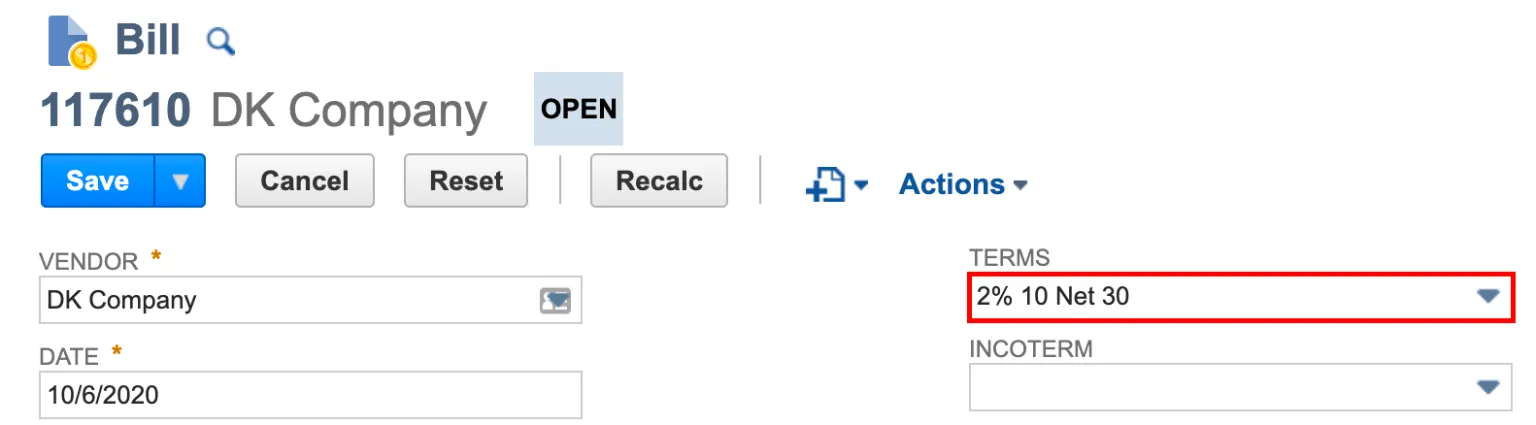
Paying Bills with Discount Applied
Using the main navigation bar, go to the Accounts Payable (New) → Payments.
Use the filters to find the bills you would like to pay. If a default payment method has not yet been set for the vendor, choose a payment method from the respective column.
Discount Amount is automatically calculated on the Original Amount of the bill based on the terms and dates set on the bill. If a discount is calculated to be available (based on the terms), the Discount Amount box will be automatically populated. Users can modify the discount amount by editing the value in the Discount Amount field.
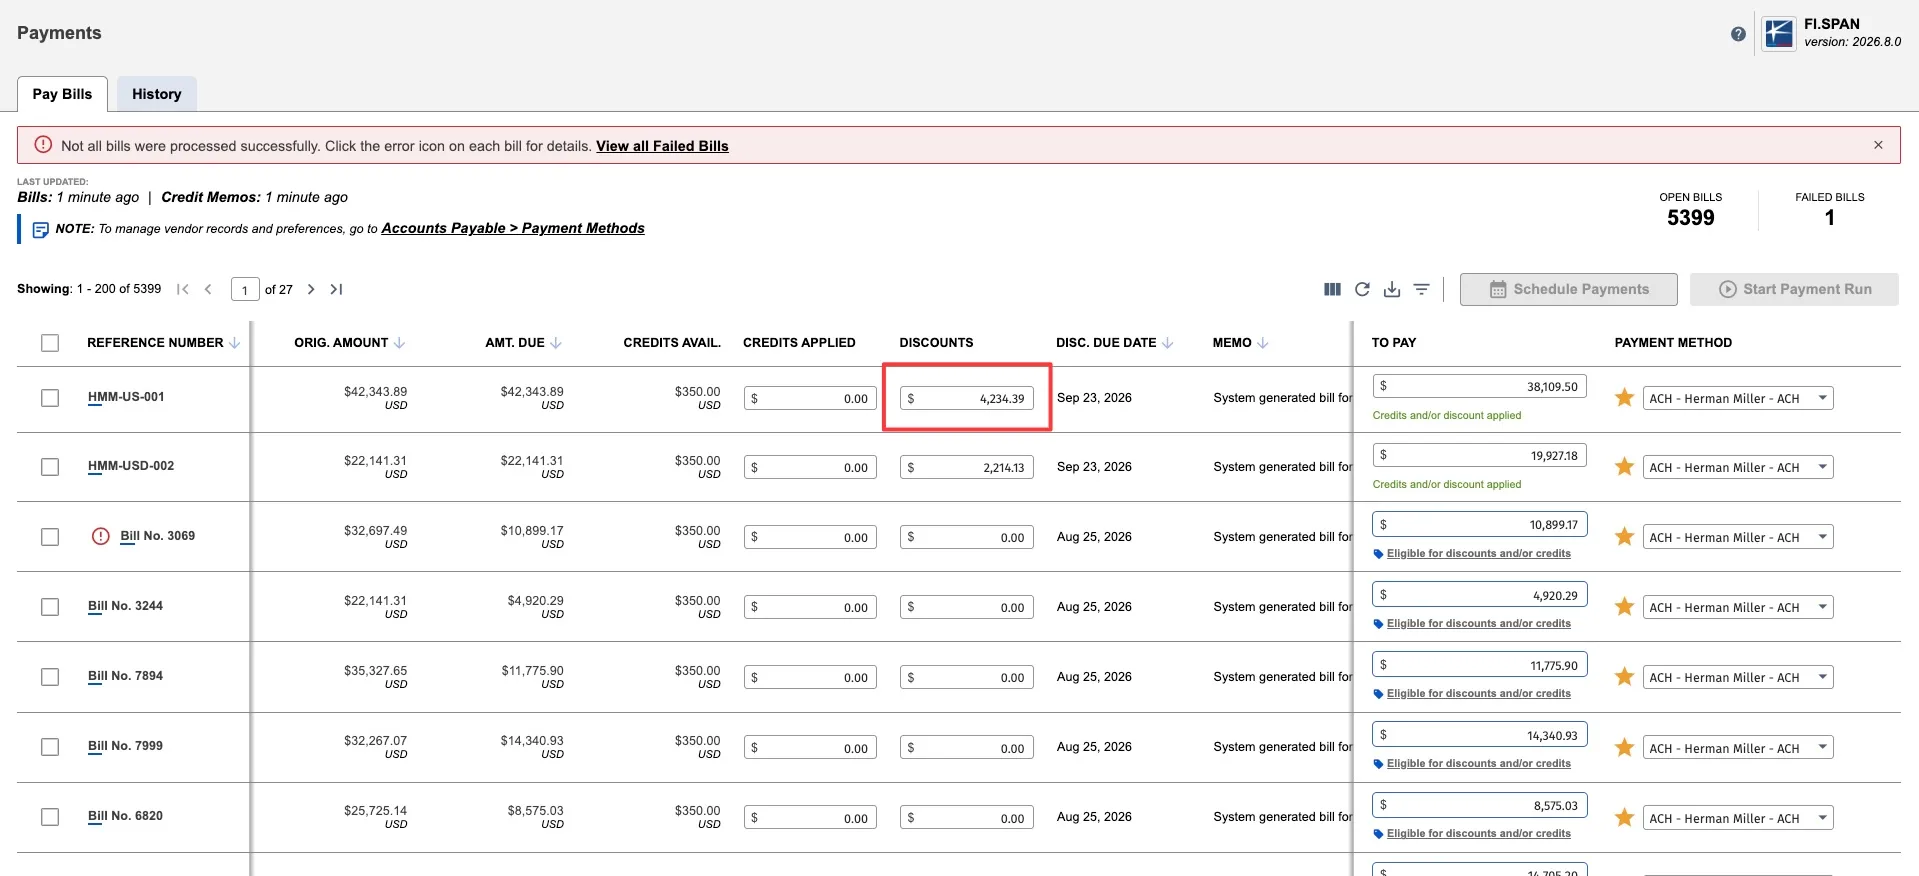
If the discount looks correct, select the bill and select Start Payment Run.
An Account Selector popup will appear to select Source Account as well as verify details. Select the account from the dropdown and confirm that payment details are correct.
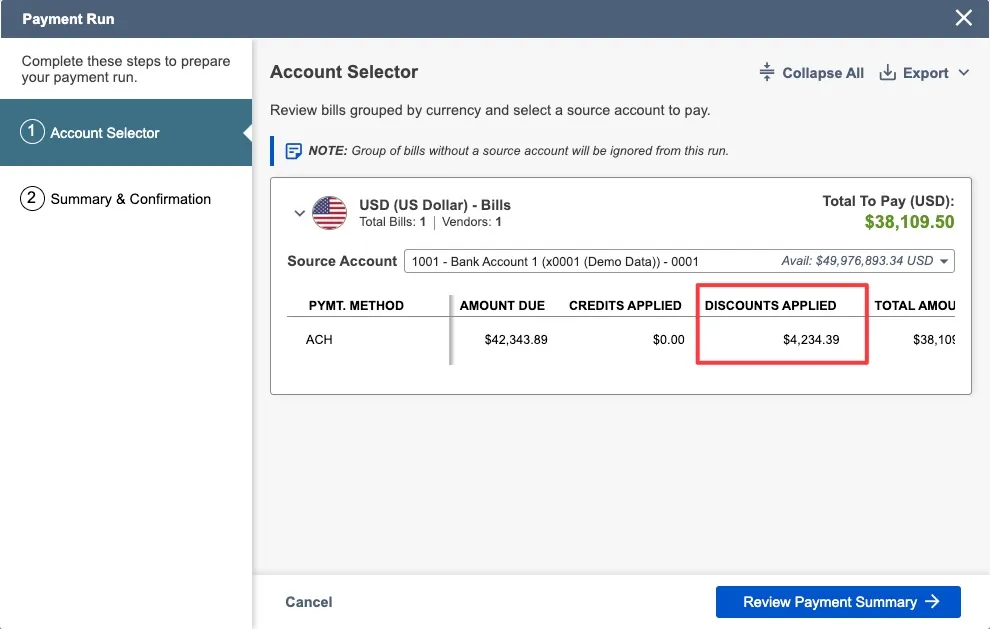
Click Review Payment Summary and initiate the payment.
Check Status of Payment
Using the main navigation bar, go to the Accounts Payable (New) → Payments → History.
You can view the payment status, bills included in the payment along with the discounts applied to each bill. Once the payment is complete, the status will display as Completed.
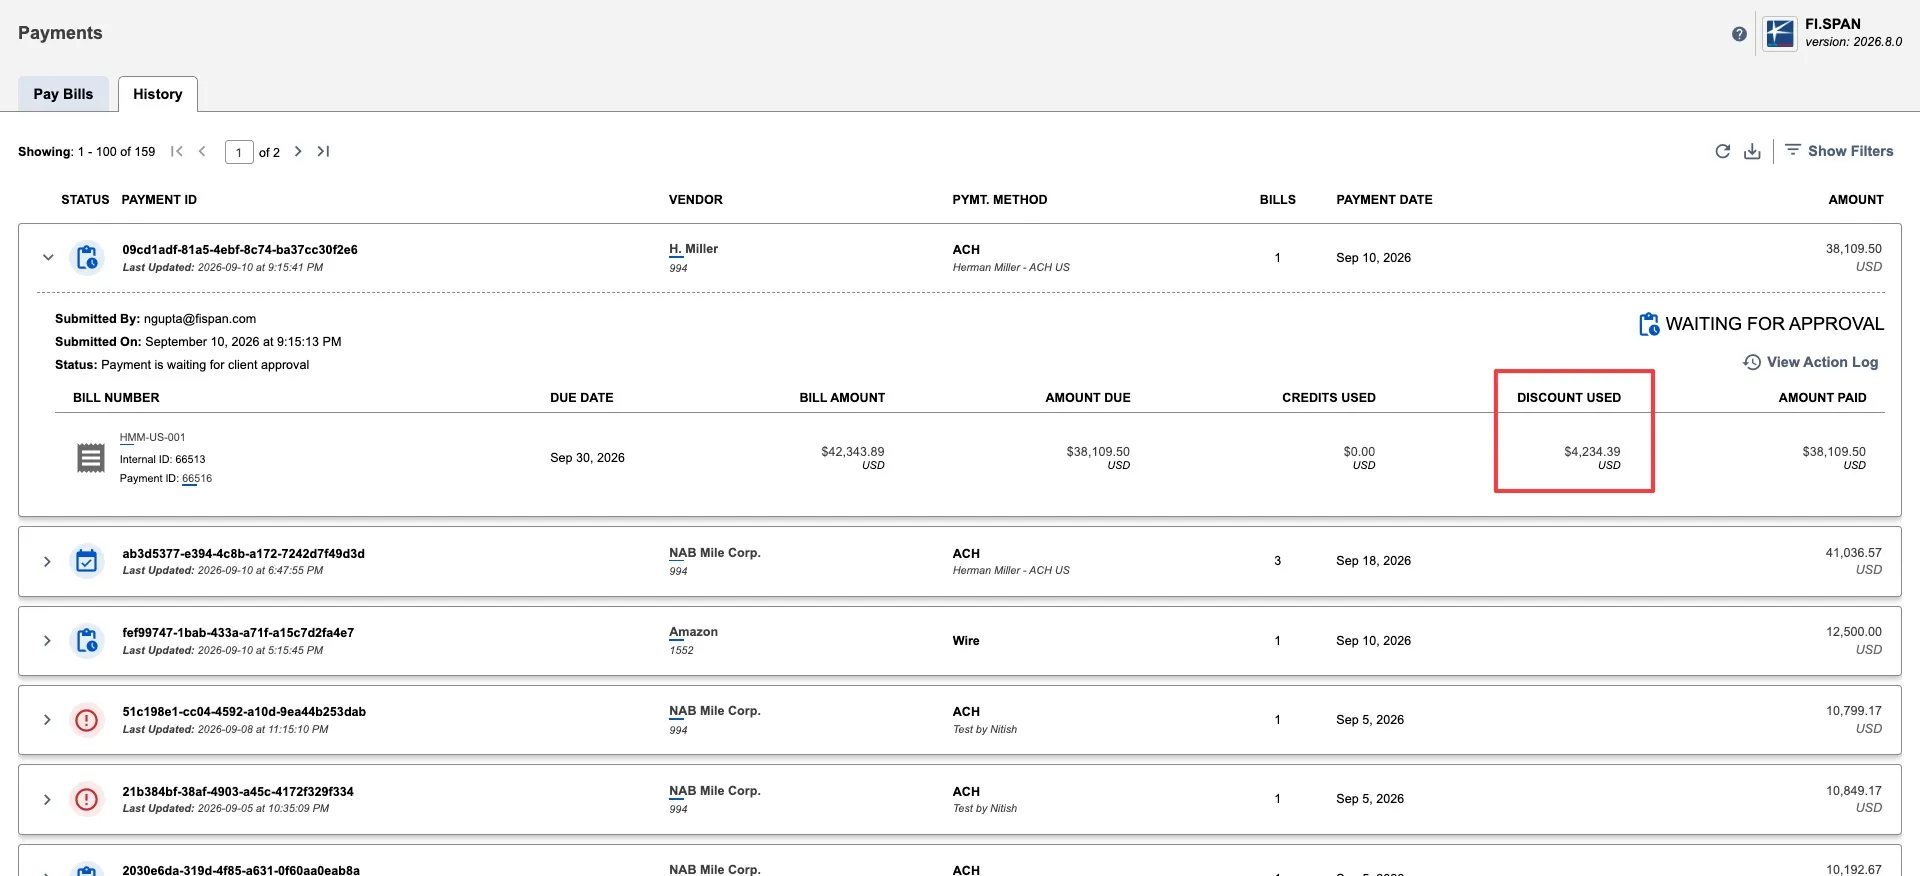
Payments take four business days to appear as Completed in the plugin since there is no positive acknowledgement from the receiving bank.
The bank plugin will only transmit the amount paid in NetSuite, which will be the remaining bill amount after any discounts or vendor credits are applied. For users who view payments made in the NetSuite bank plugin later in their bank portal, the amount shown will be the same remaining bill amount that was paid in NetSuite.
Making Partial Payments with Discounts
You can make partial payments while keeping your full discount applied. The To Pay field automatically calculates the amount due minus any discounts and credits, but you can edit this field to pay a partial amount instead.
When you edit the To Pay amount to pay less than the full balance, the discount remains calculated on the original bill amount—not just the portion you're paying. This means you receive the full discount benefit even when paying part of the bill.
Navigate to Payments
Using the main navigation bar, go to Accounts Payable (New) → Payments. Use filters to find the bills you'd like to pay. Bills with available discounts will show a populated Discount Amount field.
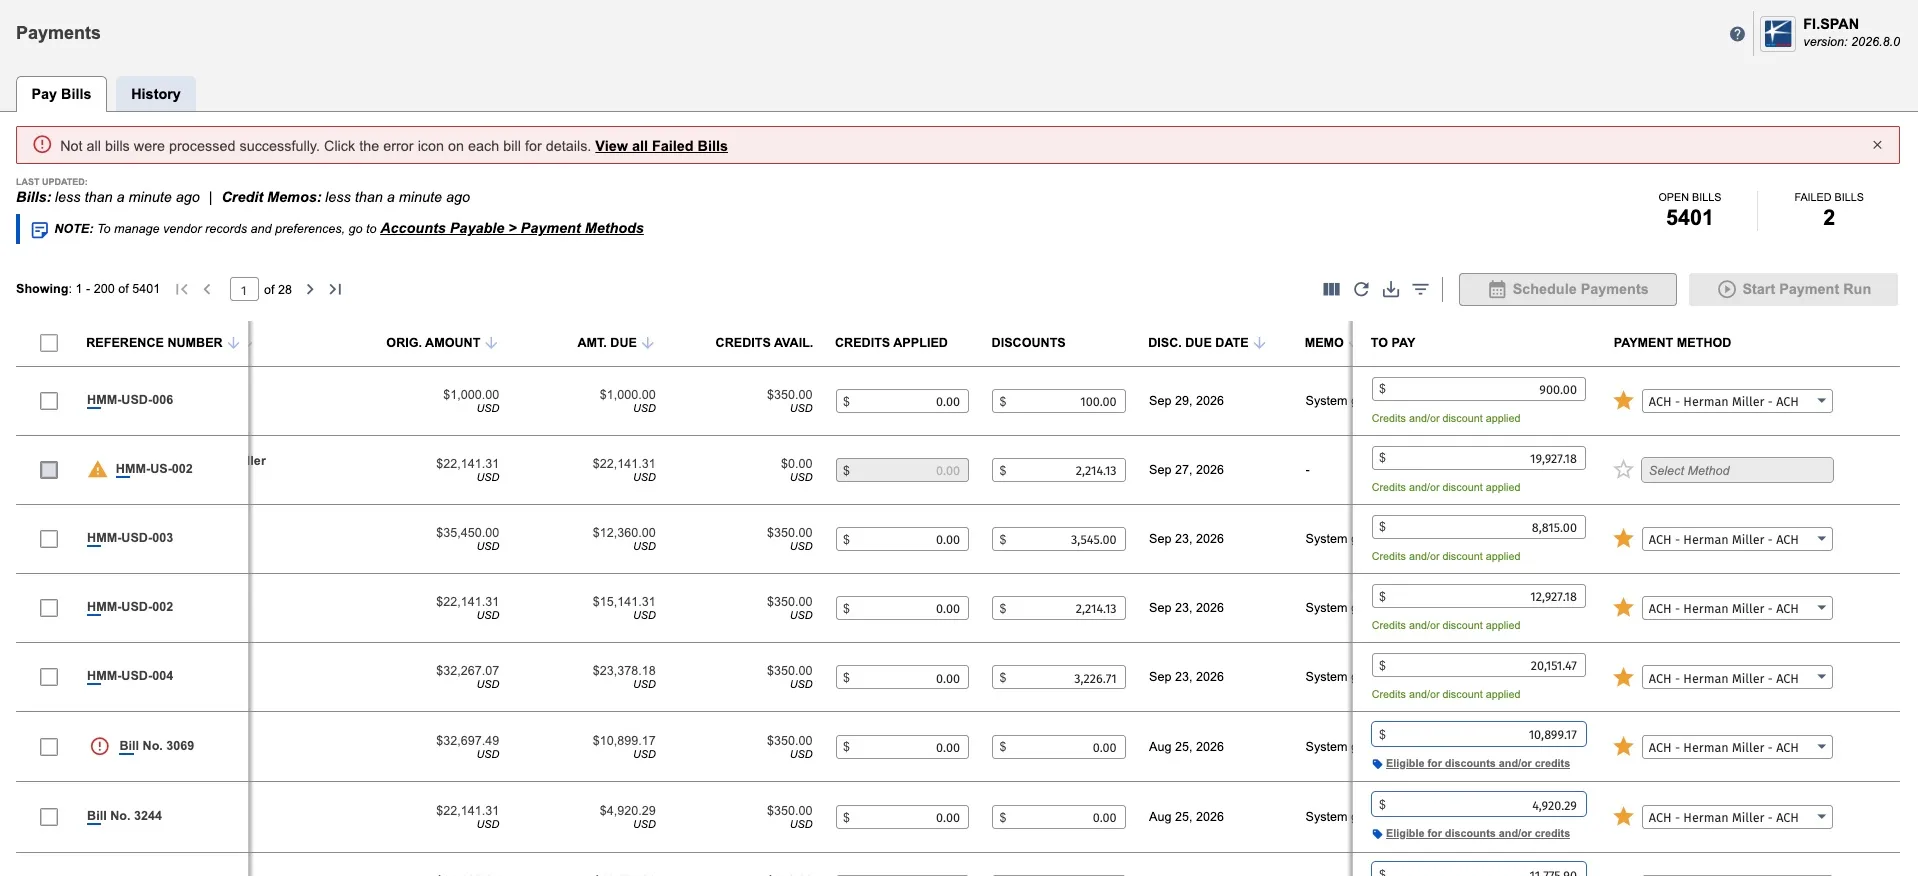
Edit To Pay for partial payment
Click into the To Pay field. Enter the amount you want to pay (e.g., $500 instead of the full $980)
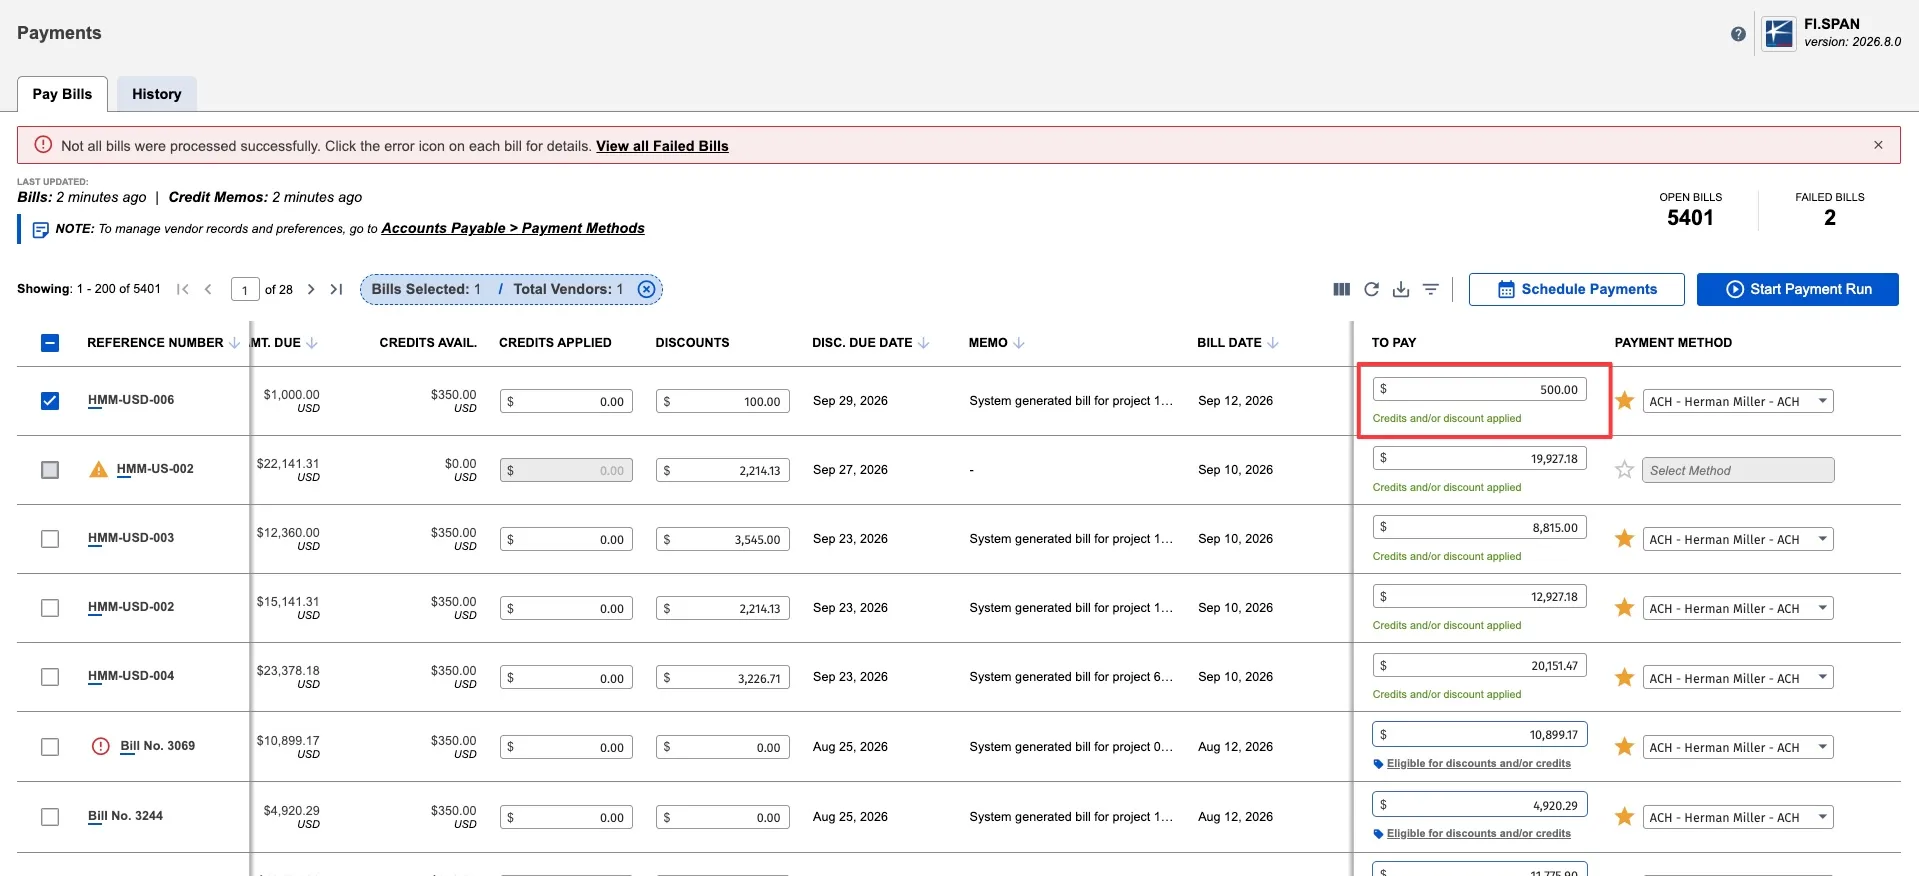
The discount remains applied—you'll pay your entered amount minus the discount
Start Payment Run
Select the bill and click Start Payment Run
Review Payment Summary
An Account Selector popup will appear to select the source account and verify details:
- Confirm the partial amount and discount are correct
- The bill shows your To Pay amount after the discount is deducted
- Click Review Payment Summary and initiate the payment
Tracking Partial Payments
Check payment status in Payment History:
- Using the main navigation bar, go to Accounts Payable (New) → Payments → History
- View the payment status and bills included
- Each bill shows:
- The partial amount paid
- Discount applied
- Payment status
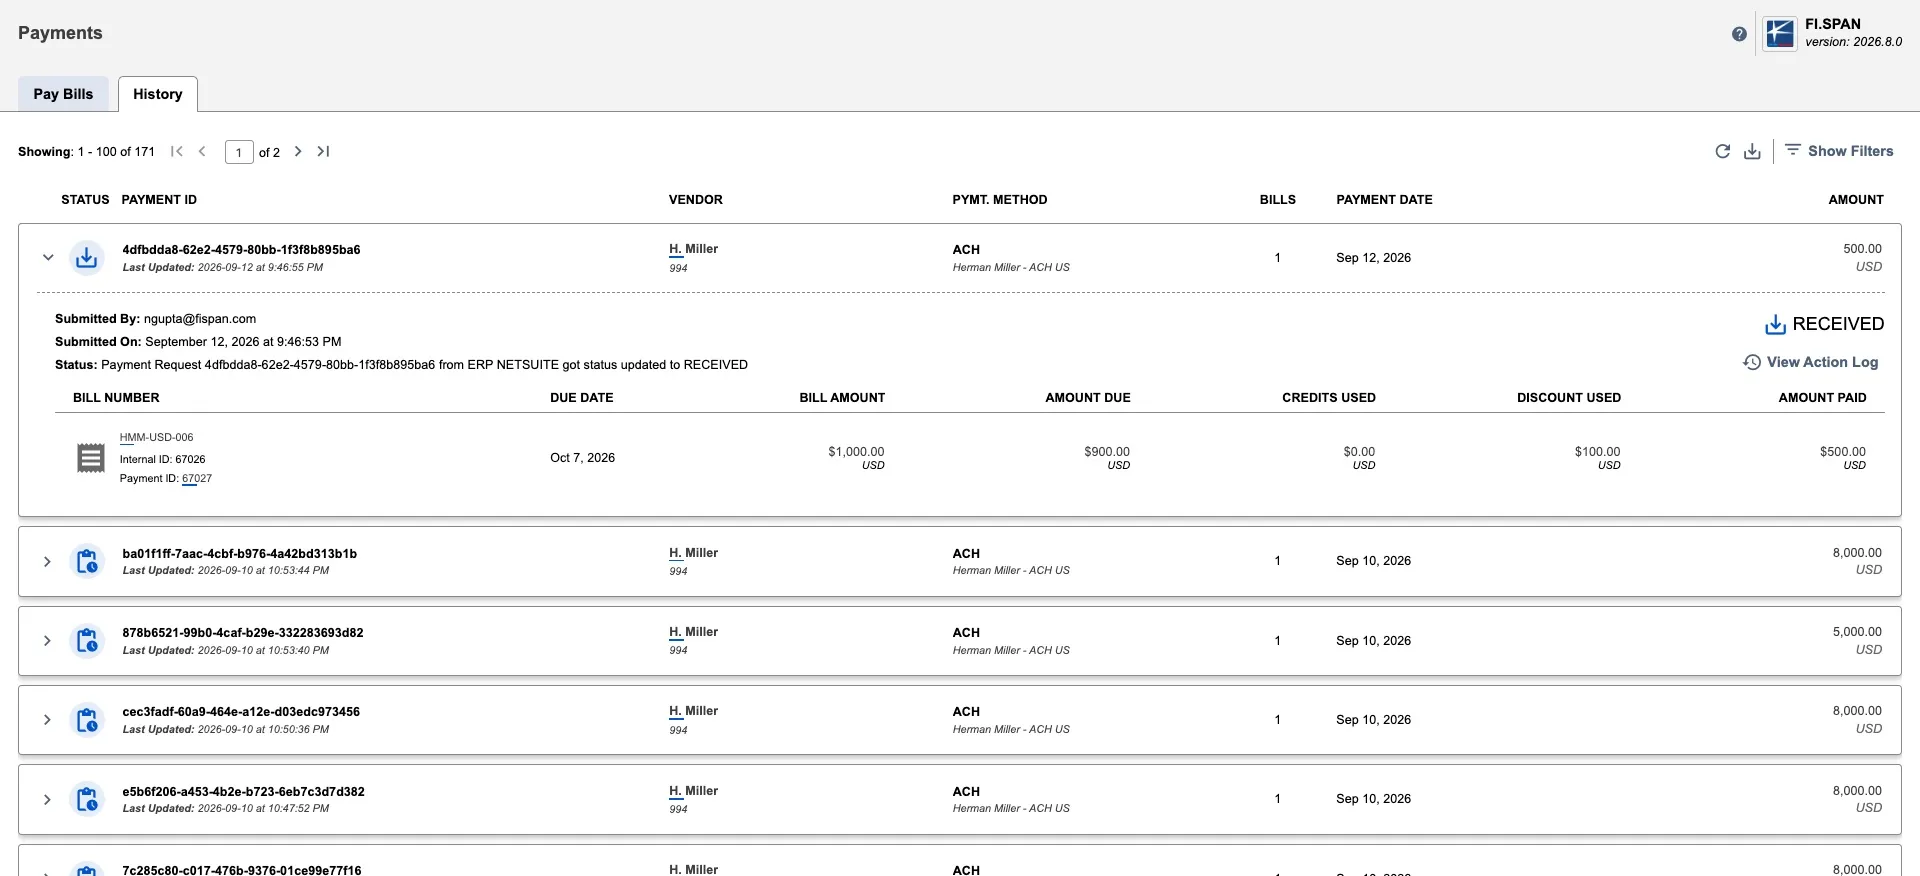
Once the payment is complete, the status will display as Completed. Payments take four business days to appear as Completed in the plugin since there is no positive acknowledgment from the receiving bank.
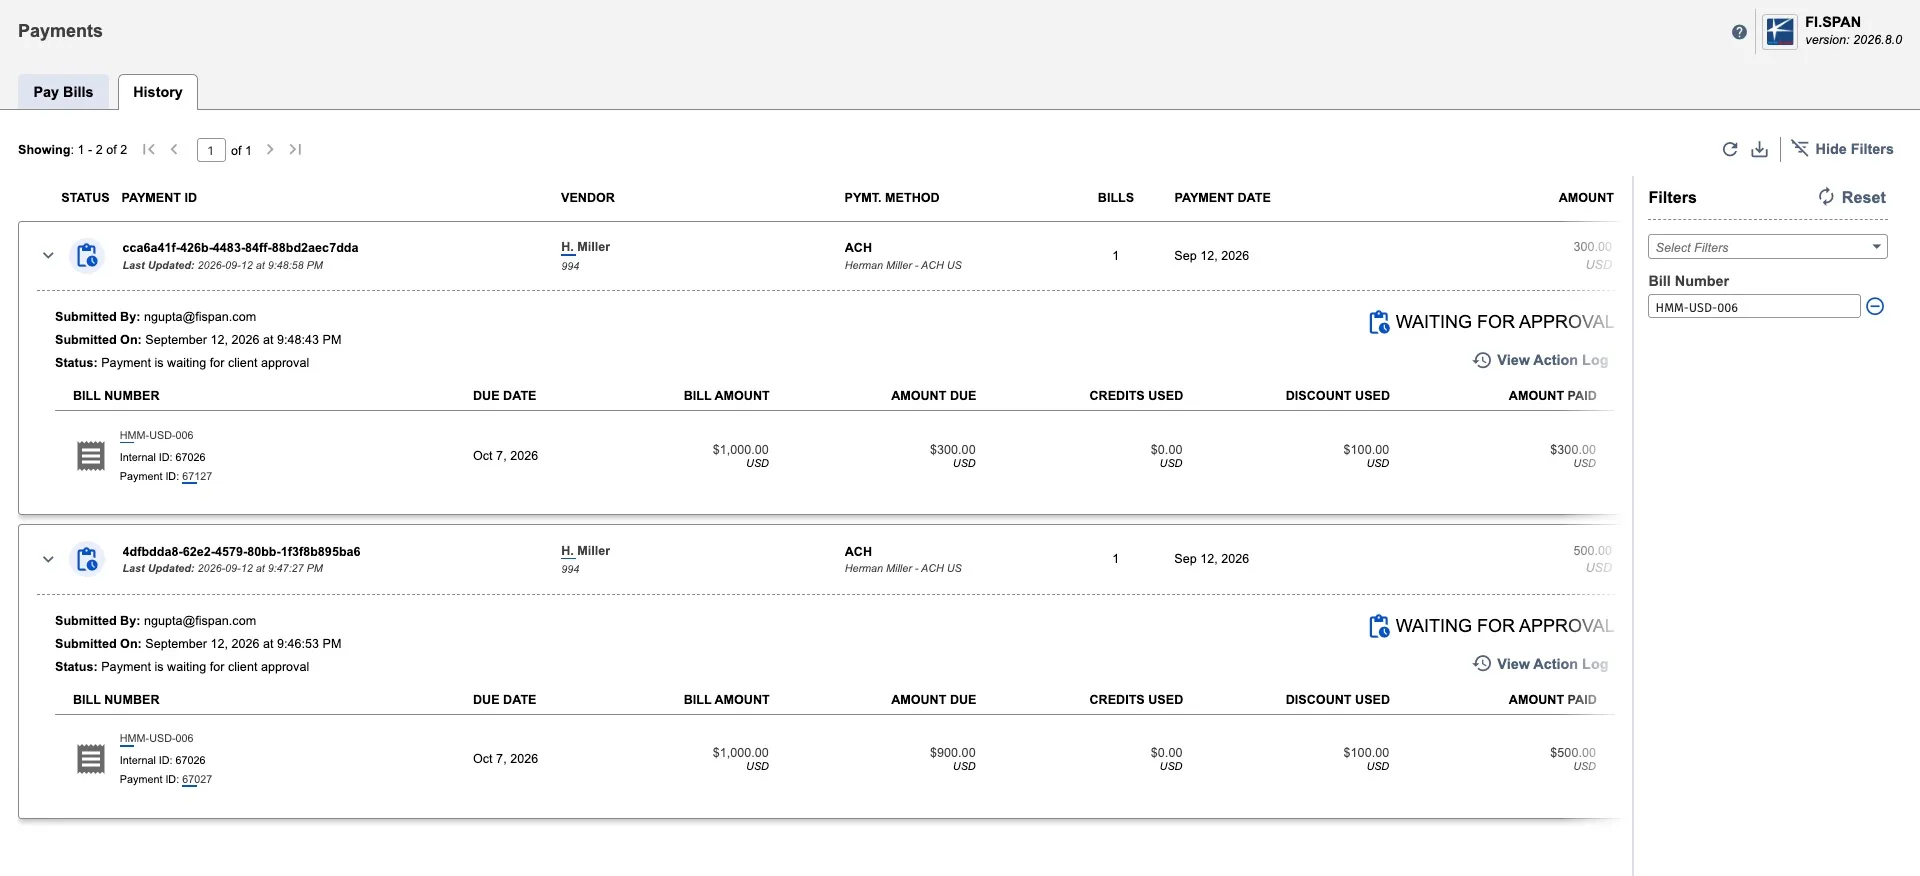
Track all payments for a specific bill:
To see all previous payments made for a bill (including multiple partial payments):
- Go to Accounts Payable (New) → Payments → History
- Use the Bill Number filter to search for the specific bill
- All payments applied to that bill will appear in the results
This is useful when you've made multiple partial payments and want to see the full payment history for one bill.
Additional payment details in NetSuite:
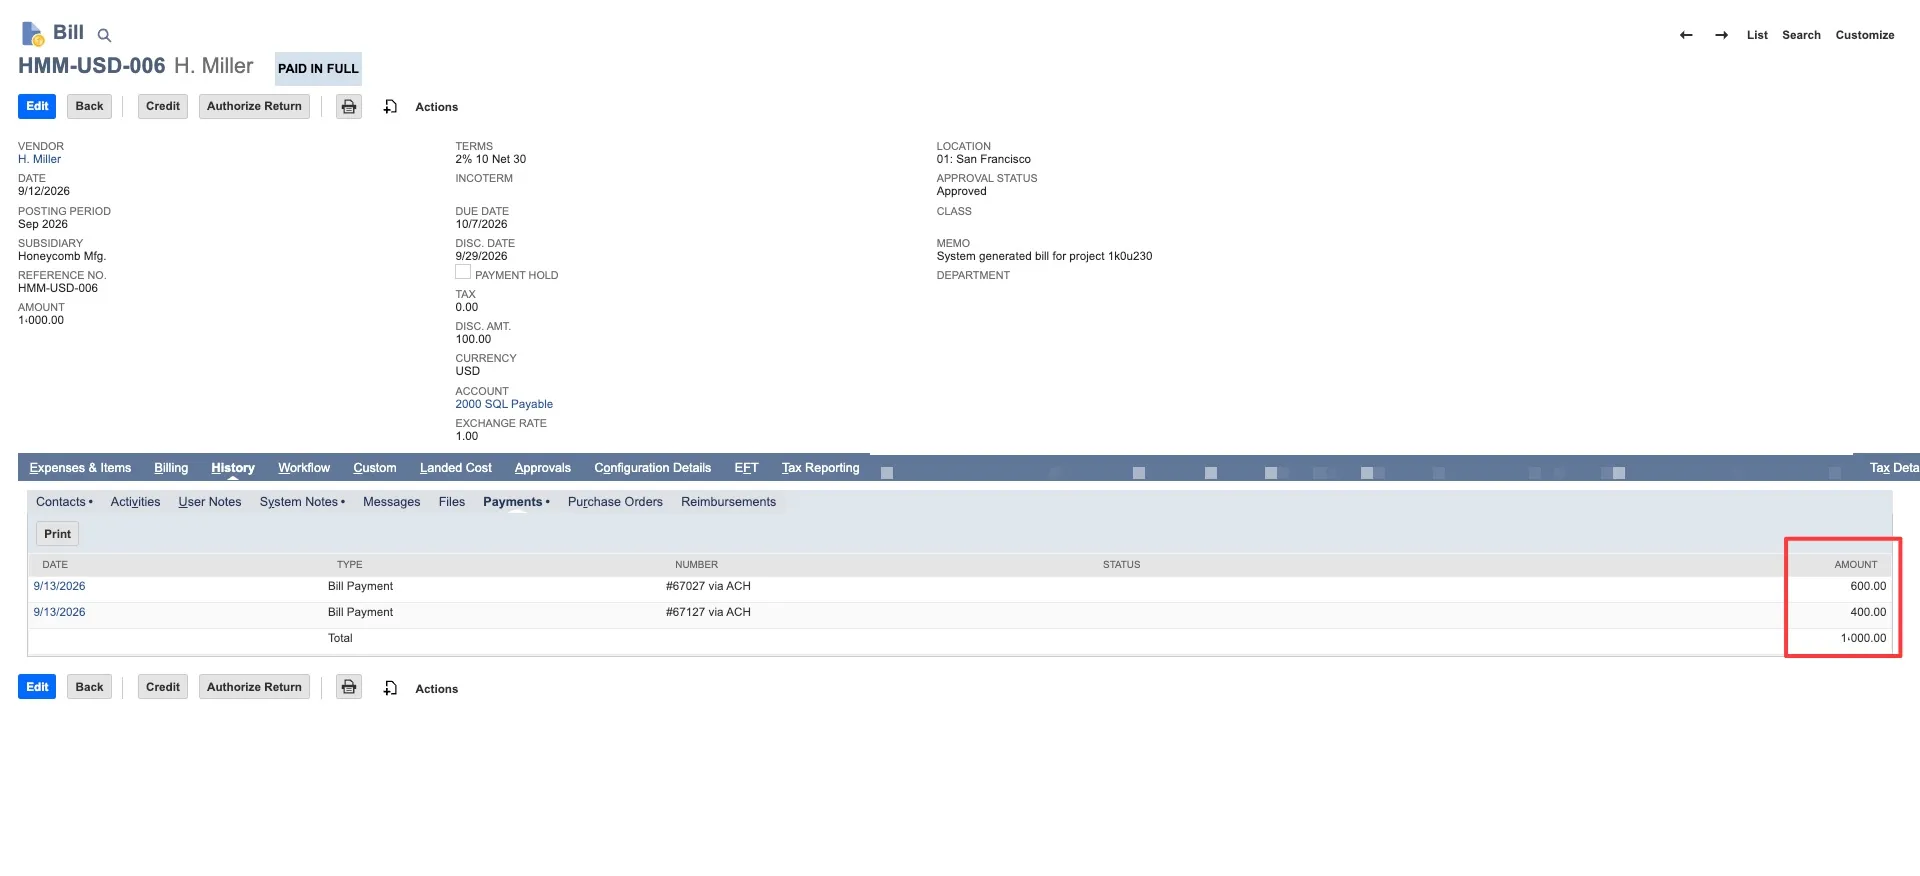
For reference, the bank plugin also records payment information directly on the bill in NetSuite:
- Custom field on bill form: Shows details from the latest payment attempt only
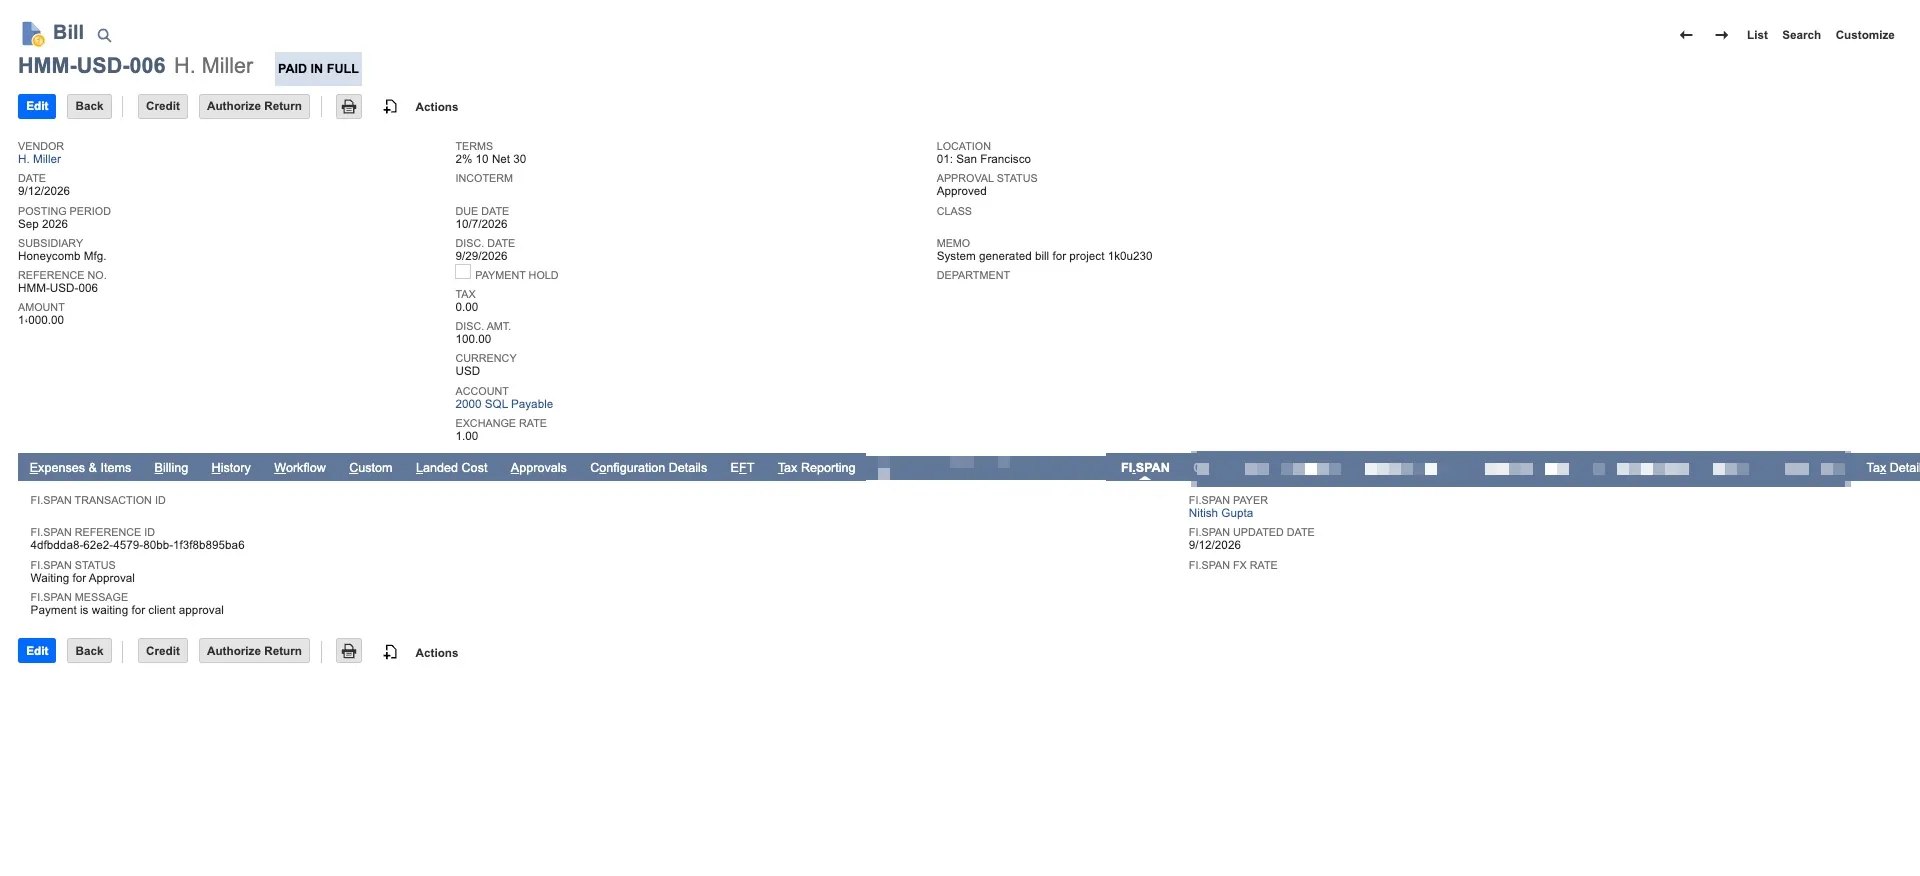
- Bill → History → Payments tab: Shows all payments applied to the bill in the native NetSuite bill record