Entity Bank Details Approvals
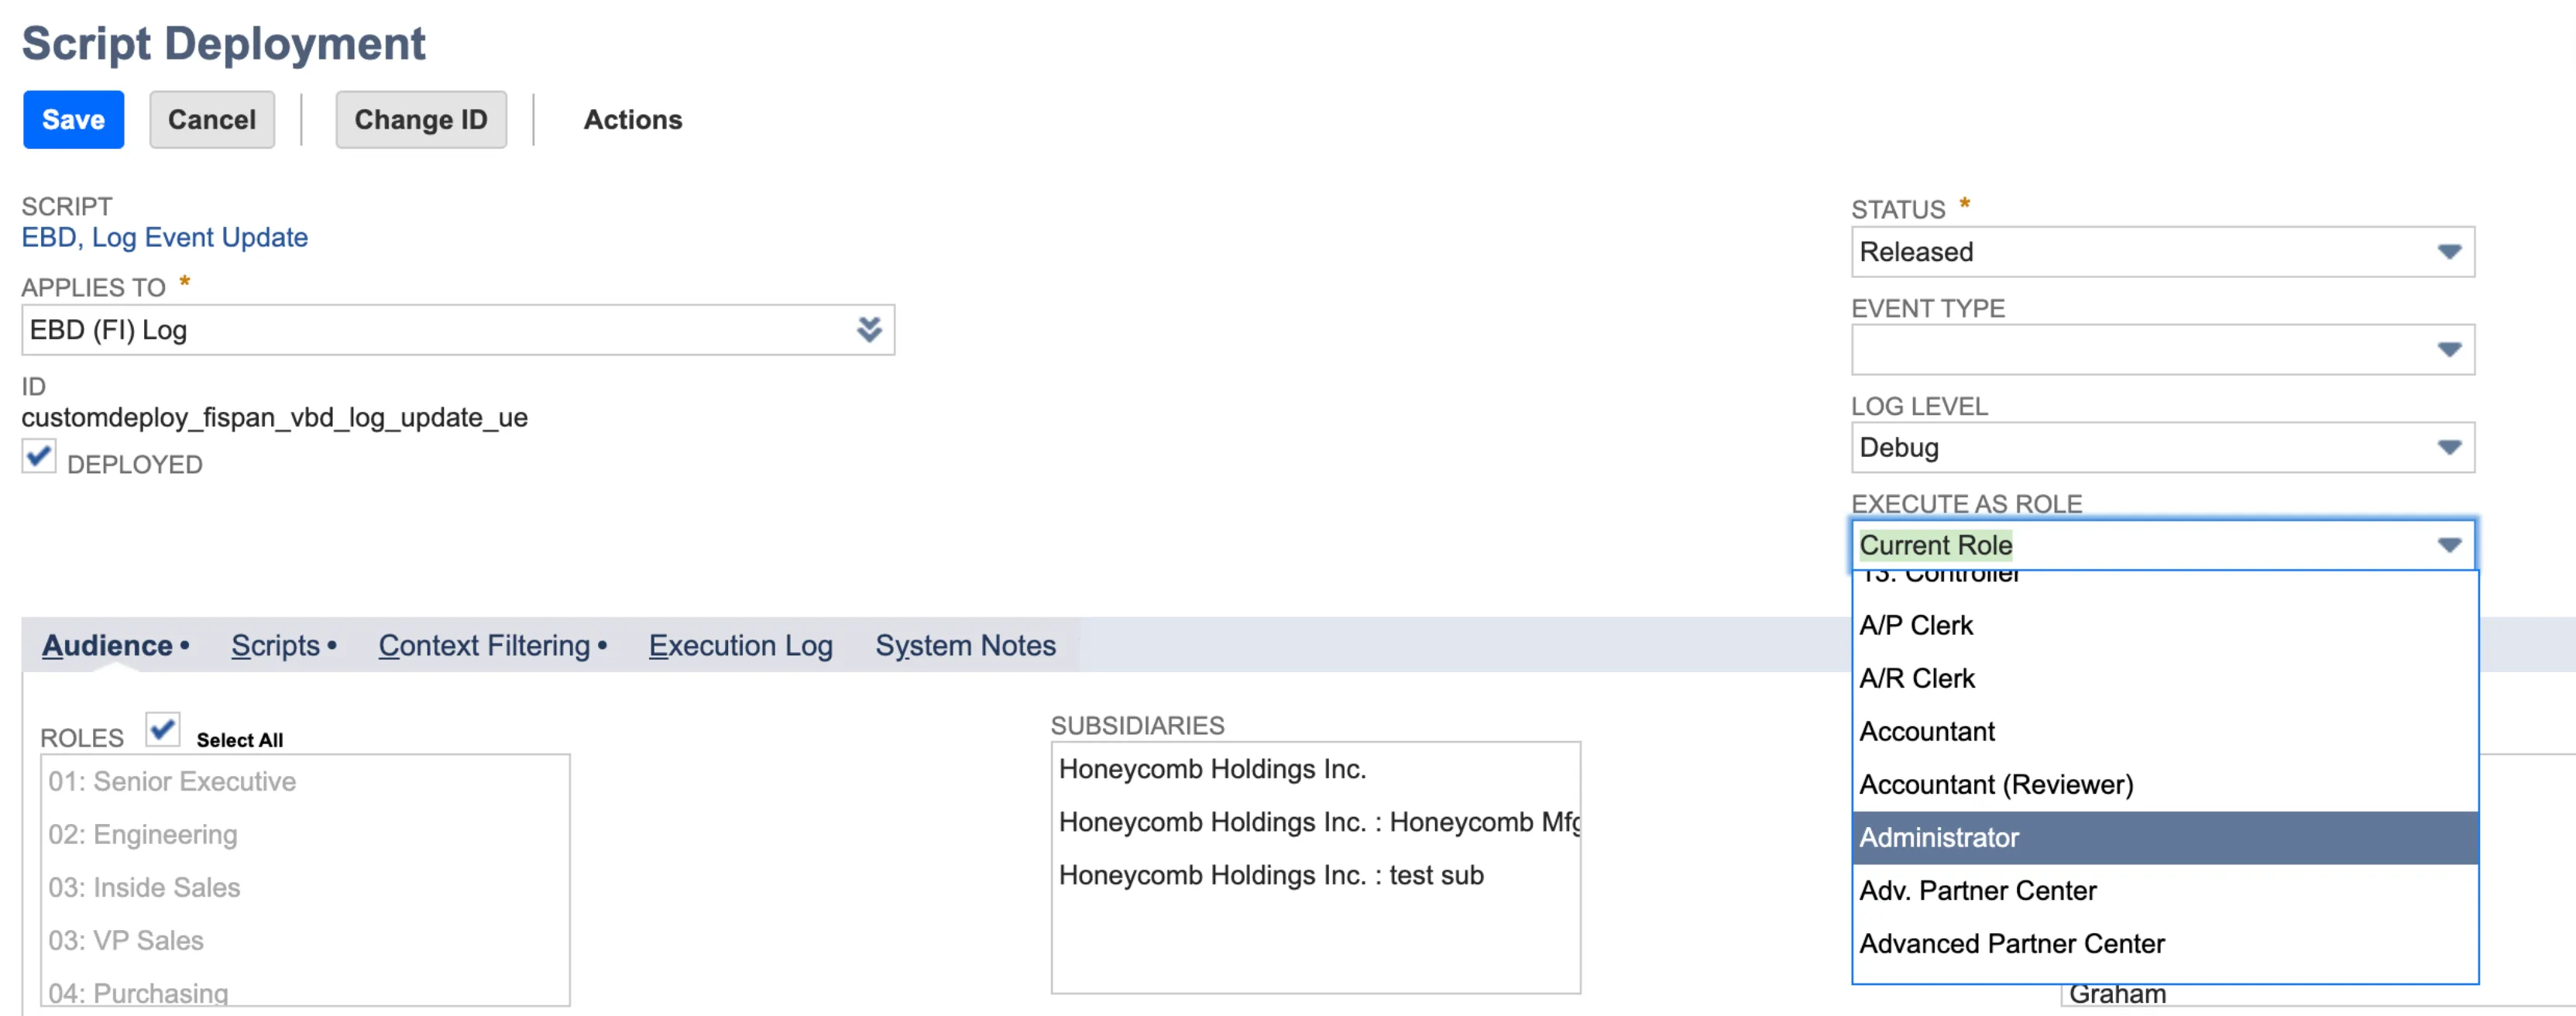
Before getting started with using the Approvals feature, ensure you have all Entity Bank Details (EBD) permissions. You can confirm the required permissions in the Entity Bank Installation Details & Setup guide.
Overview
Enabling Approvals enhances security and compliance by requiring a secondary approver for every change made in the Entity Bank Details (EBD). This approver can be anyone who has access to the Approvals page, but it cannot be the person who made the initial change. A change is defined as adding a new record, updating an existing record, or deleting an existing record. While a change is pending, payments cannot be made to that entity, and the respective payment page will block payments for the entity until the change has been approved. For example, Jenna changed Company X's bank account information in Entity Bank Details. Jenna can access the Approvals page, but she will be blocked from approving the change. Bibek, however, has access to the Approvals page and can either approve or reject this change.
NOTE: Entity Bank Details Approvals works best if your NetSuite environment has no customizations surrounding vendor or employee creation, deletion, or modification.
Approval Requirements
For Approvals, there are two additional pages and permission sets. You must add these permissions to any users who require access to the Settings and Approvals pages.
Suitelets
- Entity Bank Details, Settings (customdeploy_fispan_vbd_settings): Access to the Settings page allows users to enable or disable approvals or manage the settings of approvals for imported records.
- Entity Bank Details, Approvals (customdeploy_fispan_vbd_approvals): Access to the Approvals page allows users to approve record changes.
RESTlets
- Entity Bank Details, Settings RESTlet: This RESTlet should come with access pre-enabled for all roles. Granting users access to this script will allow them to access the Overview page. This permission, alongside the Entity Bank Details, Overview Suitelet, is required to access the Overview page.
Permissions
- Lists --> Employees (Level: View): To view the list of employee records that have pending approvals, the history of changes made to employee records, or to make changes to employee records.
- Custom Record → Entity Bank Details (FI) (Level: Full): To approve EDB changes, the role needs Level: Full permission on the Permissions tab.
User Events
- No new User Events required.
NOTE: For the Settings page to work properly, you must also have access to all Subsidiaries.
Enabling Approvals
Navigate to Settings
To enable Approvals, navigate to Setup -> Entity Bank Details -> Settings.
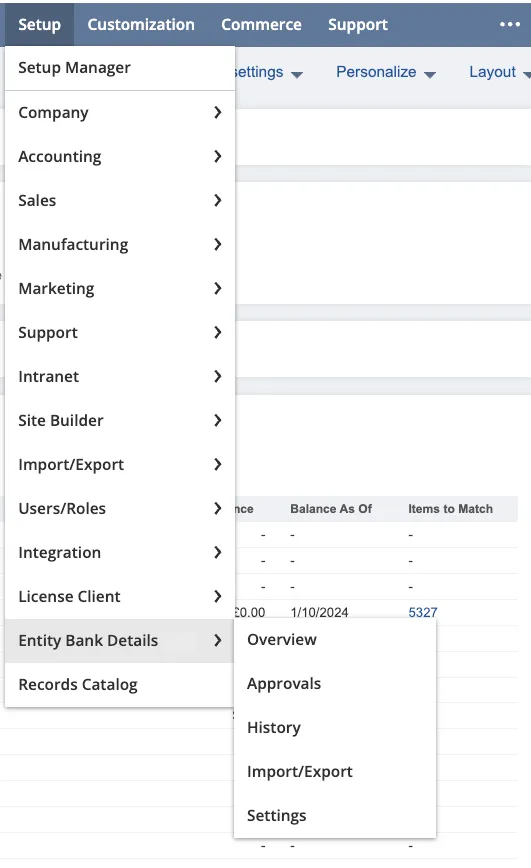
Settings is where you can decide to enable or disable Approvals.
Enable Approvals on All Changes
You can also enable and disable approvals for changes made via the Import page.
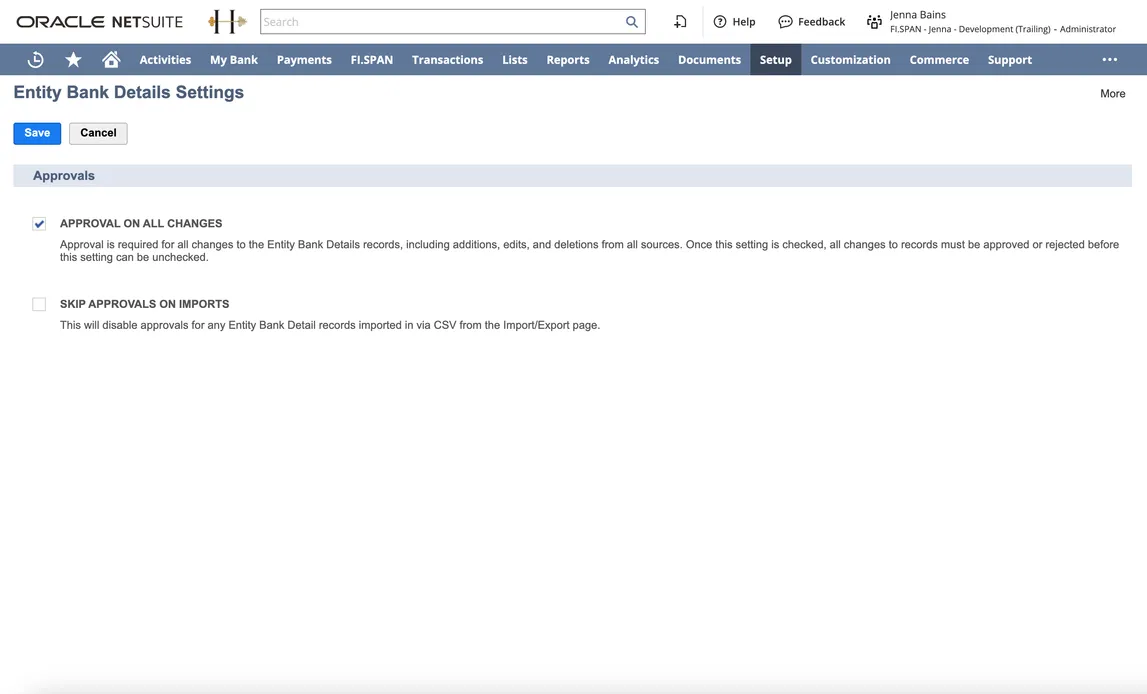
To enable these settings, select the APPROVAL ON ALL CHANGES checkbox and click Save.
Now, all changes must be approved before you can disable Approvals.
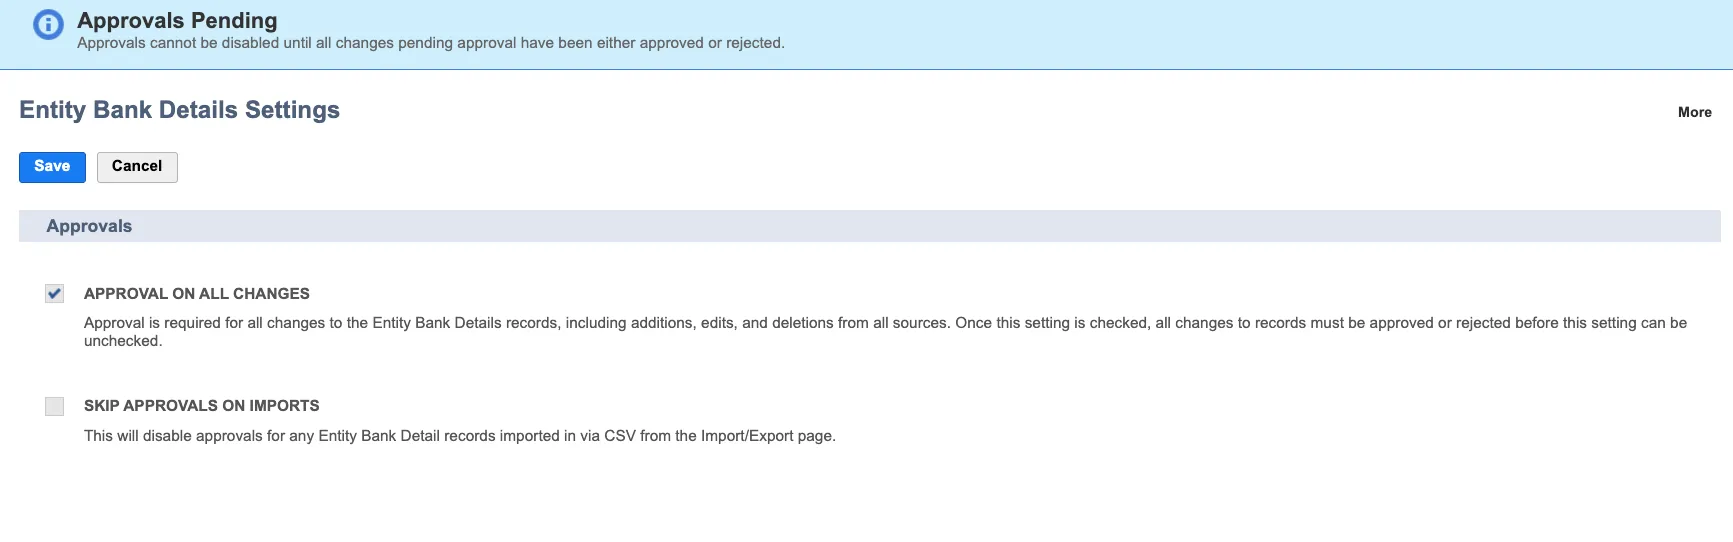
By enabling Approvals, every change, including those made via Import on the Import/Export page, will now require approval.
Enable Skip Approval on Imports
Alternatively, in Settings, you can select the SKIP APPROVALS ON IMPORTS option, which will disable approvals on any changes made via CSV import. These changes pass through without the advantage of enhanced security and compliance controls.
This setting cannot be selected if there are pending approvals.
Making EBD Changes
Overview Page
To make a change to a Vendor or Employee record, navigate to Setup -> Entity Bank Details -> Overview.
Make Changes to Entity
Select the entity you want to change.
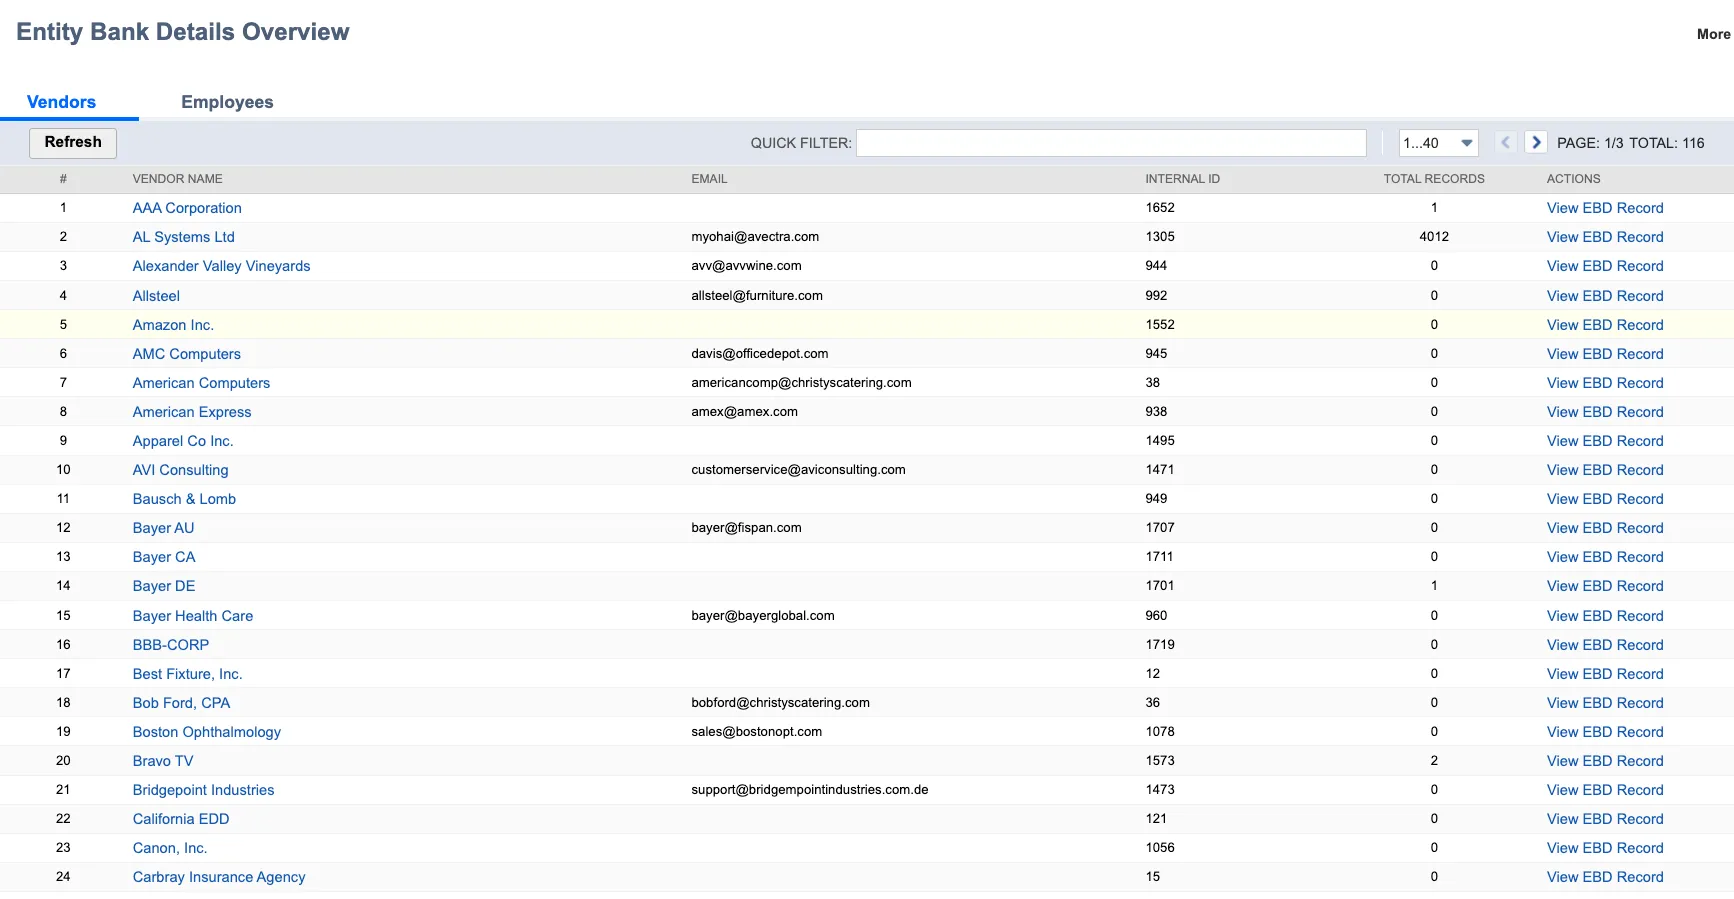
Three types of changes trigger approvals:
- Update
- Add
- Delete
Make the desired changes to the entity's record and Save.
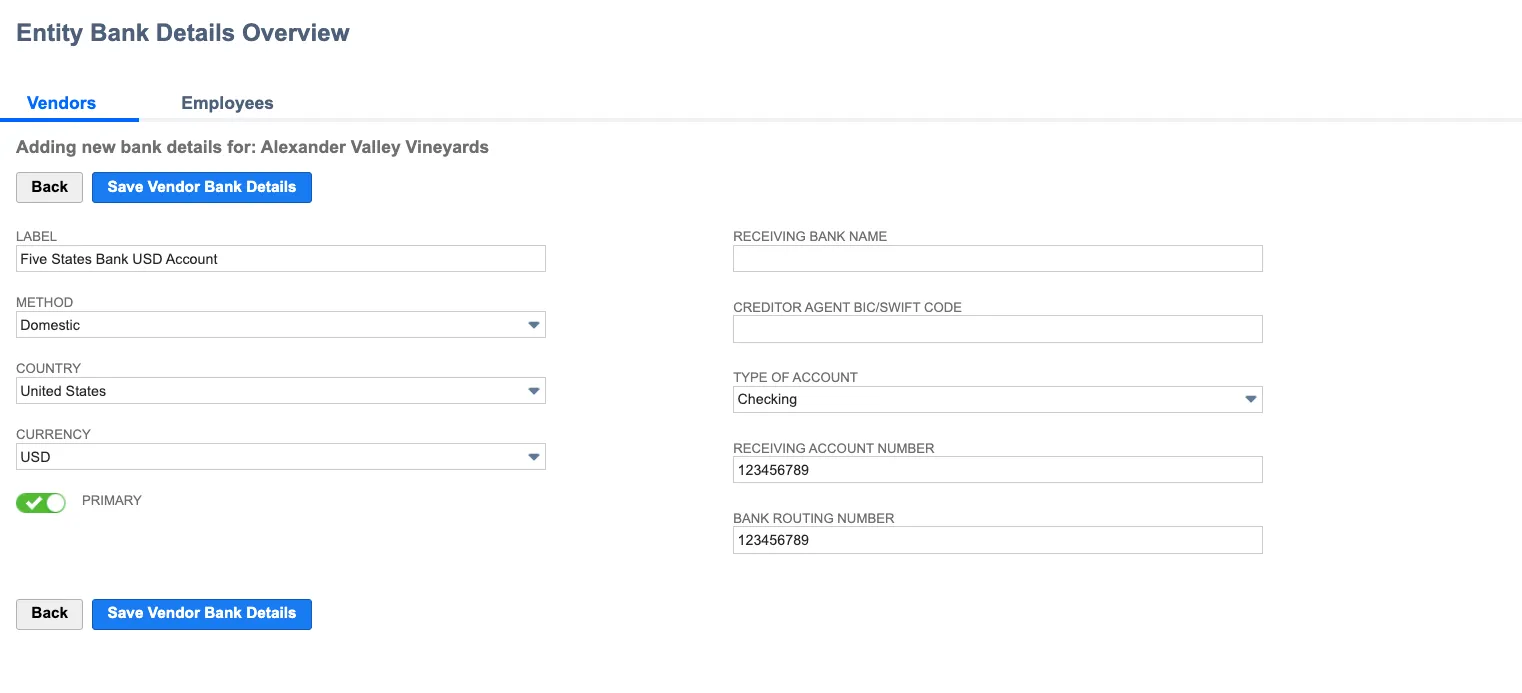
IMPORTANT: Turn off the PRIMARY toggle if you do not want this newly created account to be a primary record. If a vendor or employee does not have a primary record enabled, payments will fail.
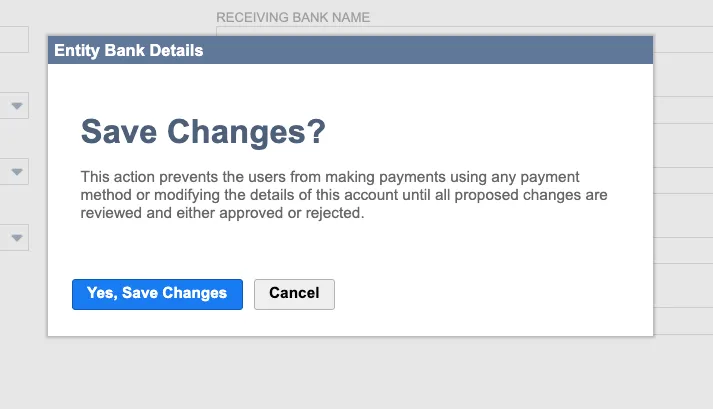
Confirm the Change
When asked to confirm the change, be aware that no payments can be made to this vendor or employee until the changes have been approved.
A blue banner will be displayed on vendor records indicating that changes are pending, while a red alert icon will appear on the relevant bank details record.
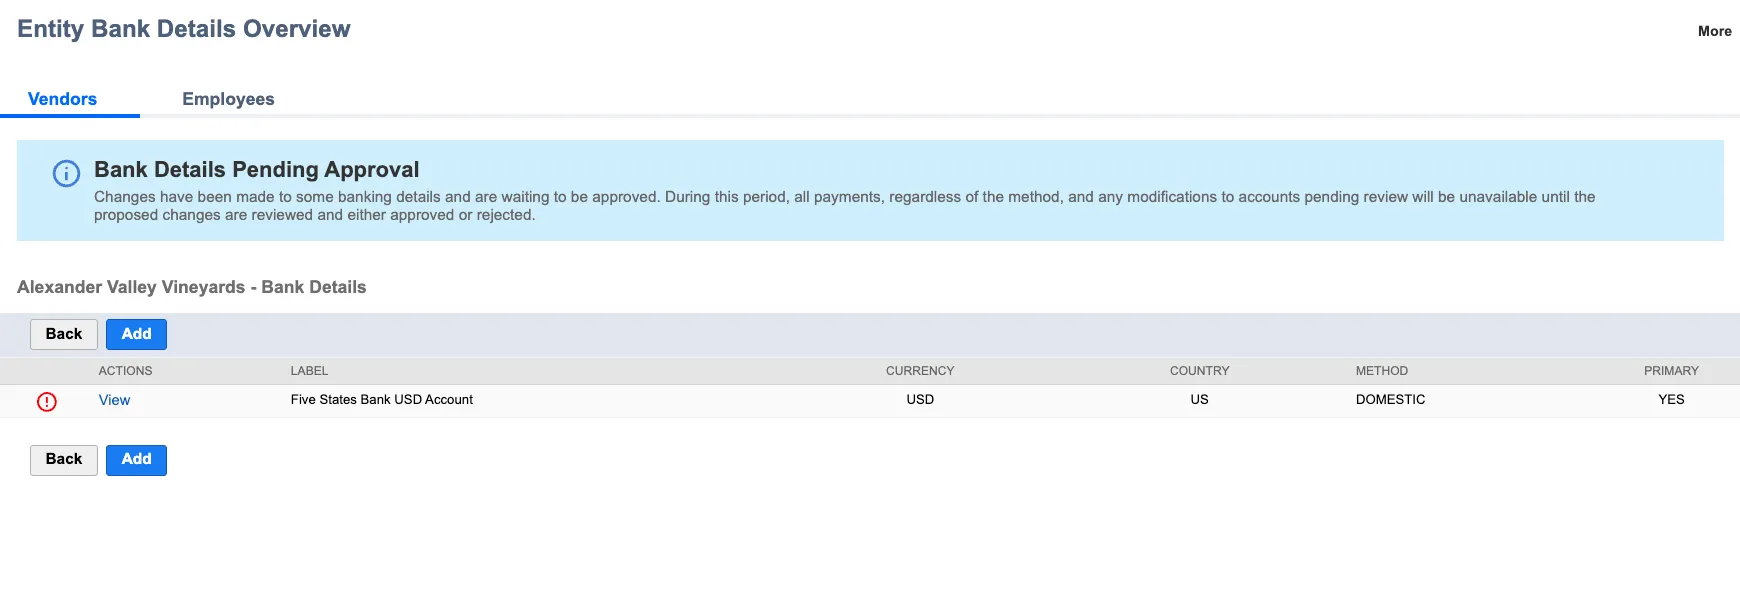
The blue banner serves as a reminder that the completion of payments is contingent upon the approval of the change. The alert icon signifies that the record has changed.
Records With Pending Changes
Should a record have a pending change, it cannot be edited again until such a change receives either approval or rejection.
If a vendor's record currently has a pending change, you can edit, create, or delete other records; however, the record with the pending change cannot be modified.
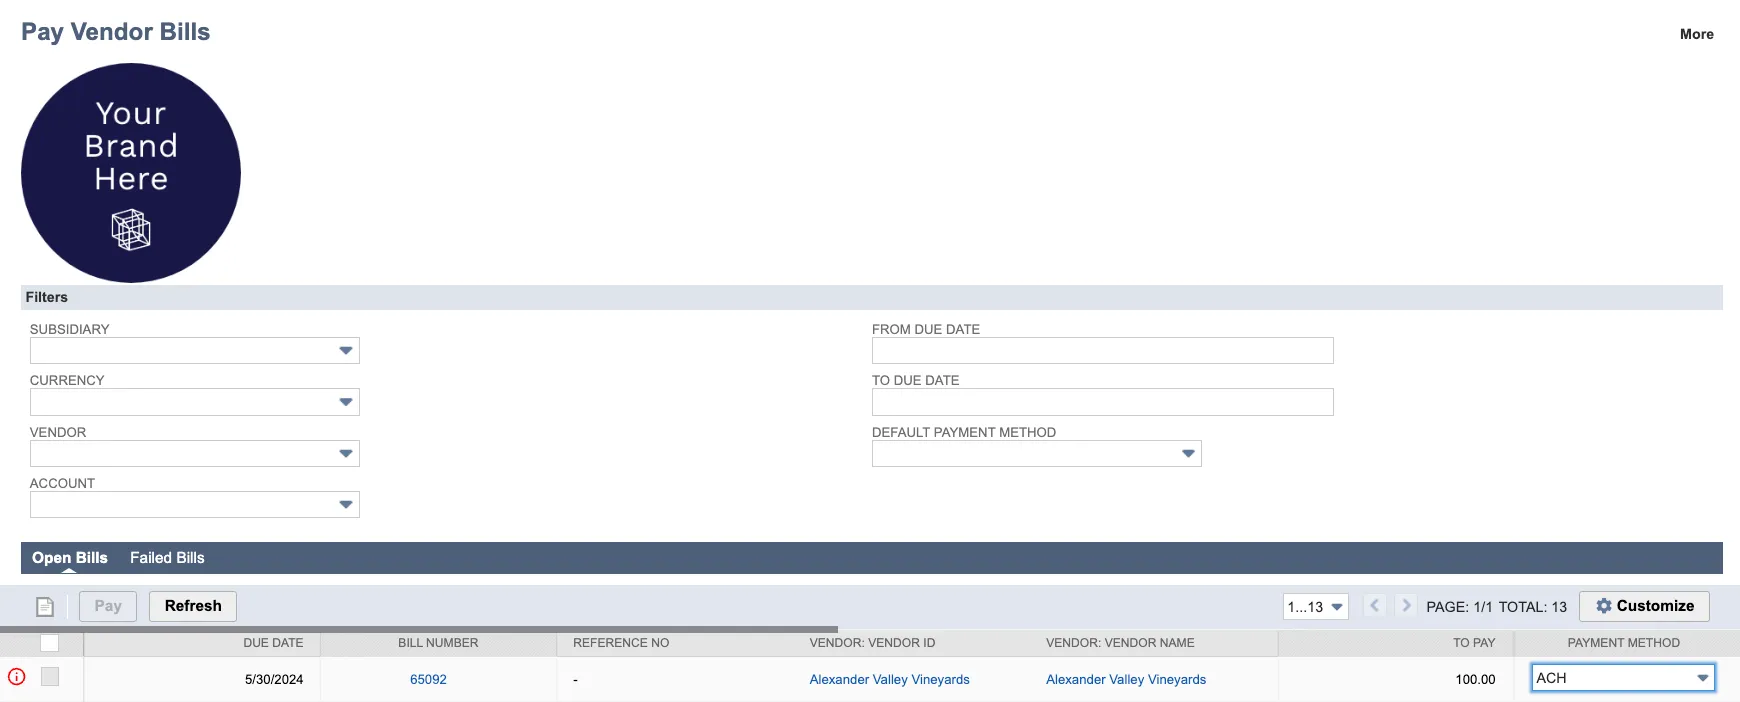
As a result, the payment page will display bills accompanied by a red alert icon, indicating that payment processing is not possible, and their associated checkboxes will be disabled.
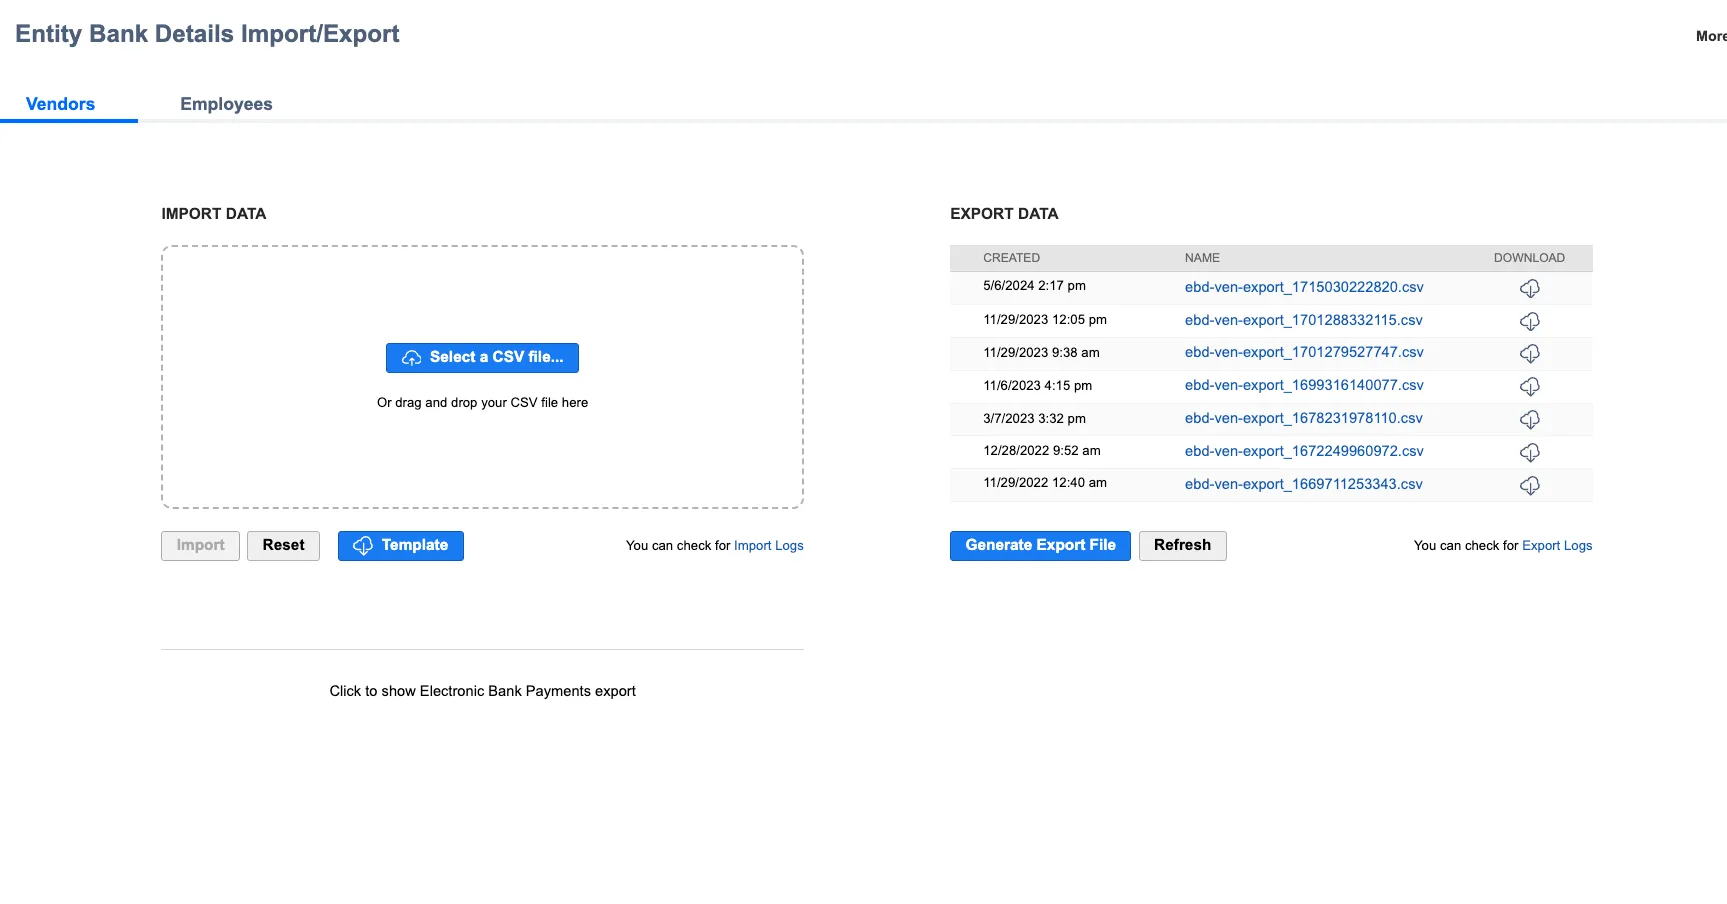
Making EBD Changes With Import/Export
Changes to Entity Bank Details can be made via a CSV import of records, and these changes will require approval.
Export EBD Data
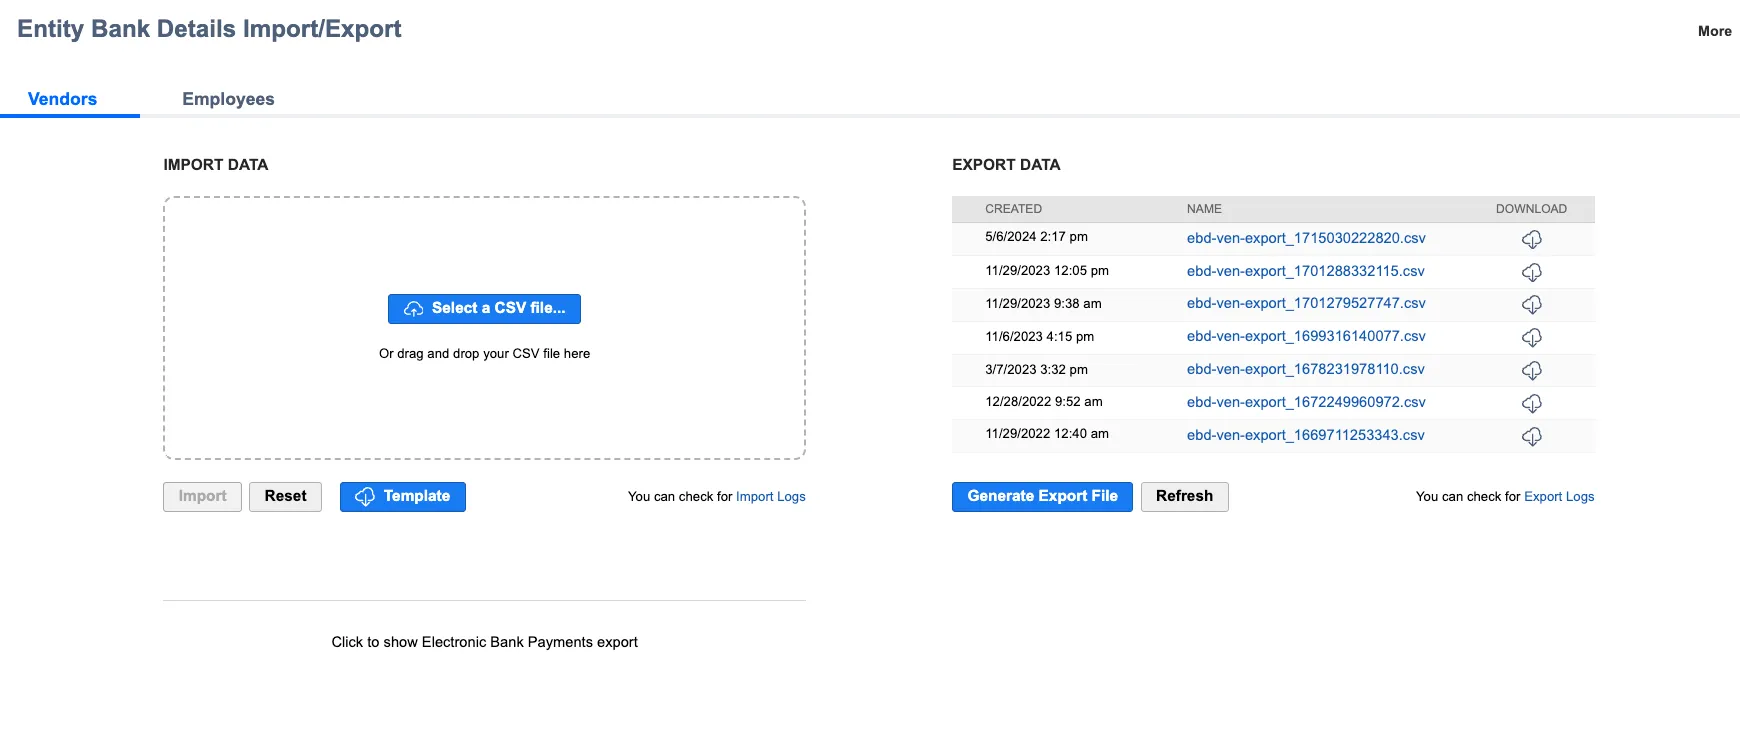
Navigate to Setup -> Entity Bank Details -> Import/Export.
Import/Export, you have the option to either download a blank template or use the Generate Export File option to create an existing export file.
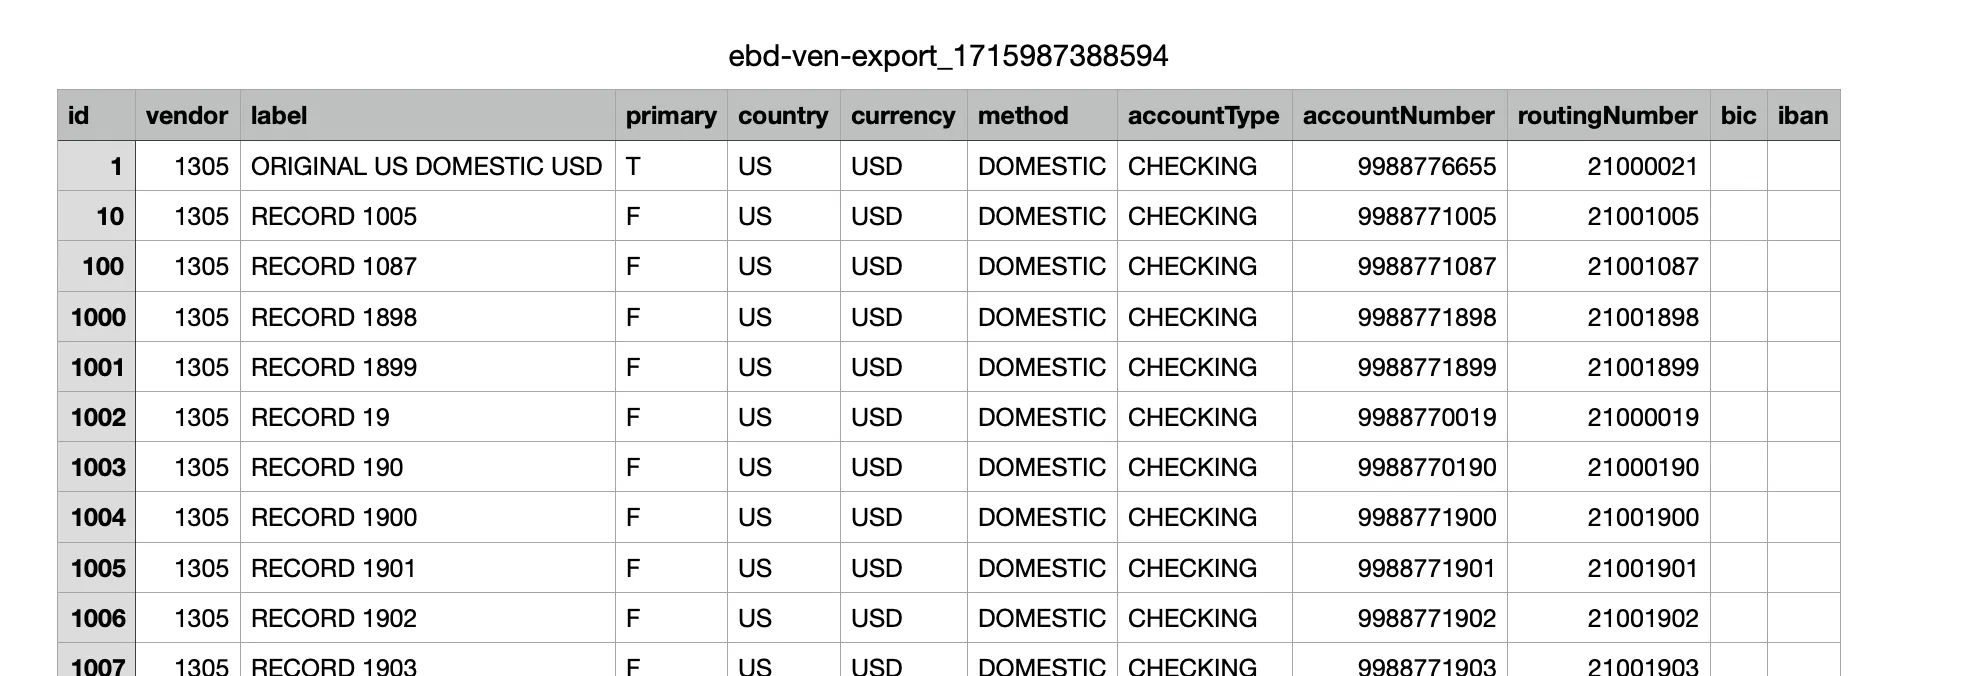
Update Exported EBD Data
Then, make changes or add data to the export file.
Reimport EBD Data
Now add the updated file to the IMPORT DATA box and select Import.
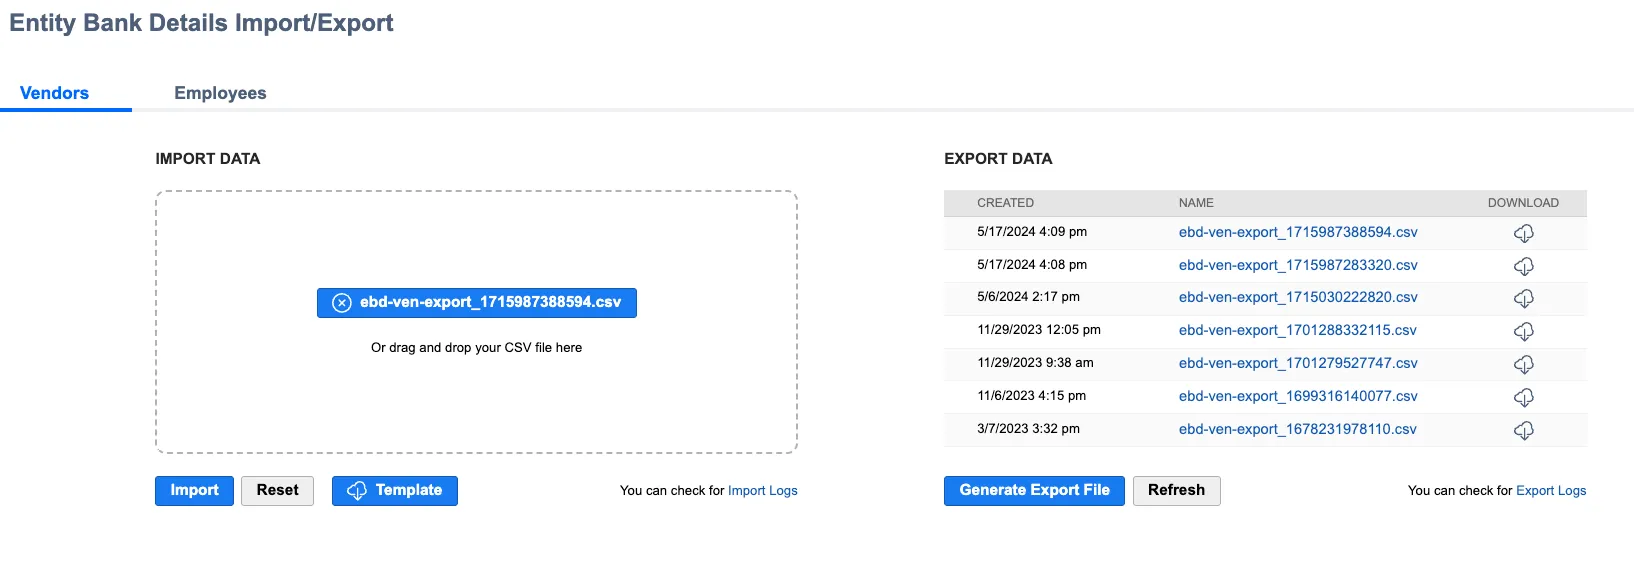
The plugin will process the imported data and notify you if there are pending changes for a record.
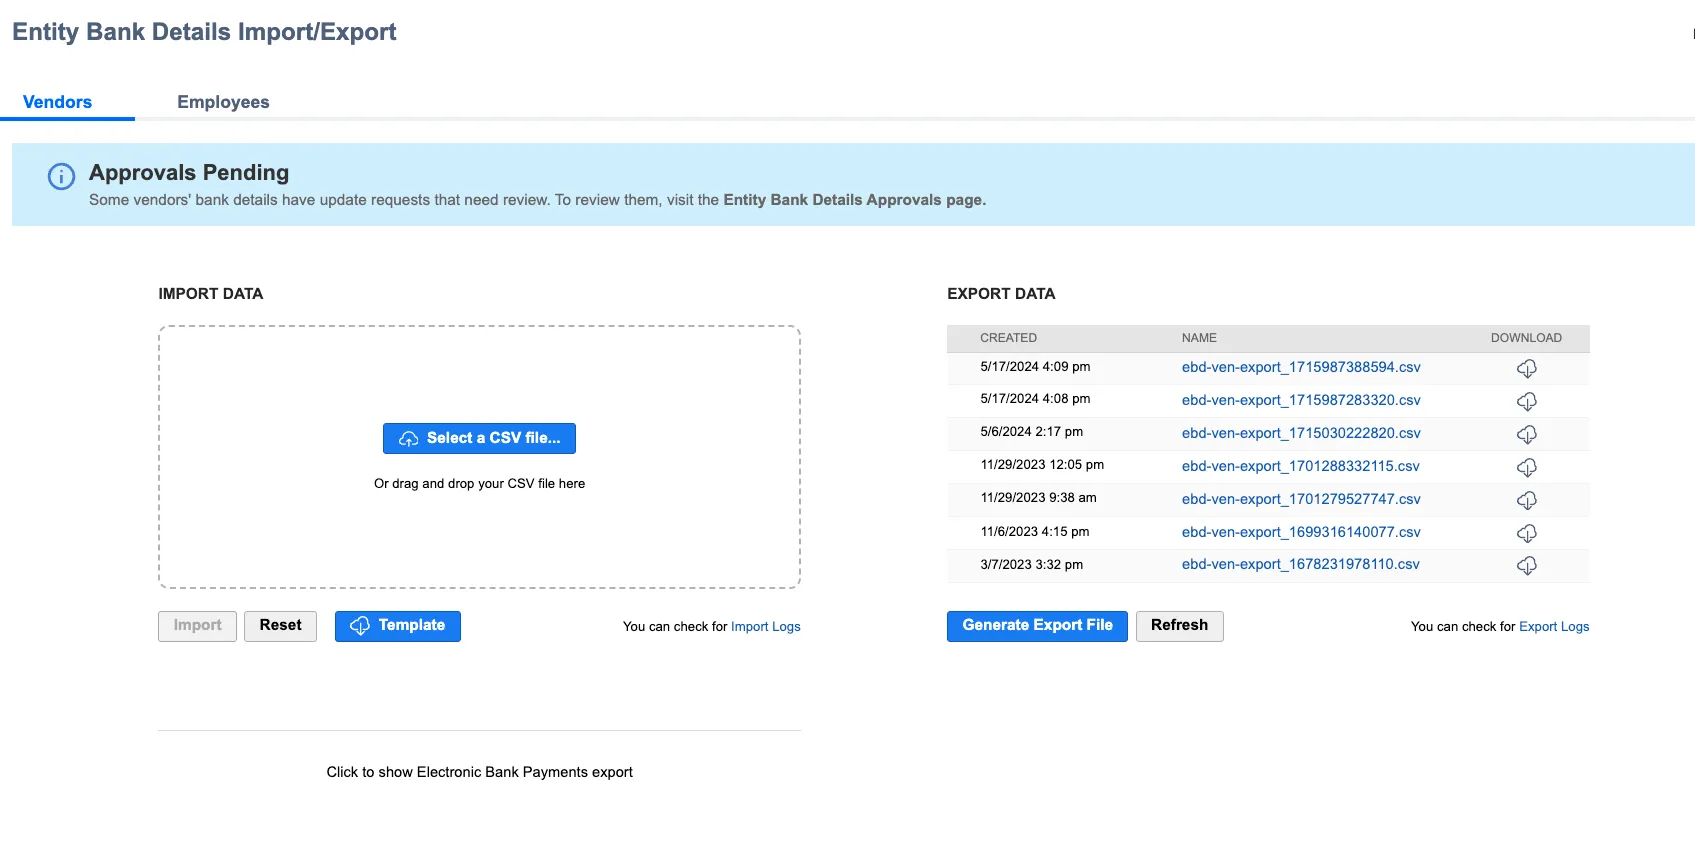
Payments are blocked for any entity with outstanding changes until the changes are approved or rejected.
Approving Changes
To approve changes, you must have access to the Approvals page, and you cannot be the user who changed the entity's record.
Locate Pending Approvals
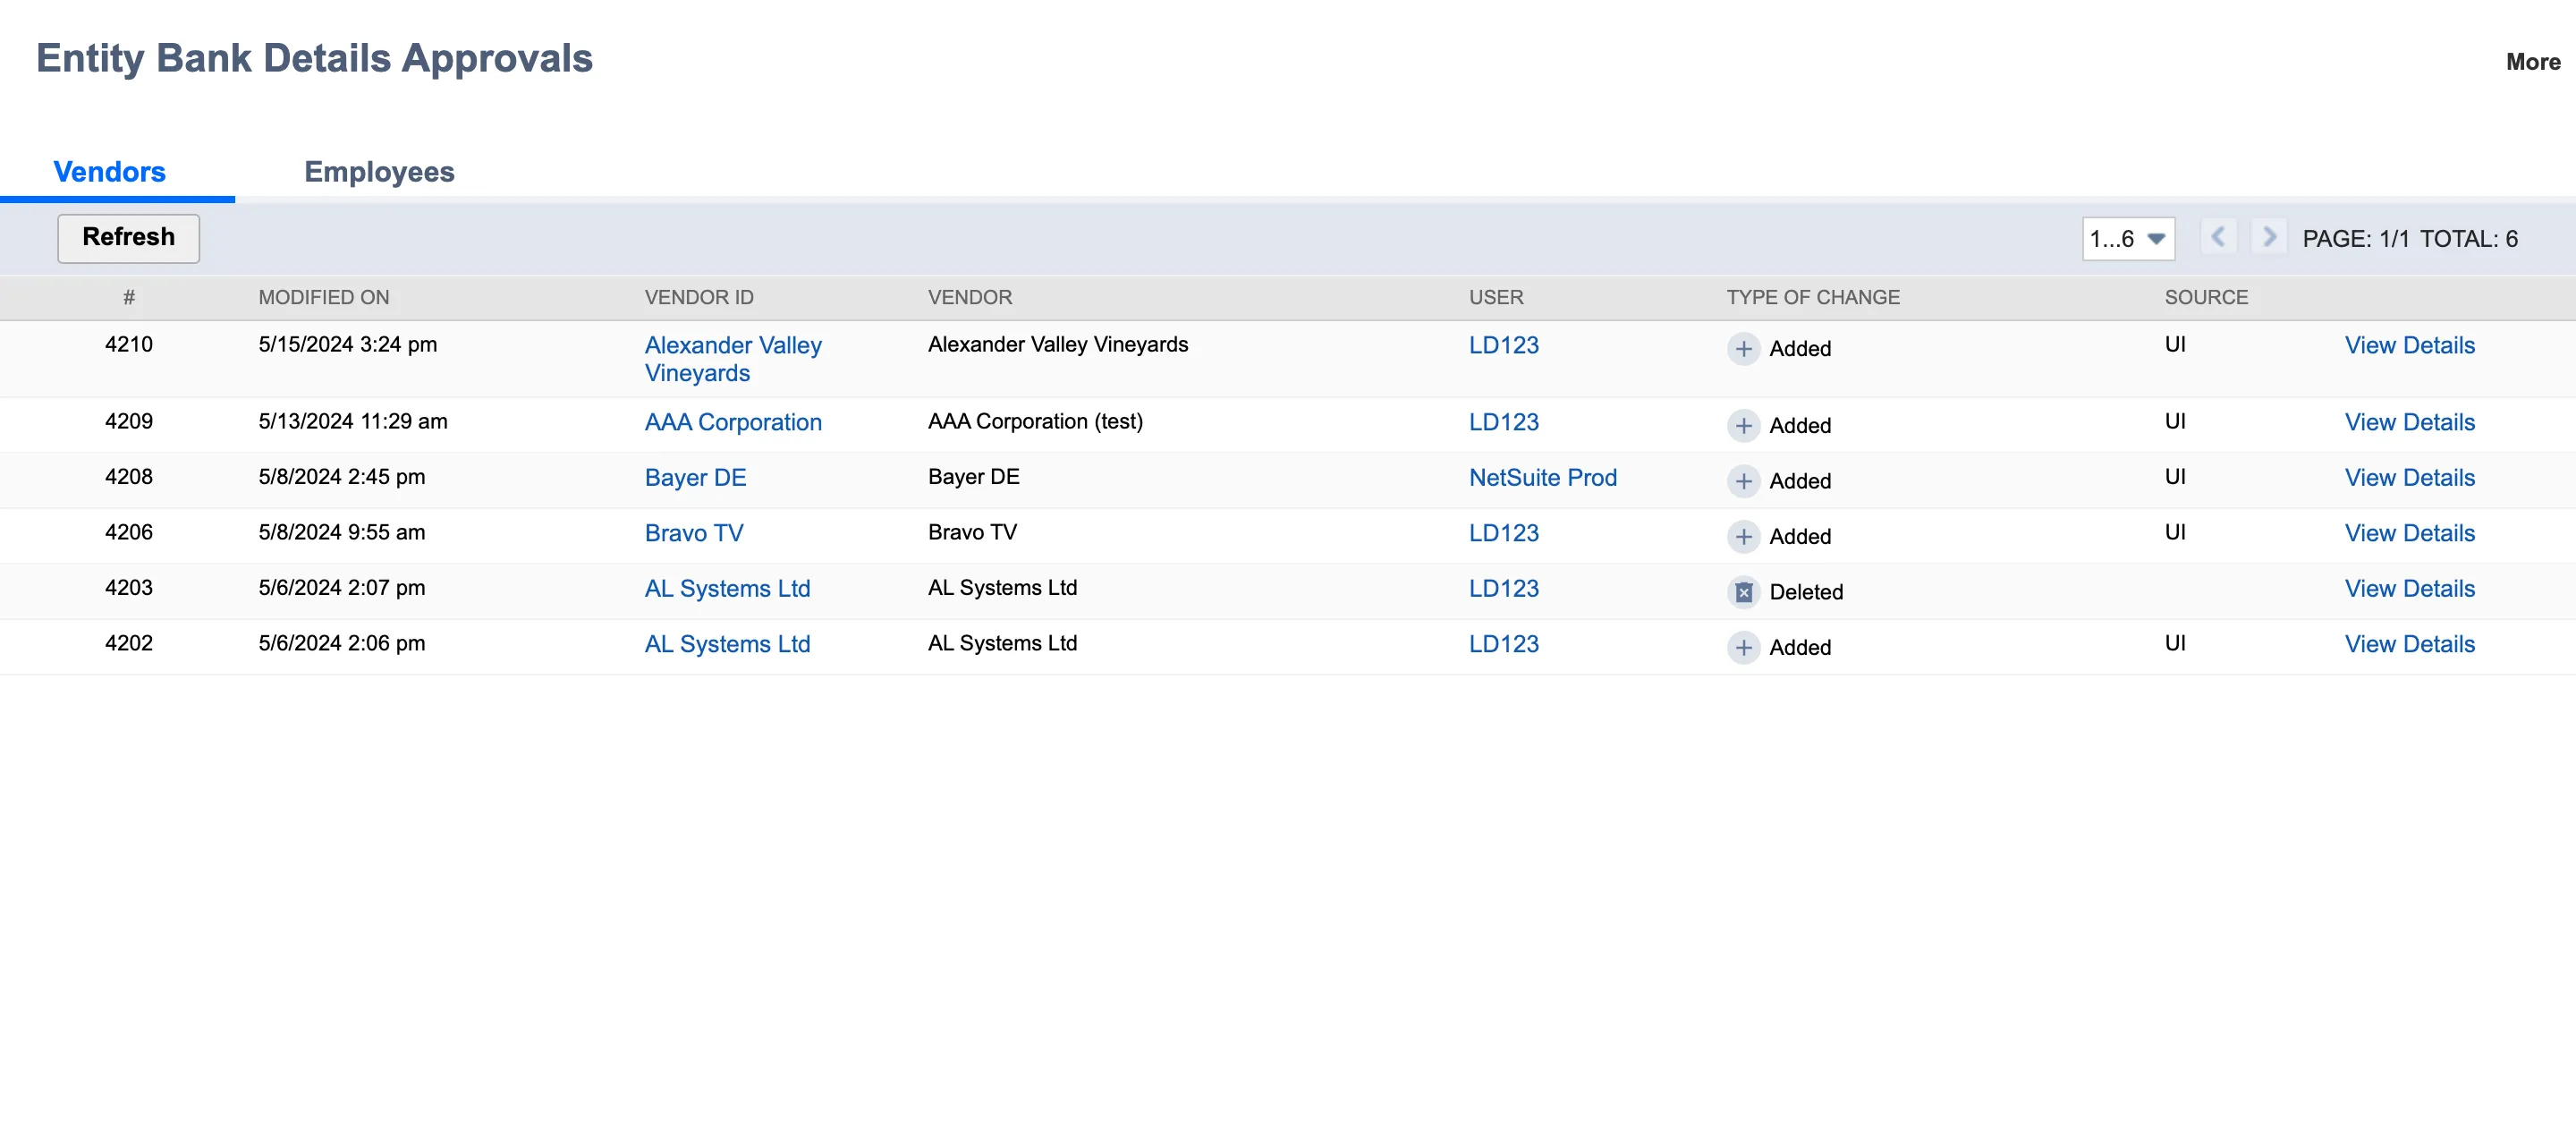
Navigate to Setup -> Entity Bank Details -> Approvals.
The page will now display any records that have outstanding changes. Click View Details to see the change and to begin approving or rejecting changes.
View Changes
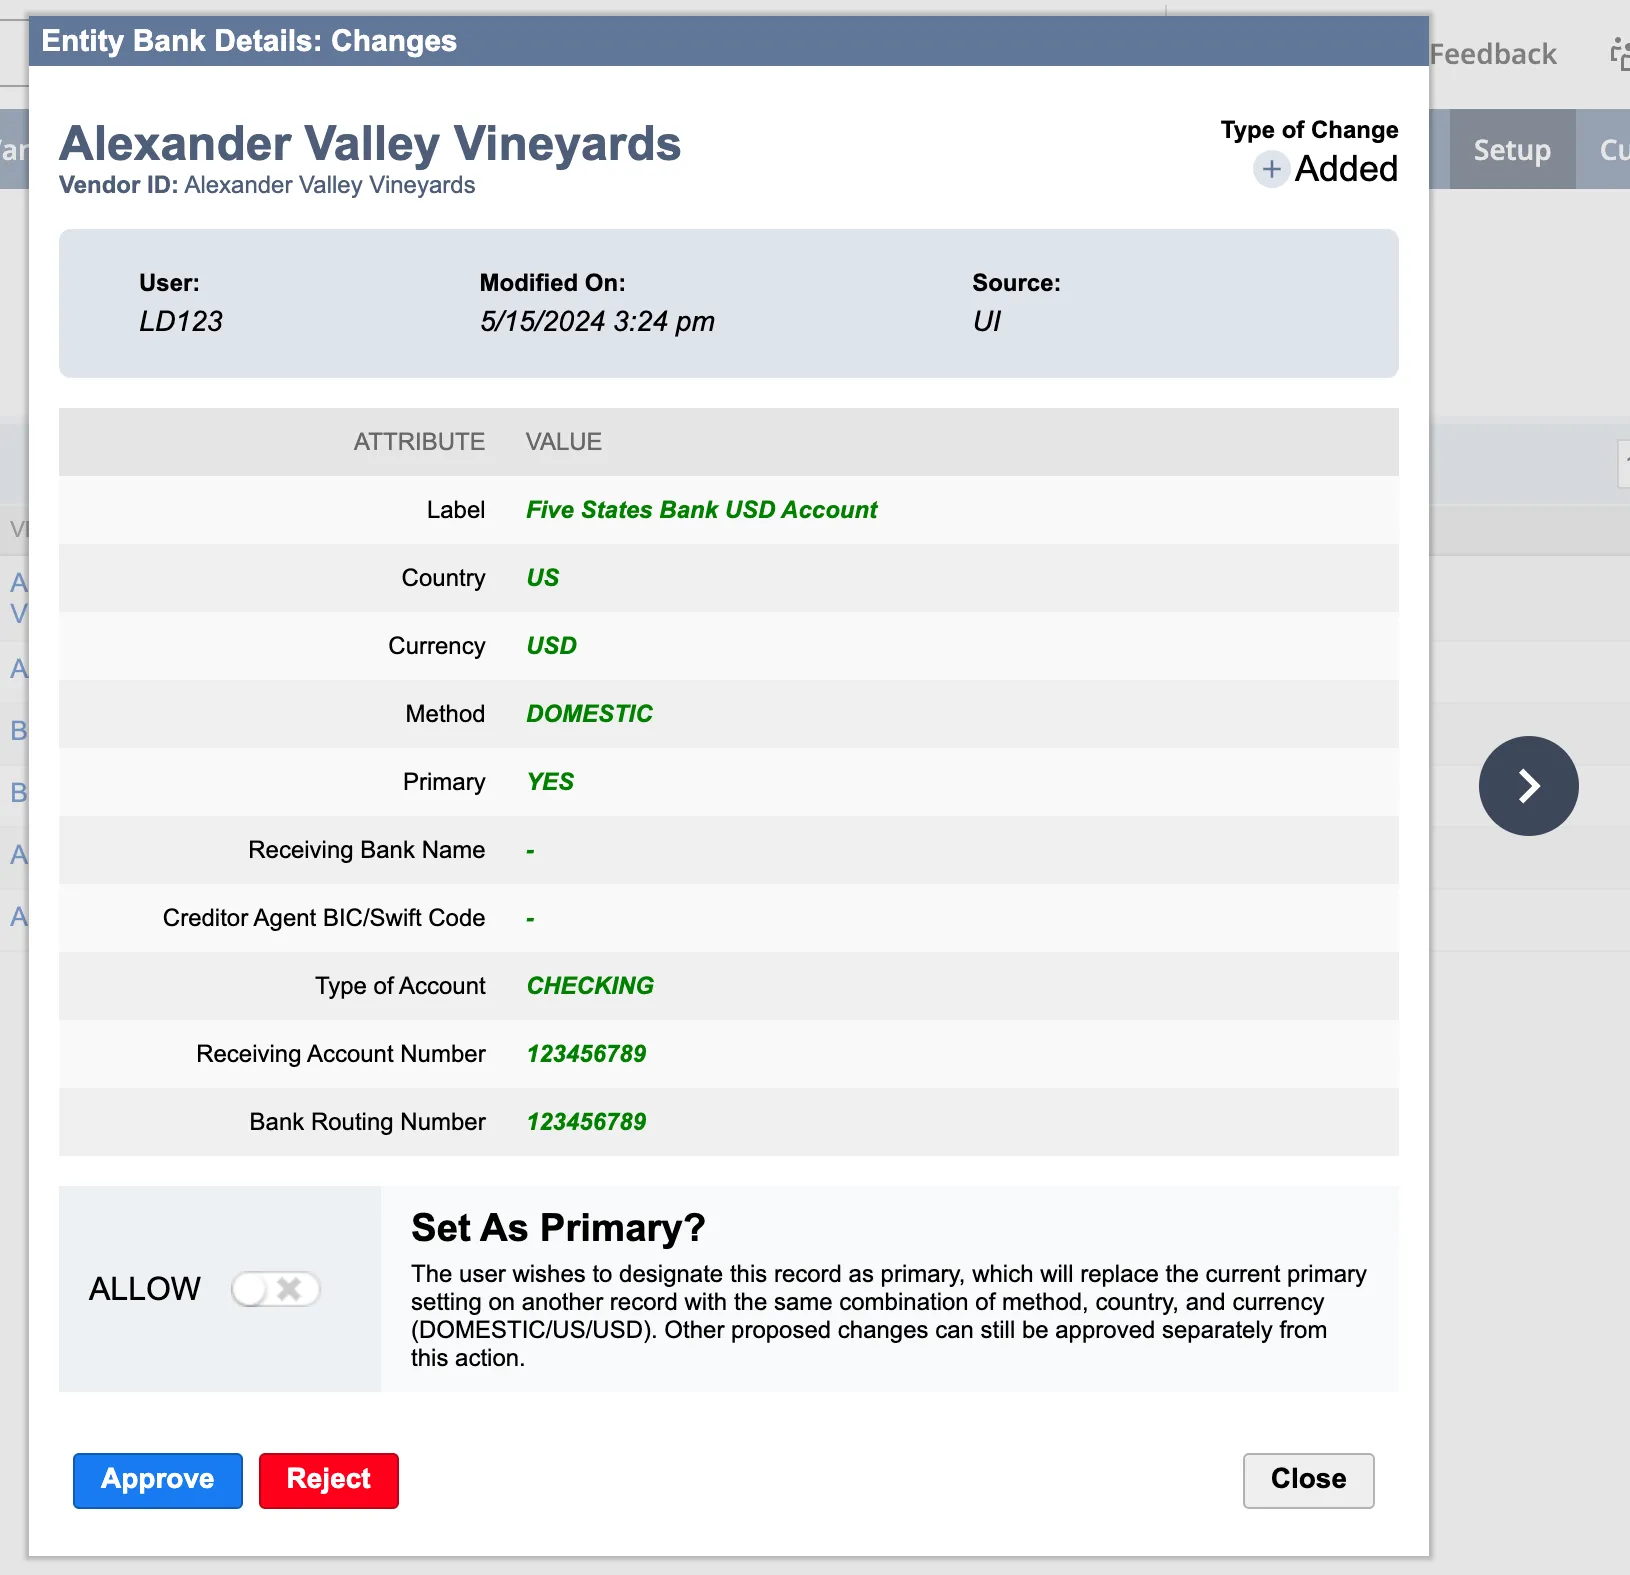
When you click View Details, a pop-up appears and outlines the changes.
If the record you are approving is classified as a Primary Account, you will have the option to either confirm this designation or revoke the account's status as a Primary Account.
This option will only appear if a record's Primary setting is being updated or if a new bank account is being added.
Approve Changes
After reviewing the changes, you can Approve or Reject. If unsure about a change, select the arrow beside the pop-up to move to the next record and return to this change later.
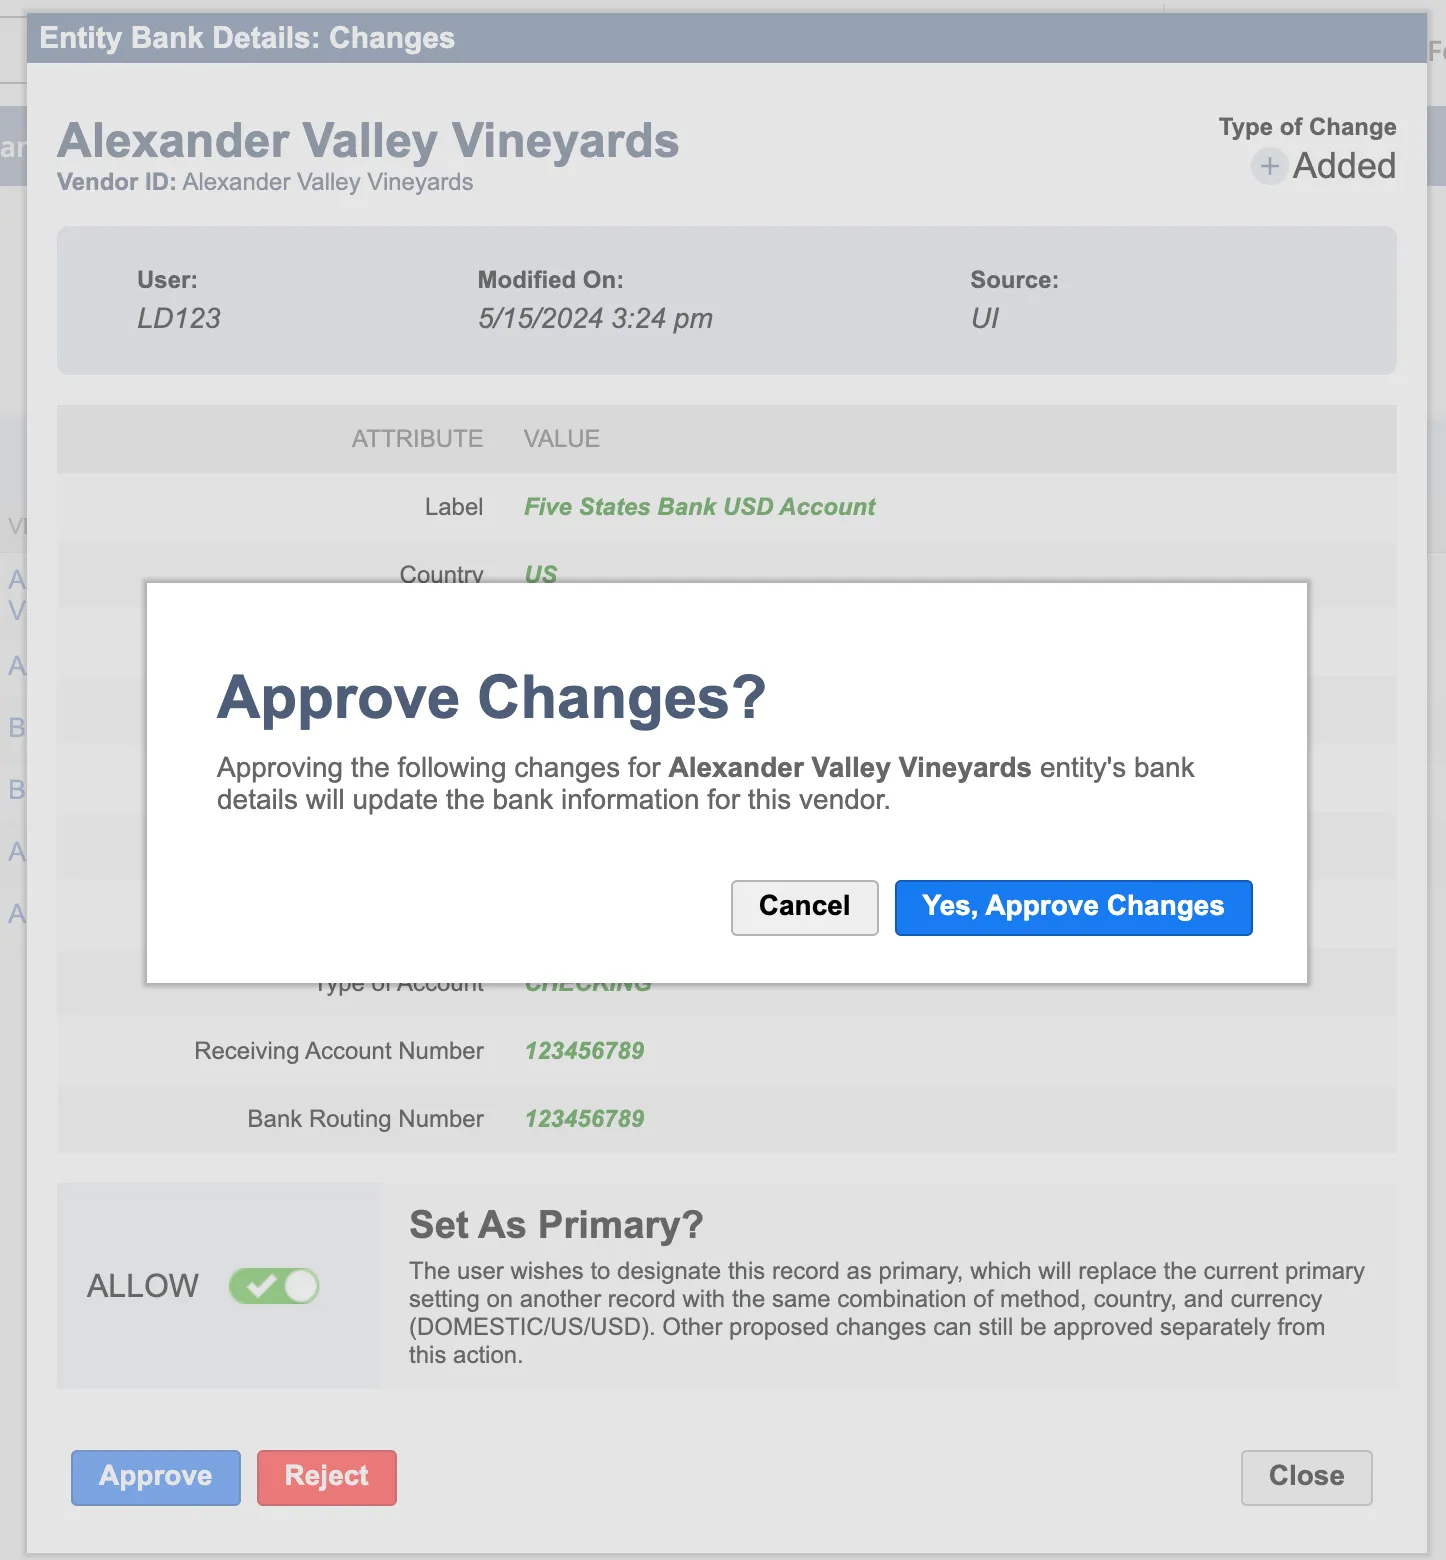
When you approve a record, a pop-up window will ask you for final confirmation.
After approval of the change, a confirmation window will display a checkmark, indicating that the change has been successfully approved and saved.
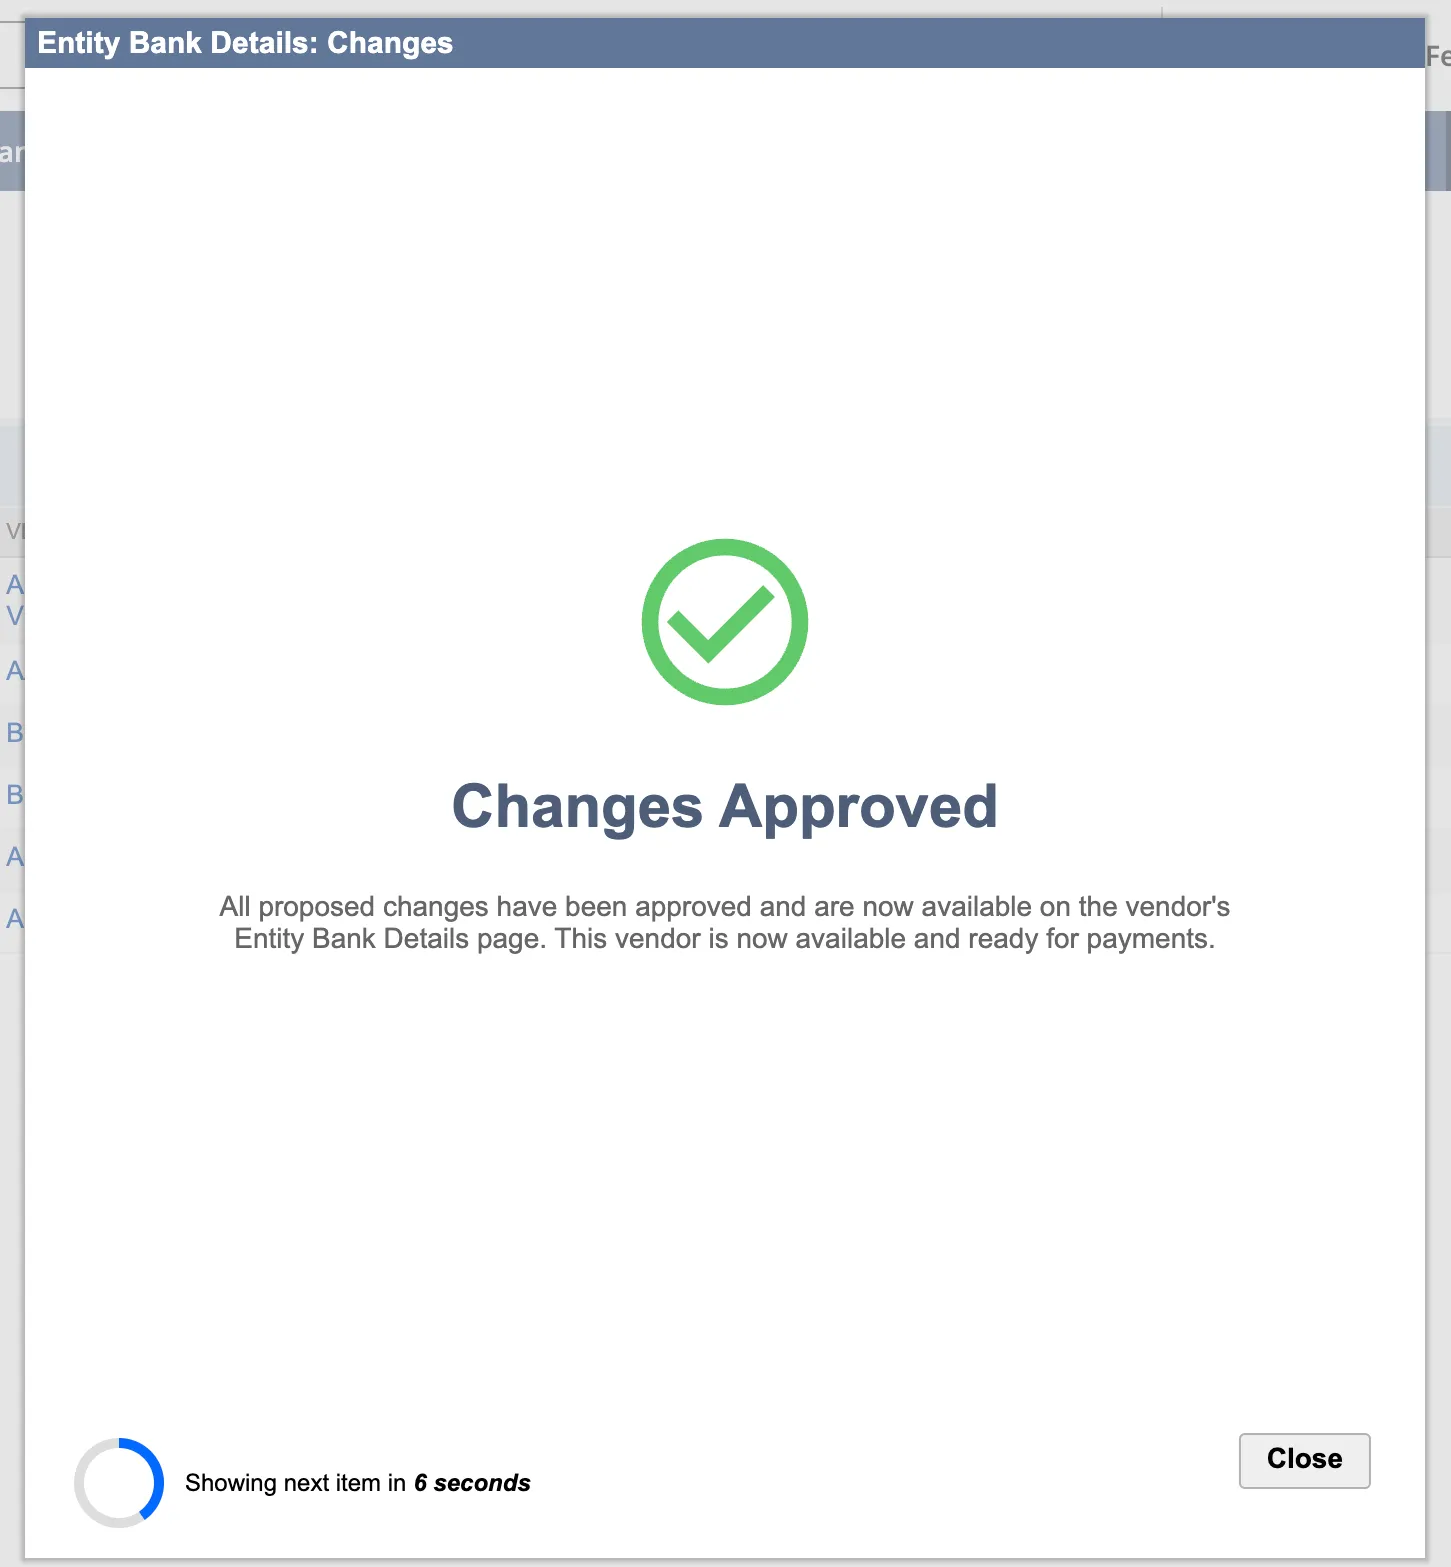
After 10 seconds, the pop-up moves to the next record so you can continue reviewing changes. You can also click forward using the arrow icons.
If there are no further changes, click Close to exit the pop-up window.
The updated entity records can be viewed on the Overview page. Payments for this vendor or employee are no longer blocked, allowing for the processing of any outstanding payments.
Reject Changes
To reject a change, select Reject.
When prompted to provide a Reason for Rejection, provide an explanation up to a maximum of 250 characters.
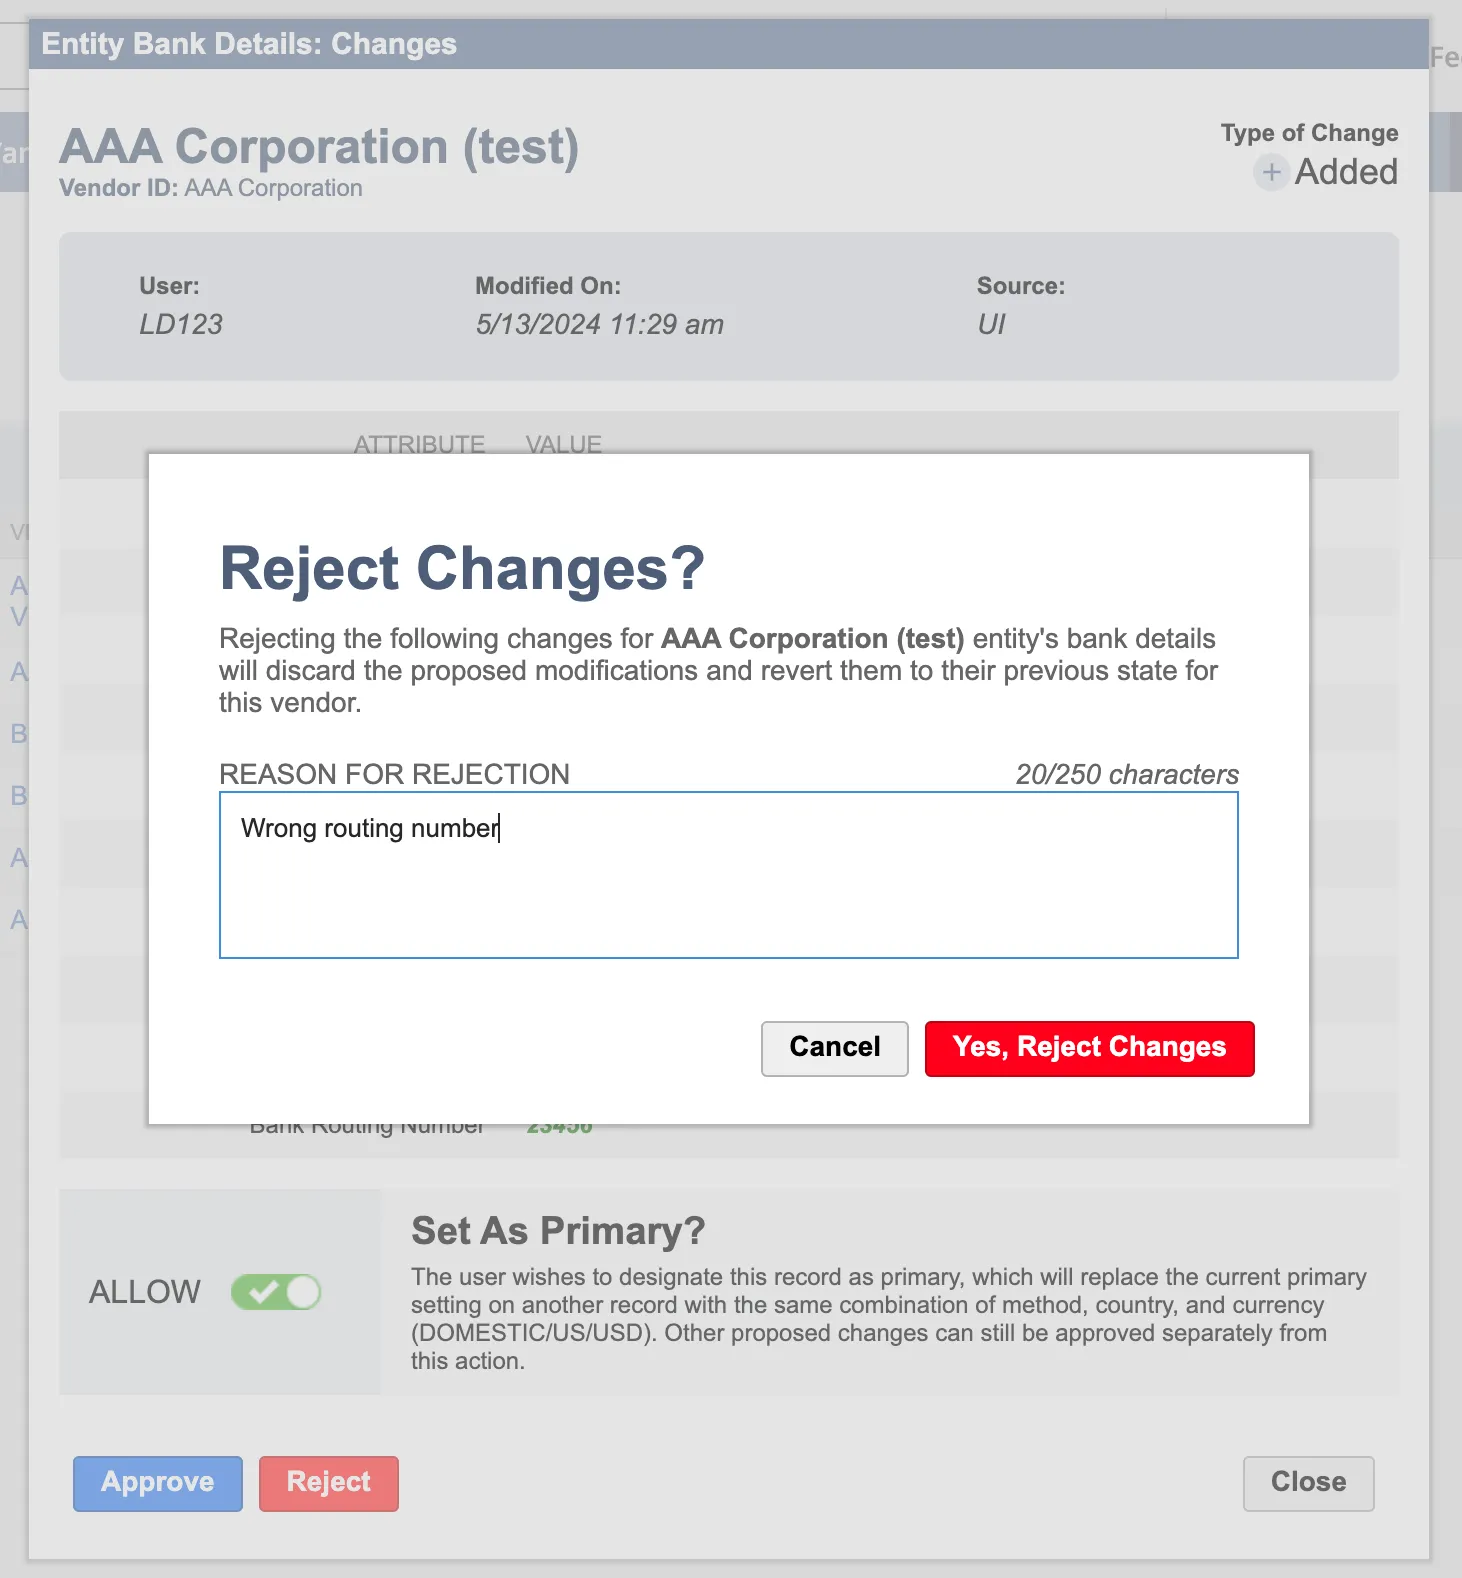
After entering the reason, select Yes, Reject Changes.
An X icon window indicates the change was rejected, and the vendor's record was not updated.
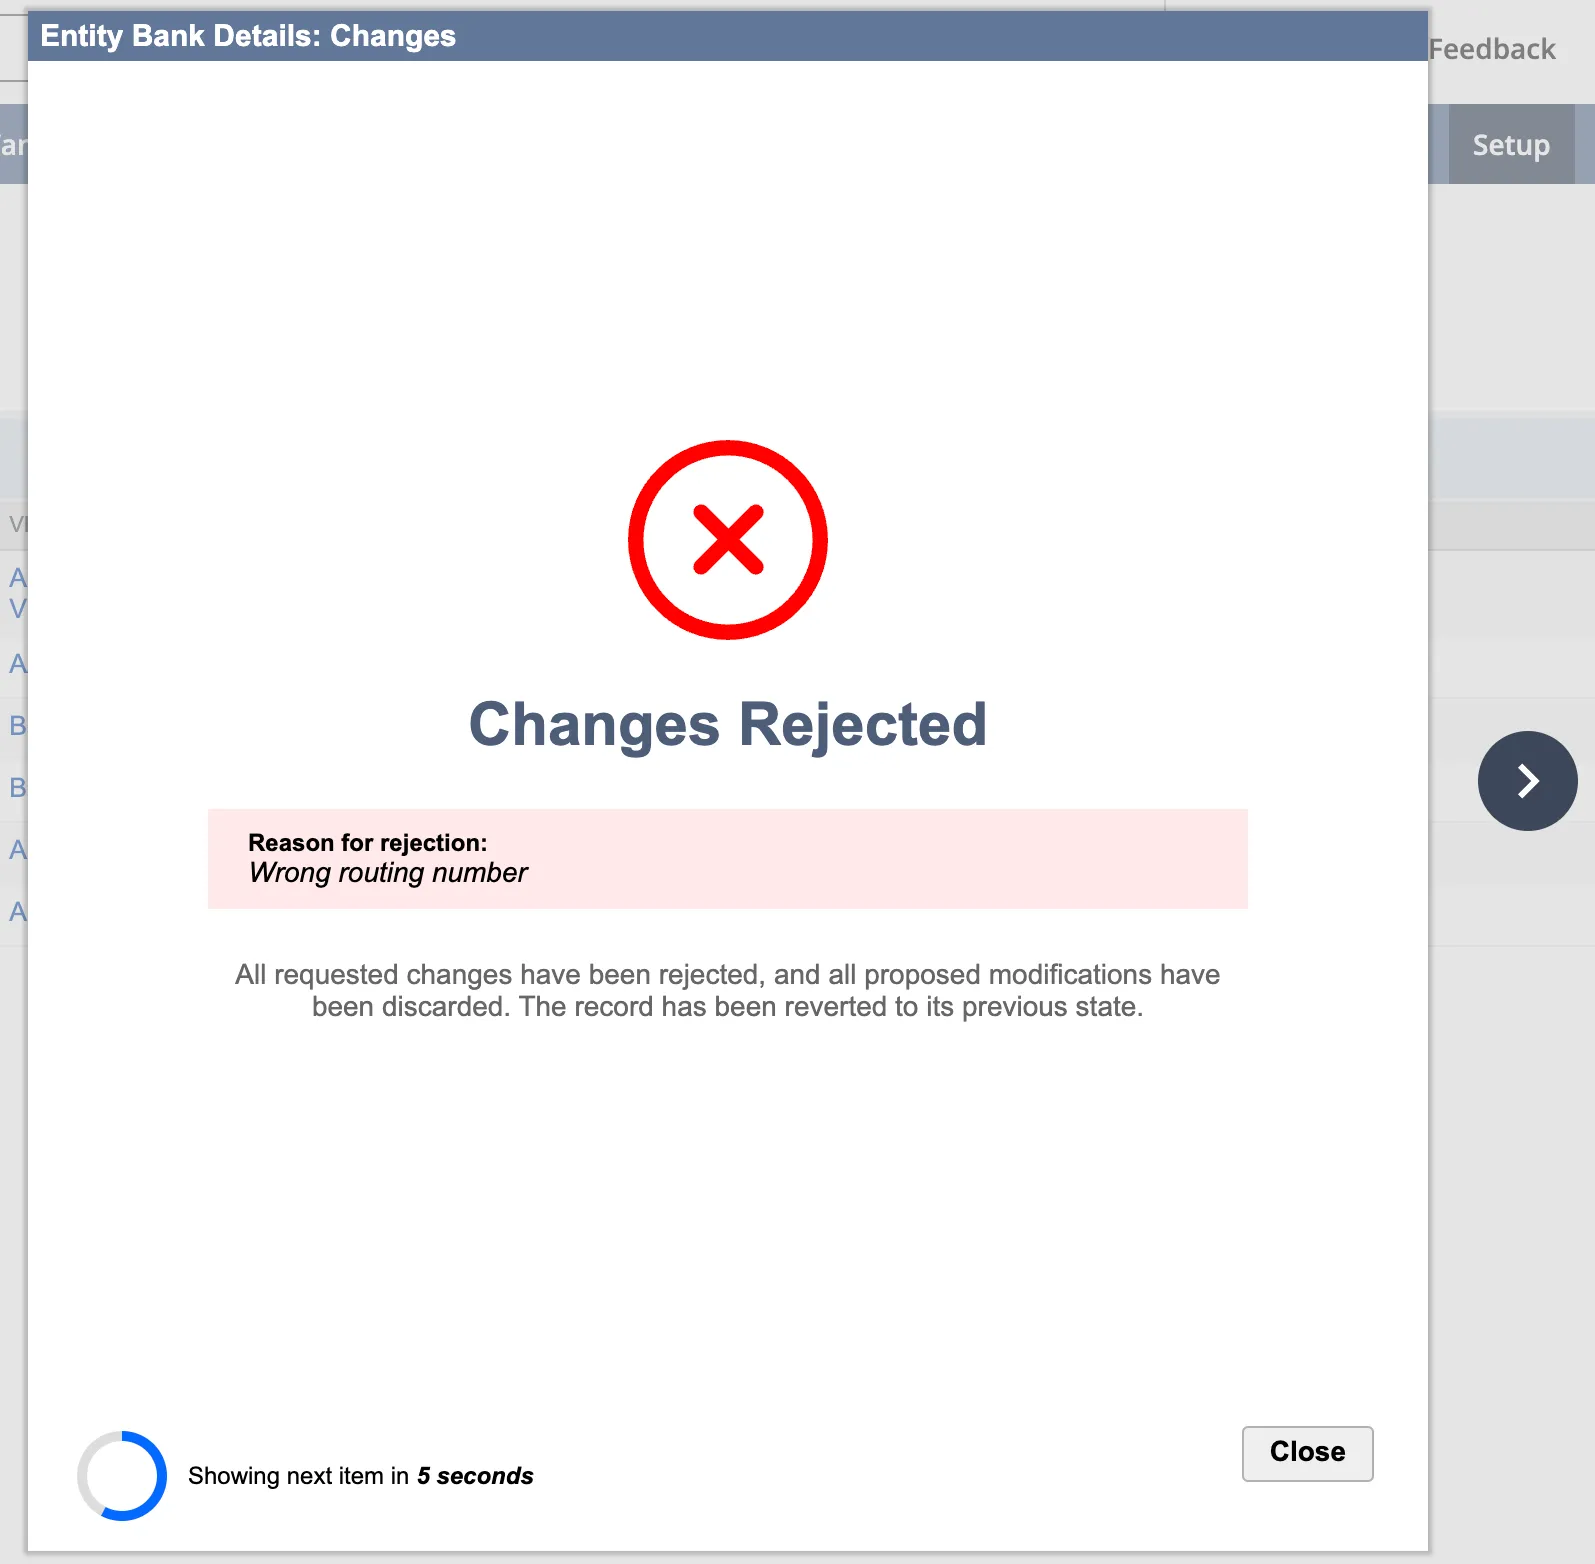
You can now successfully make payments for this vendor or employee.
Navigate to the next record using the arrow icon or by waiting 10 seconds.
Approvals History
All approvals are logged in the Entity Bank Details History, serving as a valuable resource for audits and reviews of approval histories.
Locate Approval History
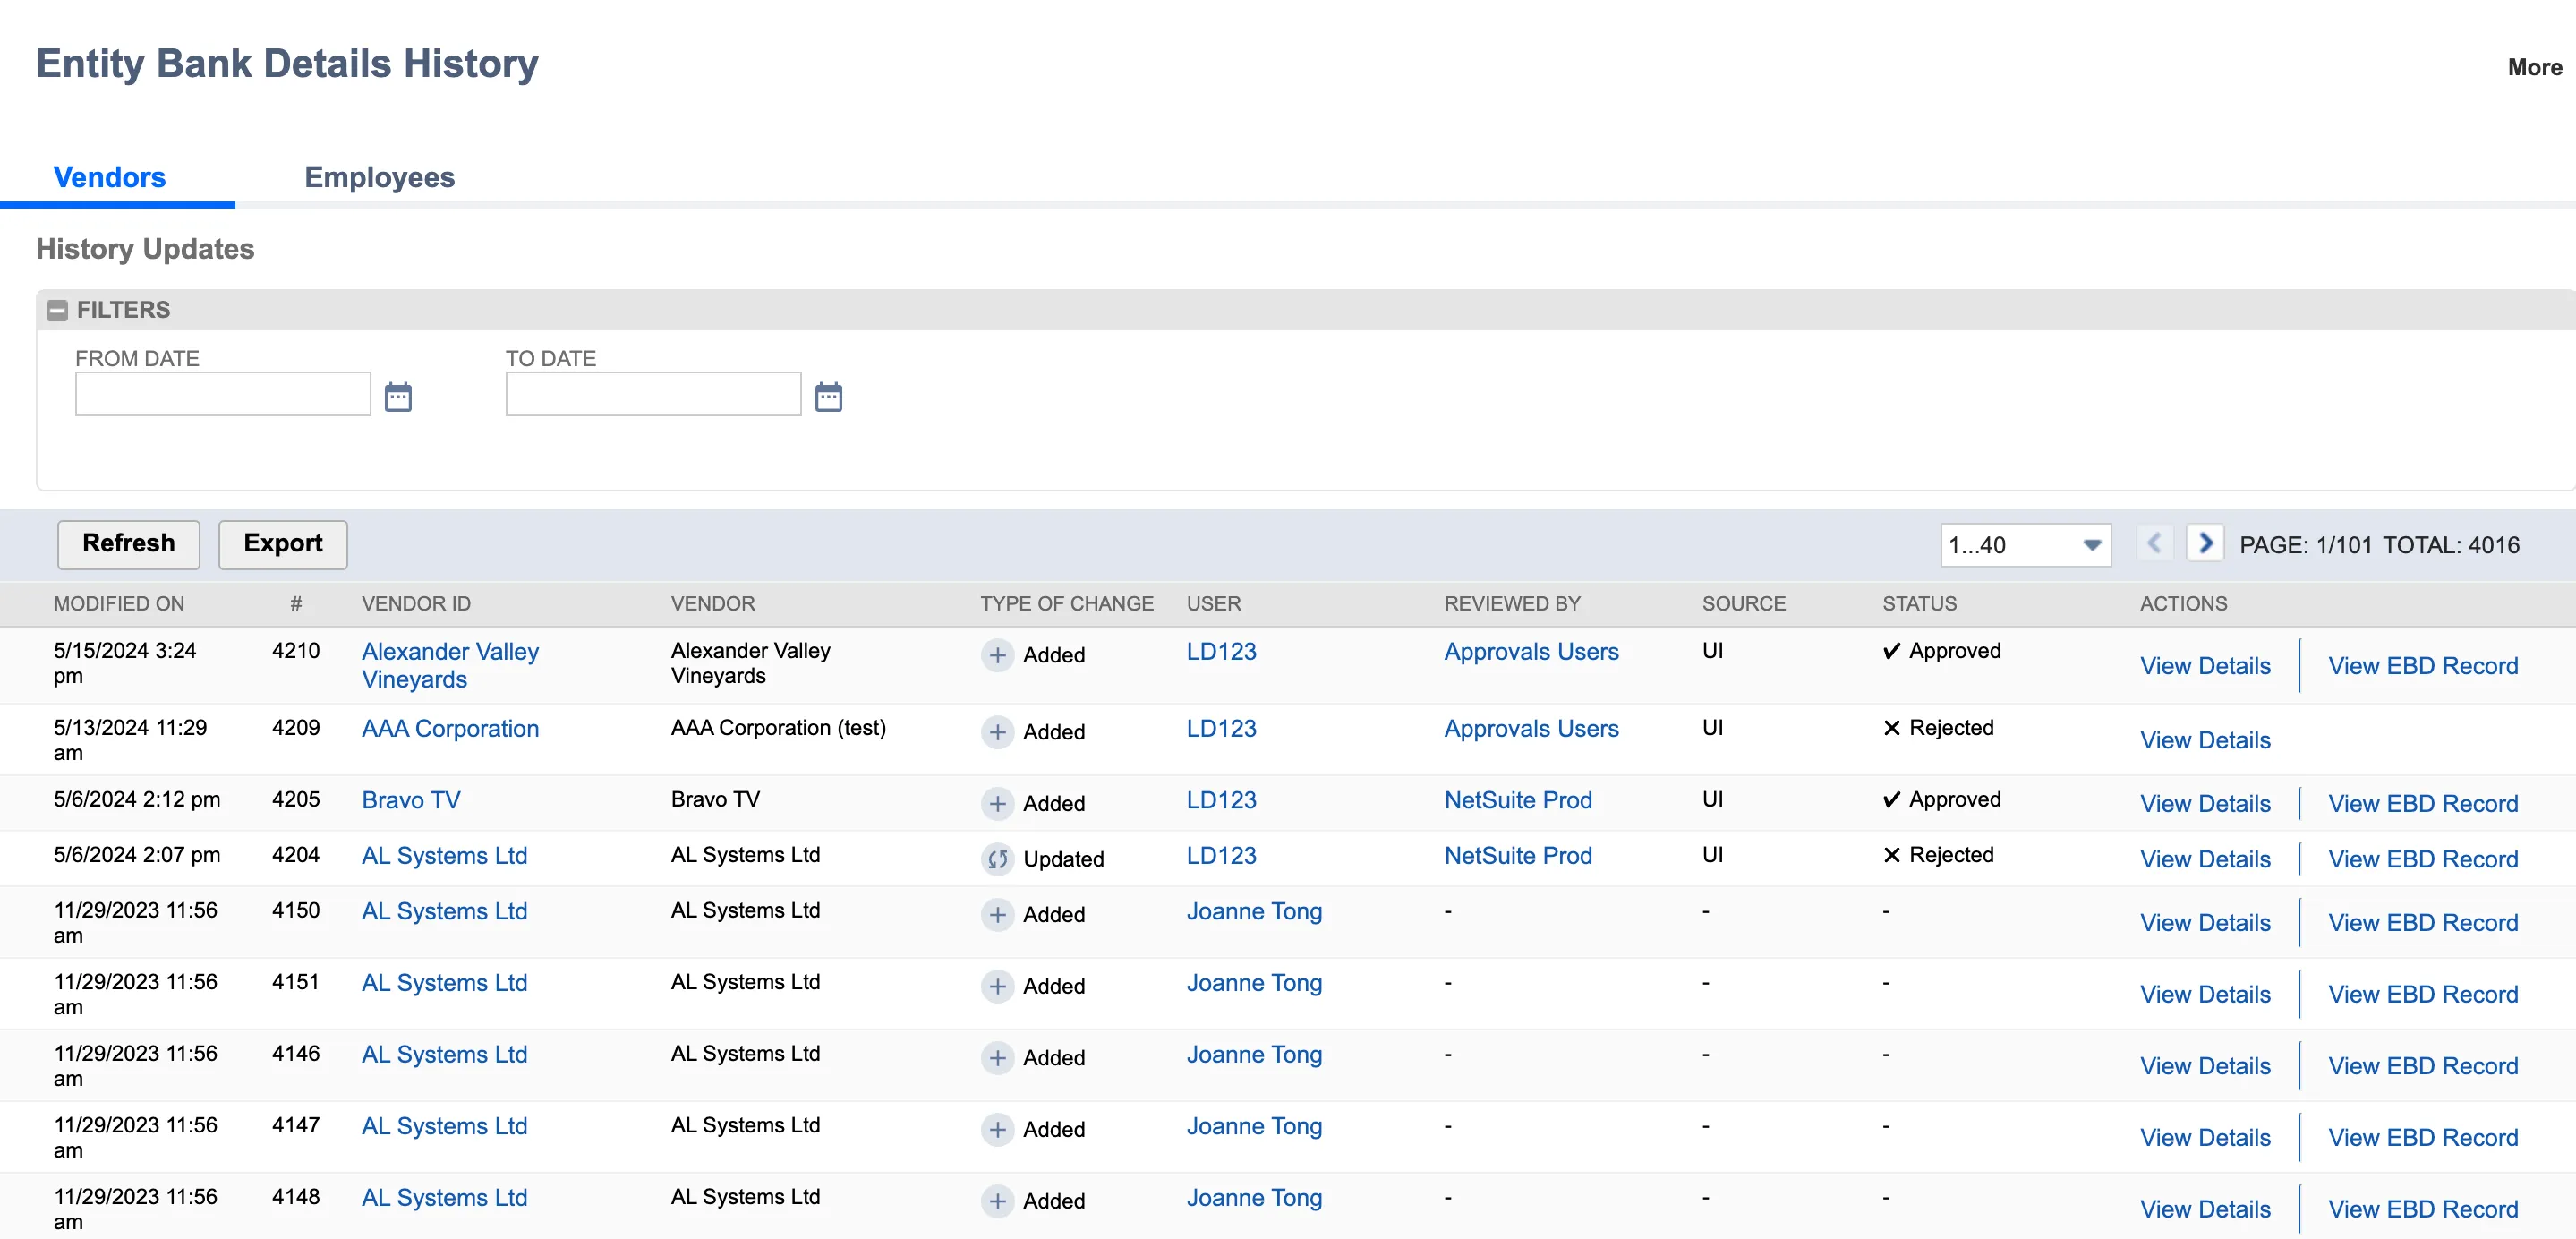
To view a history log of all changes, navigate to the History page: Setup -> Entity Bank Details -> History.
History displays a record of all changes made and approved. If the approvals feature was not enabled for some historical changes, some details like Reviewed By or Status will be missing.
View Approved Changes
Select View Details to see more information about a change.
For approved changes, a pop-up confirms that it has been Approved. It outlines key information such as who initiated the change, who approved it, and what attributes were modified.
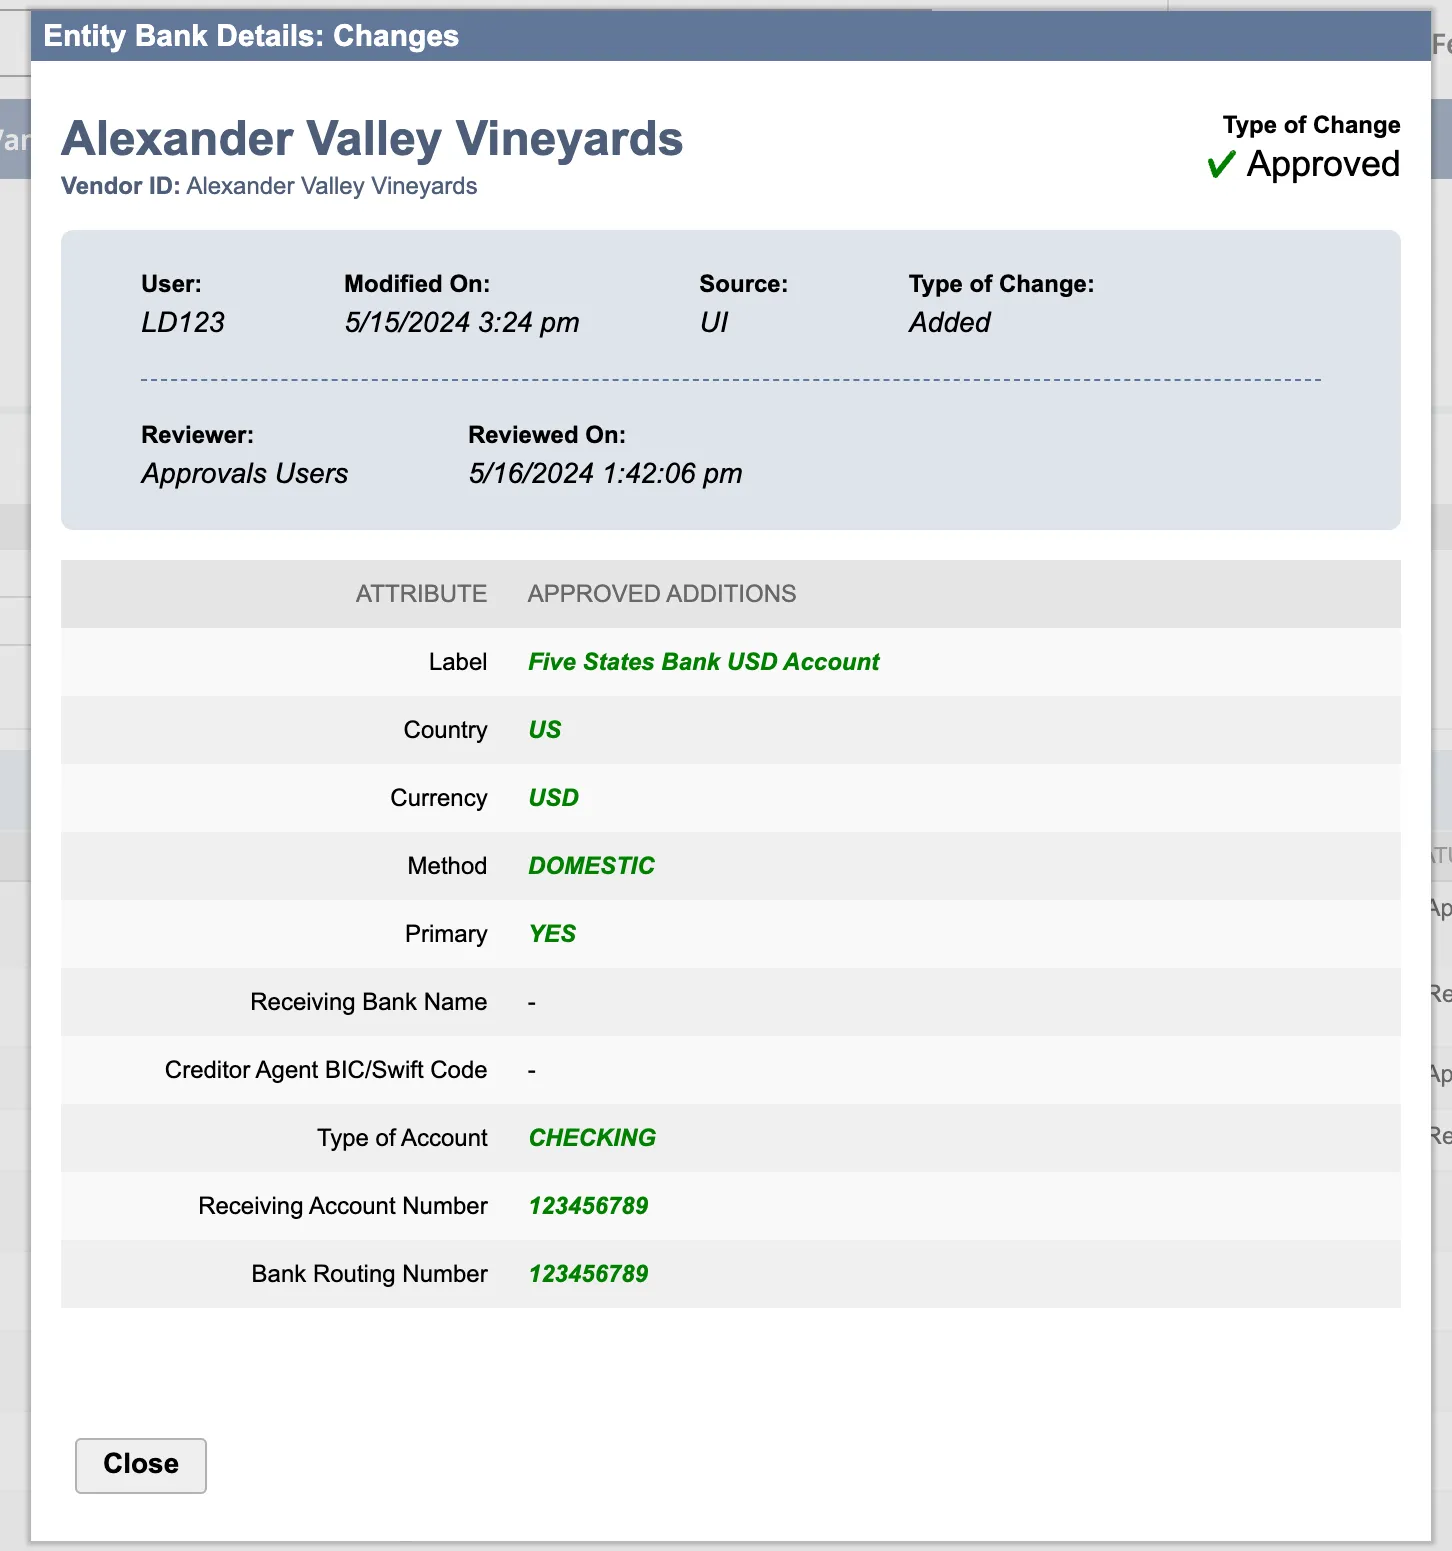
Once finished looking at the pop-up, click Close.
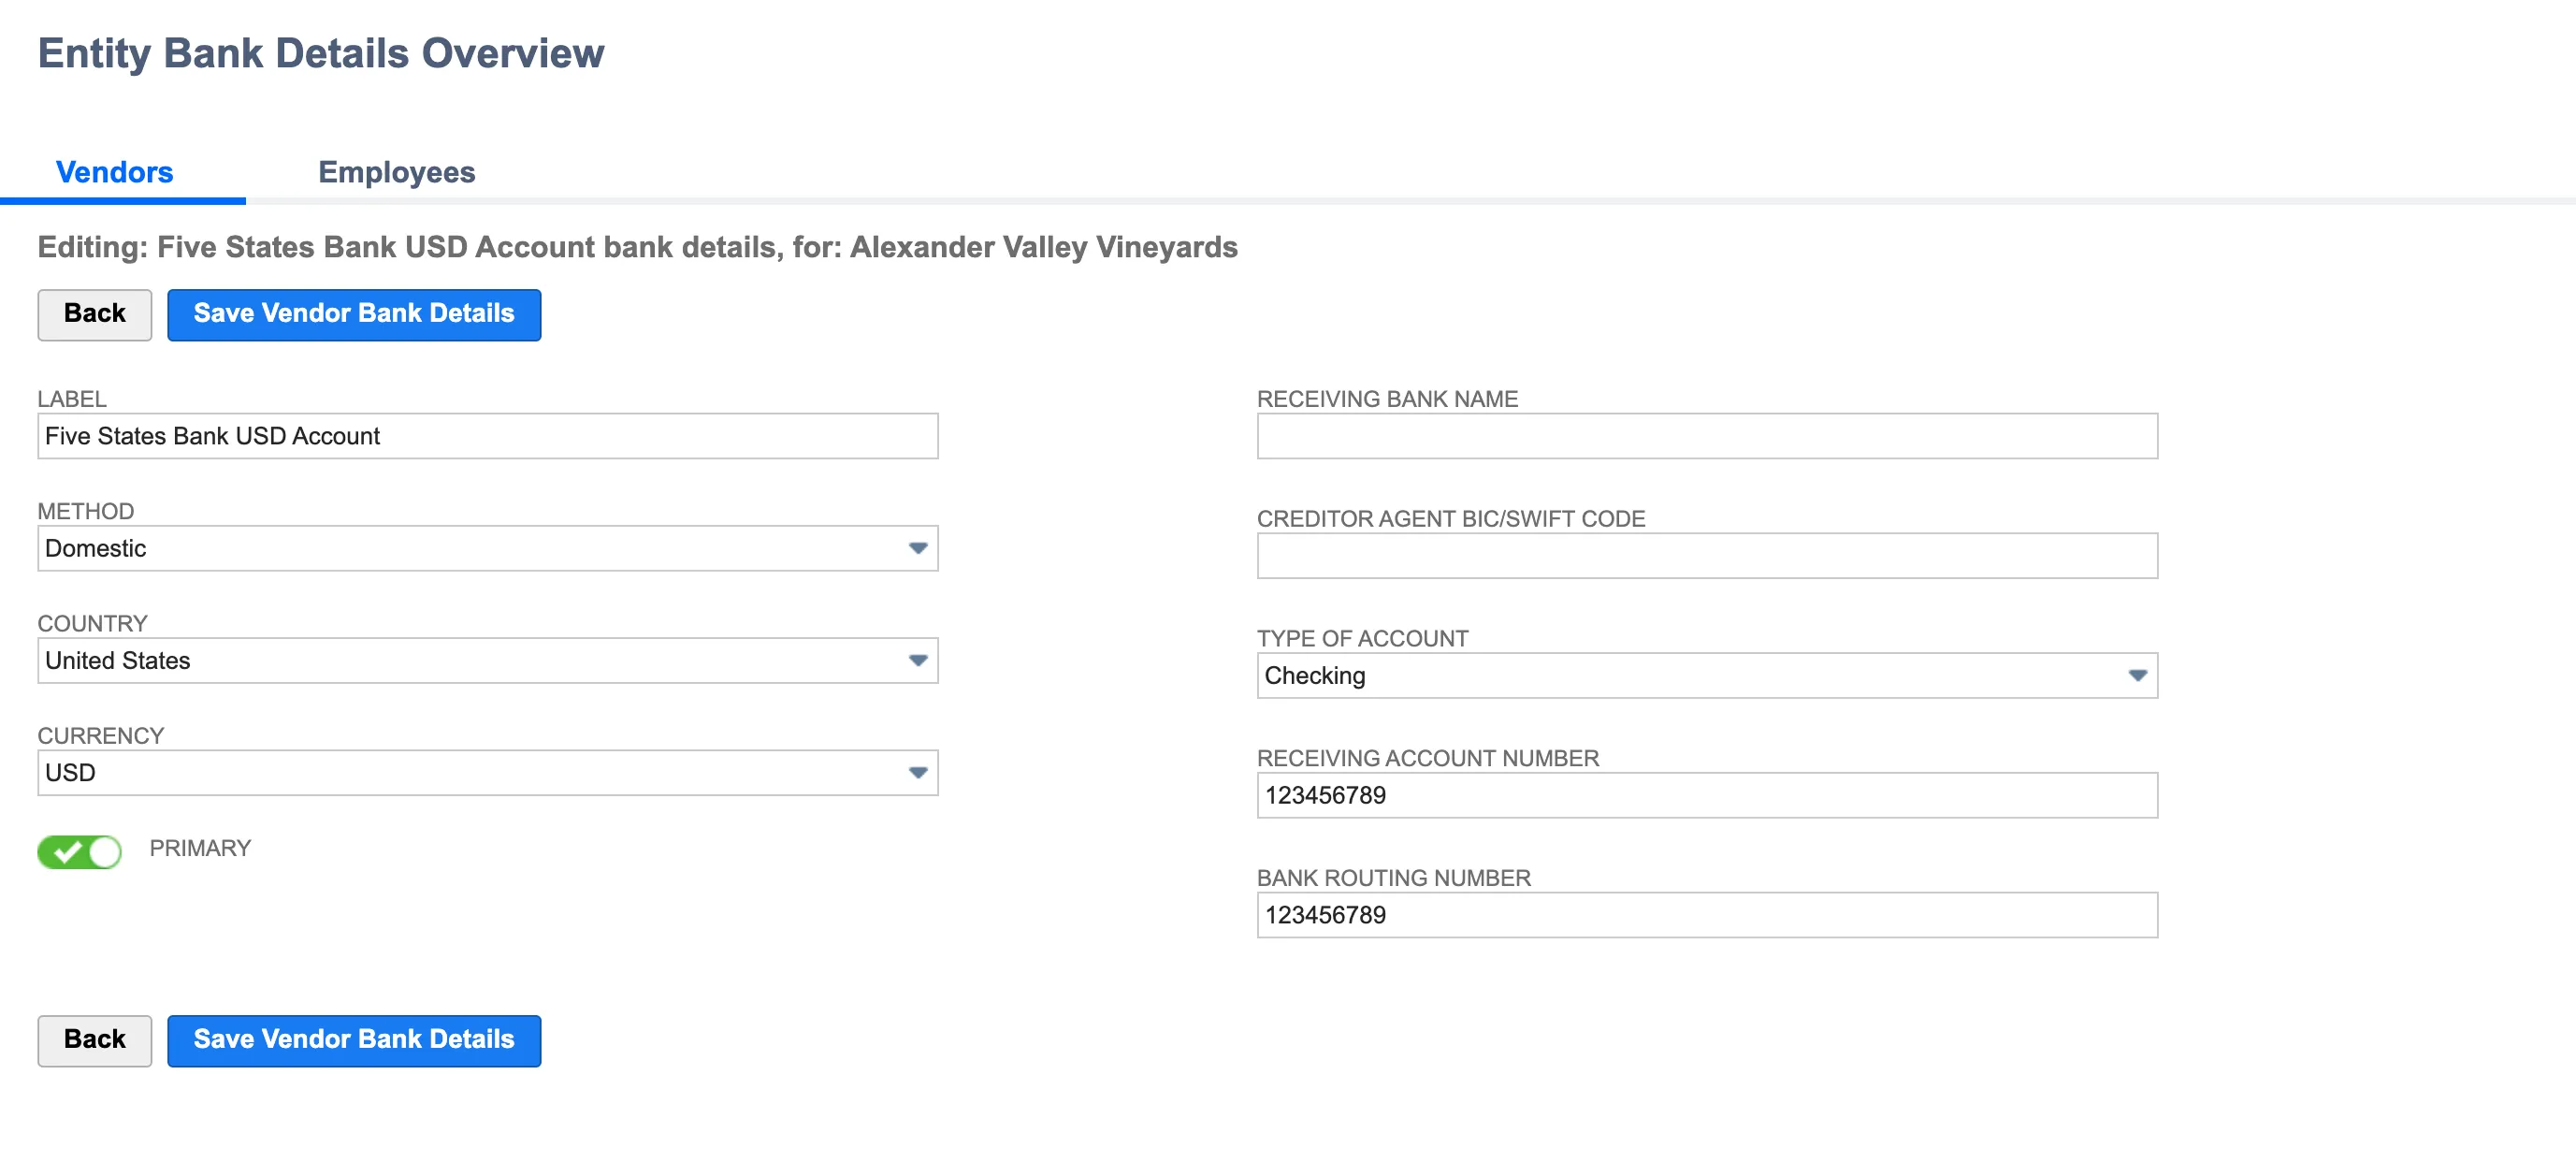
For changes that have been approved and involve additions or updates, you have the option to access the EBD Record. Simply click on the EBD Record link located next to the corresponding record.
This link will take you to the record on the EBD Overview page.
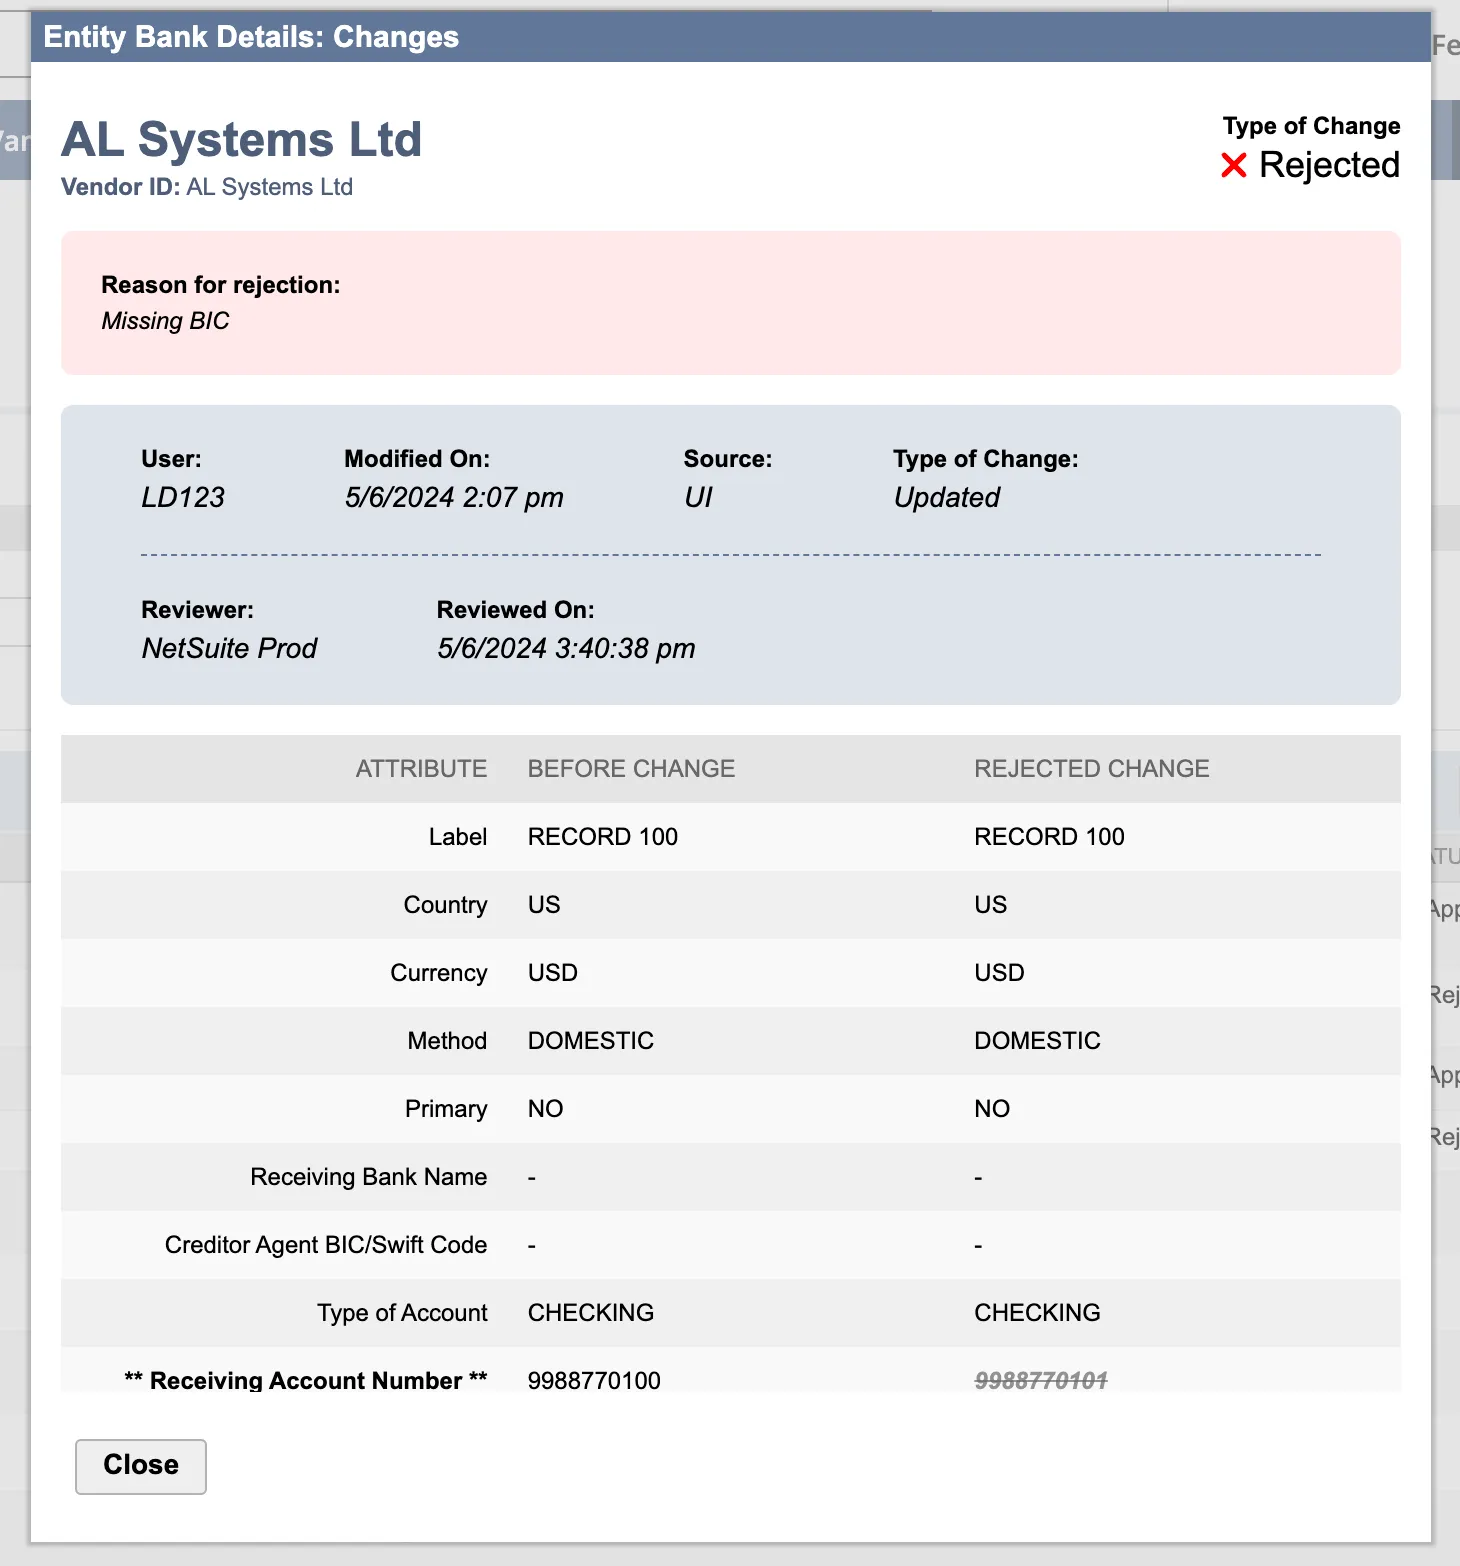
View Rejected Changes
Rejected changes will display similar information; except, it will indicate that it has been Rejected and include the Reason for Rejection as well.
Export Approvals History
To export these changes for your records, go to the History page and select Export.
Add a date range filter to limit the amount of data to include.
The History Export will display the following data:
- Log ID
- EBD ID
- Modified On (Date and Time)
- Vendor ID
- Vendor
- Type of Change: Updated, Added, or Deleted
- User: The user who initiated the change
- User ID: The user ID of the user who initiated the change
- Reviewed By: The user who approved or rejected the change
- Reviewed On: The time when the change was approved or rejected
- Status: Approved or Rejected
- Previous Entry: This shows the data that the record contained before the change. This will be empty if the history log item is for a net new record being added.
- Proposed Entry: If the entry was rejected, this is the change that was proposed. If the entry was approved, this is the change that was accepted.
- Reason for Rejection: This will be empty if the record is approved

NOTE: The same columns will appear in the report regardless of whether the Approvals feature is enabled or disabled.