Step 19: Store Vendor ACH Information
The plugin uses the Bank File fields when submitting ACH payments to vendors. The instructions below show you how to enter this required information for your existing vendors.
Before you begin, ensure you have permission to edit vendor bank details:
Go to Company → Admin tab → Roles.
Then, select Subscriptions on the role you would like to edit.
Select Permissions on the Accounts Payable Module, and check all the boxes for Vendors (This includes List, View, Add, Edit, Delete, and Bank Details).
Then, select Save.
Enter Vendor ACH Information
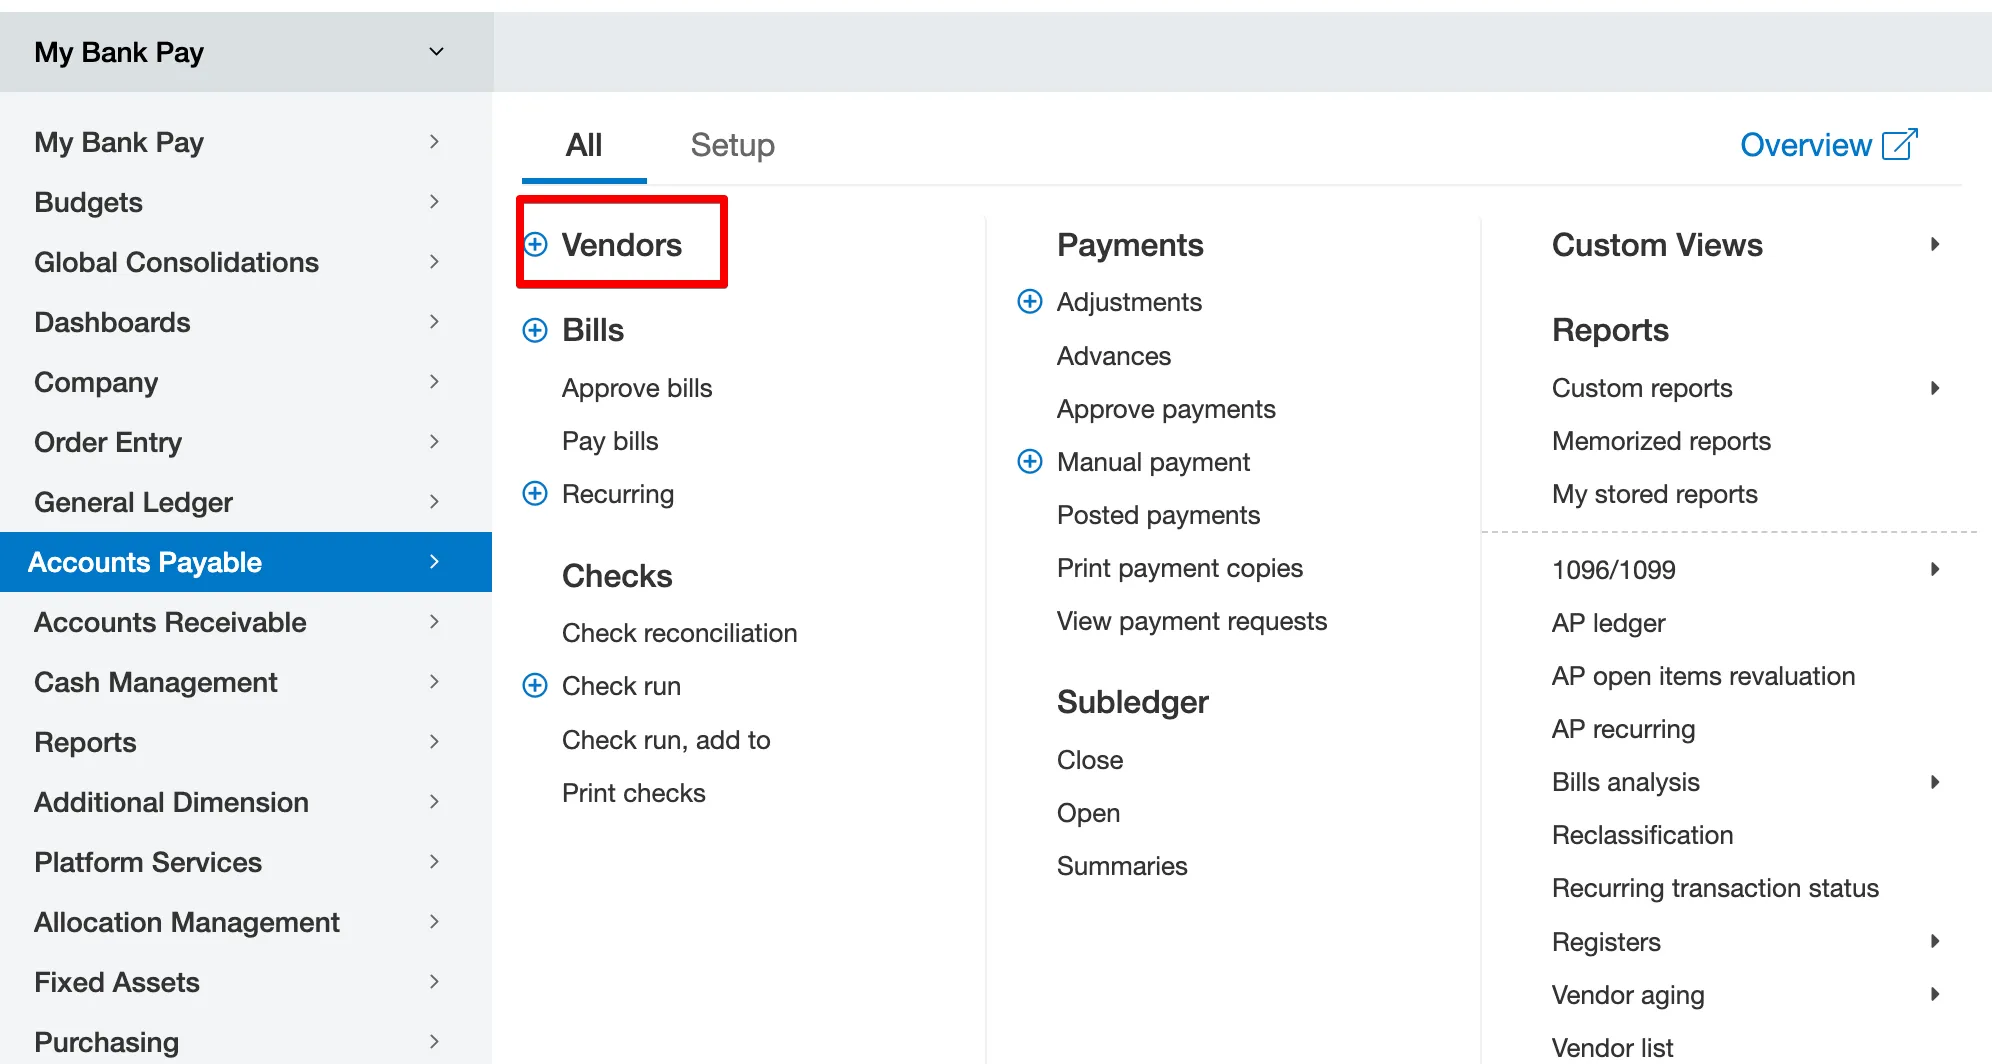
Go to Vendors
Navigate to Accounts Payable → Vendors and select Edit for the desired vendor.
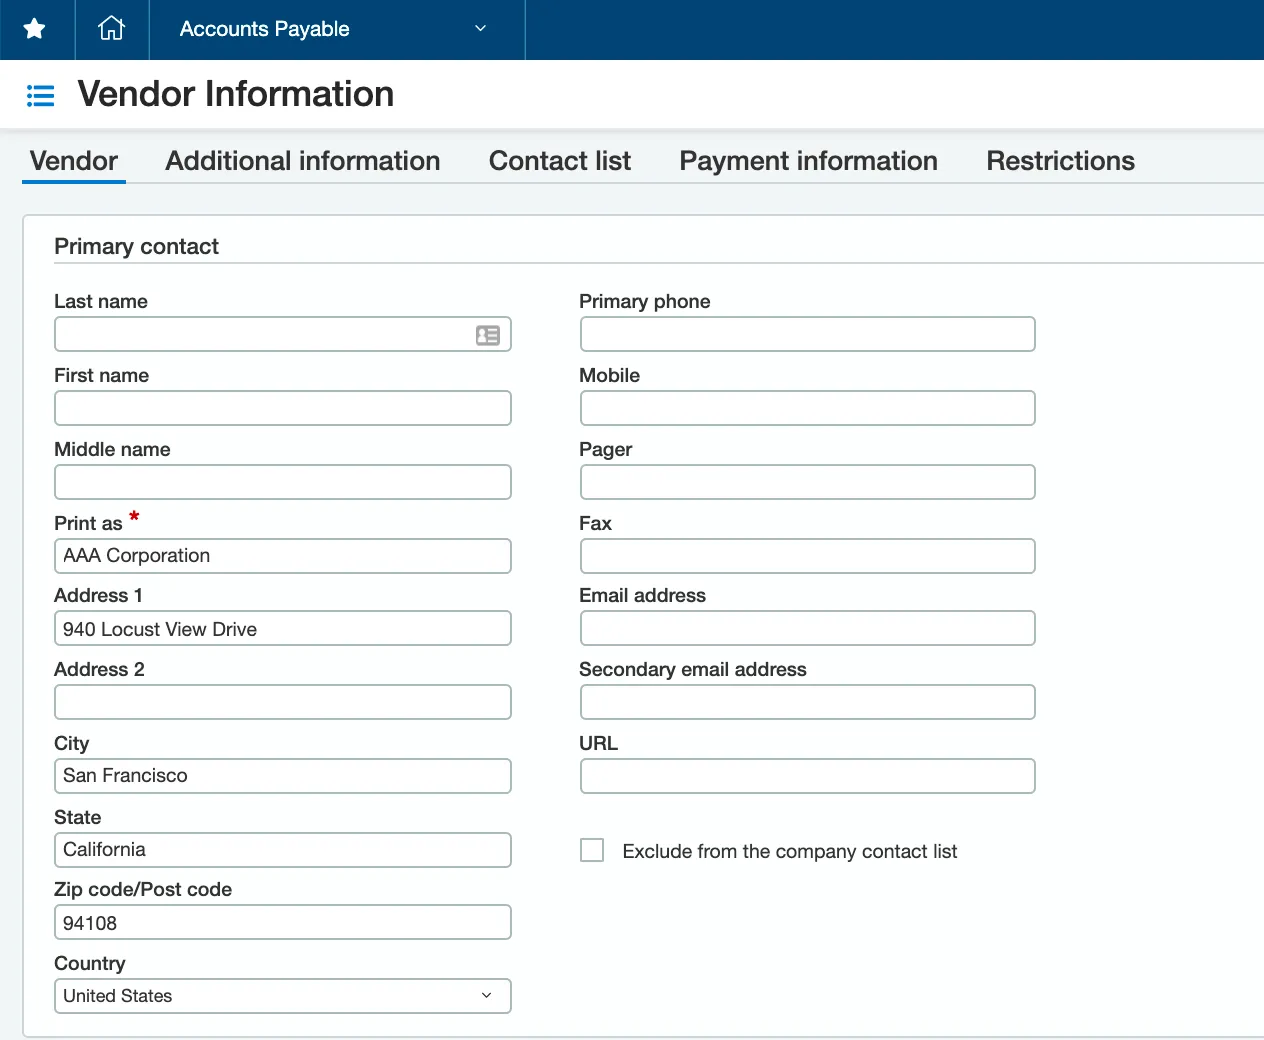
Enter Vendor Details
Under the Vendor tab, enter the Vendor’s Address, City, State, Zip Code, and Country.
Enable ACH Payments
Select the Bank file tab to access the vendor ACH information.
Scroll down to the Enable Setup section and select Enable ACH Payments.
Add ACH Information
The ACH Payments section will appear. Enter the Routing Number, Account Number, Account Type, and Account Classification.
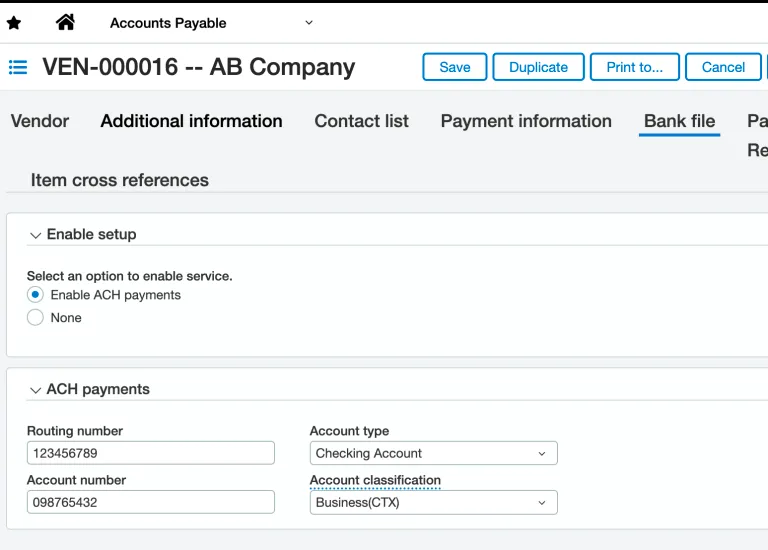
Then, select Save. ACH will now be an available payment method for that vendor.
IMPORTANT: When you first begin using the plugin, it automatically syncs the vendor's default payment method from the native Intacct record, but only if the method is set to ACH or CHECK. The plugin also ensures this default is synced when you create a new vendor.
In all other cases, the plugin will NOT be syncing the default payment method. If you would like to change the default, follow the previous step, "Set default payment information." This default can also be updated via CSV in a single upload for all your vendors.