Post-Onboarding Checklist (Intacct)
You are almost ready to use the plugin. There are a few additional steps required to use the product to its full potential. Review all items in this guide to ensure you are not missing anything.
NOTE: For Sandbox users, feel free to skip the steps that may not apply to your use case. We strongly recommend following the Sandbox Checklist (Intacct).
Grant Permissions
To ensure users can view and utilize the plugin, a Sage Intacct administrator must grant them permission. You can follow Step 11: Set Permissions for a Role, Step 12: Assign Role to Web Service User, and Step 13: Assign Role to User to enable permissions
Enable All Payment Methods
If you require payment methods that are not currently displayed on the Pay Page, please contact your bank relationship manager.
They can initiate the process of adding other payment methods, which is typically fast and straightforward. Do not hesitate to contact our support team if you encounter any issues during or after this process.
Once the new payment method is set up, you will be able to add the necessary vendor details to the Payment Method’s Page for each vendor you wish to pay using that new option. This process is explained in more detail in the following sections.
Store All Check & ACH information in Intacct
Sage Intacct natively stores both ACH and CHECK payment information. You can modify this information directly within the vendor record.
Confirm you have added the required information:
- CHECK: A valid address must be present on the vendor record.
- ACH: Valid bank information must be entered within the Bank File section of the vendor record.
TIP: You can also mass import this information natively by following this guide: Updating Vendors via CSV (Intacct).
The payment method dropdown in the plugin will display ACH and CHECK options if both of the following conditions are met:
- Both methods have been enabled by the bank (refer to the Enable All Payment Methods section of this guide).
- There is sufficient and valid information in the corresponding Sage Intacct vendor record (as outlined above).
Add Additional Payment Information
Are you looking to add other payment methods beyond CHECK & ACH? The plugin offers a secure and reliable way to store that information.
To learn how to add this information read the guide: Step 20: Store Other Vendor Payment Information. Alternatively, you can save time by performing a simple CSV import using the steps in Updating Vendors via CSV (Intacct). This method takes only minutes and updates all vendor records at once.
Set up Vendors' Default Payment Method
The final post-onboarding check is setting up your vendors with a default payment method enabled.
You can do this manually by navigating to Plugin -> Payment Methods, clicking Edit on the right, and selecting a default option from the list of available payment methods.
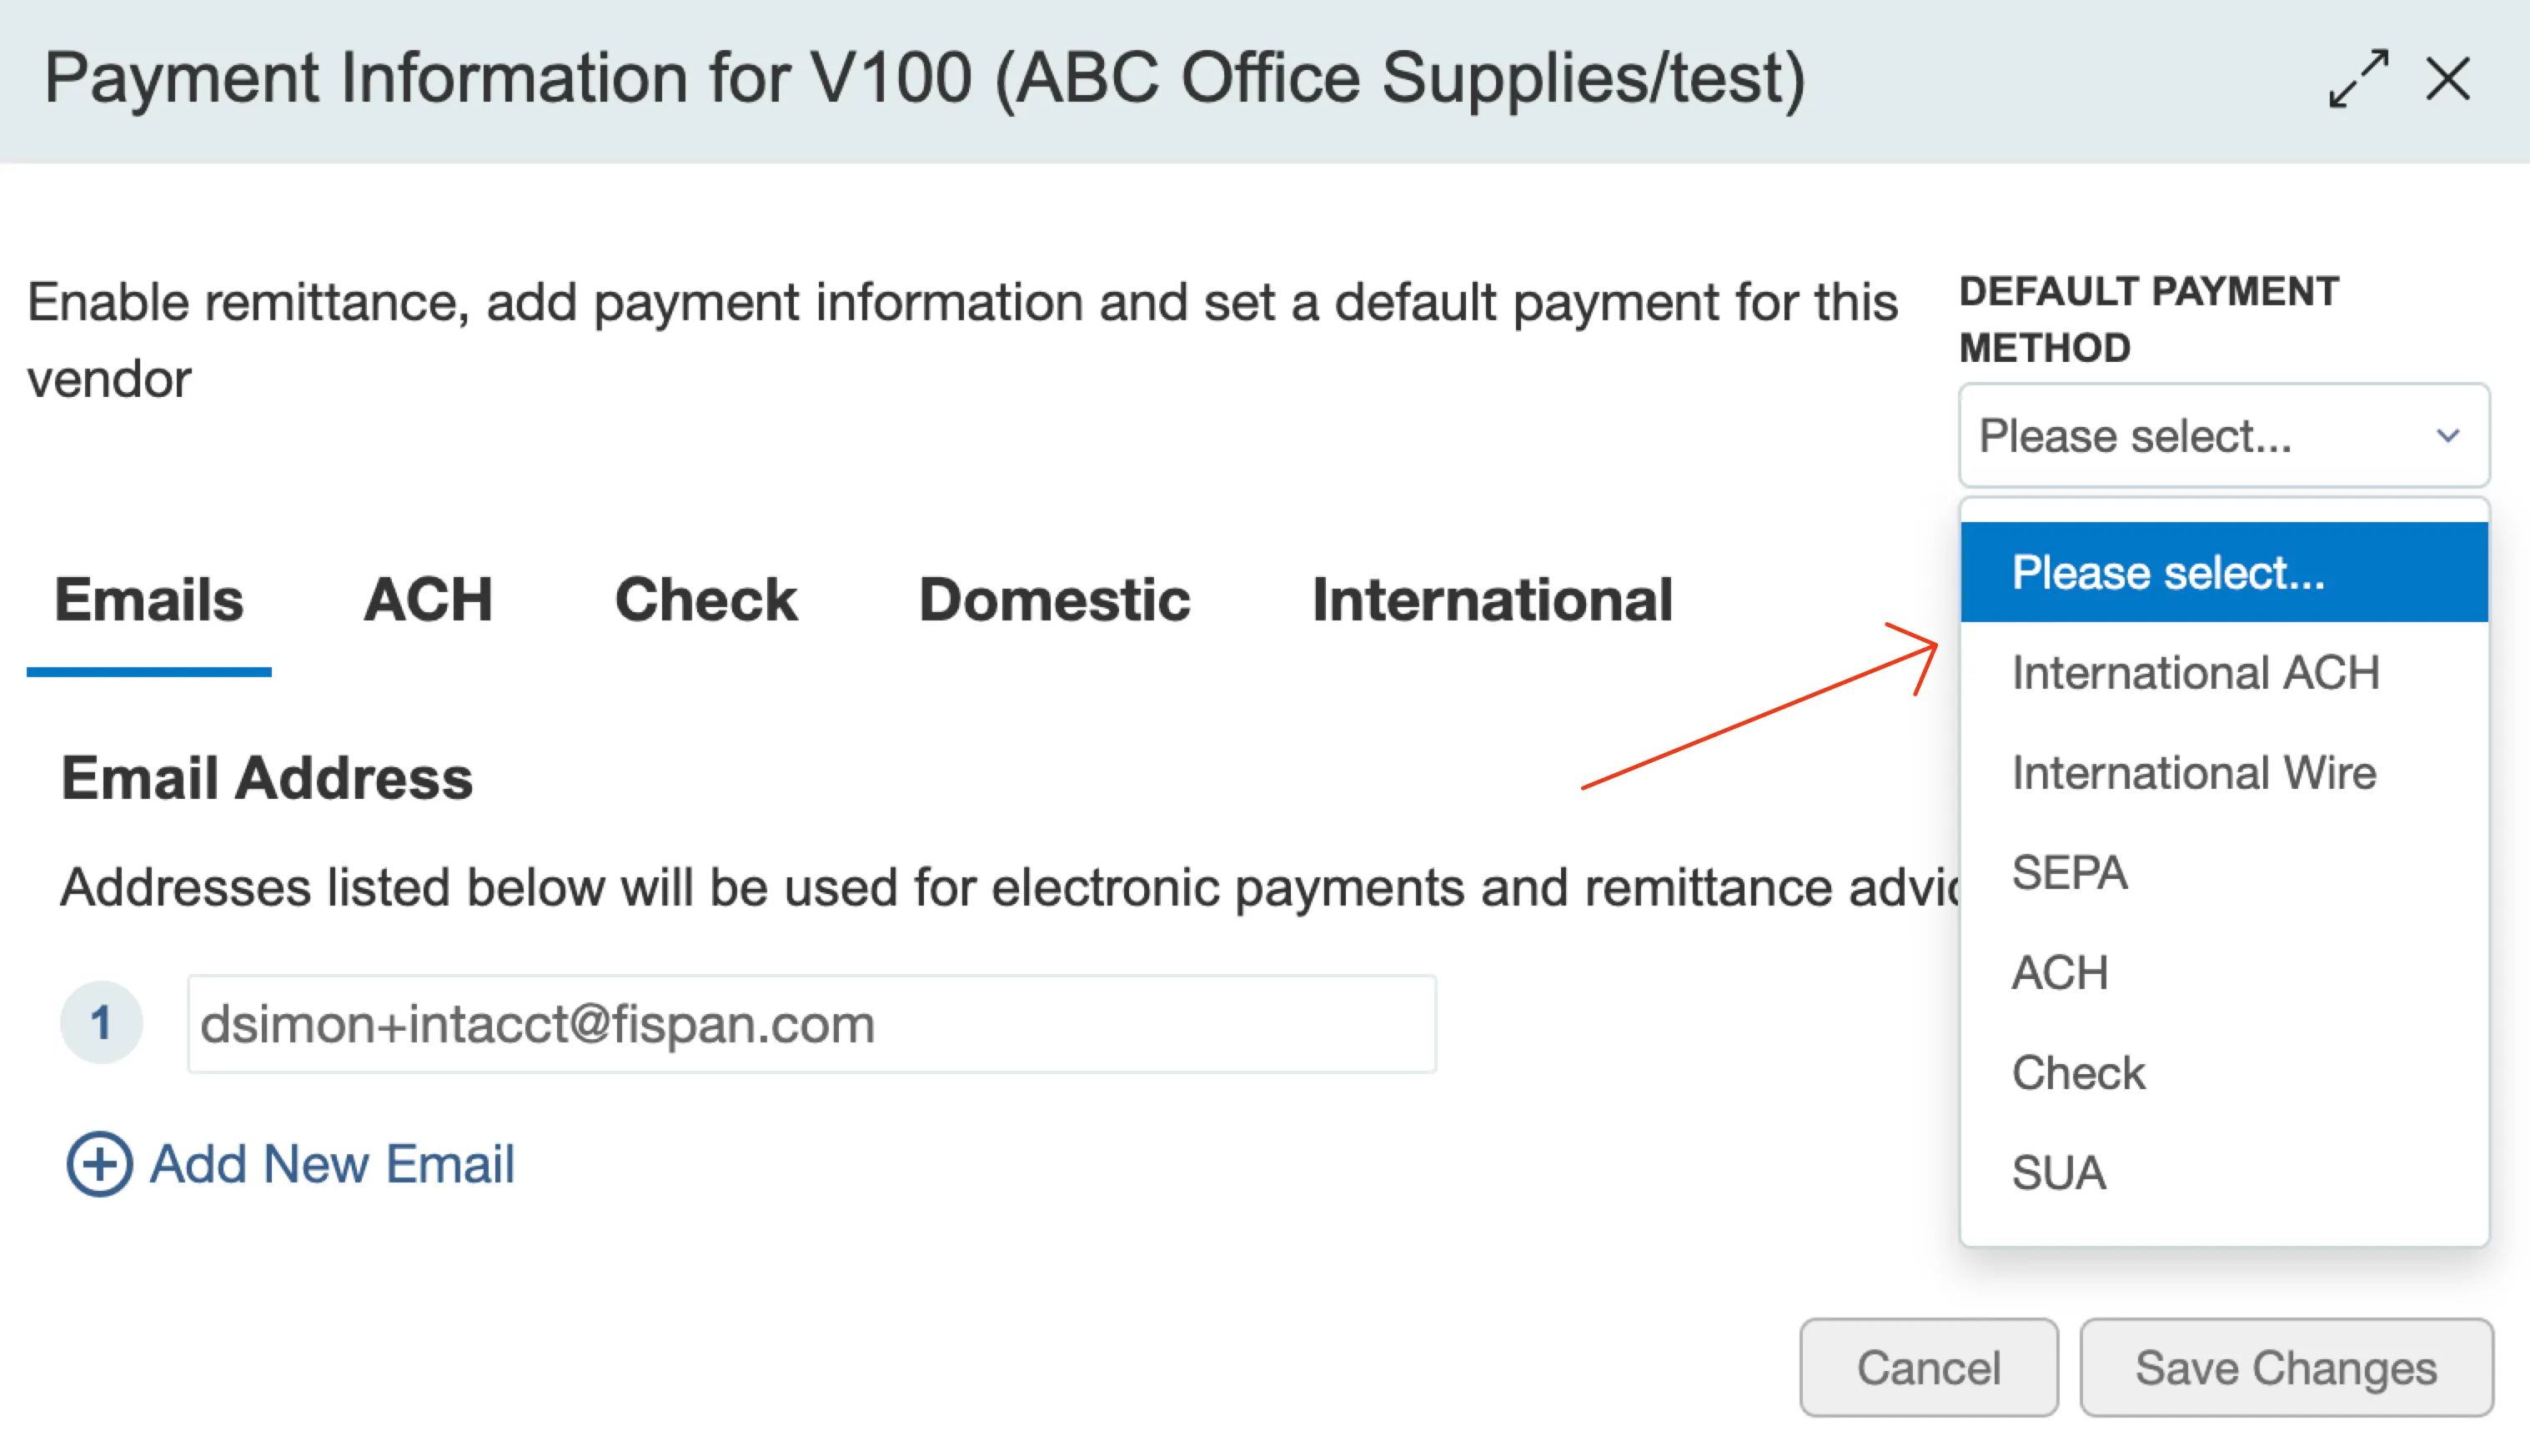
If you prefer to perform this action via a CSV import, that is also possible. Follow the steps explained in Updating Vendors via CSV (Intacct)updating to set up default payment methods for all your vendors.
Add Bank Accounts to Bank Feeds
If you would like to receive a daily push of bank transactions inside the reconciliation module of Sage Intacct, we recommend setting up bank feeds. The setup process takes minutes and allows you to set up all of your accounts at once.
Follow Step 17: Bank Feeds Setup for more information.