Paying Bills (NetSuite)
Paying vendor bills with the plugin allows you to remain within your ERP system without needing to access your Bank Account separately. You can pay a Vendor Bill individually or improve efficiency by processing them in groups. Follow this guide to learn how to do both.
Pay a Vendor Bill
Go to Vendor Bills
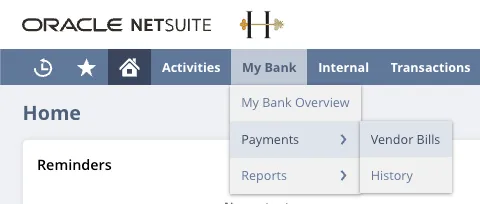
Go to J.P. Morgan Pay → Payments → Vendor Bills.
Select a Bill to Pay
Use the filters to find the bill you would like to pay.
If a default payment method hasn't been set for this vendor, select a method from the respective column.
Select the checkbox next to the payment you want to make and select Pay.
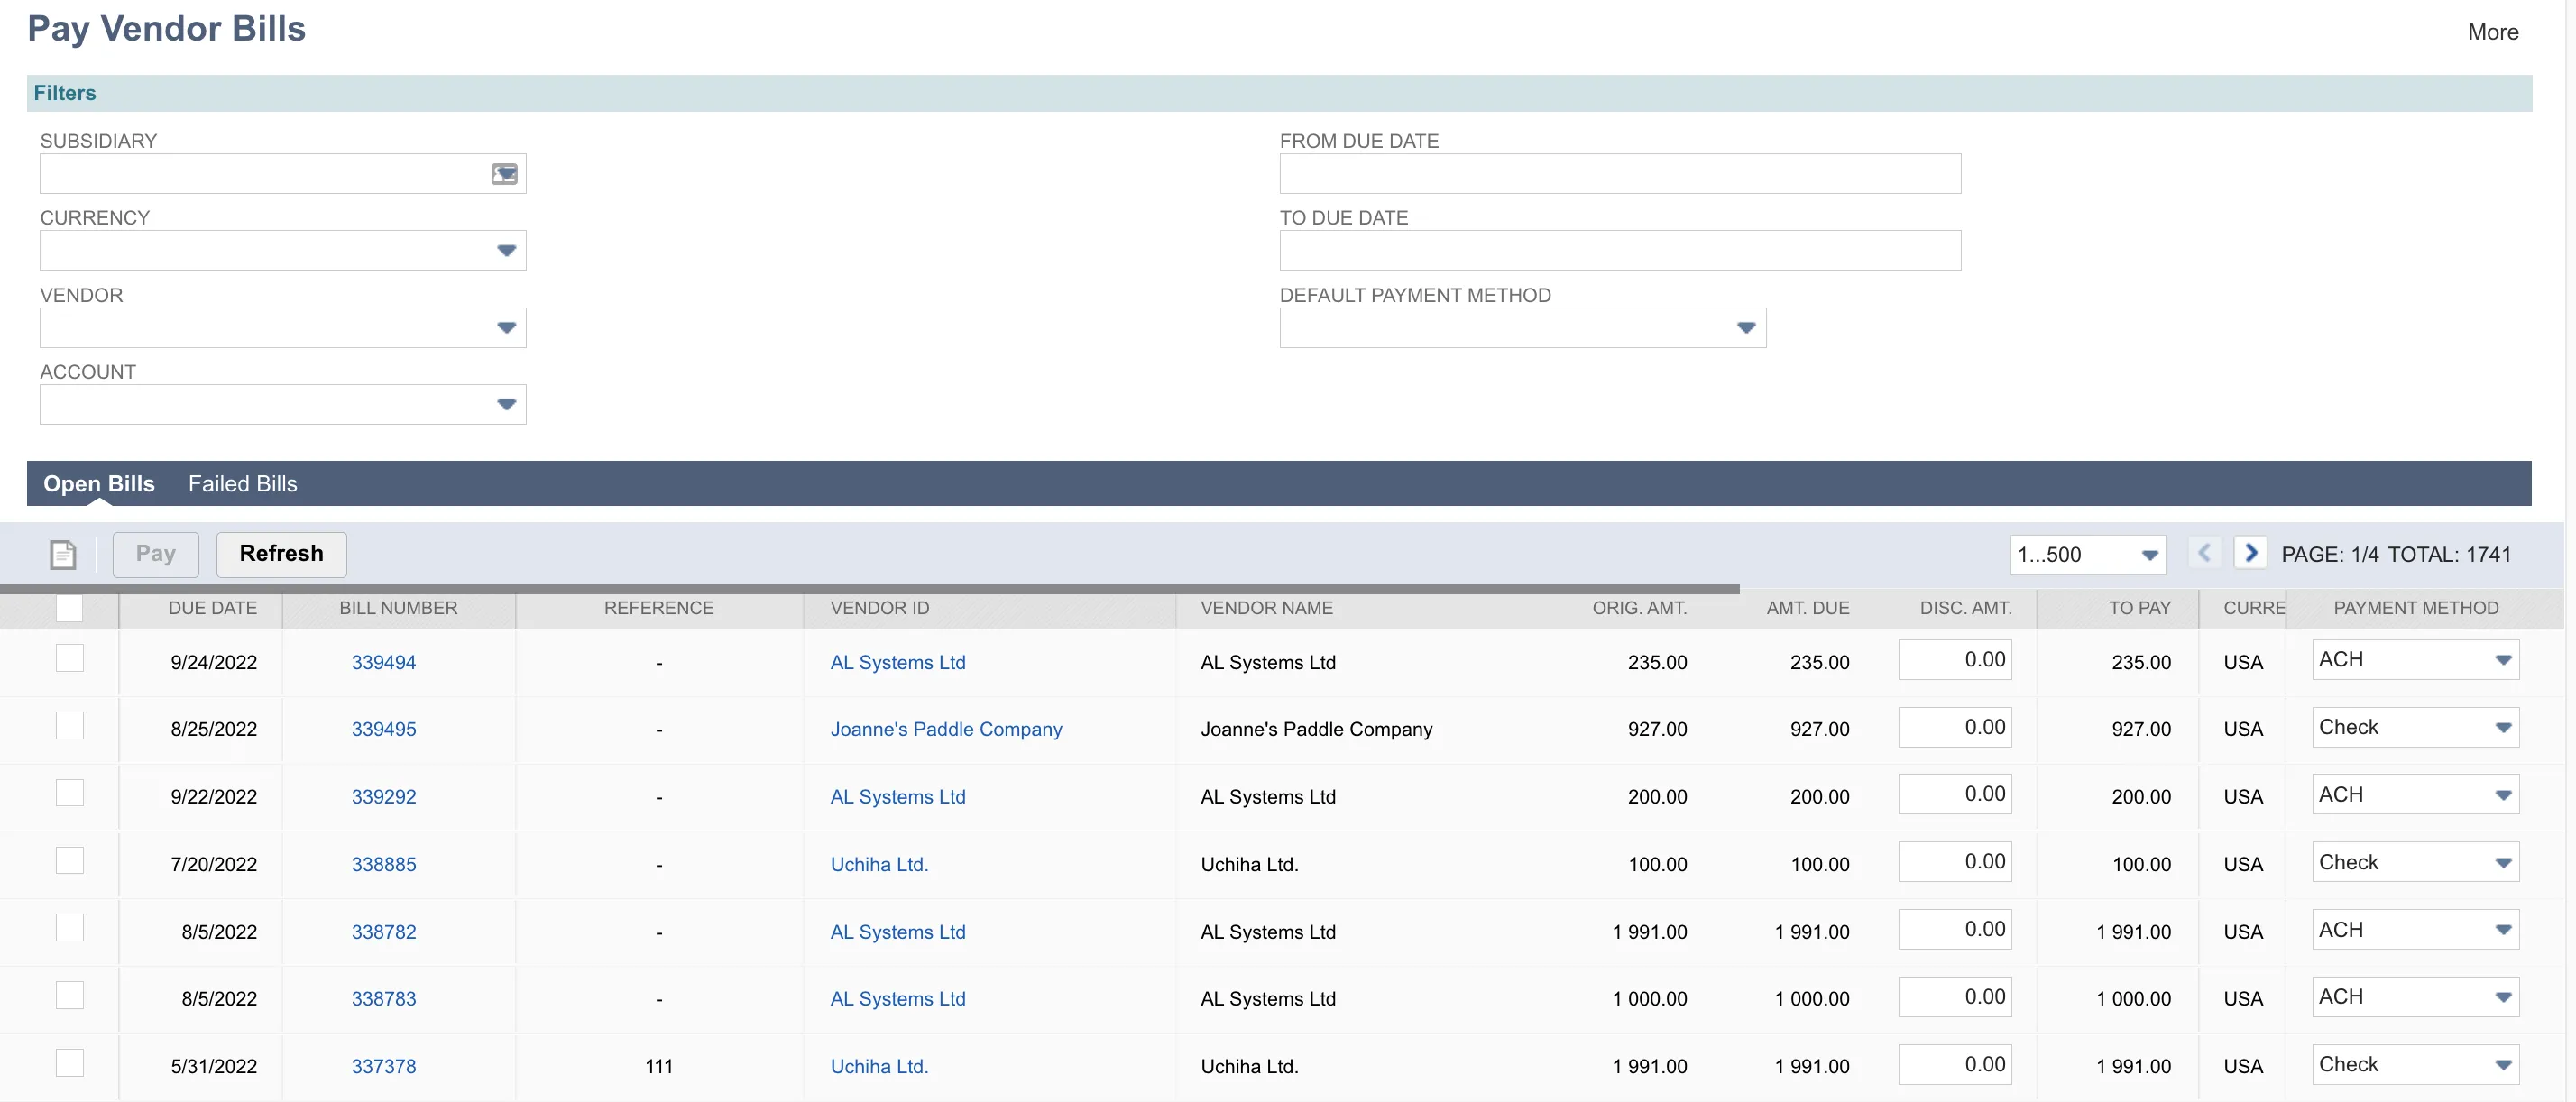
NOTE: Only bills that are Open/Approved and do not have a Payment Hold on them will appear on the Pay Vendor Bills page.
This includes Open/Approved bills that are On Hold (with no Payment Hold on them).
Confirm Payment
Select the account from the dropdown and confirm that the number of bills, payments, and amounts are correct.
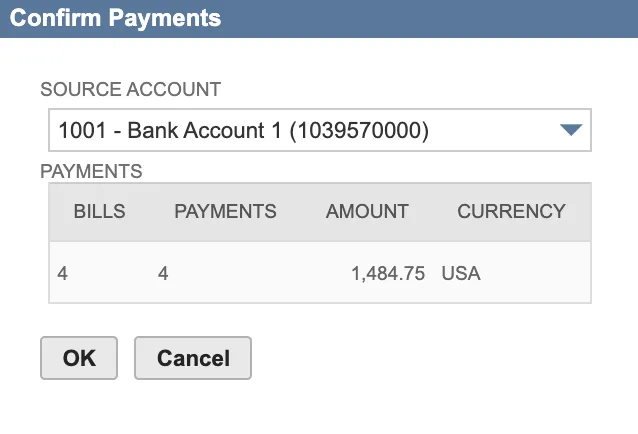
Then, select OK.
NOTE: The source account will only appear in the Confirm Payment pop-up if the associated bank account has a number input in the Number field.
Monitor Bill Processing

Once the payment request is successfully sent, the status bar will turn green.

Check the Status of Payment
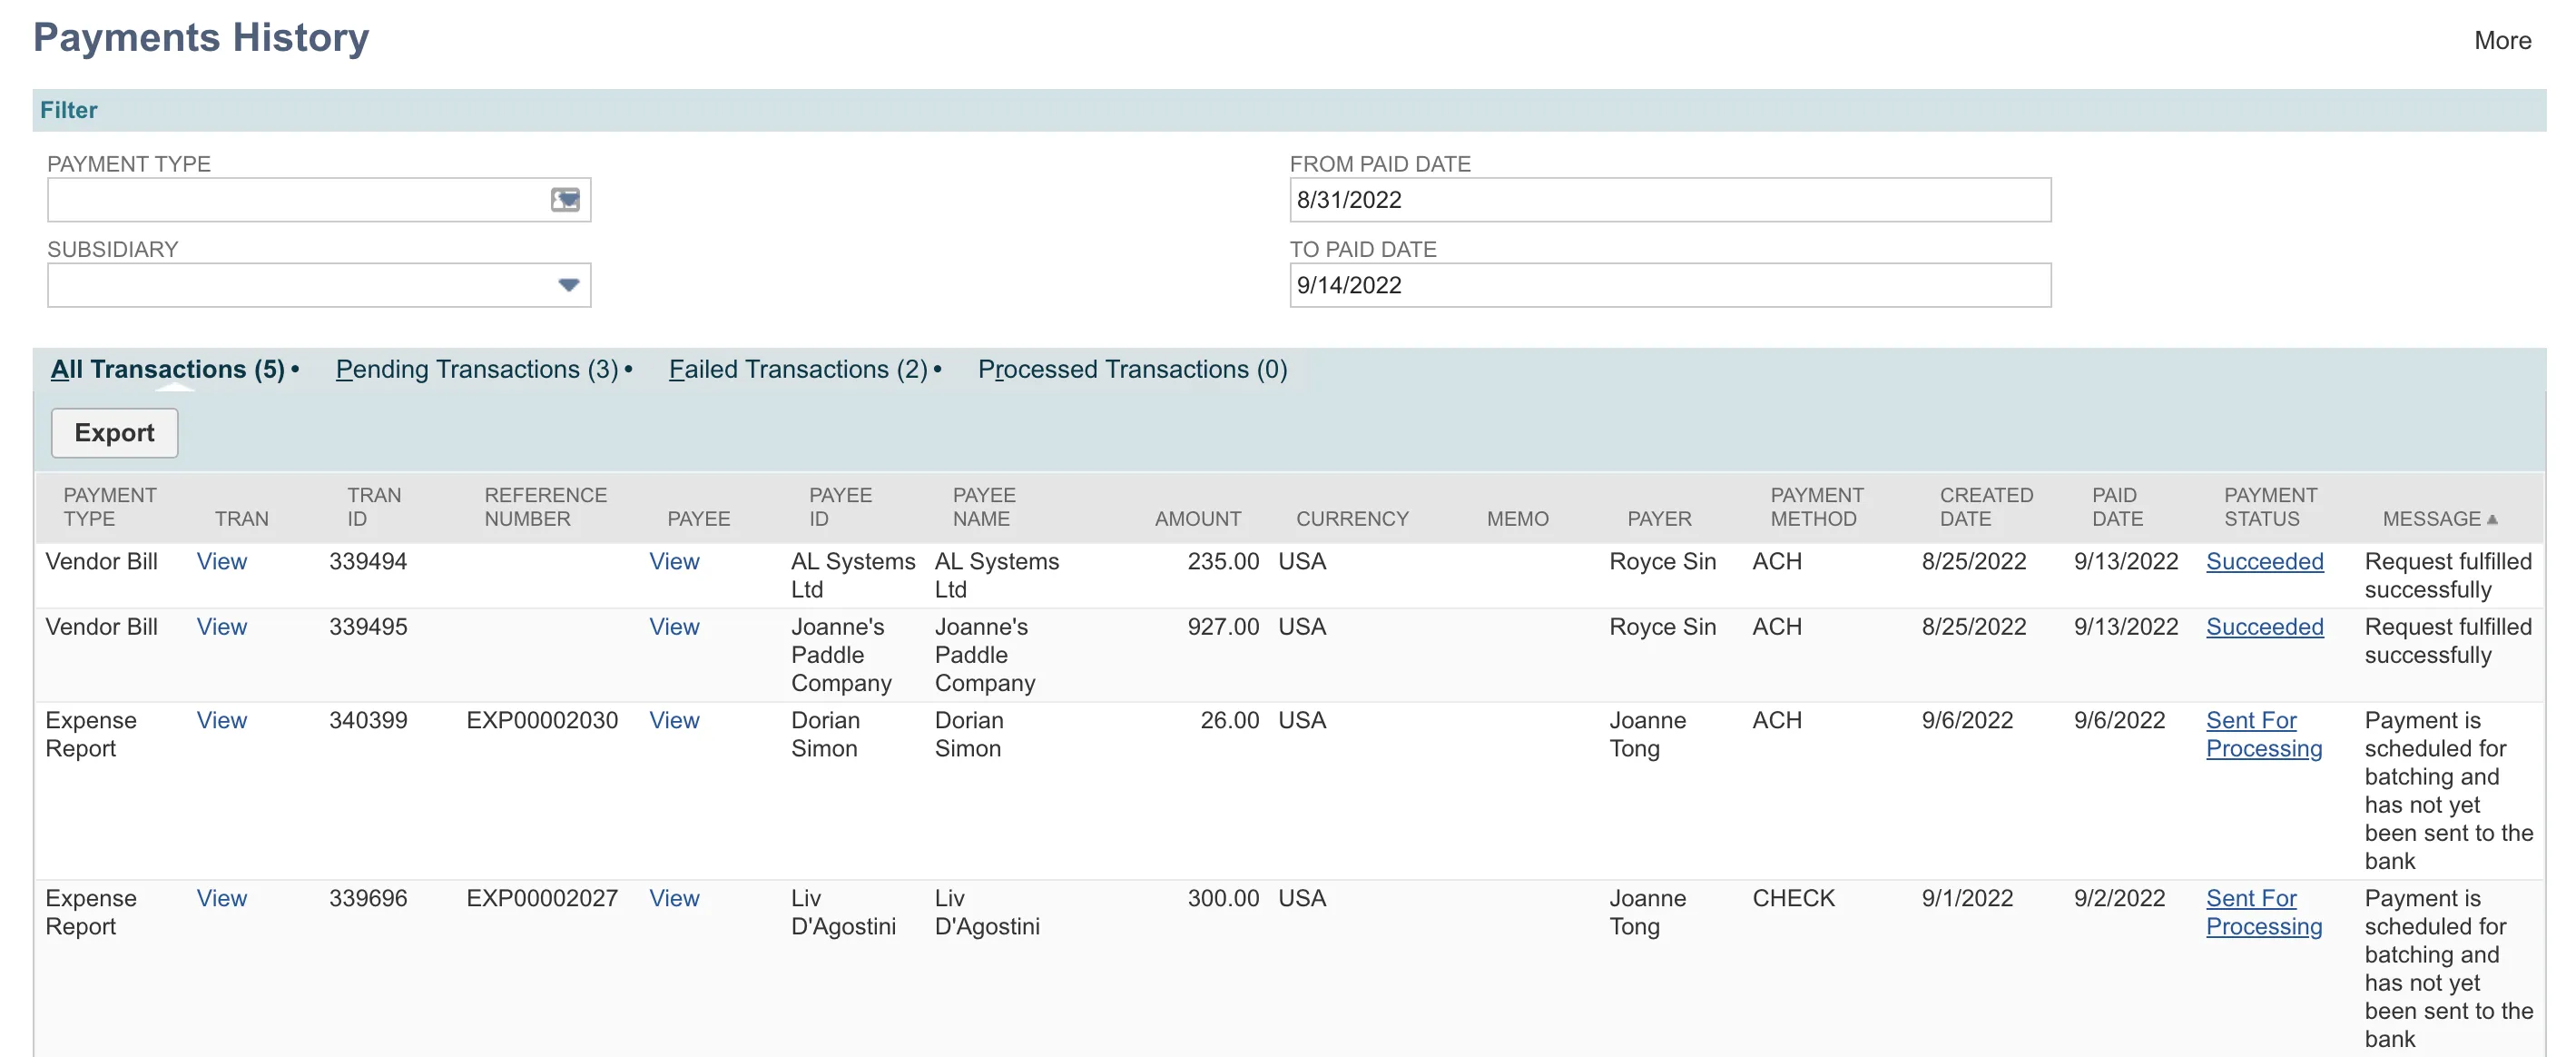
Go to Your Bank → Payments → History.
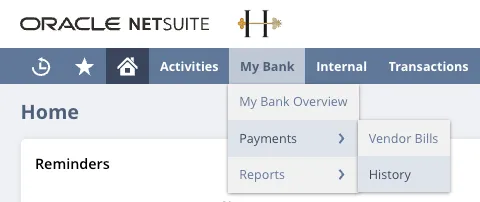
We recommend checking the Failed Bills tab after sending a payment to confirm the payment was successful.
Paying Grouped Bills
Grouping bills for payment will make it easier to manage your vendor bills within the ERP system. There are a few prerequisites you need to address to get started.
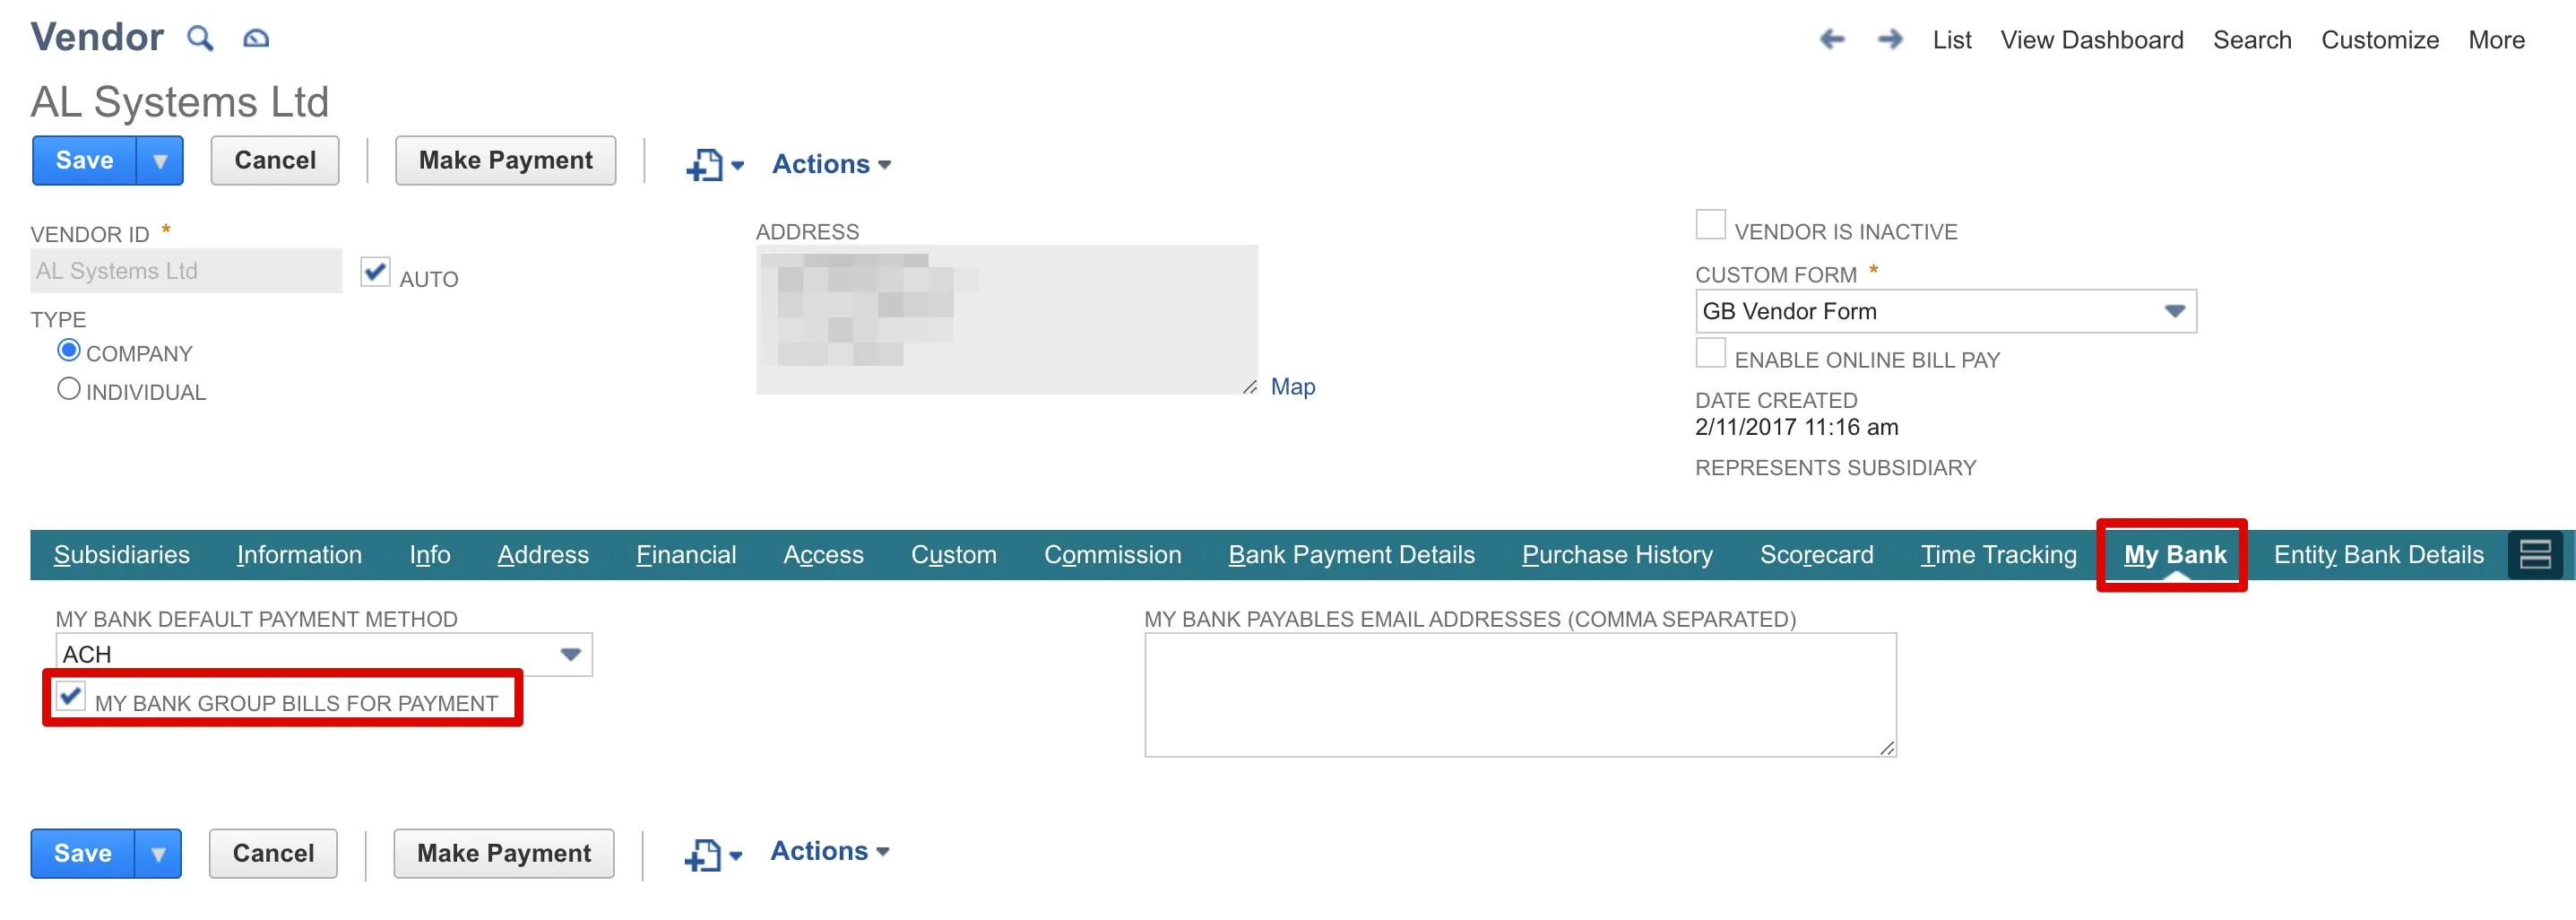
If you would like to make grouped bill payments, please ensure you have the GROUP BILLS FOR PAYMENT checkbox selected on the Vendor record. This can be done by navigating to the Vendor record and selecting the sub-tab for your bank.
IMPORTANT: Enabling the GROUP BILLS FOR PAYMENT function means only one remittance email will be sent out for the whole list of multiple bills grouped for the same vendor into a single payment.
If this feature is not enabled for this vendor, then each paid bill is considered its own unique payment with its own remittance email, resulting in multiple payments and multiple emails.
Go to Vendor Bills
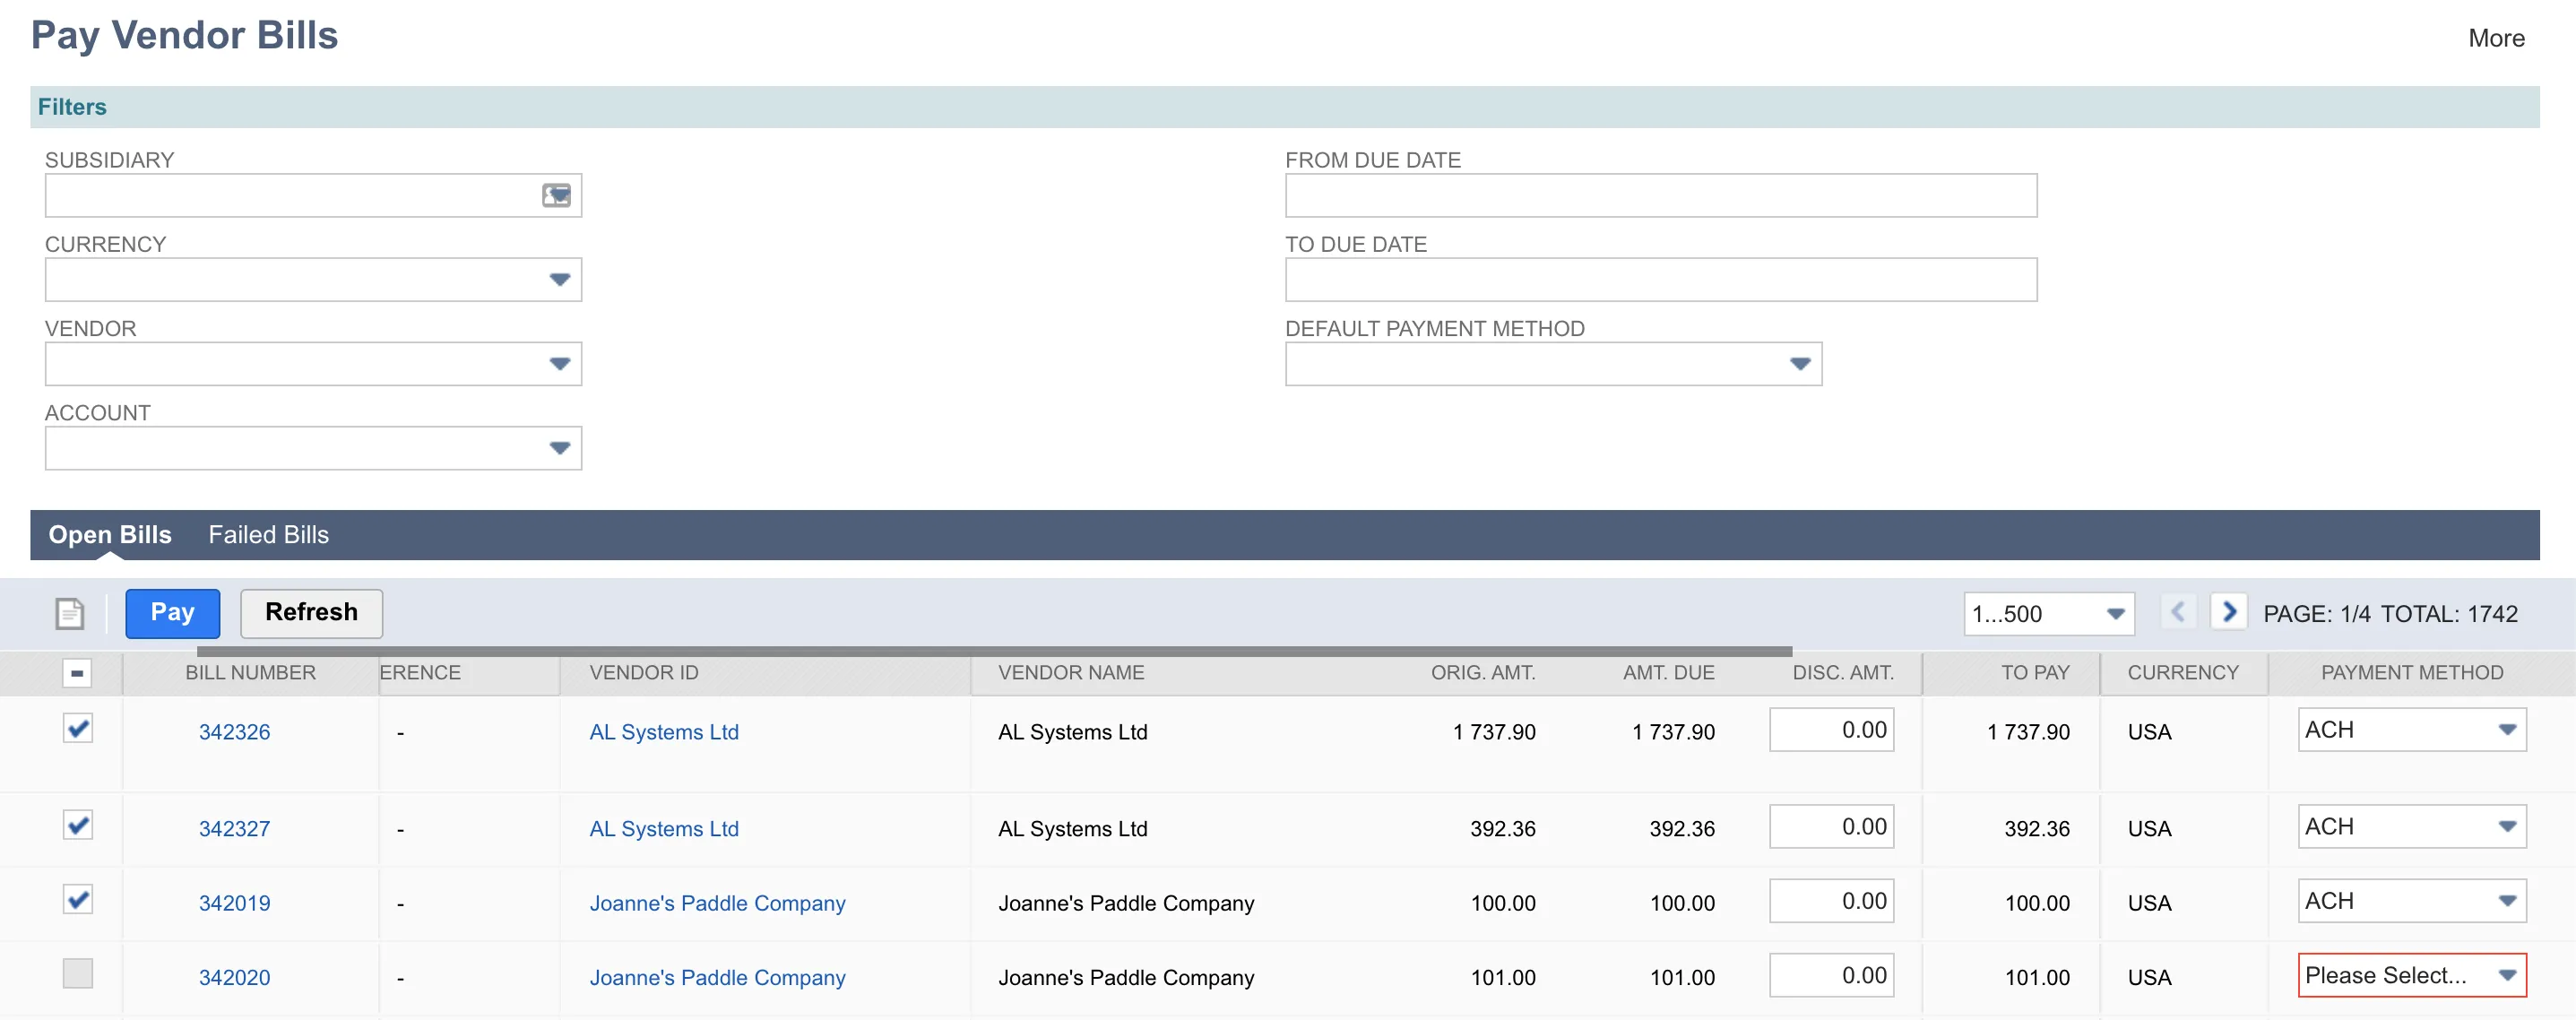
To make a grouped bill payment, navigate to J.P. Morgan Pay → Payments → Vendor Bills.
Select Bills to Pay
Select more than one bill for at least one Vendor with Grouped Bills enabled, and then select Pay.
Confirm Payment
The Confirm Payment window appears, where you can select the Source Account and verify the number of bills compared to the payments.
With Grouped Payments enabled for a Vendor to whom you are paying more than one bill, the number of payments will always be less than the number of bills.
If everything looks good, select OK to transmit the payment.
For more information on the Payments History Page, follow this guide: Viewing Bill History (NetSuite)bill
For help on resolving failed bills, read this guide: Failed Billsfailed bills