Step 20: Store Vendor Payment Information
If applicable, you can add additional payment information within the plugin's Payment Methods page by following the steps in this guide.
Only payment methods set up in your plugin and assigned to the specific vendor will be visible. If a method is missing, please add it to the vendor or reach out to your HSBC Representative to have it added to the plugin.
IMPORTANT: Before adding, updating or deleting any vendor bank account or other payment details, you should independently verify the requested change using a trusted contact and communication channel already known to you. Do not rely solely on contact details, instructions or links contained in the change request. The plugin may validate the format of payment details, but it does not independently verify that the details are accurate, authorized or free from fraud risk. You remain responsible for ensuring that any payment details are correct and properly authorized before making or approving changes.
Enable the Vendor Approvals feature to set approval workflows for any vendor record changes. This approval process ensures data accuracy, enhances security and enables an audit trail of all changes.
Store Vendor Payment Information
Follow these steps to start storing any additional vendor payment information.
Go to Payment Methods
In Intacct, go to HSBC Integrator → Payment Methods tab
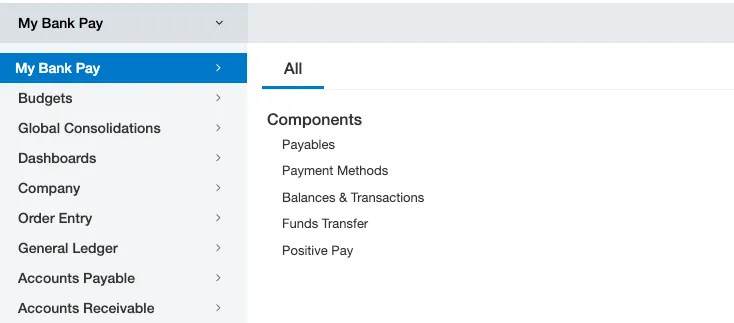
Add Bank Account
Select Edit on the vendor for which you would like to add payment information. Here, you can choose to Add Bank Account, Add Address, or Add Email Group.
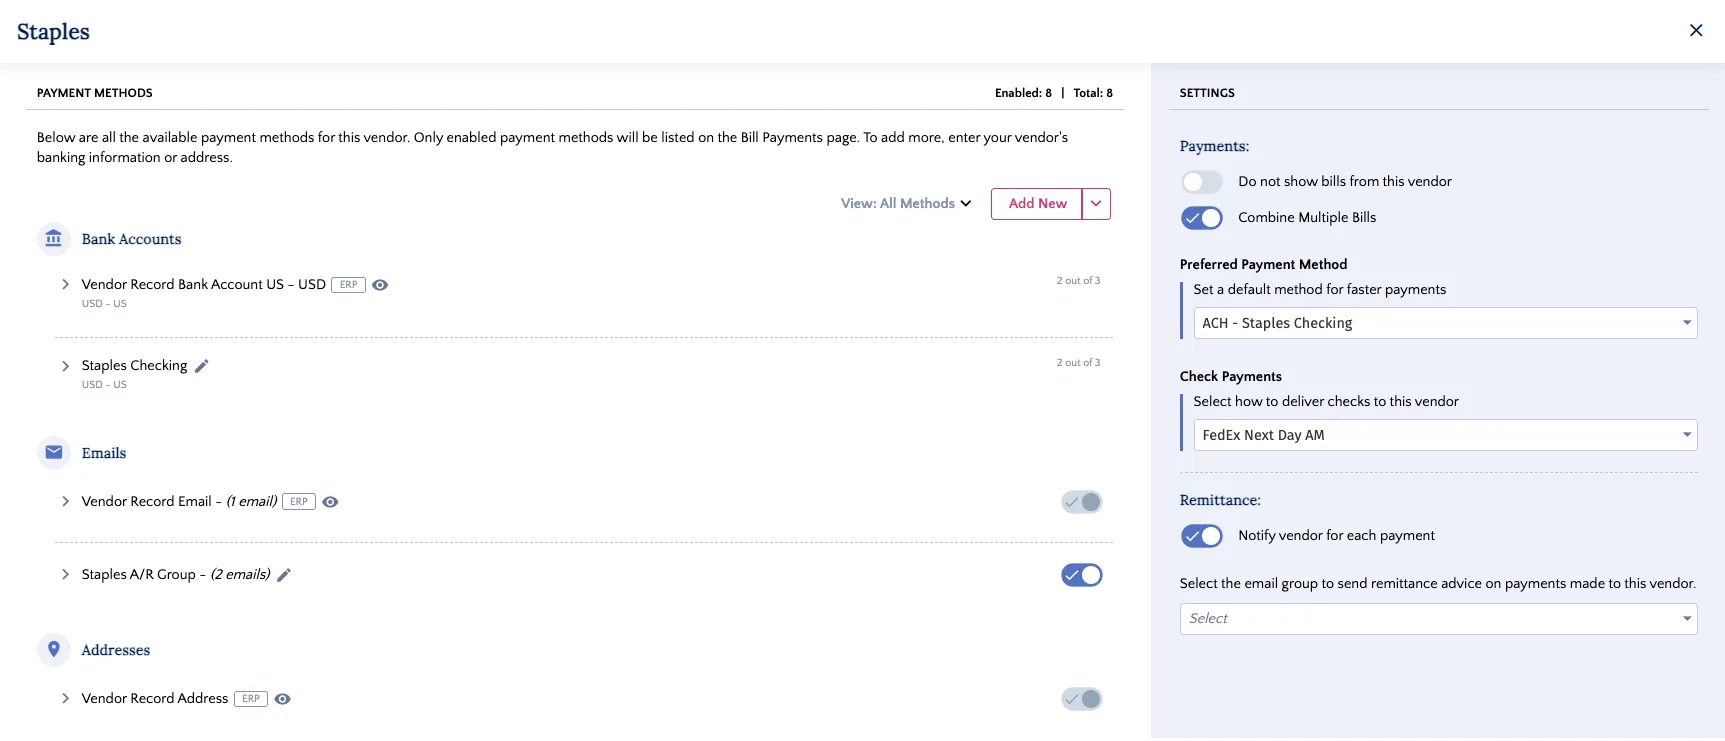
Click Add New and select Bank Account.
Here, you will see another pop-up window that will prompt you to enter a Country and Currency.
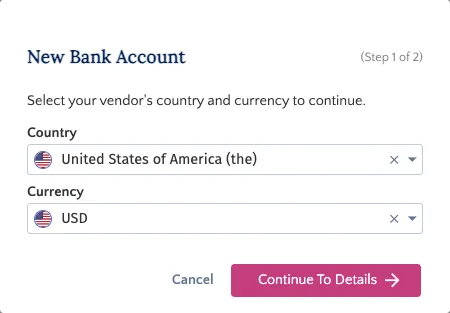
Enter the Country and Currency for this vendor, and click Continue to Details.
Add Account Details
On the Account Details pop-up, you will be prompted to fill in several fields. Please refer to the Payment Requirements section of this Product Guide for required fields, depending on the payment method you wish to use to pay your vendor.
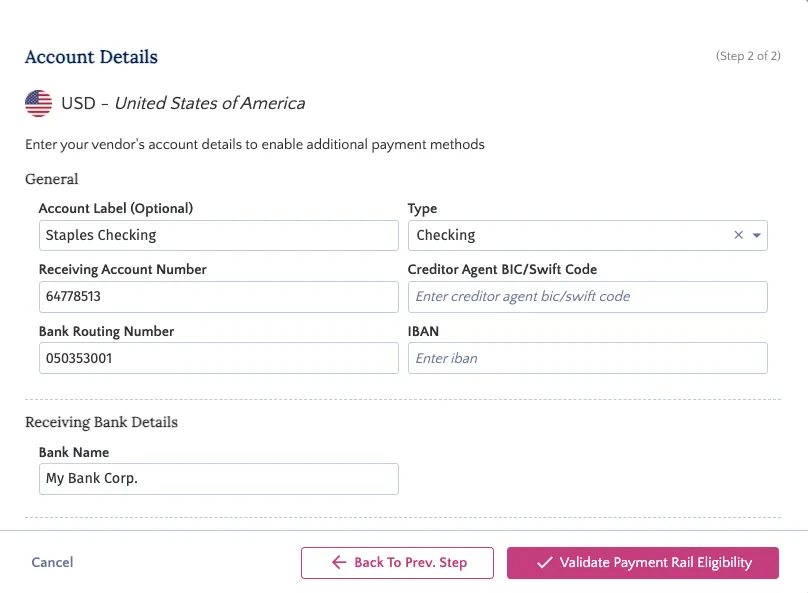
NOTE: Depending on the country and currency selected, as well as the number of fields completed on the Account Details screen, you may be eligible to pay the vendor using various payment methods.
Validate Payment Rail Eligibility
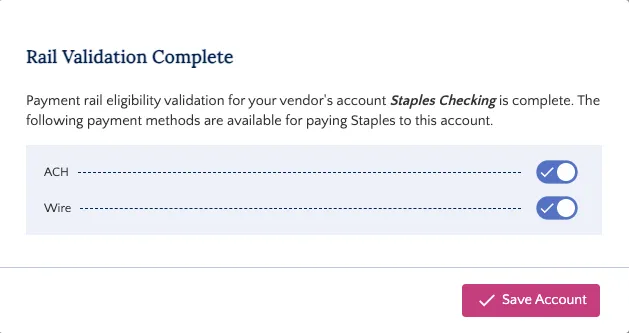
After filling in the required fields or additional fields provided by your vendor, click Validate Payment Rail Eligibility.
The system may take a minute or two to validate your inputs.
The system will verify that the information is formatted correctly for the available payment types.
Once validation is successful, click Save Account. The new account will then appear in the Bank Accounts list.
Select Default Payment Method
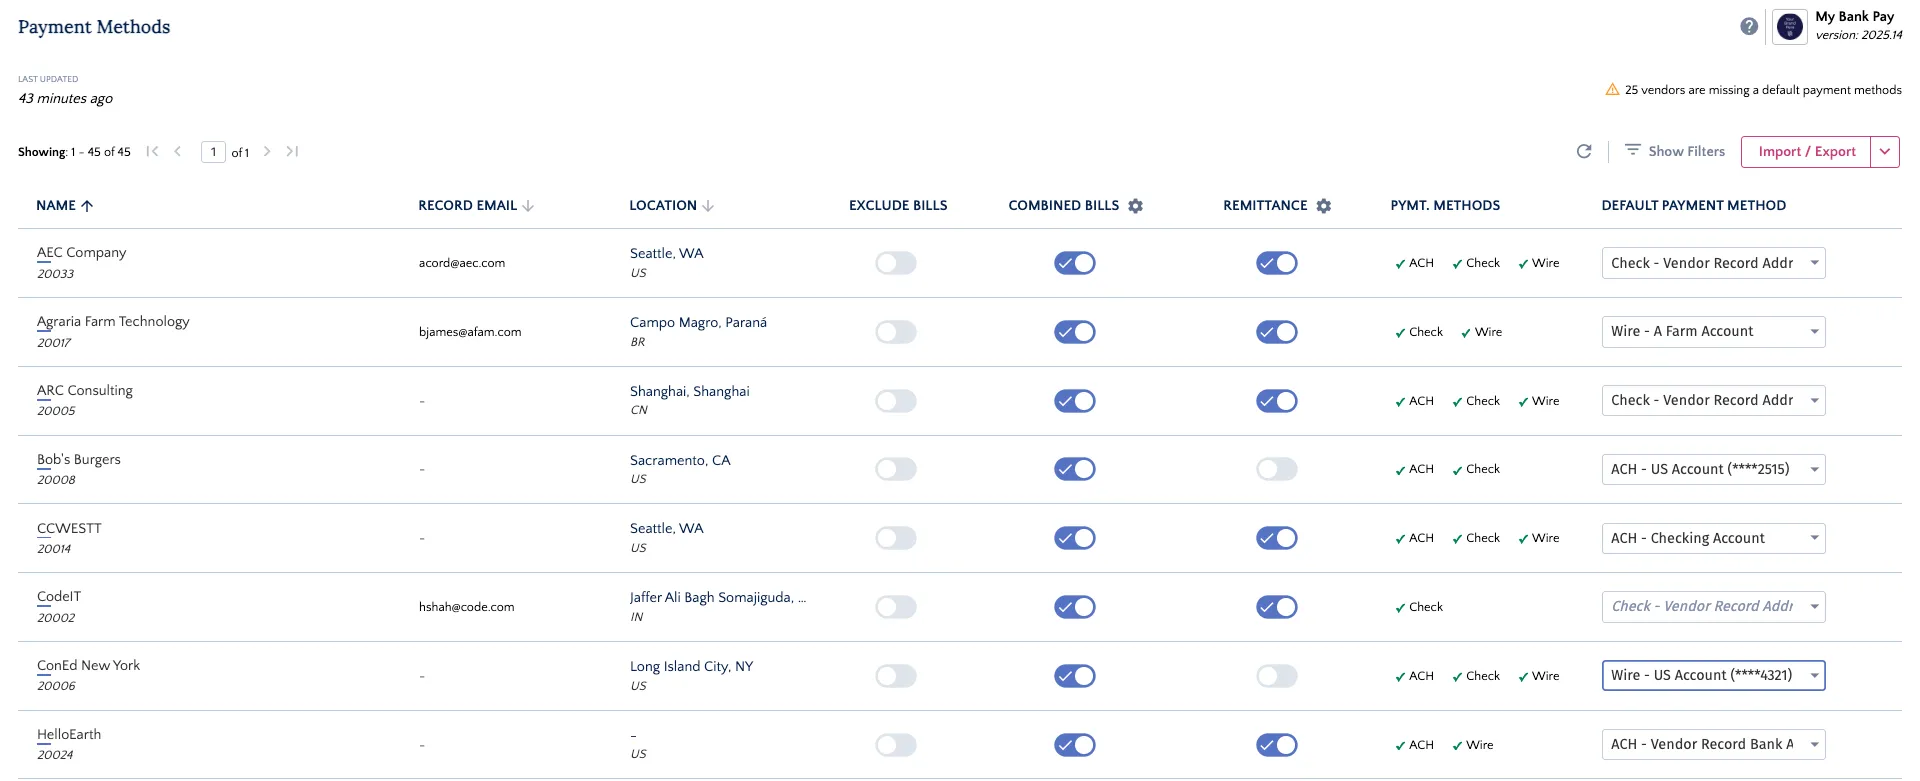
Here, you can define a default payment method for this Vendor by clicking on the dropdown for the Preferred Payment Method field.
Any changes to toggles (i.e., Combine Multiple Invoices) or the Default Payment Method dropdown on the Payment Methods page are saved automatically.
TIP: The plugin supports importing vendor payment information via CSV, allowing for immediate mass updates across all vendors. Use the Updating Vendors via CSV guide for more information.