Managing Bank Accounts (NetSuite)
Access your bank account balances directly within your financial management software, using the Cash Management Reporting features. Drill down into the details of every deposit, withdrawal, and transfer.
Follow this guide to learn how to view balances and transactions, and use bank data for reconciliation.
Viewing Bank Accounts
View account balances and transaction details across all of your accounts, all within NetSuite.
Navigate to the Bank Accounts page.
Go to HSBC Integrator → Reports → Bank Accounts.
Here, you can view all of the bank accounts that you have connected with the plugin. The bank accounts that are shown to a user depend on their level of permissions.
For instance, if a user is restricted to a subsidiary, they can only view accounts that are associated with that specific subsidiary and not accounts belonging to other subsidiaries.
Select Account
Click on any account's name to view the Intraday and Previous Day Balances.
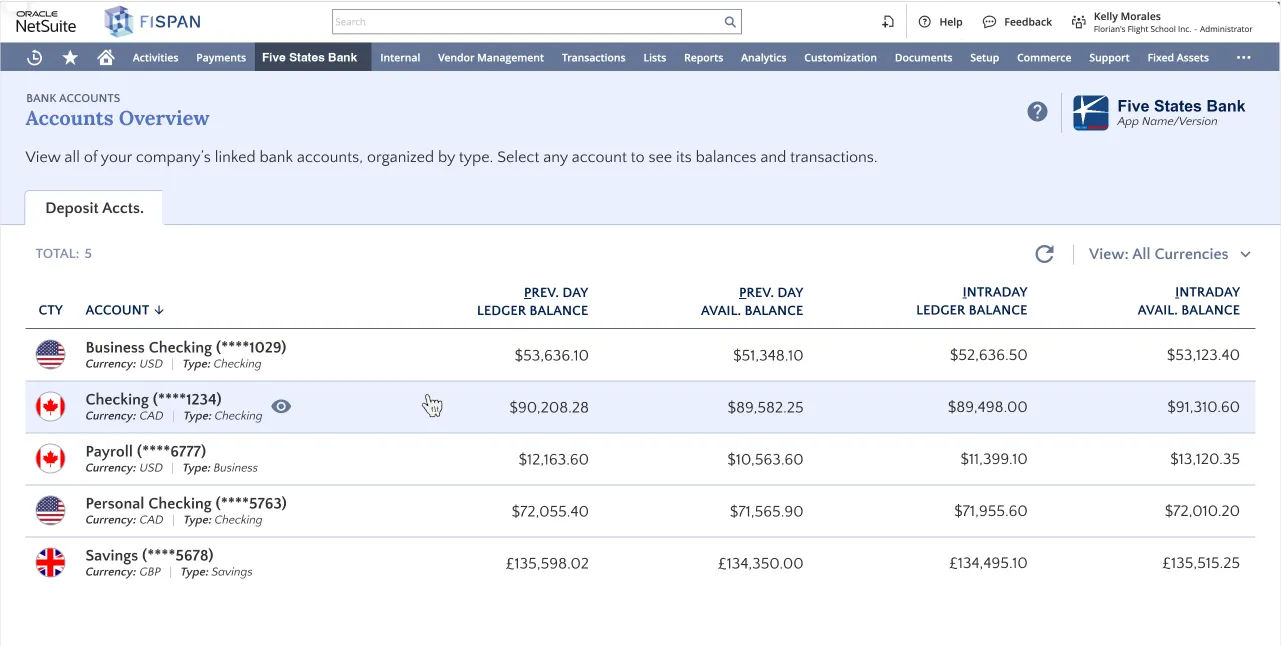
- Intraday Balances (updated time bank dependent)
- Previous Day Balances (updated time bank dependent)
View Balances & Transactions
Bank Account Balances are displayed at the top of the page.
Bank Transactions that have been posted to your account are presented in the table below. Use the date range filters to view transactions over specific timeframes, such as the past week or month, or to set a custom date range to narrow your search.
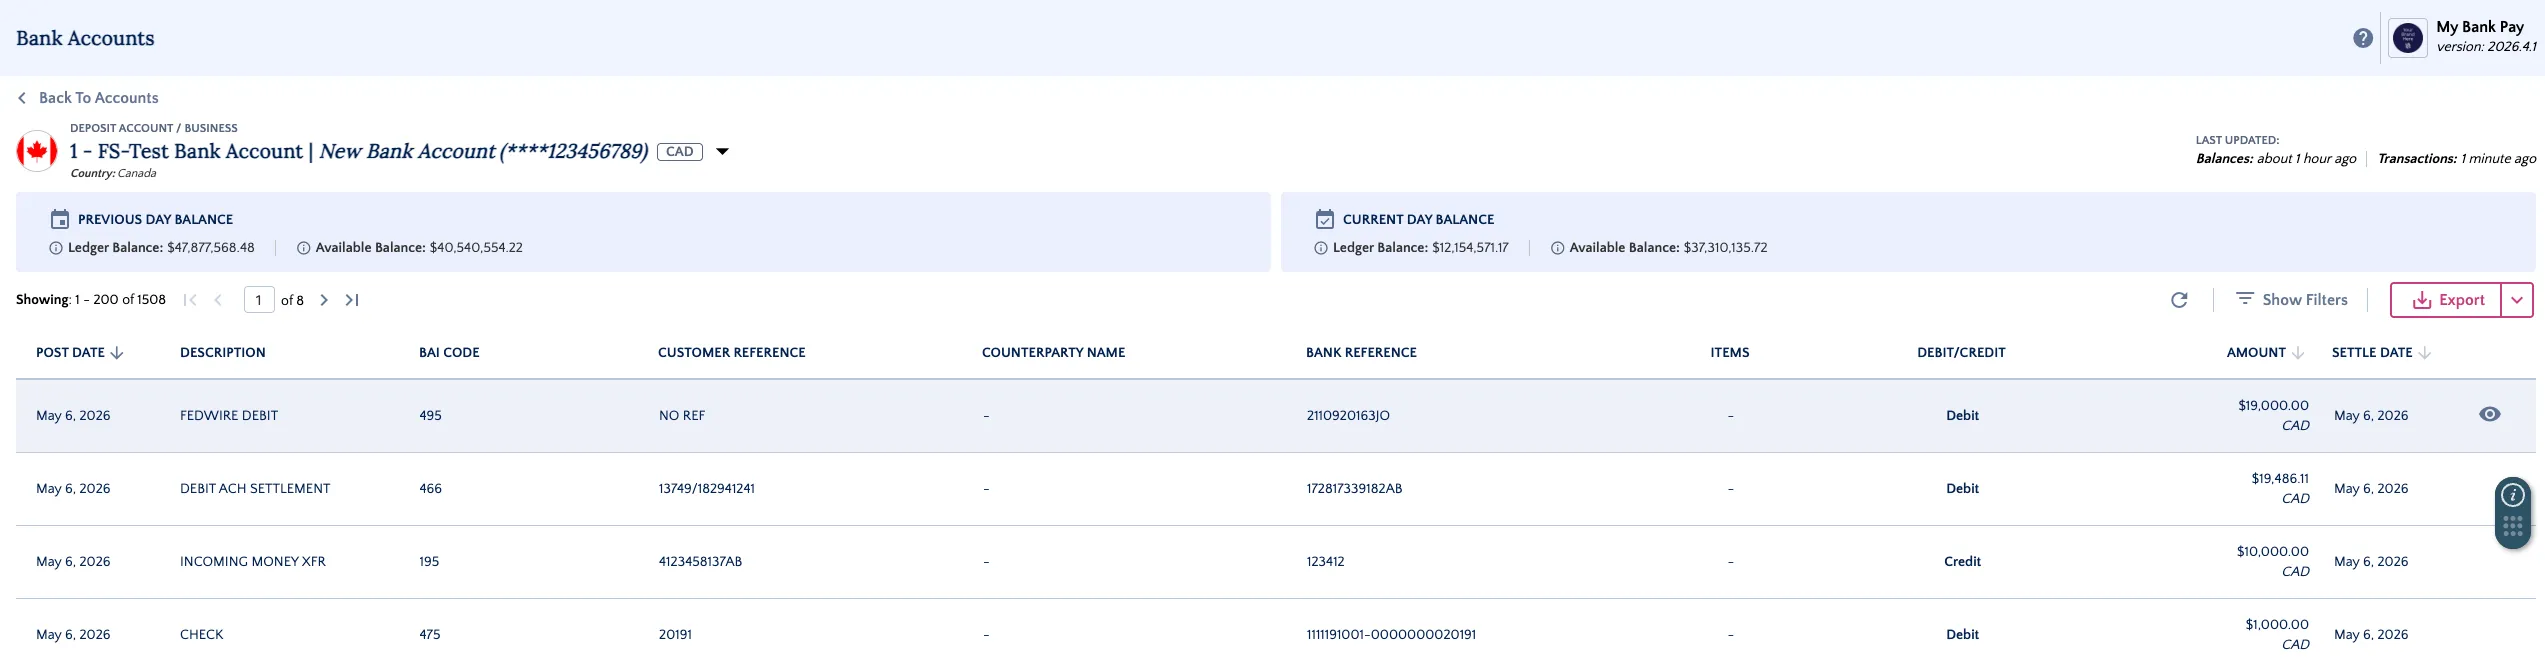
You can see all settled transactions, debits and credits for the account.
To see additional details about a specific transaction, click View under the Details column.
Match Transactions for Reconciliation
Follow these steps to start matching bank data and reconcile your accounts.
Enable Transaction Matching
Go to Setup → Accounting → Chart of Accounts (Click on the title).
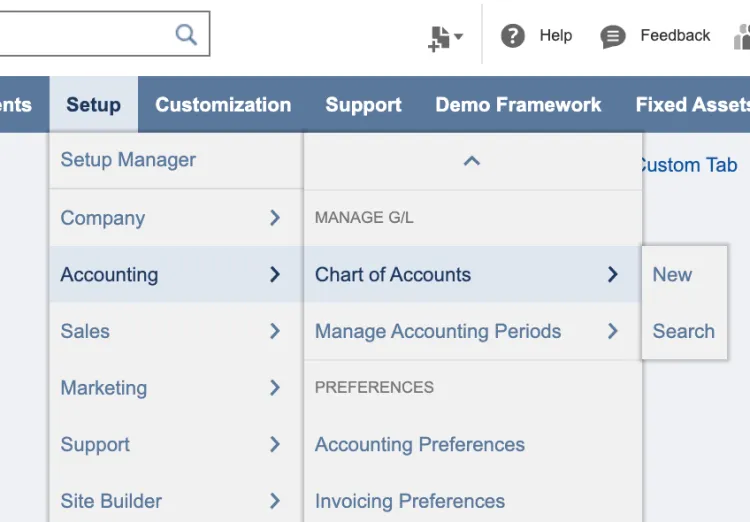
Select Edit on the bank account for which you would like to use the reconciliation feature.

Select the Use Match Bank Data and Reconcile Account Statement Pages box to enable this feature for the account.
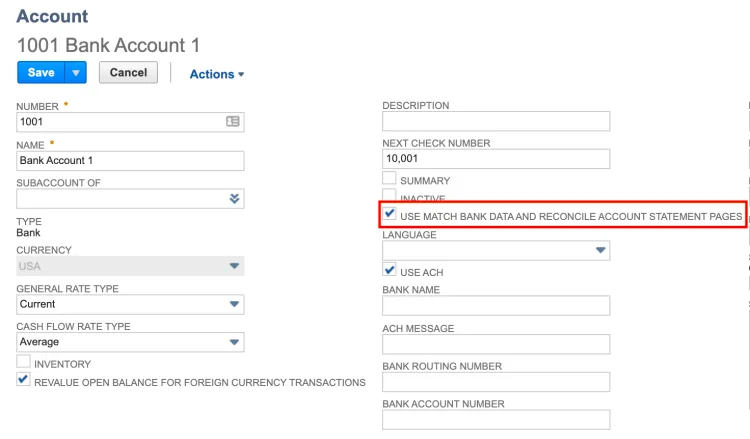
Then, select Save.
Enable Bank Feeds
Ensure that Bank Feeds have been properly enabled for your account. Once Bank Feeds have been enabled, you should be able to see transactions coming into the Match Bank Data page daily. Transactions that settled the day before will be imported early in the morning. If you do not set a custom schedule, NetSuite will default to a randomized time between 4 AM to 7 AM PST.
Confirm Transaction Matches
Go to Transactions → Bank → Match Bank Data.
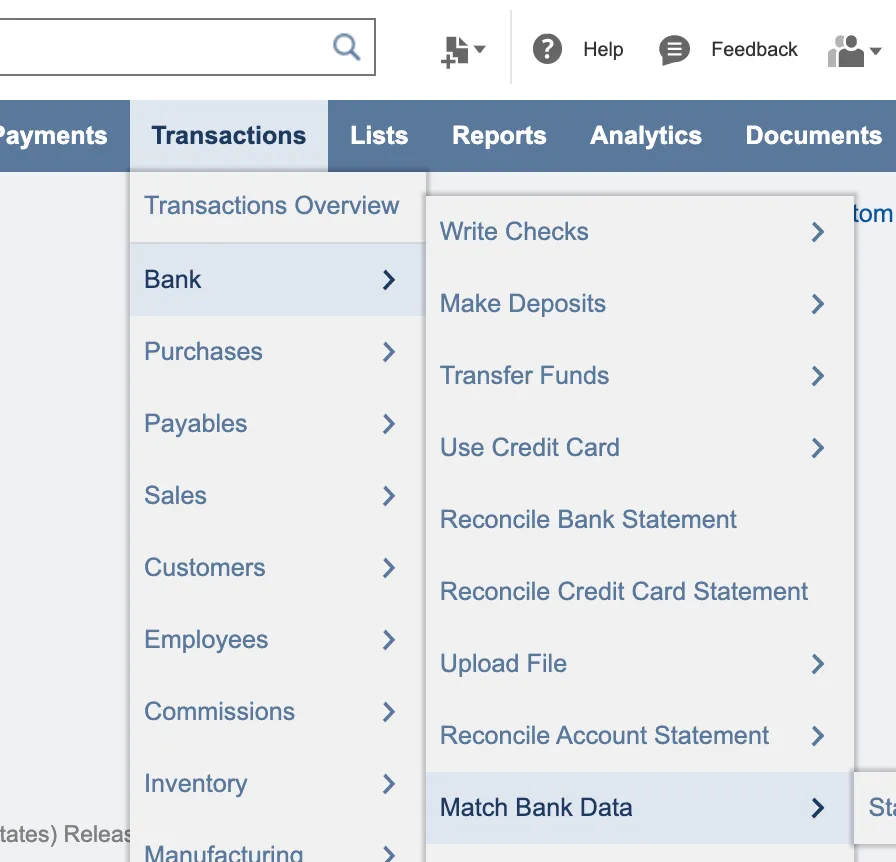
Select the appropriate account from the dropdown, and your transactions will appear in the left column for matching.
Importing Bank Transactions inside NetSuite
If you need to manually import transactions into NetSuite's Match Bank Data page, follow the instructions below. This process works even if your bank feeds are already enabled.
Navigate to Bank Accounts
Go to HSBC Integrator → Reports → Bank Accounts
Select the account you would like to access.
Export BAI2 or CSV File
Apply the appropriate filters, select Export, and select the appropriate export type. You should select BAI2 or CSV.
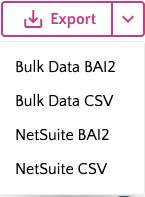
NOTE: If the file does not download, make sure your pop-up blocker is disabled.
Upload BAI2 or CSV File
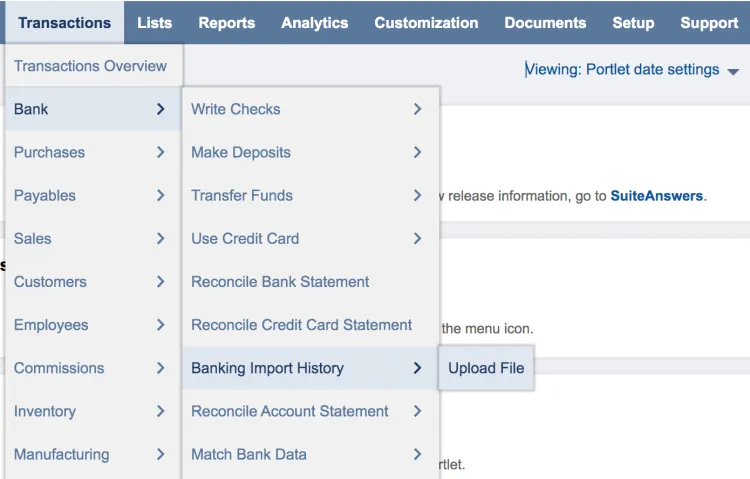
Go to Transactions → Bank → Banking Import History → Upload File.
Select Choose a file and select the file you just downloaded in the previous step.
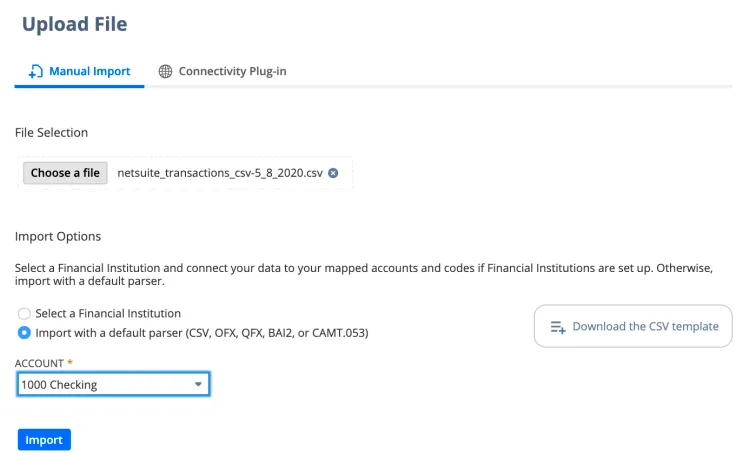
Then, select Import with a default parser, choose the appropriate account, and select Import.
NOTE: If you have selected a BAI2 file, you will not need to select your account, as the bank account information is already present in the BAI2 file itself.
IMPORTANT: For the BAI2 import to succeed, the routing and bank account numbers in the BAI2 file's first three rows must match the corresponding data in the Chart of Accounts.
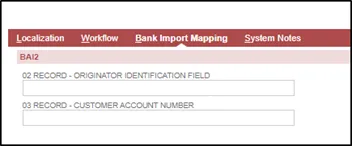
To update the Chart of Accounts records:
- Navigate to the Chart of Accounts.
- Click Edit on the relevant bank account.
- Go to the Bank Import Mapping tab.
- Ensure that Record 02 contains the routing number and Record 03 contains the full account number. This information must be an exact match for what is in the BAI2 file.